Our latest feast

Saturday, May 30, 2009

Chicken and Sweet Corn Voluvents

Noel earns extra "daddy" brownie points by making these for Alex! Trust me, if we let her she would sit there and eat four in a row without thinking twice. While Noel does make a huge batch of these, she normally gets one or sometimes two and then the rest get frozen for weekend lunches.

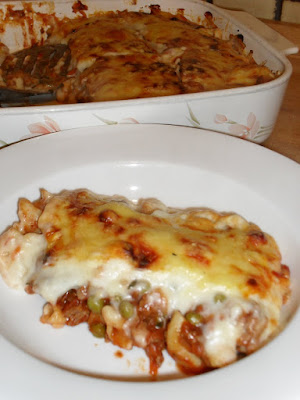
Chicken and corn is an great combination especially when combined with a cheesy white sauce. Encased in light pastry shell with additional grated cheese on top makes for one delish dish.


Chicken and Corn Voluvents
recipe courtesy of Noel

Serves 16

4 chicken fillets diced
1 onion finely diced
1 tablespoon olive oil
3 tablespoons low fat butter
6 tablespoons plain flour
3 cups skim milk
2 teaspoons dijon mustard
1 cup grated tasty cheese
1/2 cup parmesan, finely grated
salt and pepper to taste
16 large Voluvent cases (10cm)
1 cup grated tasty cheese, additional

Preheat oven to 180 deg C.

In a large non stick frying pan heat oil, add chicken and onion. Cook until chicken is brown and cooked through.

In a large saucepan, melt butter and add flour, stirring continually with a wooden spoon until mixed into a roux. Add milk slowly, stirring with a whisk, to avoid lump. Bring to the boil while stirring, adding the dijon mustard and salt and pepper to taste. Stir through grated tasty and parmesan cheese. Continue to cook, stirring until thickened.
Add cheese sauce to the chicken mixture and return to the heat. Continue to stir until fully combined and heated through.

Place voluvents onto a lined oven tray and fill with chicken mixture. Top with grated cheese and cook in oven for 20 - 30 minutes or until cooked through and cheese is golden.

If freezing, do not cook. Allow to cool on tray and individually wrap with cling film and then place in a airtight container or snap lock bag.

Thursday, May 28, 2009

Spicy Rice and Bacon Tomatoes

Well this is a creation I thought about and tried last night in order to participate in my first Royal Foodie Joust at the Left Over Queen Forums. If you get a chance, pop over there and have a look - some amazing dishes are always being posted. Some are so good it makes you just want to lick the computer screen for a taste test!! LOL!!

Okay so her I am - a little nervous here as this is my first entry! The reason I am nervous is purely due to what has been entered before mine have been incredible, leaving me thinking that I am definitely not in the same league as some of the participants but hey - you never know unless you try right? So I did!!
Oh and I have to say that I am quite exciting also to be part of the challenge too!

Spicy Rice and Bacon Tomatoes was a dish made using all three ingredients - rice, tomatoes and bacon. We had these as a side dish with t-bone steak last night but I would also be tempted to serve them as an entree.

We liked it - so I hope you do too.


Spicy Rice and Bacon Tomatoes

Serves: 8

8 large tomatoes
1 cup long grain rice
2 rashers bacon
2 spring onions (green onions)
1 tablespoon extra virgin olive oil
1 tablespoon dried oregano
1/2 teaspoon dried chilli flakes (or to taste)
salt
freshly ground black pepper
50g coarsley grated parmesan cheese

Wash tomatoes and dry. Remove stem and cut a large circle around the top of the tomato, remove circle and tomato centre leaving a hollow cavity (be careful not to cut into sides of tomato). Repeat with remaining tomatoes.

Bring a large saucepan of salted water to the boil, add rice. Cook for 8 - 10 minutes or until rice is cooked, drain.

Remove rind and visible fat from bacon and dice. Fry in a large non stick frying pan and cook until a little crispy and brown. Remove to a paper towel covered plate to drain excess fat. To the same pan add the olive oil and the spring onion. Cook for 1 - 2 minutes or until spring onions start to soften. Lower heat and return bacon to the pan. Stir for a further 1 - 2 minutes. Add the rice, oregano and chilli. Mix until well combined. Add salt and pepper to taste. Remove from heat, transfer to a bowl and allow to cool for at least 10 minutes.


Once rice mixture has almost cooled stir through the grated parmesan cheese until well combined.

Using a small spoon, fill the cavity of the tomato pressing down with each addition. Ensure that the cavity is overflowing slighty. Repeat with remaining tomatoes.


Place on a foil lined tray, spray topping with cooking spray. Cook in oven for 15 - 20 minutes or until heated through.

Serve immediately.

Tuesday, May 26, 2009

Macaroni Beef

If you were to ask Alex, my daughter, what she would like to have for dinner - without hesitation she always replies Macaroni Beef! This dish has been a favourite of hers since the first time that it was cooked and if Alex had her way we would eat it nearly every night.


It is from a collection of cookbooks called Symply To Good To Be True which focusses on tasty, healthy and low fat homestyle cooking suited to weight loss, diabetes, heart problems, cholesterol and good health. These cookbooks have been written by Annette Sym, who lost 35 kilograms herself in 1993 and has kept it off to this day.


I am an avid user of these books but one thing I do find with a few recipes from these books is that some of the portions are quite large, especially too big for my children so I have to admit to modifying some recipes slightly. This is one of those recipes where the portions are quite large as the original recipe served 6 and I have to admit I found, as did my family, that there wasn't enough of the topping. So now I get 8 serves from this dish and I have doubled the quantities for the white sauce mix to ensure there was a thicker layer of the topping.


Macaroni Beef
(recipe adapted STGTBT Book 2)

Serves: 8
Points per serve: 5.5

600g lean beef mince
cooking spray
¾ cup carrot, grated
¾ cup zucchini, grated
1 small onion, finely diced
½ cup frozen peas
1 x 420g can tomato soup (condensed)
2 teaspoons chicken stock powder
2 tablespoons tomato paste
3 cups cooked macaroni noodles
2 tablespoon low fat butter or margarine
6 tablespoons plain flour
3 cups skim milk
1 tablespoon dijon mustard
salt and white pepper to taste
1 ½ cups reduced fat grated tasty cheese
3
Preheat oven to 180 deg C.

Coat a large non-stick frying pan and cook mince until browned. Drain liquid then return the mince to the pan. Add the carrots, zucchini, onion, peas and soup. Cook for 2 minutes stirring continuously. Add stock powder and tomato paste, cook a further 5 minutes stirring frequently. Fold in cooked macaroni noodles and mix together well. Pour mixture into a lasagne dish.

Melt margarine in a saucepan, add flour and cook for 1 minute. Slowly add the milk and whisk to avoid lumps, stirring continuously until boiling. Stir through the dijon mustard and season to taste with the salt and white pepper. Pour over the meat and sprinkle with grated cheese. Bake for 25-30 minutes or until top is golden brown.

(If you omit the topping points per serve would be 4 points)

Lamb Souvlaki

For an early week treat I thought we would have Lamb Souvlaki instead of a full meat and three veg dinner last night especially as I was fancying something different, plus they are quick and easy to make! Not to mention they go down a treat - yes another meal to be eaten with your hands - my kids are in heaven!! LOL


Lamb Souvlaki

Serves 6
Points per serve: 7

1 kg butterflied lamb leg (bone removed)
2 tablespoons olive oil
1 tablespoon dried rosemary chopped
2 teaspoons crushed garlic
2 tablespoons dry white wine (chardonnay)
6 souvlaki or lebanese wraps
5 - 6 iceberg lettuce leaves, shredded
2 ripe tomatoes, sliced
1 red onion, finely sliced
1/2 cup low fat natural yoghurt
2 teaspoons crushed garlic
salt
freshly ground black pepper

Combine olive oil, rosemary, garlic and wine in a dish. Add butterflied lamb roast and marinate for several hours, overnight if time permits.

Preheat oven to 180 deg C. Cover an deep oven tray with foil and place a rack inside. Lay the lamb on the rack and cook for approximately 10 minutes, remove from oven and turn over. Continue to cook for an additional 10 - 15 minutes or until lamb is cooked to your liking. Remove from oven, cover loosely with foil and allow to rest for 5 minutes before carving. When ready, slice lamb thinly.

While lamb is cooking, place yoghurt and garlic in a small bowl. Mix until completely and place in refrigerator to chill until required.

Lay a souvlaki bread on a chopping board and top with lamb, lettuce, tomato, onion, garlic yoghurt sauce, salt and pepper (and/or other toppings as desired), ensure you are placing the toppings in a line down the centre of the bread leaving a small portion at one end empty.

Folding the end over then wrap from one side to the other as tightly as possible. Secure with a napkin or a square of baking paper.

Other optional toppings (depending on your tastes) can include grated tasty cheese, tomato sauce, chilli sauce, hommus, cucumber slices, in fact the potential is endless....

Friday, May 22, 2009

Cinnamon Swirl Teacake

This cake really caught my eye when I visited Denise's blog, Keeper Worthy Recipes (a really good blog to read), and knew that it would be a recipe that I would be cooking sooner rather than later. So even before cooking dinner last night I had the cake mixed up and baking in the oven - priorities I know!! Even hubby was amazed!!

BUT I do need to, however, apologize for two things....

The first thing is the lack of icing... well not really. There is a lot of icing there but due to my impatience I think I put it on the cake while the cake was still too warm and it has therefore been absorb in the cake top! So please wait just those few extra minutes before icing.

Secondly I had to rush to get a photo as it was literally walking off the platter....

This cake was so moist and light. The cinnamon swirl amongst the plain butter cake was divine especially while still that little bit warm... thanks Denise!


Cinnamon Swirl Teacake
2 packets butter cake mix (or 1 box yellow cake mix)
4 eggs
3/4 cup vegetable oil
1 cup sour cream
1 cup brown sugar
1 tablespoon cinnamon
2 cups icing sugar
4 tablespoons milk
Preheat oven to 180 deg C (350 deg F).
In a large bowl mix the cake mix, eggs, vegetable oil and sour cream until completely combined. Pour batter into a greased 23cm x 30cm (9 x 13). Mix the brown sugar and cinnamon together and sprinkle over top of the entire cake. Swirl into batter with a knife. Bake for 40 minutes.
Remove from oven and allow to rest for 15 minutes before icing. To make icing mix together the icing sugar and the milk until smooth and well combined. Pour over warm cake

Wednesday, May 20, 2009

Belgian Beef Stew

With winter approaching there is nothing I like better than using the slow cooker. Especially as it can be all organised in the morning, switched on and left to it's own devices until I walk back through the front door. My favourite thing is opening the front door to the delish smells coming from the kitchen.... not only does the smell make you hungry but there is a sense of relief that tonight there will be no rush or panic to get dinner on the table quickly.

This year we have made it a mission to try some different dishes than the handful of dishes we have cooked in the past. So armed with a new slow cooker recipe book we sat down and chose a recipe to try. Belgian Beef Stew was the lucky winner!!

"Carbonnade" is the traditional name of this traditional Belgian dish. The name "Carbonnade" comes from the Lation root for "carbon". The word reflects that the stew was originally cooked very slowly in a cast-iron pot over the charcoals of an open fire or hearth. No doubt it refers to the caramelized onions and the dark beer that gives the finished dish a rich colour and deep flavour.

I have to tell you that this stew was just that - deep in flavour, in fact a unique taste that pleased everyone who partook in dinner last night, including my girlfriend Sharon and her son Tom. Tom had two serves which just amazed us as Tom has to be the fussiest eater I have ever come across - this kid doesn't even eat bread!
3
We served the Belgian Beef Stew with a serve of creamy mashed potato. I think that it would be just as nice with plain pasta and next time I will definately have some fresh crusty bread on hand to mop up the juices.


Belgian Beef Stew
(recipe adapted from Essentials of Slow Cooking)

Serves: 8
Points per serve: 6.5


4 tablespoons low fat butter
4 slices bacon, trimmed and roughly chopped
4 brown onions, thinly sliced
2 teaspoons firmly packed dark brown sugar
2 cloves garlic, minced
3 tablespoons plain flour
1 teaspoon salt
1 teaspoon freshly ground black pepper
1 kilogram chuck steak, fat removed and largely diced
2 tablespoons olive oil
2 cups (500 ml) dark beer
4 - 5 carrots, largely diced
200 grams whole button mushrooms


In a large frying pan over medium-high heat, warm 2 tablespoons of butter. Add the bacon and cook, turning frequently for about 5 minutes or until the bacon is crisp. Add the onions, sprinkle in the sugar and saute until the onions turn a deep caramel brown colour, about 35 minutes. Stir in the garlic. Transfer the onion mixture to the slow cooker bowl.

In a large snap lock bag stir togheter the flour, salt and pepper. Add the diced beef, seal tightly and shake in the seasoned flour until completely covered, discarding any excess flour. In the frying pan over a medium heat, melt the remaining butter with the olive oil. Add diced beef, in batches if required, and cook for 10 minutes or until browned on all sides turning occasionally. Add to the onion mixture in the slow cooker. Add the carrots and mushrooms into the slow cooker also.

Pour in the beer and deglaze the pan, stirring and scraping up the browned bits on the bottom of the pan with a wooden spoon. Bring to the boil. Pour the beer mixture onto the onion and beef mixture. Cover and cook until the meat is very tender, 3 hours on the high heat setting or 6 hours on the low heat setting.

Poached Chicken, Lime and Coriander Sandwich/Baguette

I will be the first to put my hand up and say that I am NOT a huge lover of sandwiches. Don't get me wrong I do enjoy a nice fresh sandwich but detest prewrapped sandwiches made first thing in the morning only to be eaten at noon. Often pre-made sandwiches are either soggy or dry but the lunch time which in my opinion is a total turnoff!! I make my children's sandwiches fresh every morning but only use fillings that will remain the same as when I pack them and the kids have a lunchbox with a freezy pack (ice block) in them to keep the sandwiches, drink, fruit etc as fresh as possible.

This however is more about the filling rather than the actual sandwich. The original recipe calls for a baguette but I have found that the filling actually suits any bread type. I have made this sandwich, today, with German Grain Bread which I made in my breadmaker.

Poached chicken and coriander sounds quite exotic and complicated. The combination of the coriander, spring onions, lime juice and mayonnaise is exciting to say the least. I will tell you right now that the flavour is amazing and very easy to make. I promise you will definately not be disappointed!

Now as I mentioned I don't like prepacked sandwiches and this sandwich is no exception. The chicken mixture goes into a small container and I make the sandwich/baguette up when it's lunchtime. I am sure that this would definitely turn into a soggy sandwich if premade.


Poached Chicken, Lime and Coriander Sandwich/Baguette
(recipe adapted from WW Simply Swap 2007)

Serves: 1
Points per serve: 4.5

140 gram chicken fillet
1/2 teaspoon crushed garlic
1/2 teaspoon crushed ginger
2 tablespoons low fat mayonnaise
1 spring onion, finely sliced
1 teaspoon finely grated lime rind
2 teaspoons freshly squeezed lime juice
1 tablespoon chopped fresh coriander leaves
salt
freshly ground black pepper
2 slices bread or 15cm long baquette or French stick

Half fill a deep frying pan or saucepan with cold water. Bring to simmer over a medium-low heat. Add chicken, garlic and ginger, poach for 10-15 minutes or until cooked through. Drain, discarding liquid. Set aside for 10 minutes to cool. Shred chicken.

Combine the mayonnaise, spring onion, lime rind and juice, shredded chicken and coriander in a bowl. Season with salt and freshly ground black pepper. Top one slice of bread with chicken mixture and cover with over slice of bread. Alternatively if you are using a baguette/French stick, cut open lengthwise and fill with the chicken mixture.

Monday, May 18, 2009

Lasagne

Lasagne is another family favourite and always goes down a treat with only ever a slim chance that there will be any leftovers. This is normally a weekend meal for us, but having a little time up my sleeve yesterday I pre-made it and all that's left for me to do is pop it in the oven when I get home. I must say everyone is in for a surprise tonight!

The kids love the fact that there is never normally a side serve of vegetables with this dish with the occasional exception of a side salad. The reason for this is that I actually add quite a few vegetables to the meat sauce to ensure that they are still receiving their daily vegetable intake.


Lasagne

Serves: 8
Points per serve: 7.5 pts
or
Serves: 10
Points per serve: 6 pts
3.
750g very lean beef mince
cooking spray
2 x 425g cans tomato puree
1/2 cup tomato paste
1 cup water
1 onion finely diced
2 carrots finely diced
1 red capsicum diced
200g mushrooms sliced
2 medium zucchini, grated
1/2 cup red wine
2 teaspoons crushed garlic
2 teaspoons beef stock powder
2 teaspoons dried oregano
salt and pepper to taste
2 tablespooons fat reduced butter or margerine
6 tablespoons plain flour
5 cups skim milk
1 tablespoon dijon mustard
salt and pepper to taste
8 sheets lasagne sheets
1/2 cup reduced fat grated tasty cheese
1/2 cup reduced fat greated mozeralla cheese

Preheat oven to 180 degrees Celcius.

Brown mince in a large frying pan that has been coated with cooking spray, drain well and remove to a plate.

Respray the pan with cooking oil and add onions, carrots and capsicum. Cook for 2 - 3 minutes to soften then add the mushrooms and zucchini. Cook for a further 5 minutes. Add remaining ingredients and bring to the boil. Reduce heat and simmer for 5 minutes. Return mince to the pan and cook for a further 5 minutes. Set to one side.

Meanwhile melt butter or margarine in a saucepan. Add flour, mix well using a whisk. Slowly add the milk stirring constantly until the sauce boils and starts to thicken. Add dijon mustard and stir well. Season to taste.

Spoon 1/2 mixture over base of a lasagne dish. Cover with 1/3 of the white sauce. Top with 4 lasagne sheets. Spread remaining beef mixture over the lasagne sheets and cover with the remaining lasagne sheets. Spread remaining white sauce over the lasagne sheets and sprinkle with the combined grated cheese.

Cover with foil (spray foil with cooking spray to stop cheese sticking to the foil) and bake in oven for 40 - 45 minutes. Remove foil and cook for a further 5 - 10 minutes until cheese is golden brown.

Serve immediately.

Note I have labeled this post "freezable" and does freeze well both before and after cooking.

I have frozen this prior to cooking in the oven but I don't put the cheese on the top. I also ensure it is tightly wrapped with cling film and completely cooled prior to putting in the freezer. Defrost overnight in the refrigerator, top with the cheese and cook as above.

To freeze individual portions you can either put single serves into plastic containers and freeze or individually wrap tightly in cling and freeze when cool.

Saturday, May 16, 2009

Homemade Pizza

Homemade Pizza is definitely one of our favourite family "make your own" dinners. Not only do we get to choose the toppings that we each individually want but we also have a lot of fun together preparing, cooking and eating the pizzas.

Definitely a great way to get the kids involved in cooking especially when it's what they want! My kids thinks it's ace to be in the kitchen, can't you tell? For more photo's of my kids in the kitchen pop over here.


We always start off with a simple pita bread base instead of pizza dough, which of course keeps it lower in fat and also thin based, as for the toppings the suggestions are endless. Toppings that we have used have varied depending on our moods at the time and range from the simple to the extravagant. And that's the beauty of making pizza at home - it's totally dependant on your taste buds at the time.

My pizza tonight consisted of a tomato salsa base, grated mozzarella cheese, mild salami, bacon, chicken, pineapple, capsicum, mushrooms, onions, grated tasty cheese, boccocini cheese slices and some chilli sprinkles - I guess a little Mexican style theme happening there.

Naturally we made four pizza's - one each.... and all very different!! Noel's in the background (mine is the front one) was a BBQ sauce base, ham, hot chilli salami, ham, prosciutto, onions, pineapple, cheese, oregano and chilli. (And his was good too.)

Toppings we have been known to use are:

  • tomato paste
  • BBQ sauce
  • tomato salsa (great for a Mexican style pizza)
  • ham
  • salami (mild and hot)
  • chicken
  • bacon
  • prawns
  • mince
  • prosciutto
  • pepperoni
  • chorizo sausage
  • prawns/shrimp
  • tasty cheese
  • mozzarella cheese
  • boccocini cheese
  • Parmesan cheese
  • onions
  • mushrooms
  • tomatoes
  • sun dried tomatoes
  • capsicum red and green
  • olives
  • pineapple pieces
  • baby spinach
  • artichokes
  • roasted pumpkin
  • egg
  • fresh chilli
  • fresh herbs
  • jalapenos
  • dried herbs such as crushed chilli, oregano, etc.
  • crushed garlic
  • To be totally honest with you - there is no set range of toppings you can put on a pizza. You are eating it so what ever you want goes..... right?


L


As you can see the kids started eating their pizzas before I could get full photo's...... I really don't mind as it shows they were ready and waiting to devour their creations..... lol!! (I can't even remember what went on theirs!)

They were definitely a hit (again) they had a large (8 slices) pizza each and there was only a couple of slices of each left for lunch the next day..... homemade is definitely better than takeaway!!


.
>
.
3


Will have to try the Big Mac Recipe soon, my friend Donna (My Tasty Treasures) posted it recently but to be perfectly honest we both owe the recipe and newfound inspiration from Chubba girl.

Thursday, May 14, 2009

Stir Fried Beef with BBQ Sauce

Recently in the Australian Weight Watchers Magazine this recipe was published. I must say it looked very nice the first time I read the recipe and it was also raved about on the Weight Watchers forums for several weeks.

So you know what that means, right? I just had to give it a go and of course, made a few minor changes to the recipe to suit us.....

Firstly I don't like microwaving vegetables for an asian style dish. I always prefer to cook them fresh so I removed the beef strips from the wok, proceeded to stirfry the vegetables and then when just about cooked I returned the beef strips to the wok.

Secondly as a family we love saucy chinese dishes especially when serving with steamed rice so I made a little more sauce which I added just before the end of the cooking process.


Stir Fried Beef with BBQ Sauce
Adapted from: WW Magazine (Australia)

Serves: 4
Points per serve: 6.5

2 cloves of garlic crushed
3 tablespoons tomato sauce
3 tablespoons hoisin sauce
3 tablespoons maple syrup
500 grams beef, thinly sliced
3 green shallots, cut into 3 cm lengths
1 medium carrot, thinly sliced
150 grams broccoli, cut into small florets
80 grams snow peas, trimmed
2 tablespoons dry sherry
2 cups steamed rice, to serve

Combine garlic, 2 tablespoons hoisin sauce, 2 tablespoons tomato sauce and 2 tablespoons maple syrup in a large bowl. Add shallots and beef allowing to marinade for at least 15 minutes (longer if you can).

Heat oil in a wok or large non stick frying pan over high heat. Cook beef mixture in batches until browned. Remove from heat and repeat with the remaining beef mixture. To the same pan stirfry the carrot and broccoli for 2 - 3 minutes. Return beef mixture to the pan along with the snowpeas. Add remaining combined sauces and dry sherry. Stir fry for a further 2 - 3 minutes or until beef is cooked through.

Serve with steamed rice.

N0te - 3/4 cup rice yields approx 2 cups cooked

Wednesday, May 13, 2009

Pan Fried Veal with Tomato and Rosemary Sauce

This is a recipe that I have been wanting to try for awhile but have hesitated due to my husband's past dislike of veal. To be honest I was never sure where his dislike of veal came from considering he likes all meats but I am not complaining as now he has acquired the taste for it.
3
The last time we went to the local RSL for dinner I order the veal cutlet and as usual Noel had a try of my meal, enjoyed the veal and we have been buying veal ever since. While discussing his recent change in tastebuds he actually told me "that it probably wasn't the veal he disliked in the past it was probably the way that I cooked it!!" What the?
3
Anyway all is good in The House of Murray now and veal is now a regular meat on our menu. The kids enjoy it too, which is always a counted blessing.
3
The verdict on this recipe - DELISH. "Mam you can cook this again" - words that bring joy to my ears.
3
Overall a very easy dish to prepare and cook. The flavour of the rosemary infused tomato sauce with the mashed pumpkin was amazing and a really nice combination. The tenderness of the veal really made the dish so be careful not to overcook this delicate meat.
3

Pan Fried Veal with Tomato and Rosemary Sauce
Adapted from: WW Pure Taste

Serves: 4
Points per serve: 6.5

1 tablespoon olive oil
4 x veal steaks, 150g each
2 tablespoons finely chopped fresh rosemary
2 teaspoons crushed garlic
1 small red chilli, seeded and finely chopped
4 x 425g tins diced tomatoes
1 tablespoon tomato paste
salt and freshly ground black pepper to taste
500g pumpkin, peeled and cut into chunks
200 grams baby spinach leaves

Heat 2 tsp olive oil in a non stick frying pan and cook the veal until browned on both sides. Remove from pan.
3
Heat the remaining oil in the same pan, add the reosemary, garlic and chilli. Stirfry for 1 minute or until the rosemary becomes aromatic. Add the canned tomatoes and tomato paste, mix well and bring mixture to the boil. Simmer, uncovered, ove medium heat for 10 minutes or until the sauce thickens. Season to taste.
3
While the sauce is simmering, steam the pumpkin until tender, season to taste and mash. Cover with cling wrap to keep warm (if need you can microwave for a minute or so to reheat prior to serving).
3
When the sauce has thickened return the veal to the pan and simmer until the veal is just heated through.
3
Place the pumpkin on a plate and top with the spinach leaves. Serve the veal on the bed of mash with the sauce spooned over.

Tuesday, May 12, 2009

Warm Carrot, Zucchini and Basil Salad

This dish is quite appealing on the eye and makes a change from good old steamed carrot and zucchini slices plus I have to say it went down well with the Mediterranean Chicken Casserole that we had on Mother's Day.

Overall a little time consuming to prepare but it does cook in a flash.


Warm Carrot, Zucchini and Basil Salad

Serves: 8
Points per serve: 0

5 carrots, peeled
5 zucchinis
2 teaspoons oil
1 handful of fresh basil leaves

Using a vegetable peeler, ribbon cut the carrots and the zucchini, keeping both separate.

In a large frying pan or wok, heat the oil and add carrots. Stir fry to 1 - 2 minutes and then add the zucchini. Continue to stir fry for another 1 - 2 minutes or until zucchini is warmed through and mixed in with the carrot.

Transfer to a large serving plate or bowl and sprinkle with the basil leaves. Serve immediately.

Monday, May 11, 2009

Prosciutto Bean Bundles

I have made these once before, actually at Christmas time, and they went down a treat. So naturally I had these in mind for another side dish on Mother's Day, especially as they fit nicely into the Italian/Mediterranean theme I had planned.

The saltiness of the prosciutto actually compliments the beans which are precooked prior to wrapping. They look quite attractive all bundled up on the platter so I was quite happy with the outcome and the fact that everyone ate them including my son, Oliver, who will not eat beans at all!

Prosciutto Bean Bundles

Serves: 12
Points per serve: 0.5

30 green beans, trimmed
12 thin slices prosciutto
cooking spray

Cut all beans to the same length. In a large saucepan of boiling water add beans. Return to the boil and simmer for 5 minutes. Drain and allow to cool.

When beans are cool lay a slice of prosciutto on the board. Top with 5 beans and roll tightly using the whole slice of prosciutto. Continue with remaining beans and prosciutto slices.
Cover a non stick frying pan with cooking spray, heat over a medium heat and add the prosciutto bean bundles. Cook, whilst turning, until prosciutto is browned and crispy. (To ensure beans are heated through place a lid on the frying pan for 1 - 2 minutes - be careful not to burn the prosciutto).

Cranberry Fizz

My Mother's Day cocktail or apperitif was meant to be Pomegranate Fizz but I managed to buy Cranberry Juice instead of the Pomegranate....not sure how I managed that but I did so what's a girl to do? Make Cranberry Fizz of course!!


Cranberry Fizz

Serves 6

1 cup crushed ice
1 cup Ocean Spray Classic Cranberry Juice
1 bottle Champagne


Place all ingredients in a jug and stir.

Serve immediately.

Friday, May 8, 2009

Mother's Day Luncheon

This Sunday is Mother's Day. Mother's Day is always celebrated in May in Australia, always the second Sunday of the month. As everyone knows Mother's Day is a special day, a day to honour your mother, celebrate motherhood and to recognize the contribution your mother makes not only to your family but to your life and to society in general.
In fact this year Mother's Day will be very special! Not only are we are holding the Mother's Day lunch at our house with most of our family but there will be some very special mothers amongst us.

Firstly there is my mam. Many of you know that she came down here to visit from Queensland to help Noel celebrate his 40th birthday but luckily for me her visit will incorporate Mother's Day. My mam and I are very close, we always have been. She idolises Noel as "her" son and they are great mates.

Then there is Noel's mam, Ann. We have a close bond also, in fact I don't even refer to her as my mother in law - I call her mam also and she is a very important person in my life. As far as inlaws go I have been very lucky with mine and yes I do know it!

As well as both of my mothers, another special mam will be spending time with us this year. This is my sister in law, Vicky. Vicky is married to Sean, Noel's brother, and this year she is celebrating her second Mother's Day and they have recently announced that they are expecting again with the baby due in November!!

So in light of our special company, we decided that our luncheon should be special also. So this is the menu we have planned.


Mother's Day Luncheon

Cranberry Fizz

Antipasto Platter
(courtesy of Sean and Vicky)

Meditterean Chicken Casserole
Prosuitto Bean Bundles
Crusty French Bread Sticks

Cherry and Custard Tart
(courtesy of Mam and Dad)
Cheese and Cracker Platter


The table all set with the beautiful Singapore Orchids...

Wednesday, May 6, 2009

American Style Lamb Ribs

Last night we had Nasi Goreng for dinner, so no new recipe to post on this blog as I have already blogged that dish before. However I will say, as usual, the Nasi Goreng was delicious, didn't fail to impress the tastebuds and more importantly easy and quick to make! And we all know that easy and quick are the best part of the recipe instructions when it comes to cooking especially in my case where last night my plans went haywire.

I do however want to share another recipe with you, if I may?

I cannot take credit for this recipe at all as this recipe belongs to Noel, who is fast becoming the "master rib cooker" in the house!! These ribs (this recipe) are what he made for his 40th birthday party back in April and went down a treat. As proof of their success they were devoured that quickly it was obvious he just didn't cook enough!

As I mentioned Noel has become the master chef in our house when it comes to cooking ribs. Infact I think he has somewhat challenged himself to make them better each time. In the beginning he was experimenting with pork ribs but is now also cooking lamb ribs or riblets as they are often called.

Noel boils the ribs prior to marinating them as this removes excess fat/oil from the cooking process and therefore removes some of the "grease" and the "richness" that puts some people off eating ribs. I have read many recipes, especially asian, that calls for the ribs to be boiled prior to using in a recipe and I think this actually also assists in tenderising them also.

I am not quite sure where Noel got this recipe from. I suppose, if asked, he could say that he found this recipe on the "back of his forehead"!! LOL!! Unconventionally Noel often makes a lot of his dishes from scratch which are more often hit rather than miss and to his credit the majority of the flavours that he does create are wonderful!! He never fails to amaze me or others who are lucky enough to experience his cooking.

Getting another recipe from Noel in my books is an honour for me - so thank you my darlin'.


American Style Lamb Ribs
recipe source - noel


Serves 4 as a main
or 8 as an entree


Points per serve: main: 9
or entree: 4.5
1 kilogram lamb ribs
1 tablespoon oil
1 onion, finely diced
1 tablespoon vinegar
1 tablespoon Worchestershire sauce
1/3 cup water
1 teaspoon salt
1/2 teaspoon paprika
1/4 teaspoon cayenne pepper
4 teaspoons black pepper
1 teaspoon chilli powder
1/3 cup tomato Ketchup
juice of 1/2 lemon
1 teapsoon mustard
1/4 teaspoon garlic powder
1/4 teaspoon ground cumin

Bring a large saucepan filled with water to boil and add the lamb ribs. Boil for approximately 10 - 15 minutes. Drain and leave to one side.

In a frying pan add oil and cook onions until soft. Add all remainder of ingredients, bring to a boil and simmer over a low heat for 20 minutes or until sauce has thickened.

Meanwhile preheat oven to 150 deg C.

Once sauce has thickened add ribs tossing to ensure that all the ribs are covered in the sauce. Place ribs in a baking dish (or foil trays) and cook in oven for 3 - 4 hours or until ribs are tender and easy to remove from the bone.
Serve immediately - enjoy!!
~ ~ o 0 O 0 o ~ ~

WW Note: To be honest and although I have put a WW points value against these ribs I have also labelled this recipe as a WW "Danger Beware". The points value I have allocated is definately only a rough guess due to the fat content of the lamb ribs prior to boiling and how much it is reduced after cooking is something I alone cannot work out. My only advice, especially after eating these myself, is that you do not have these as a regular meal on your diet plan. I say this not only because of the guesstimated points value I have allocated but because they are very morish and you could easily eat the whole lot without realising it! Hence the warning!

Tuesday, May 5, 2009

Creamy Potato and Spinach Bake

Our family are not huge potato eaters at the best of times and when we do have them they are normally baked, roasted or mashed with of course the occasional serve of chips. Often though we just don't want a plain old boring potato so we welcome the taste of a creamy potato bake and I must say that this potato bake does not dissapoint the tastebuds.

This version of a potato cake is quite different from the normal as hidden amongst the diced potato is bacon, baby spinach leaves, spring onions and cheese all baked together with a creamy sauce.


Creamy Potato and Spinach Bake

Serves: 8
Points per serve: 3.5
 
800 grams potatoes, peeled and diced approx 2 cms
2 rashers bacon, all visible fat removed and diced
6 spring onions, roughly chopped
200 grams baby spinach leaves
1 cup grated tasty cheese
1/4cup thickened light cream
3/4 cup skim milk
1 teaspoon crushed garlic
1 teaspoon chicken stock powder
freshly ground pepper to taste

Preheat oven to 180 deg C.

Parboil potatoes in a large saucepan of salted water for approximately 10 minutes or until potatoes are soft when peirced with a knife tip - do not overcook. Drain and set aside to cool slightly.

In a small frying pan fry diced bacon until cooked. Remove from heat and drain on a paper towel allowing to cool slightly also.

In a large bowl place spring onions, baby spinach leaves, bacon and 1/2 cup of the grated cheese. Add potatoes and toss gently to combine all ingredients. Place potato mixture into a large casserole dish or baking pan.

In a jug combine cream, milk, garlic, stock powder and freshly ground black pepper. Pour evenly over potato mixture. Sprinkle with remaining grated cheese and cook in the oven for 30 mins or until cheese on top has melted and is golden.

Monday, May 4, 2009

Sizzling Garlic and Chilli Prawn Pots

Many years ago there was a restaurant chain called The Keg Steakhouse and Bar. From what I remember The Keg Steakhouse and Bar concept originated in Canada in the early 70's but didn't come to Australia until the late 80's if not earlier. Famous for it's atmosphere and of course, as the name suggests, it's steaks it was an experience to dine there as it was different to the good old Aussie Pubs and restaurants at the time.


Unfortunately I believe all of the Australian franchises have closed down now but there was one particular entree that both Noel and I enjoyed, Sizzling Garlic Prawns (I think that's what it was called or something similar). It came served to in a cast iron ramekin served with a crusty roll, took forever to cool enough to eat but was delicious.


Noel and I have tried many different versions and ways of cooking this at home ourselves. Each way a little different, some successful others too oily or overcooked. Let's face it - prawns don't exactly take too long to cook but the butter and oil combination needs to be red hot prior to adding the prawns so there is a little difficulty involved with getting this dish right. Also it pays to have everything prepared and ready as the cooking time is quite minimal.


As we both enjoy the combination of garlic and chilli it goes without saying that we did indeed have to try it and as expected the dish was delicious!! I must also add that using fresh garlic cloves and fresh birdseye chilli increased the amazing flavours - so much better than using pre-crushed garlic and chilli from a jar but saying this, using the jarred variety is quite okay and still makes a good flavoured meal.


This dish is definately an entree sized portion but I would imagined that it could easily be adapted to main size serving especially if served with some steamed rice and vegetables.


And yes we did use a nice crusty warmed roll to soak up the garlic and chilli butter left in the bottom of the ramekin!! Naughty but very very nice!! LOL!!


Sizzling Garlic and Chilli Prawns Pots


Serves: 4
Points per serve: 7.5

500g raw large king prawns
4 tablespoons butter, reduced fat
4 tablespoons extra virgin olive oil
6 cloves of garlic or 6 teaspoons crushed garlic
2 birdseye chillis, sliced and deseeded depending on your taste
4 spring onions, diagonally sliced
salt and freshly ground pepper to taste


Preheat oven to 300 deg C.


Place ramekins on an oven tray as this will assist in moving them in and out of the oven quickly.


In individual ramekins add 1 tablespoon of butter and 1 tablespoon of olive oil. Place in oven for approximately 5 minutes or until butter is completely melted and bubbling.


Remove from heat and quickly add garlic and chilli. Return the ramekins to oven for 2 minutes to return butter and oil mixture to a high temperature.


Working quickly again, remove ramekins from oven add prawns and spring onions, season with salt and pepper. Return to oven for a further 3 - 5 minutes or until sizzling and prawns are a nice pink colour.


Place ramekins onto a plate and serve immediately.

Note: If using cast iron ramekins, preheat them in the oven prior to adding the butter and the oil. These will not take as long to cook either due to the heat retained by the cast iron.

Sunday, May 3, 2009

San Choy Bow

Now this would have to be one of my family's all time favourites.

San Choy Bow is normally served as an entree but can quite easily become a main meal and a morish one at that. As an entree you could easily dish up individually but as a main I put all the dishes in the middle of the table as I like to watch everyone create their own "lettuce cup", roll them up and try to delicately eat them... evil of me I know!!

The best thing about San Choy Bow (besides eating with your fingers!) is that you can use any meat but our choice is always pork. The crunchy yet soft texture of this dish is complemented with extra beanshoots, sliced spring onions and if you choose, sliced birdseye chilli.

As mentioned this is a favourite and we do tend to order it when we try dining at different asian restaurants just to see what their flavours are and whilst I have experimented with many different recipes, some successful, but this is my version.....


San Choy Bow

Serves: 8 as entree or 4 as main
Points per entree serve: 2.5
Points per main serve: 4.5
8 iceberg lettuce leaves
500g lean pork mince
1 teaspoon crushed garlic
1 teaspoon crushed ginger
150g button mushrooms, finely chopped
6 spring onions, finely chopped
1 x 225g can water chestnuts, rinsed and finely chopped
200grams bean sprouts, finely chopped
3 tablespoons hoisin sauce
1 tablespoon soy sauce
1 tablespoon sweet chilli sauce
1 tablespoon dry sherry
50 grams bean sprouts, for garnish
1 spring onion, diagonally sliced, for garnish
2 birdseye chillies, sliced, for garnish (optional)
4 tablespoons hoisin sauce, for garnish

Carefully remove lettuce leaves so they remain intact. Cut into a round dish-like shape. Place in a fridge, covered, until required. (This is the hardest part of the recipe!!)

In a small jug combine hoisin sauce, soy sauce, sweet chilli sauce and dry sherry.

Spray a wok with cooking spray. Over a high heat cook pork mince, garlic and ginger until pork is browned and cooked through. Remove from heat and drain to remove excess fat.

To the same wok add drained pork, mushrooms, spring onions, water chestnuts and bean sprouts until mixed through and somewhat sizzling. Add sauce mixture, stirring until completely combined with pork mixture.

If individually serving up, place lettuce cup on a plate. Top with pork mixture and sprinkle with bean sprouts, spring onions and birdseye chillies if using. Serve immediately with additional hoisin sauce.

Otherwise place pork mixture into a serving bowl and serve with lettuce cups, other condiments
and additional hoisin sauce and watch as others make their own meal, just like we do.....