Showing posts with label marinade. Show all posts

Saturday, December 1, 2018

Sticky Oven Barbecue Ribs

If you really want to see 2 kilograms of ribs disappear really quickly - I suggest you cook this recipe!

Saturday night feast had us smacking our lips and licking our fingers with this Sticky Oven Barbecue Ribs recipe.  And to say it beats restaurant or takeaway ribs is a total understatement.  Once you cook these I am guessing that you will hesitate to even order ribs at a restaurant or as a takeaway again.

One thing I do love is preparing and cooking easy yet flavoursome food - and to be perfectly honest this recipe was very easy to prepare taking about 15 minutes in total.  Slow cooked, giving me time to do other things, however devoured in minutes!  

I seasoned the pork ribs with a magic combination of herbs and let them rest in the fridge for around 8 hours (you can just rub the seasoning in and cook straight away).  Smelling these cook low and slow in the oven made coming into the kitchen irresistible as the aroma was very inviting.  Hints of garlic, cumin and chilli filled the air - definitely couldn't wait to eat these.

The sticky barbecue sauce, added to the ribs towards the end of the cooking time, was super easy to prepare also.  Add as little or as much cayenne powder to suit your palette (we added a fair bit but we like spicy) pop them back into the oven for 10 minutes and your fork free dining is ready.  Slice them or serve them as full racks with or without chips, salad!  So many choices.... just have serviettes or napkins on hand.

I am sure that these ribs won't last long - they didn't at ours!  


Sticky Oven Barbecue Ribs
(recipe adapted from Cafe Delites)

Serves: 4 - 6

2 kilograms American Style pork ribs
2 teaspoons garlic powder
1 teaspoon onion powder
2 teaspoons paprika
2 teaspoons salt
1 teaspoon cracked black pepper
1/2 teaspoon cumin
1 teaspoon Cayenne powder or chilli
4 tablespoons olive oil
2 cups (500ml) barbecue sauce
3 tablespoons minced garlic
1 tablespoon Worcestershire sauce
1/2 - 1 tablespoon cayenne pepper (optional for heat)
1 teaspoon salt


Preheat oven to 180 degrees Celsius.
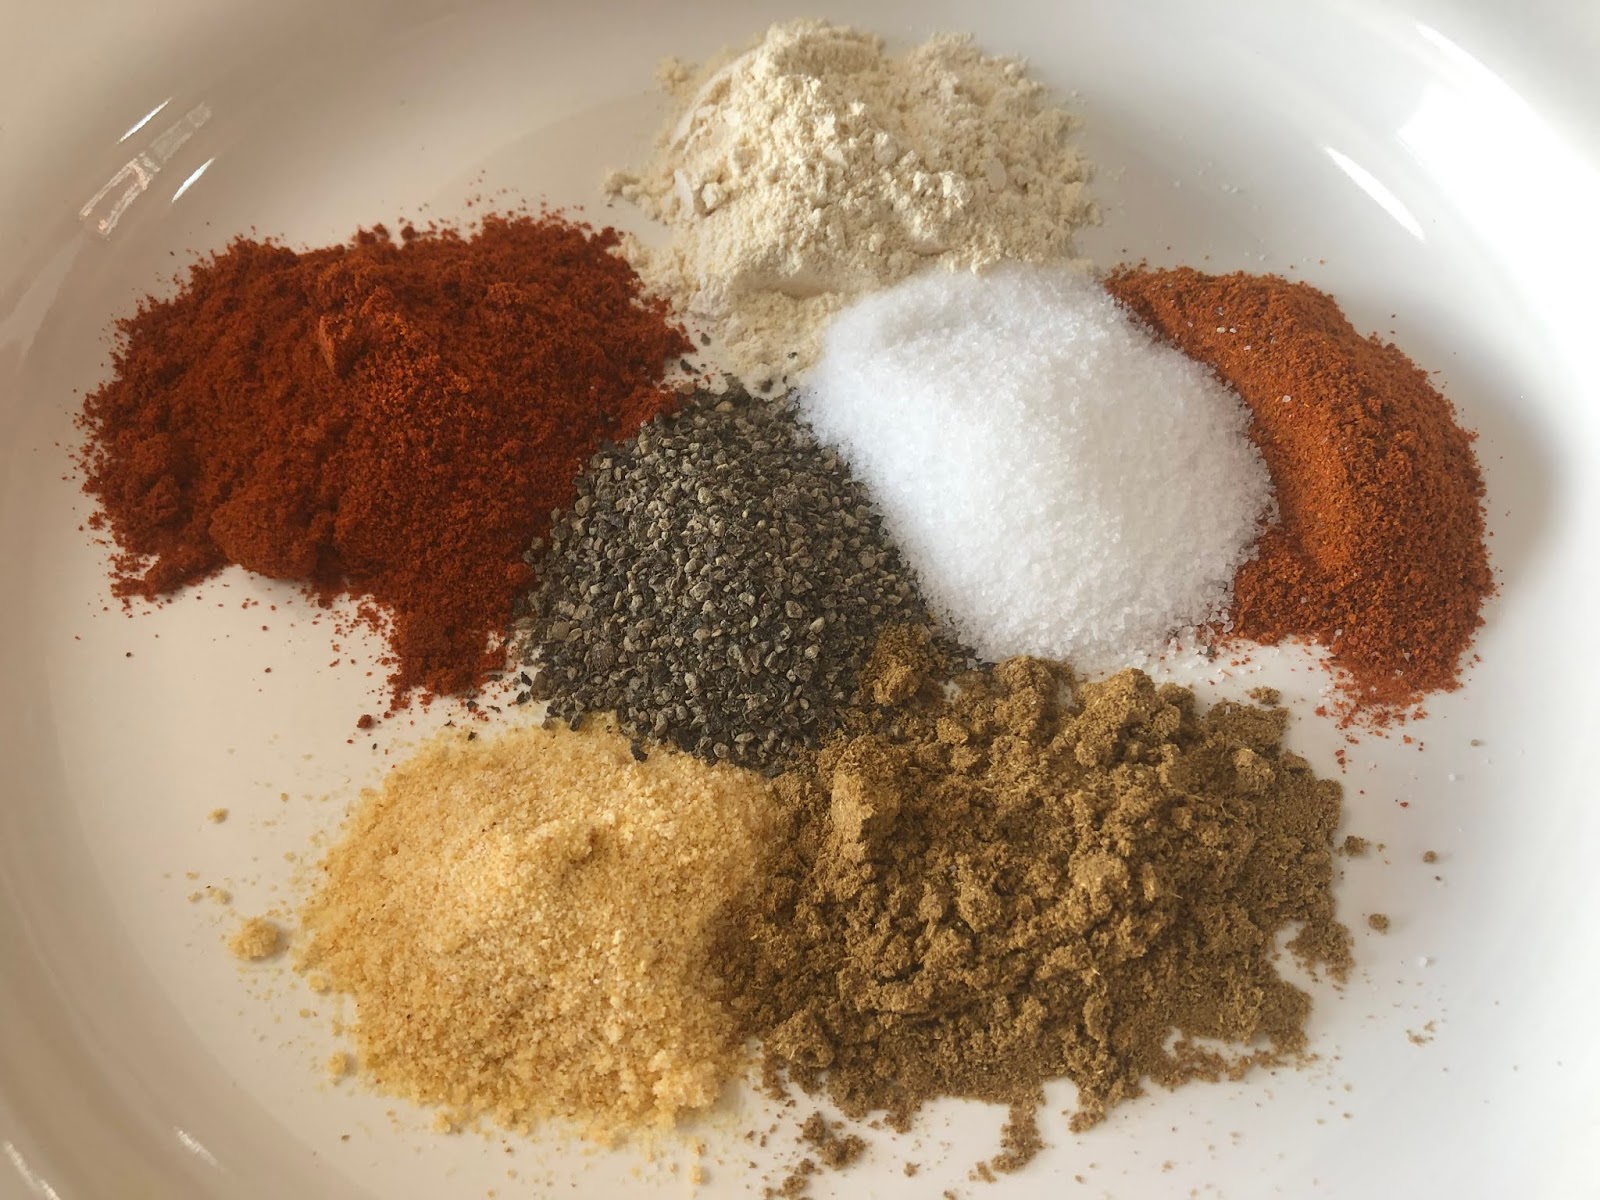

Combine together garlic powder, onion powder, paprika, salt, pepper, cumin and chili or Cayenne. 


Sprinkle seasoning over ribs on both sides.  Place in a glass casserole dish cover with cling film and marinate in fridge for at least 2 hours - longer if time permits.


Place on a baking sheet or tray lined with foil and baking paper.  Drizzle with 2 tablespoons of olive oil.  


Cover tray with foil and bake for 2 hours, turning over once during the cooking time.


Mix together remaining ingredients to make the sauce.

Remove ribs from the oven, remove foil and spread the tops of the ribs with the barbecue sauce mixture.


Increase oven temperature to 240 degrees Celsius.  Return ribs to the oven, uncovered, and bake for a further 10 minutes.


Rest for 10 minutes before slicing or serving.


Enjoy....


(Click here for a printable version of this recipe)

Thursday, October 26, 2017

Alice Springs Chicken

It's kind of funny when you see something on Facebook and it sits in your head until you do some research on it.  The other day a recipe popped up in one of the many foodie forums I belong to and I thought "WOW that looks different" as I read a recipe for Alice Springs Chicken and then the next thought was "what is the Outback Steakhouse?"

The Outback Steakhouse is an Australian inspired steakhouse restaurant in the States. Many items on the menu are similar to meals found at most bistro or steak restaurants in Australia however the menu items are "Aussie-ied" to reflect meals that we would eat out here in the Aussie Outback.  I guess the Outback Steakhouse is very similar to the Lonestar and Hogsbreath Chains. 
 
On the menu of very interesting dishes is The Bloomin' Onion.  The Bloomin' Onion is a signature Outback item. It is a one-pound onion cut to 'bloom' open, breaded, deep-fried and served with mayonnaise-horseradish sauce.    However I had to try Alice Springs Chicken!  Described as a wood-fire grilled chicken breast topped with sautéed mushrooms, crisp bacon, melted Monterey Jack and Cheddar and honey mustard sauce I knew it would be a winner at our place.
 
The copycat recipe for Alice Springs Chicken I found looked easy enough so it made up my mind to make it even though I have never been to an Outback Steakhouse.  All the ingredients just sounded so delicious together.  In fact the first this I thought was how it was similar to a gourmet chicken parma - just without the breadcrumbs and the tomato sauce and we all know how well a parma goes down in this house.

A juicy chicken fillet, marinated in honey mustard, smothered in mushrooms, bacon and cheese was presented to the family last night and it was really tasty.  A further drizzle of honey mustard mayonnaise added another sweet yet savoury dimension to the chicken temptation. 

This dish was really easy to prepare and cook, even easier to eat and as always, it was a really nice mid week wonder for our ever busy lives. However, I think I need to tweek the recipe a little more as it's quite high in SmartPoints but if you have a day where you can accommodate this dish you will enjoy it.


Alice Springs Chicken
(Recipe adapted from CenterCutCook.com)
 
Serves: 4
SmartPoints per serve: 16

1/2 cup Dijon Mustard
1/2 cup honey
3 tablespoons reduced fat mayonnaise
juice of half a lemon
4 boneless skinless chicken breast halves
salt
freshly ground black pepper
200 grams sliced button mushrooms
cooking spray
200 grams short cut bacon, thickly sliced
100 grams shredded low fat tasty cheese
100 grams shredded low fat mozzarella
 
In a small bowl, combine Dijon mustard, honey, mayonnaise and lemon juice. Pour half the sauce into a small bowl, cover and reserve for later.

Place the chicken in a large zip lock bag. Pour the remaining marinade in the bag and toss the chicken to coat. Chill in the refrigerator for at least two hours, overnight if time permits.

Preheat your oven to 200 degrees Celsius.

Spray a small frying pan with cooking spray and heat over medium heat.  Add the mushrooms and cook for 7-10 minutes, or until the mushrooms are tender and just starting to turn golden brown.  Remove from pan.

Using the same frying pan, add bacon and cook until crispy.  Remove and drain on paper towel.

Heat a large frying pan to medium high heat. Coat with cooking spray.  Remove the chicken from the marinade, discarding marinade. Place the chicken in the pre-heated pan. Cook for about 4 minutes, then when the chicken is golden brown, flip the chicken and cook for an additional 4 minutes.  Transfer the chicken to an oven safe casserole dish.

Top chicken evenly with mushrooms and bacon.

In a small bowl mix the two cheeses together and sprinkle evenly over each piece of chicken.

Place the chicken in the oven and bake for about 10 - 15 minutes or until the chicken is cooked through and the cheese has melted.

Serve chicken drizzled with remaining honey mustard sauce or serve the sauce on the side.

 
(Click here for a printable version of this recipe)

Tuesday, January 31, 2017

Sticky Chilli Barbecue Chicken Cutlets

It feels like a lifetime since we've chatted about our cooking adventures (well it's been many weeks - actually nearly 2 months) and I have missed sharing our experiences on my blog. So here goes my first blog post for 2017. By the way, Happy New Year. I hope that 2017 is kind to you in every way possible.

2016 ended up being the year of unorganised chaos and frantic lifestyle and 2017 has pretty much started off the same way.  But it is what it is and more importantly through all the experiences in the past two months, both good and bad, it has made memories and learnings for all in the House of Murray.  Whilst we have been busy rest assured that we didn't' stop cooking.

So after finally deciding I needed to get my blogging arse back into gear I hope you enjoy this little number we prepared early (well early this evening!)  I say we but in all honesty I made the coleslaw and chopped the potatoes - Noel is responsible for marinating and cooking the chicken.

Sticky Chilli Barbecue Chicken Cutlets, perfect for a mid summers' evening dinner - in fact it tasted that good it would be perfect anytime of the year.  Sticky with a hint of heat and smokiness enveloped the tender juicy chicken - melt in your mouth perfect.

The Chilli component is completely up to your discretion - you can use what ever chilli sauce you like - mild, medium or hot.  Please bear in mind however that using sweet chilli sauce would only add to the sweetness.  We used Maggi Chilli Sauce but you could use Sirracha Sauce, which contains less sugar than most chilli sauces.  Add less sauce for less heat obviously.

Being a "sticky" dish it's quite high in sugars - therefore it's not a meal that should be eaten a lot if you are trying to lose weight but honestly if you want to treat yourself for one meal - this recipe should definitely be on your "to try" list,.  Obviously I will be attempting to modify the recipe to make it more Weight Watcher friendly in the near future.  But in the moment - I really enjoyed dinner tonight.


Sticky Chilli Barbecue Chicken Cutlets
(recipe adapted from Taste.com)

Serves: 4

4 cups water
2 teaspoons salt
1 teaspoon whole black peppercorns
1/2 lemon, rind coarsely chopped, juiced
5 fresh thyme sprigs
1 tablespoon brown sugar
8 (about 1.4kg) chicken thigh cutlets
1 tablespoon extra virgin olive oil

Barbecue sauce
1 1/2 cups tomato sauce
1/3 cup chilli sauce, to taste
1/2 red onion, coarsely chopped
2 large garlic cloves, peeled
1 tablespoon brown sugar
1 tablespoon molasses or honey
1 tablespoon Worcestershire sauce
5 fresh thyme sprigs, leaves picked
2 teaspoons smoked paprika
1 teaspoon dry mustard powder
1 teaspoon ground cumin

Combine water, salt, peppercorns, lemon juice and rind, thyme and sugar in a glass or ceramic bowl. Add chicken and stir to combine. Cover. Place in fridge for at least 30 minutes or up to 3 hours to brine.

For the barbecue sauce, process all the ingredients until smooth. Bring to a simmer in a saucepan over medium-low heat. Reduce heat to low. Simmer, partially covered, stirring occasionally, for 15-20 minutes or until thickened. Season. Reserve one-third of the sauce.

Heat a barbecue grill on medium. Drain chicken from the brine and pat dry with paper towel. Rub with oil, then season. Cook the chicken, turning, for 10 minutes. Baste with marinade and continue cooking, basting generously with marinade and turning every 3 minutes, for 20 minutes or until the chicken is cooked through.

Serve chicken with reserved sauce and sides of your choice.

Saturday, December 3, 2016

Heston’s Barbecue Chicken Wings

Noel was on a mission recently to cook chicken wings.  This fascination started when we went to the Loch Festival with our gorjus friends Kelee and Dave.  We had the most devine Buffalo Chicken Wings there and the men have been talking about them ever since.

I love the fact that Noel loves to cook and he spends hours googling and reading recipes. However saying this he has been know to create his own marinades - successfully I might add. He recently came across this recipe for Heston Blumenthal's Barbecue Chicken Wings and talked about making them for a couple of weeks.  I have to admit they sounded good on paper but they were magnificent in real life.

To quote the great man himself Heston said "Chargrilled chicken wings slathered in a rich, sticky sauce has got to be one of the all-time barbecue classics. This recipe will have those wings flying off the barbecue faster than you can make them. A little lime marinade to season and soften the meat, a coating of sauce made from the gutsy, punchy flavours and a sprinkle of sesame seeds for a toasted note and some crunch – and you’re good to go. Especially with a cooling, easy-to-make blue cheese dip on the side."


Heston’s Barbecue Chicken Wings
(Recipe adapted from Waitrose.com)

Serves: 4 – 6

For the barbecue sauce
2 cups chicken stock
100 grams white caster sugar
100 mls rice wine vinegar
200 mls tomato ketchup
1 tablespoon mushroom oyster sauce
1 tablespoon Worcestershire sauce
1 tablespoon sesame oil
1 tablespoon Tabasco Pepper Sauce, to taste
2 teaspoon Cayenne pepper

For the cheese dip:
300 grams blue cheese
300 ml soured cream

For the chicken wings:
juice of 4 limes
2 teaspoon salt
4 tablespoon oil
1 kilogram chicken wings
50 grams sesame seeds, toasted

To make the barbecue sauce, place the chicken stock in a pan over medium-high heat and reduce until it is approximately 150 ml. Place another pan over medium heat, add the sugar and cook until a medium caramel is formed. Slowly add the rice wine vinegar while whisking until the caramel has dissolved. Add the remaining sauce ingredients and whisk until well combined. Set aside.

To make the blue cheese sauce, removing any rind from the cheese, chop into small pieces and add to a bowl with the soured cream, and use a hand blender to blitz until smooth if desired. Put into a small container and allow to stand in the fridge.

When ready to cook, place the juice, salt and oil in a bowl, add the wings and toss until well coated. Allow to stand in the fridge for 45 minutes. Once the time has elapsed, place the wings on the preheated barbecue and cook for 20 to 25 minutes, turning them every few minutes until cooked through with no pink meat. Once cooked, transfer the wings to the bowl with the barbecue sauce and toss to thickly coat. Remove and transfer the wings to a clean bowl then sprinkle over the toasted sesame seeds.

Serve in a bowl with the cheese sauce, celery and any remaining barbecue sauce on the side.


Saturday, October 1, 2016

Oven Baked BBQ Beef Ribs

To say that we really enjoy pork ribs is an understatement - this house goes mad for them.  However there is also a sneaky admiration for thick cut beef ribs (or short ribs as they can be known by). There is nothing more enjoyable than slow cooked beef ribs that are tender and melt in your mouth.  Now normally I would marinade them in an Asian influenced style sauce and slow cook for 8 hours in my trusty slow cooker but this time I decided to try an American BBQ based recipe and I am so glad that we did.

Half way through making the dry rub, when I realized that I didn't have any Cajun Seasoning and had to make my own (lol a recipe within a recipe), I knew just from the combination of the herbs and spices that these beef ribs were going to have so much flavour not to mention a little kick of heat with having both chilli and cajun seasoning in the mix.  I marinade these overnight to allow the flavours to develop.

Slow cooked in the oven on a very low temperature for 4 hours ensured that these nice plump beef ribs were tender and fell off the bone.  The addition of the BBQ sauce in the last step not only added the sweetness but also the stickiness that gave you a reason to lick your fingers to ensure you savour every mouthful.

It was the AFL Grand Final today and these ribs would be our dinner after watching the match. Not really an traditional Aussie meal (we ate party pies during the game) but OMG I enjoyed these ribs, and so did the others, and will definitely be cooking them again.     


Oven Baked BBQ Beef Ribs
(Recipe adapted from Diva's Can Cook)

Serves: 8

2 kilograms meaty beef ribs
 2 - 3 tablespoons Liquid smoke (optional)
2-4 tablespoons olive oil
2 tablespoon garlic powder
2 tablespoon onion powder
2 tablespoon cajun seasoning
4 tablespoon brown sugar, packed
1 teaspoon chili powder
2 teaspoon salt
2 teaspoon paprika
4 teaspoons oregano
 4 tablespoons of your favorite BBQ Sauce

Rinse ribs and dry with paper towels
.
Douse dry ribs with liquid smoke if using.

Lightly coat ribs in olive oil.

Mix together seasoning and sprinkle generously over ribs, front and back.


Massage the spices into the ribs, adding more olive oil to help distribute the spices well if needed.


Place the ribs in a large ziplock bag or covered bowl and marinate in the fridge for 1-2 hours or overnight.

Preheat the oven to 120 degrees Celsius.

Place the ribs on a foil lined baking tray in a single layer.

Add another piece of foil on top to create a pouch for the ribs to cook in. Be sure to seal the edges of the foil so that it's tight and steam won't seep out.

Bake on the middle rack of 3½ -4 hours. Check on it after the 3½ hour mark.


When the ribs are done to your liking, drain off the excess fat.

Brush the ribs with desired amount of BBQ sauce.

Grill until the sauce is sticky.


Serve with oven baked potato wedges and coleslaw.

(Click here for a printable version of this recipe)

Friday, September 30, 2016

Homemade Cajun Seasoning

Oh my time flies when you are having fun or if you are just out right busy!!

Apologies for my absence - life has just been one massive juggle for the last few months. One thing after another and I found myself saying many times "I'm too old for all this shit" but we all pulled through it together as a family.  Sanity wise I am ok (well at least I think I am), a little exhausted but needing to control the stress better and also actually let myself relax every now and then.  

As you can only imagine I have so many recipes banked up to share with you so hopefully you will enjoy what you see while I am not only catching up but creating new meals doing what I like best - enjoying myself in the kitchen.

While I was preparing BBQ Beef Ribs for dinner and gathering all the ingredients for the dry rub I was missing Cajun Seasoning.  Rather than get in the car and drive to the shops just for 2 tablespoons of mixed herbs and spices I decided to make my own.  I already make my own Homemade Taco Seasoning and that is damn good, even if I say so myself.

It is not a hard process at all - simply measure and mix!  Thankfully I had all the ingredients to make the recipe to use in the original recipe I had planned to make.  LOL what a laugh this process has been - I hope these BBQ Beef Ribs are bloody good!  Will let you know tomorrow as they are marinating overnight.


Homemade Cajun Seasoning
(recipe sourced from Allrecipes.com)

Makes 1/4 cup

2 teaspoons salt
2 teaspoons garlic powder
2 1/2 teaspoons paprika
1 teaspoon ground black pepper
1 teaspoon onion powder
1 teaspoon cayenne pepper
1 1/4 teaspoons dried oregano
1 1/4 teaspoons dried thyme
1/2 teaspoon red pepper flakes (optional)

Stir together salt, garlic powder, paprika, black pepper, onion powder, cayenne pepper, oregano, thyme, and red pepper flakes until evenly blended.


Store in an airtight container.

(click here for a printable version of this recipe)

Sunday, May 8, 2016

Moroccan Roast Lamb

Mother's Day saw many of the family get together... well Noel's family as my mam lives in Queensland.  It was great to catch up with everyone again and enjoy not only each other's company but a feast (as we all love food). We decided to break away from the traditional roast dinner that we have most times and have a Moroccan taste adventure.  I was actually quite worried how this would be received as it was outside the norm for the Murray family. 
 
To my surprise it was enjoyed by everyone and there were lots of comments about the flavour on the lamb.  I have to say there is nothing more enjoyable than making your own marinade - knowing what is in it and especially as I picked some of these herbs from my own herb pots.  Moroccan flavours are just magical - they just make your tastebuds dance with every mouthful.  The fresh herb flavour envelope with heat from the chilli and spices mixed with the sourness of lemons combined to make perfect tastebud harmony.
 
My only disappointment was the actual way the lamb looked when it came out of the weber.  To be honest I think this dish would have been better cooked in the oven as the marinade may not of charred as much.  (So apologies about the finished product picture).
 
 
Moroccan Roast Lamb
(Recipe adapted from Taste.com)

Serves: 8
SmartPoints per Serve: 7

1/3 cup chopped fresh coriander
1/4 cup chopped fresh continental parsley
3 garlic cloves, coarsely chopped
1 long fresh red chilli, chopped
2 teaspoons ground cumin
2 teaspoons ground coriander
2 teaspoons sweet paprika
juice of 1 lemon
salt
freshly ground pepper
2 tablespoons olive oil
2 kilogram leg of lamb, trimmed
 
Process the fresh coriander, chopped parsley, garlic, chilli, cumin, ground coriander, paprika, lemon, salt, pepper and oil in a food processor until coarsely chopped.


Score the lamb crossways. Rub the coriander mixture over the lamb and into the cuts. Cover and place in fridge for 2 hours or overnight to marinate.

 
Bring to room temperature before cooking.
 
 
Light coals in Weber and when coals are ready cook lamb for 1 1/2 hours or until cooked to your liking.
 
 
Alternatively, heat oven to 220 Celsius.
 
Place lamb in a roasting pan. Roast for 30 minutes. Drain fat.
 
Reduce oven to 180 Celsius. Add the water. Roast for 1 hour, adding more water if necessary, or until cooked to your liking.
 
Transfer the lamb to a platter, reserving the juices in the pan. Cover with foil. Set aside to rest.
 
Slice and serve.


Wednesday, April 1, 2015

Slow Cooker Balsamic Honey Pulled Pork Sliders with Slaw

This was a wonderful feed, especially with it being school holidays here in Victoria and we had a house full of extra children sleeping over.  Fork free dining is always a treat for the kids and adults a like and this was definitely a meal that was a relaxing event - even cooking it was easy.

A piece of Pickled Pork drowned in a thick aromatic marinade slow cooked for 9 hours, shredded apart just before serving and then served with the sauce, coleslaw and nice fresh buns.... every meal should be this easy.


Slow Cooker Balsamic Honey Pulled Pork Sliders with Slaw
(recipe adapted from Just A Taste)
 
Serves: 12
ProPoints per Serve: 9

1 kilogram Pickled Pork or boneless pork shoulder
1 onion, diced
1/2 cup honey
1/2 cup balsamic vinegar
1/4 cup blackberry or raspberry jam
1/4 cup hoisin sauce
1 teaspoon crushed chilli
1/2 cup chicken broth
3 cloves garlic, minced
1 tablespoon cornflour
3 tablespoons cold water
1 x 200 gram packet coleslaw kit (with dressing included)
12 slider-sized buns or  dinner rolls

Trim any excess fat from the pork shoulder and place it in the slow cooker.  Sprinkle with onions.

In a medium bowl, whisk together the honey, balsamic vinegar, jam, hoisin, chilli, chicken broth, garlic, salt and pepper.  Pour the sauce over the pork shoulder.

Cover the slow cooker and cook the pork shoulder on LOW for 9 hours until it is no longer pink and is cooked through.

Using tongs, remove the pork shoulder from the slow cooker (reserving the liquids) and place it on a cutting board. Using two forks, shred the pork shoulder into smaller pieces. Place the pulled pork in a large bowl.

Meanwhile remove all liquid from slow cooker into a saucepan, draining the onions out if preferred.  Place over medium heat, slowly bringing to the boil.  In a small bowl, whisk together the cornflour with water.  Whisk through the cornflour, mixing well.  Bring to full boil and cook until it reduces and has thickened slightly for about 5 minutes.  Put into a serving bowl and set aside.

Make the coleslaw as per the packet directions using the sauce included.

Halve the buns. Divide the pulled pork between the buns, drizzling sauce over the pork and serving with some slaw.

Note: I have allowed 3 ProPoints per roll (35g each).  You could also serve with a 0ppt salad on omit the Coleslaw at 1ppts per serve.


(Click here for a printable version of this recipe)

Monday, March 4, 2013

Five Spice Chicken with Noodles

Chinese Five Spice is definitely an interesting flavouring used often in Asian recipes.  Some people like it others don't.  Thankfully we do and all really enjoyed this easy noodle dish for dinner.

The chicken is marinated for several hours which allows the flavours to develop.  With this taken care of early it's only a matter of preparing the vegetables, noodles and actually cooking the dish.

The flavour itself was somewhat sweet and salty combined with the underlying incredible flavour that Chinese Five Spice provides. Chinese Five Spice powder is a ground spice blend of cinnamn, star anise, cloves, fennel seeds and pepper.  Needless to say it definitely tantalised the tastebuds while eating this noodle dish.


Five Spice Chicken with Noodles
(Recipe Sourced from WW The Complete Kitchen Cookbook)
 
Serves: 4
ProPoints per serve: 10
 
2 tablespoons kecap manis (sweet soy sauce)
2 tablespoons soy sauce
2 teaspoons cornflour
1 teaspoon Chinese Five Spice powder
1 teaspoon finely grated fresh ginger
1 garlic clove, cruushed
600 grams lean chicken breast fillets, fat trimmed, thinly sliced
200 grams rice stick noodles
1 tablespoon canola oil
1 carrot, cut into matchsticks
1 red capsicum, thinly sliced
2 green shallots, thinly sliced
1 bunch baby bok choy, cut into 5cm lengths

Combine kecap manis, soy sauce, cornflour, five spice, ginger and garlic in a large glass or ceramic bowl.  Add chicken and turn to coat.  Cover and refrigerate for 3 hours.

Prepare noodles following packet instructions or until just tender.  Drain.  Using scissors, cut noodles into 5cm lengths.

Drain chicken, reserving marinade.  Heat a wok over high heat.  Add half the oil and heat for 5 seconds.  Stir fry chicken, in batches, for 5 minutes or until browned.  Transfer to a bowl.  Reheat wok over high heat.  Add remaining oil and heat for 5 seconds.  Stir fry carrot and capsicum for 2 minutes or until just softened.  Add 3/4 shallots and bok choy and stir fry for 3 - 4 minutes or until vegetables are tender.

Return chicken to wok with noodles and reserved marinade.  Stir fry until heated through.

Serve sprinkled with remaining shallots as garnish.


(click here for a printable version of this recipe)

Thursday, January 10, 2013

Barbecued Lamb and Vegetables

We are still cooking on the barbecue - probably will until the novelty wears off again this summer.  To be honest we don't use it enough or should I say we don't use it too it's full potential.  Really, a girl can only have so many sausages on the barbie!! If we continuously cook the same thing that's when I start thinking to myself that I am sooooo over barbecues!!

So with all that said, the challenge then is to keep barbecuing exciting and this recipe is a perfect example of not only an easy dish but a very flavoursome meal.  Right from the preparation stage and the aromas of the garlic and rosemary I knew we would all enjoy.


Barbecued Lamb and Vegetables
(recipe adapted from Weight Watchers Cook Easy Cookbook)

Serves: 4
ProPoints per Serve: 9

4 cloves fresh garlic, crushed
2 tablespoon fresh rosemary, plus extra sprigs to garnish
salt
freshly ground black pepper
2 tablespoons olive oil
500 gram trimmed lamb fillet or backstrap
2 carrots halved lengthways, cut into 3 cm pieces
2 medium zucchini, thickly sliced
1 small red onion, cut into thin wedges
1 medium red capsicum, cut into 3cm pieces
cooking spray

Combine garlic, chopped rosemary and oil in a small bowl. Place half of the rosemary mixture in a shallow dish. Add lamb and turn to coat.

Steam, boil or microwave carrots until just tender.  Drain and allow to cool slightly.

Combine carrot, zucchini, onion, capsicum and eggplant in a large bowl. Add remaining rosemary mixture and toss to coat.

Heat an oil-sprayed chargrill or barbecue over medium-high heat. Chargrill lamb for 3–4 minutes each side or until cooked to your liking. Transfer to a plate. Cover to keep warm. Rest lamb for 10 minutes before slicing thickly.

Meanwhile, chargrill vegetables, turning occasionally, for 8–10 minutes or until golden and tender. Transfer to a large serving bowl. Add sliced lamb and rosemary sprigs and toss to combine. Serve.


Sunday, January 6, 2013

Beef Tomato and Zucchini Kebabs with Chutney

Another night of balmy weather called for more barbecuing.... tonight with what my children have always fondly called "Meat on Sticks".

These marinated Beef, Tomato and Zucchini Kebabs were a breeze to prepare, cook and devour complimented with a sweet, slightly spicy chutney that screamed homemade... jar chutney is so boring.  The pungent spices used in the marinade surprisingly matched each other creating a really enjoyable flavour on the tender beef.

Served with Smashed Potatoes and a green salad - I would definitely recommend these at your next barbecue.....


Beef, Tomato and Zucchini Kebabs with Chutney
(recipe sourced from WW 1 Recipe 3 Ways Cookbook)

Serves: 4
ProPoints per serve: 7

1 teaspoon ground cumin
1 teaspoon smoked paprika
1 teaspoon fennel seeds
1 teaspoon dried oregano
1 garlic clove, crushed
3 teaspoons olive oil
600 grams lean beef rump, fat trimmed and cut into 3cm pieces
500 grams baby chat potatoes
cooking spray
1 red onion, finely chopped
1 teaspoon brown sugar
2 teaspoons red wine vinegar
1 small fresh birdseye chilli, deseeded if desired, finely chopped
400 gram can cherry tomatoes
2 small zucchini thickly sliced
8 cherry tomatoes

Place cumin, paprika, fennel, oregano, garlic and half the oil in a large glass or ceramic dish.  Add beef and turn to coat.  Cover and refrigerate for 3 hours.

Preheat the oven to 220 degrees Celsius or 200 degrees Celsius fan forced.  Lightly spray a baking tray with oil.  Boil, steam or microwave potatoes until tender.  Drain and allow to cool for 5 minutes.  Using a potato masher gently press potatoes until lightly crushed.  Lightly spray with oil and bake for 20 minutes or until golden.

Meanwhile, heat remaining oil in a small suacepan over medium heat.  Add onion and cook, stirring, for 5 minutes or until softened.  Add sugar, vinegar and chilli and cook, stirring, for 1 minute.  Add canned tomatoes and bring to the boil.  reduce heat and simmer, uncovered, for 10 minutes or until chutney is thick.

Thread beef, zucchini and fresh cherry tomatoes onto 8 wooden skewers (see note).  Preheat a chargrill or barbecue over medium high heat.  Lightly spray skewers with oil and cook, turning occasionally, for 3 - 4 minutes each side or until cooked to your liking.

Serve skewers with crushed potatoes and tomato chutney.

Note: Soak skewers in cold water for 10 minutes to stop them burning during cooking.

(Click here for a printable version of this recipe)


Wednesday, February 29, 2012

Honey and Paprika Chicken Drumsticks

We don't have chicken drumsticks as a meal very often so when I saw the original recipe for this dish I knew that we had to try them.  We like chicken drumsticks but tend to have them on the bbq or for lunch never really for dinner.

The ingredients caught my eye - honey, paprika and fennel for the marinade accompanied by a sauce of orange.  WOW... I got excited.

I am glad that I did... the flavours combined magically and there was definitley an intriguing after tastes tantalising taste buds leaving them waiting until the next bite.

Serve with a simple salad or like us we had Herbed Potato Slices and corn cobs.


Honey and Paprika Chicken Drumsticks
(Recipe adapted from WW Just Say Yum Cookbook)

Serves: 6
ProPoints per serve: 8

1 tablespoon olive oil
3 tablespoon honey
2 tablespoons ground sweet paprika
1 tablespoon ground fennel
1 tablespoon water
12 individual chicken drumstick skin removed or lovely legs
cooking spray
2 teaspoons freshly grated orange rind
2 cups orange juice

Combine oil, honey, paprika, fennel and 2 teaspoons water in a jug.  Place chicken in a large snap lock bag or casserole dish.  Cover with marinade and turn to coat. Cover and refrigerate for 3 hours.

Lightly spray a large non-stick frying pan with oil and heat over high heat. Cook chicken, turning, for 5 minutes or until browned. Add rind and juice and bring to the boil. Reduce heat to low and simmer, covered, for 15 minutes or until chicken is cooked through.

NOTE: Chicken Lovely Legs are drumsticks with the bones trimmed and skin removed. They are available from most supermarkets or from chicken shops. I find it easier and cheaper to buy normal drumsticks and remove skin by holding the drumstick firmly and pulling the skin back using a tea towel to assist gripping the skin.

(Click here for a printable version of this recipe)

Monday, October 31, 2011

Mustard and Herb Roast Potato Bites

I managed to buy baby (chat) potatoes somehow instead of normal ones so my plans for making wedges to go with our hamburgers went out the window.  Instead I quarter the baby potatoes and make some yummy potato bites.

Very easy, quickly marinade the potatoes and then roast......


Mustard and Herb Roast Potato Bites

Serves: 6
ProPoints per serve: 3

800 grams baby (chat) potatoes
2 teaspoons dijon mustard
1 tablespoon olive oil
juice of 1 medium lemon
1 tablespoon Masterfoods Pizza Topper (mixed herbs)
cooking spray

Preheat oven to 200 degrees Celsius.

Quarter potatoes and place in a large snap lock bag or bowl.

Mix together the mustard, olive oil, lemon juice and herbs.  Pour into bag or bowl and mix well to cover all potatoes.  Allow to stand for 30 minutes.

Cover a baking tray with foil and spray with cooking spray.  Empty potatoes on to the tray spreading to one layer.  Cook in oven for 30 - 40 minutes or until potatoes are crispy on the outside and cooked through.

(click here for a printable version of this recipe)

Sunday, September 18, 2011

Honey Mustard Pork with Roasted Pear Salad

I was always brought up thinking that Apple Sauce was the perfect condiment for pork but I can tell you know that pears are a pretty good match also especially with this dish.

Beurre bosc pears are the pears that you find with the rough brownish skin but the white flesh inside is sweet and really great when roasted as they didn't mush as I would imagine normal pears to do.

A brilliant cooking tip with this recipe is to line your frying pan with baking paper as this will stop the marinade on the pork from burning. This recipe from the marinaded pork to the roasted pear salad and the sticky gooey sauce went down a treat.


Honey Mustard Pork with Roasted Pear Salad
 (recipe sourced from WW Programme Cookbook)

Serves: 4
ProPoints per Serve: 8

3 beurre bosc pears, quartered and cored
500 grams baby (chat) potatoes, halved
cooking spray
1 tablespoon olive oil
2 tablespoons honey
1 tablespoon wholegrain mustard
1 teaspoon fresh thyme leaves
500 grams lean pork fillet, fat trimmed
100 grams cherry tomatoes, halved
2 cups baby spinach leaves

Preheat oven to 200 degrees Celsius.

Place pears and potatoes in a large baking dish. Lightly spay with cooking spray and toss to coat. Roast for 40 - 45 minutes or until golden and tender.

Meanwhile combine oil, honey, mustard and thyme in a large shallow bowl. Add pork and turn to coat.

Line a frying pan with baking paper and heat over medium to low heat. Cook pork, turnin, for 12 - 15 minutes or until cooked through. Transfer to a plate and cover to keep warm.  Rest pork for 5 minutes before slicing thickly.

Place tomatoes and spinach in a medium bowl. Add roasted pears and potatoes and toss to combine.

Drizzle pork with pan juices and serve with the roasted pear salad.

(Click here for a printable version of this recipe)

Tuesday, February 15, 2011

Rosemary and Mustard Kangaroo Fillets

This post has been a long time coming - once again due to my work load and the fact that for some reason we are just soooo busy! Anyhow - enjoy!!
Despite the fact that Kangaroo is a national emblem on our Coat of Arms and an Australian icon it’s a meat that we enjoy eating. It is quite gamey to taste but it is very lean so therefore a better meat to eat.

The key with cooking Kangaroo is that it needs to be cooked medium rare – medium but no more otherwise it will go tough. We tend to cook ours either over the coals in the Weber or on the BBQ.

This time I marinated the roo fillets overnight and they had a beautiful flavour. The rosemary and the mustard really complimented the natural flavour of the meat without overpowering it.


Rosemary and Mustard Kangaroo Fillets

Serves: 4
ProPoints per serve: 7

1 kilogram lean kangaroo fillets
½ cup white wine
2 tablespoons seeded mustard
2 tablespoons redcurrant jelly
1 tablespoon fresh rosemary, chopped
1 teaspoon salt
1 teaspoon freshly ground black pepper

Place the fillets in a large snap lock bag or a large dish.

Mix together all remaining ingredients in a jug and mix well. Pour over the fillets. Seal bag or cover dish and refrigerate for 2 hours, overnight if time permits.

Preheat grill or weber.

Remove fillets from marinade, reserving if desired. Cook fillets for 3 – 4 minutes each side. Allow to rest for a few minutes before serving.

Bring reserved marinade to boil in a small pan and allow to reduce by half. Serve with kangaroo, if desired.

(click here for a printable version of this recipe)

Thursday, August 19, 2010

Teriyaki Steak with Onion Rings

I needed a quick dinner for tonight as I worked back late and this quick marinade for steak was the simple answer. The steak only needs to marinade for a little as 15 minutes for the flavour to be absorbed into the meat but you can marinate for longer. I used rump steak but any cut of steak would work well with this recipe.

Not only is this a simple marinade but it is very flavoursome and I am sure will go down a treat with everyone as it does in our house.


Teriyaki Steak with Onion Rings
(recipe adapted from The Backyard Barbecue Cookbook)

Serves: 4
Points per serve: 5

1/4 cup dry sherry
1/4 cup soy sauce
1 teaspoon crushed garlic
1 teaspoon grated ginger
freshly ground black pepper
4 x 200g rump steaks, all visible fat trimmed
cooking spray
2 teaspoons oil
2 large brown onions, sliced into rings

In a large bowl combine sherry, soy sauce, garlic and ginger. Season with freshly ground black pepper and mix well. Add steaks ensuring they are completely covered by the marinade. Allow to stand for at least 15 minutes.

Preheat a barbeque flat plate or large frying pan and heat oil. Cook onion over medium heat until golden, sprinkle with 1 - 2 tablespoons of the marinade and continue to cook until caramelised, approximately 5 minutes. Remove and keep warm.

Clean and respray the flat plate or frying pan and cook beef on high heat for 5 minutes on one side and 3 minutes on the other side or to desired liking. Serve meat with onion rings.

Monday, June 7, 2010

Dim Sum Scallops

Saturday night we decided to have an Asian inspired feast, with tasting plates of several dishes. The idea behind this wasn't because we all enjoy asian food but was to get all four of us involved and cooking allowing us to share and spend good quality family time together. Something that we have been missing recently in our busy lifestyle at the moment.

Oliver loves scallops although he's not big on most other seafood or fish. With this in mind he took on the challenge of cooking the scallop dish. This was quite an easy dish to cook but it was great to see him in the kitchen again.

The original recipe calls for scallops in their shells but I had frozen scallops and shells which I had kept from a previous time and these worked just as well.


Dim Sum Scallops
(recipe adapted from Essential Fingerfood Cookbook)

Serves: 4

Points per serve: 1

12 scallops in shell
2 tablespoons teriyaki sauce
1 tablespoon dry sherry
2 spring onions, finely chopped
2 teaspoons lemon or lime juice
2 teaspoons oyster sauce
1/2 teaspoon sesame oil
1 clove garlic, crushed
1/2 teaspoon grated fresh ginger
fresh coriander to garnish

Preheat the oven to 180 deg Celsius.

Place the scallops, in shells, on an oven tray.

Combine the teriyaki sauce, sherry, spring onions, juice, oyster sauce, sesame oil, garlic and ginger in a bowl; stir to combine. Drizzle 2 tablespoons of marinade over each scallop.

Bake the scallops for 5-10 minutes or until tender and white.

Note: These can be cooked under a preheated hot grill for 5 minutes instead.

(Click here for a printable version of this recipe)

Saturday, February 13, 2010

Balsamic and Herb Mushrooms

I love eating the large mushrooms and although jam packed with flavour and vitamins they are sometimes a little boring so I decided to marinade giving them just that extra little zing. The marinade was a basic combination of balsamic vinegar, olive oil and herbs.

These were cooked over direct heat on the weber whilst Noel cooked the steak but they could be easily (and I have) roasted in the oven.


Balsamic and Herb Mushrooms

Serves: 8
Points per serve: 1


8 large or 16 medium mushrooms
1/4 cup olive oil
1/2 cup balsamic vinegar
1/4 cup red wine
1 tablespoon dried oregano flakes
1 tablespoon dried parsley flakes
pinch of salt
freshly ground black pepper

Place mushrooms in a large snap lock bag.

In a small jug mix together remaining ingredients, seasoning to taste with salt and pepper. Pour of mushrooms, seal bag and toss mushrooms around ensuring mushrooms are well coated.

Cook until soften and starting to darken, turning several times.

If cooking in the oven:

Preheat oven to 180 degrees Celsius.

Place mushrooms on a lined oven tray or baking dish. Cook for 20 - 30 minutes turning several times.

(click here for a printable version of this recipe)

Thursday, February 11, 2010

Mojo Pork Cutlets with Sweet Potato Wedges

I have to say that we were totally impressed with this dish and not only can I cook it again but they would have been happy to have it tonight and tomorrow night if you understand what I am saying. I think this has just become the "favourite" pork dish (well for the time being anyways!)

"Mojo" marinade is a mix of citrus and spice and is very popular in Cuban cooking. Not only was it jam-packed with flavour but not overpowering this dish is so simple and quick to prepare - another excellent mid week dish!


Mojo Pork Cutlets with Sweet Potato Wedges
(recipe adapted from Australian Good Food Magazine March 2010)


Serves: 4
Points per serve: 6.5


1/4 cup olive oil
1 tablespoon cumin seeds
4 x 250 gram pork loin cutlets
salt
freshly ground black pepper
cooking spray
juice of 2 oranges
1 orange, sliced
2 small sweet potatoes, peeled and cut into wedges
coriander leaves, to garnish

Preheat oven to 250 degrees Celsius.

Rub 1 tablespoon olive oil and cumin seeds over pork cutlets. Season lightly with salt and pepper.

Spray a large frying pan with cooking spray and place over high heat. Cook pork for 2 - 3 minutes on each side or until cumin seeds are toasted and pork golden. Transfer to a baking dish.

Pour over orange juice and scatter over orange slices. Bake for 10 - 15 minutes, or until orange starts to caramelise and pork is cooked through.

Meanwhile heat remaining oil in a large pan over medium heat. Cook sweet potato, turning for 10 minutes, until golden and tender.

Place pork and orange slices on plates and drizzle with pan juices. Scatter over coriander and serve with wedges.


(click here for a printable version of this recipe)