Showing posts with label spicy mild heat. Show all posts

Wednesday, May 15, 2019

Baked Spicy Chicken Tacos

I have really been wanting Mexican for some time now but didn't want the usual boring beef tacos that are normally a mid week quick fix for dinner.  Then, as normal, I enlisted the help of my friend Google and came up with some fantastic ideas as always.

After deciding I would try baked tacos - the next decision was all about what filling I wanted.  There are so many different flavour combinations out there.  Something that everyone would eat is always the main criteria so chicken was a must.  And of course, being me, I had to add those vegetables in.  In this version I just used onion, corn, capsicum and black beans - I guess any vegetable would work though depending on your preferences.

This meal was so easy and perfect for a mid week dinner.  To make it even easier you could always used a cooked chicken from the supermarket rather than poaching the chicken yourself.  If you can save time cooking dinner during the week - go for it!

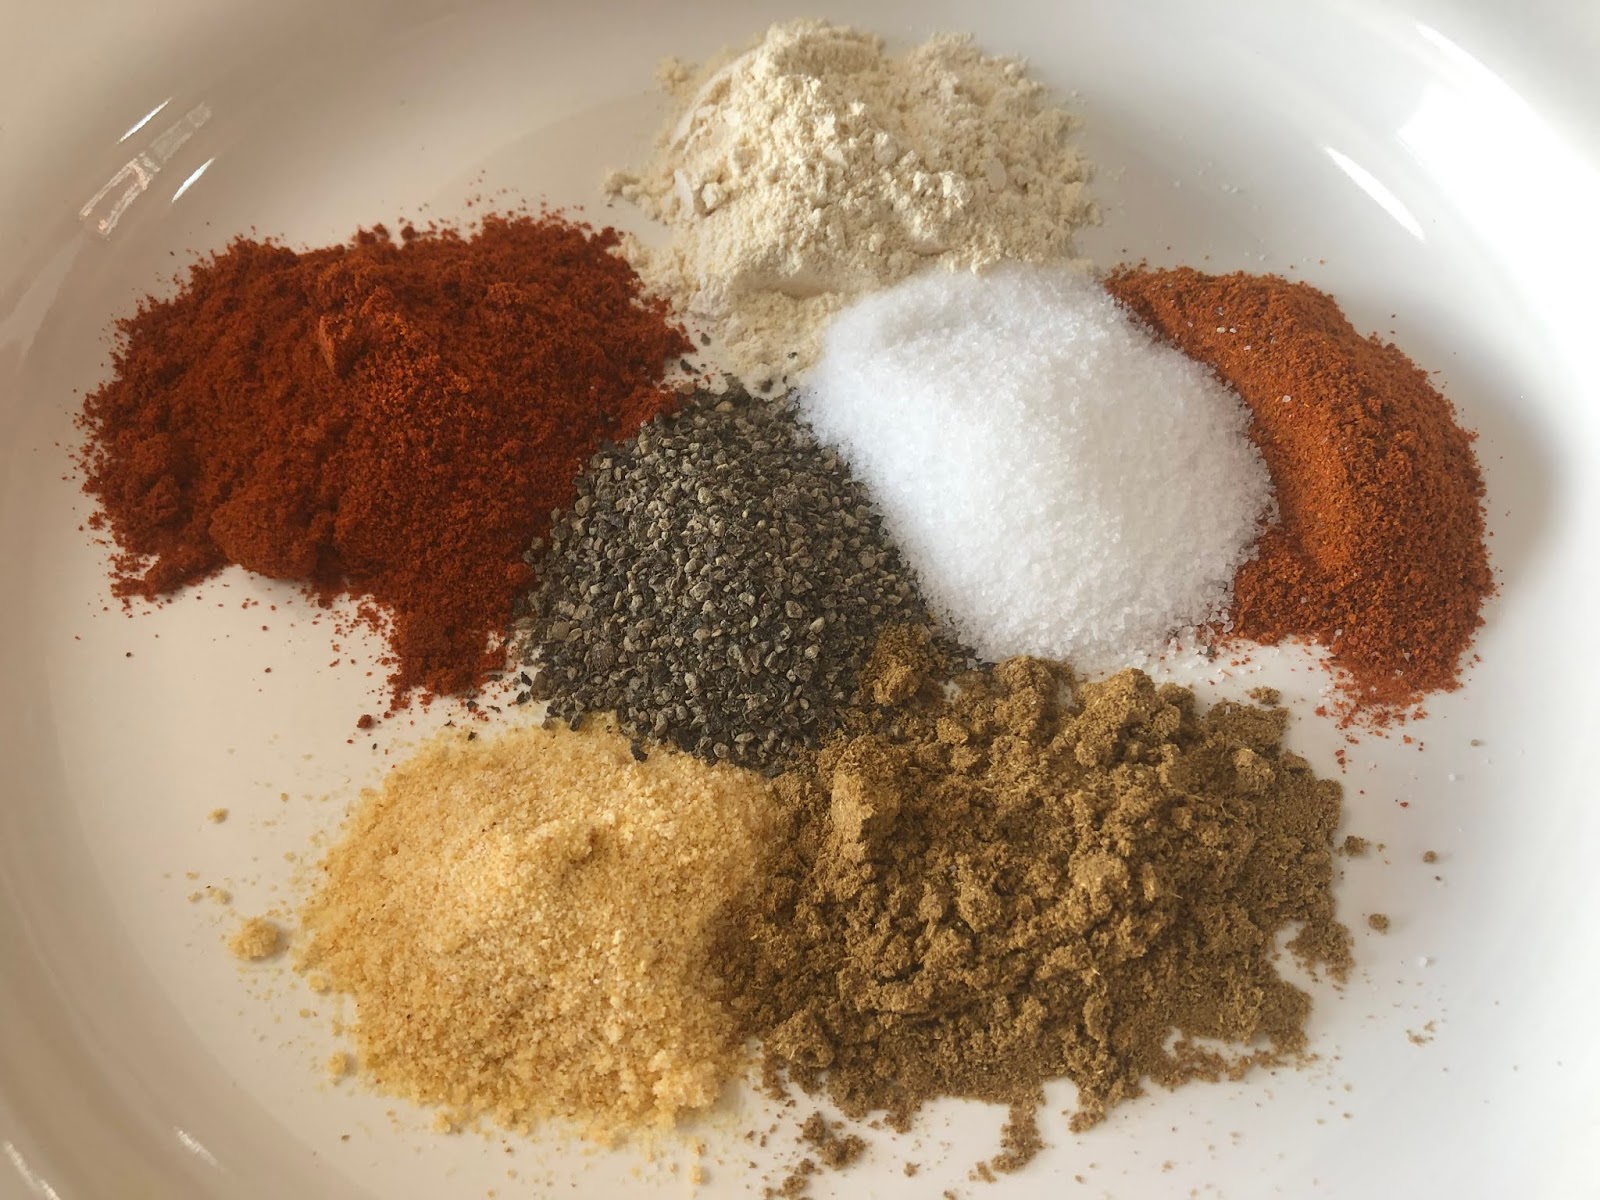
Flavours were magic - fixed my Mexican craving that's for sure.  A little spicy as I used my Homemade Taco Seasoning rather than shop brought.  However the additional cumin and garlic gave the flavours a little more depth and the lime juice added a beautiful zing.

I was pleasantly surprised at the crunchiness of the taco shells as I did expect them to sog a little and set the table with knives and forks at the ready.  No need.  This dinner was definitely finger food worthy and I am pleased to say completely all eaten... with lots of compliments from the family.


Baked Spicy Chicken Tacos

Serves: 6 - 8

4 chicken breast fillets
1 teaspoon salt
1 teaspoon ground black pepper
2 onions, diced
1 cup corn kernels
1 x 400 gram can Black Beans, rinsed and drained
1 red capsicum, finely diced
2 limes, juiced
2 teaspoons taco seasoning (or as desired)
1 teaspoon ground cumin
1/2 teaspoon garlic powder
20 Stand and Stuff (flat bottomed) taco shells
2 cups grated  cheddar cheese
1½ cups shredded iceberg lettuce
2 tomatoes, diced
2 tablespoons chopped coriander
taco sauce or preferred sauce, for garnish

Trim fat off the chicken fillets and cut into 3 pieces.

Bring a medium saucepan of water to boil and add the chicken, salt and pepper.  Stir to ensure that the fillets do not stick together.  

Bring the water to the boil again and reduce heat to medium-low.  Allow chicken to simmer for 20 minutes. After 10 minutes add the onions.  Drain and set aside allowing to the chicken to cool.

In a large bowl mix together the corn, black beans, capsicum, lime juice, taco seasoning, cumin and garlic powder.

When chicken has cooled, shred using 2 forks or your preferred method.

Add chicken and onions to the bowl of vegetables.  Stir to combine well.

Preheat the oven to 200 degrees Celsius. 

Arrange the taco shells inside 2 large baking dishes (not too loosely or they will fall over).

Sprinkle a little cheese into the bottom of each taco shell.

Divide the chicken mixture among the taco shells and top with the remaining cheese.

Bake for 10 - 15 minutes or until tacos are warmed through and cheese is golden and melted.

Serve accompanied with lettuce, tomato and coriander.  Top with taco sauce if desired.


(Click here for a printable version of this recipe)


Thursday, May 2, 2019

Sticky Chinese Pork and Vegetables

Fakeaway at it's finest tonight.  Tender pork and crisp vegetables in a sweet yet slightly spicy sauce served on a bed of rice noodles.  Quick, easy and best of all it's nicer on the hip pocket.

The key to making fakeaway Asian meals at home is to ensure that you have all the ingredients ready as once you start cooking the meal comes together very quickly.

No need to marinade the pork fillet as it's a tender meat - also it's one that cooks quickly. So a quick toss in a chinese five spice based sauce while you prep all the other ingredients is all that was needed.  

We used rice noodles as they are gluten free but you can use any noodle you prefer or even rice if desired.  You will need something however to help soak up the delicious sauce.

Not a fan of chilli or love chilli - adjust the quantities to suit yourselves.

A switch I did was use peanuts.  The original recipe called for cashews but I had peanuts - use any nuts you like to be honest.

No doubting that this dish just rose to the top of the pork dish list of favourites.  Even my mother had seconds!  


Sticky Chinese Pork and Vegetables
(Recipe adapted Taste.com.au)

Serves: 4

600 grams pork fillet, thinly sliced
2 tablespoons brown sugar
1 1/2 tablespoons gluten free soy sauce
1/2 teaspoon Chinese five spice
2 teaspoons fish sauce
250 gram packet dried rice stick noodles
1 1/2 tablespoons vegetable oil
1 red onion, halved, cut into thin wedges
1 tablespoon grated ginger
2 teaspoons crushed garlic
1 teaspoon crushed chilli
1 red capsicum, thinly sliced
1 carrot, halved, sliced diagonally
1 teaspoon gluten free chicken stock powder
1/4 cup water
2 teaspoons cornflour
1 bunch baby pak choy, roughly chopped
250 grams snow peas, trimmed
1/4 cup gluten free oyster sauce
1/4 cup dry roasted peanuts
1 long red chilli, sliced diagonally

Combine pork, sugar, soy sauce, five spice and fish sauce in a medium bowl. Toss to coat.

Prepare rice stick noodles, following packet directions until tender. Drain well. Cover to keep warm.

Heat 1 tablespoon of oil in a wok or large frying pan over medium-high heat. Stir-fry pork, in 2 batches, for 1 to 2 minutes or until golden. Transfer to a bowl.

Heat remaining oil in wok over high heat. Stir-fry onion, ginger, garlic, chilli, capsicum and carrot for 5 minutes or until just tender. 

In a small jug mix stock powder, water and cornflour until combined.  

Add pork, pak choy, snow peas, stock mixture and oyster sauce. Stir-fry for 2 to 3 minutes or until pork is cooked through and snow peas are tender. 


Serve with rice noodles and sprinkle with peanuts and sliced chilli.


Tuesday, February 26, 2019

Butter Chicken Rice Pie

Total heaven in a casserole dish this meal was.  I must admit we all love butter chicken in the Murray household so I had a feeling this would definitely be a winner winner chicken dinner!

Now we all know that Indian cooking is all about the spices and the marinating time for many of their meals, butter chicken definitely being one of those dishes.   However this dish was put together in under 30 minutes and in the oven for around the same time.  It definitely could not be any easier to make and the flavours were very authentic.

A rich yet not overly spicy butter chicken, with hints of cinnamon, chilli and garam marsala through the creamy tomato sauce.  In all honestly you would think that it had been marinating for days and slowly cooked.

The rice topping well it made the dish!  The rice laced with Saffron threads and peas provided  a crunchy top yet was still soft underneath drawing up the butter chicken.  It was such a treat instead of having a spoonful on the side.

Needless to say leftovers were quickly packed up in containers and labelled with individual's names for lunches tomorrow.  I'm crossing fingers I get some.


Butter Chicken Rice Pie
(recipe adapted from Taste.com.au)

Serves: 6
SmartPoints per serve: 10

1/2 cup Chobani low fat plain yoghurt
2 tablespoons tomato paste
1/2 teaspoon ground cinnamon
1/2 teaspoon mild chilli powder
1 teaspoon garam masala
1 kilogram chicken breast fillets, cut into 4cm pieces
1 1/2 cups basmati rice
Pinch of saffron threads
3/4 cup frozen peas
20 grams butter
1 brown onion, chopped
1 large red capsicum, chopped
2 garlic cloves, finely chopped
1 cup tomato puree
1 tablespoon brown sugar
1/2 cup thickened light cream
cooking spray
fresh coriander leaves, to serve

Preheat oven to 220 degrees Celsius or 200 degrees Celsius fan-forced.

Combine yoghurt, tomato paste, cinnamon, chilli powder and garam masala in a bowl. Mix well.

Add chicken. Toss to coat well. Set aside.

Place rice and 2 cups water in a large heavy-based saucepan over high heat. Stir with a fork. Sprinkle with saffron. Cover. Bring to the boil. Reduce heat to low. Simmer for 10 minutes or until liquid is just absorbed and rice is almost tender. Remove from heat.

Add peas. Season. Stir with fork. Set aside.

Meanwhile, melt butter in a large, deep frying pan over medium-high heat. Add onion. Cook, stirring, for 3 minutes.

Add capsicum. Cook, stirring, for 5 minutes or until onion has softened.

Add garlic. Cook, stirring, for 1 minute or until fragrant.

Add chicken and marinade to pan. Cook, stirring, for 2 minutes or until chicken just starts to change colour.

Add tomato puree and sugar. Cook, stirring until combined. Bring to a simmer. Reduce heat to low. Simmer for 5 minutes.

Stir in cream. Season with salt and pepper.

Spoon chicken mixture into an 8 cup-capacity roasting pan.

Place rice mixture evenly over the top of the chicken.

Spray rice liberally with cooking spray.

Bake for 25 to 30 minutes or until top is golden and crunchy.

Top with coriander leaves and serve.


Thursday, January 31, 2019

Spicy Prawn & Scallop Fettuccine

While hubby and I are absolute self confessed foodaholics there are times (not many) that we are actually over food.  This obvious happens after we have eaten too well for too long.  Every now and then we fancy something plain Jane and easy.  This often includes Eggs, Beans and Chips for dinner which the kids think is actually fantastic by the way.

Tonight, after eating an abundance of good food between Christmas through to Australia Day weekend (last weekend) we both fancied something simple and easy yet full of flavour.  Funnily enough we both fancied seafood but didn't want anything Asian as we had just had lunch in Chinatown the previous Sunday.  Plus we always seem to cook prawns and scallops with an Asian influence.

While googling recipes, my next favourite hobby after cooking, I came across an Aussie blogger and her website Em's Food for Friends.  Let me tell you I am so glad that I did.  A really good read, full of recipes and delicious pictures.  And thats where I found a recipe for Spicy Prawn and Scallop Spaghetti.  From that moment dinner was sorted although there would be a few small alterations.

I didn't cut the prawns and scallops up as I prefer them whole.  I did however remove the shells of the tails of the prawns as that is a PET HATE of mine when you go to a restaurant and order a dish where you use cutlery and you have to battle prawn tail shells.  I am also not a fan of the roe on scallops so I purchase scallops with the roe already removed.  If you like the roe, add that in it too.

Overall this seafood laced pasta dish was magic. Starting with the simplicity of cooking all components right through to eating perfectly cooked seafood and pasta in a chilli, garlic and lemon tomato based sauce.  Both hubby and I were really surprised by the dish we will now also put on our comfort food list especially when we fancy something different.  We will definitely be cooking this again.


Spicy Prawn & Scallop Fettuccine
(Recipe adapted from Ems Food For Friends)

Serves: 4
SmartPoints per Serve:

300 gram fettuccine or pasta of your choice
2 teaspoons olive oil
1 tablespoon crushed garlic
2 teaspoon of dried chilli flakes
1 lemon
1/2 cup dry white wine
400 gram tin chopped tomatoes
1/2 cup reduced fat cream
1/2 teaspoon white sugar
salt 
freshly cracked pepper
600 grams raw green prawn meat, cleaned and patted dry
400 grams scallops, without roe, cleaned and patted dry
1/4 cup finely chopped flat leaf parsley


Cook your pasta according to packet instructions.  When almost al dente, drain and set aside.


Heat a large fry pan and add a little olive oil. Lightly fry the garlic, lemon zest and chilli flakes for approximately 1 minute.


Pour in the lemon juice and wine.


Allow to reduce for a few minutes.


Add the tomatoes, cream and sugar, season with salt and pepper. Stir well to combine and allow to simmer.


Fold the scallops, prawns and 2 tablespoons parsley through the simmering sauce.


Bring the mixture back to a simmer.


Add the pasta to the pan.


Toss well to combine.


Place in a large serving bowl, sprinkle with remaining parsley and serve immediately.


(Click here for a printable version of this recipe)


Saturday, December 1, 2018

Sticky Oven Barbecue Ribs

If you really want to see 2 kilograms of ribs disappear really quickly - I suggest you cook this recipe!

Saturday night feast had us smacking our lips and licking our fingers with this Sticky Oven Barbecue Ribs recipe.  And to say it beats restaurant or takeaway ribs is a total understatement.  Once you cook these I am guessing that you will hesitate to even order ribs at a restaurant or as a takeaway again.

One thing I do love is preparing and cooking easy yet flavoursome food - and to be perfectly honest this recipe was very easy to prepare taking about 15 minutes in total.  Slow cooked, giving me time to do other things, however devoured in minutes!  

I seasoned the pork ribs with a magic combination of herbs and let them rest in the fridge for around 8 hours (you can just rub the seasoning in and cook straight away).  Smelling these cook low and slow in the oven made coming into the kitchen irresistible as the aroma was very inviting.  Hints of garlic, cumin and chilli filled the air - definitely couldn't wait to eat these.

The sticky barbecue sauce, added to the ribs towards the end of the cooking time, was super easy to prepare also.  Add as little or as much cayenne powder to suit your palette (we added a fair bit but we like spicy) pop them back into the oven for 10 minutes and your fork free dining is ready.  Slice them or serve them as full racks with or without chips, salad!  So many choices.... just have serviettes or napkins on hand.

I am sure that these ribs won't last long - they didn't at ours!  


Sticky Oven Barbecue Ribs
(recipe adapted from Cafe Delites)

Serves: 4 - 6

2 kilograms American Style pork ribs
2 teaspoons garlic powder
1 teaspoon onion powder
2 teaspoons paprika
2 teaspoons salt
1 teaspoon cracked black pepper
1/2 teaspoon cumin
1 teaspoon Cayenne powder or chilli
4 tablespoons olive oil
2 cups (500ml) barbecue sauce
3 tablespoons minced garlic
1 tablespoon Worcestershire sauce
1/2 - 1 tablespoon cayenne pepper (optional for heat)
1 teaspoon salt


Preheat oven to 180 degrees Celsius.


Combine together garlic powder, onion powder, paprika, salt, pepper, cumin and chili or Cayenne. 


Sprinkle seasoning over ribs on both sides.  Place in a glass casserole dish cover with cling film and marinate in fridge for at least 2 hours - longer if time permits.


Place on a baking sheet or tray lined with foil and baking paper.  Drizzle with 2 tablespoons of olive oil.  


Cover tray with foil and bake for 2 hours, turning over once during the cooking time.


Mix together remaining ingredients to make the sauce.

Remove ribs from the oven, remove foil and spread the tops of the ribs with the barbecue sauce mixture.


Increase oven temperature to 240 degrees Celsius.  Return ribs to the oven, uncovered, and bake for a further 10 minutes.


Rest for 10 minutes before slicing or serving.


Enjoy....


(Click here for a printable version of this recipe)

Sunday, November 4, 2018

Braised Beef Cheeks

We are back.... not that we really went anywhere!  More a case of being uber busy and overwhelmed with life.  Jobs (both hubby and mine) have been very intense of late - mine has been all year.  We have a teenager living out her last year of high school and in the midst of exams as I type and to top it all off we decided to move house.

Moving house has brought it's ups and downs. The ups being a bigger house, including an extra bedroom and a swimming pool, along with a bigger and brighter kitchen.  The downs obviously being packing and moving everything given that we were at the last house for 10 years.

The kitchen is pretty much sorted however the rest of the house looks like an episode of Hoarders.  Needless to say I manage to cook over the weekend which I was determined to do as I am totally over takeaways after the previous weekend.

Armed with my trusty slow cooker (well one of the four that I own) I decided some tender Braised Beef Cheeks and Garlic Mash would fit the bill nicely for an easy dinner.  And I wasn't wrong at all.  The beef cheek melted in your mouth not to mention the herb and chilli infused sauce married with them perfectly.  I left the seeds in the chillis I used as I have not been finding them to have a high heat rating of late but you can deseed them if you wish.  The trick for a richer sauce is to ensure that your brown the meat well.  The darker the tones on the cheeks at this stage, the richer the sauce will be.

Beef cheeks are something that you definitely need to cook low and slow - so obviously the slow cooker is perfect for this.  However the original recipe was cooked on a stove top (both instructions for cooking are below).


Braised Beef Cheeks
(recipe adapted from Good Food)

Serves: 4

salt
freshly ground black pepper
2 tablespoons olive oil
4 large beef cheeks
1 brown onion, diced
2 tablespoons crushed garlic
2 long red chillies, deseeded (if desired) and finely chopped
2 tins diced tomatoes
560 ml bottle red wine
½ bunch rosemary, finely chopped
½ bunch thyme, finely chopped
½ bunch parsley, finely chopped


Season the beef cheeks, both sides, with salt and pepper.

Put a large cast-iron pot or large heavy based frying pan over a high heat. Add the oil, add the beef cheeks and brown them in the pot. Remove the cheeks from the pot and place in slow cooker vessel.


To the same pot add the onion, garlic and chilli and cook until the onions are translucent.


Add the tomatoes, red wine, rosemary and thyme and bring to a simmer.


Add the tomato sauce to the beef cheeks, put the lid on and cook on low for 8 - 9 hours.


Serve with creamy garlic mashed potatoes and garnish with parsley.


Stove top instructions:

Season the beef cheeks, both sides, with salt and pepper.

Put a large cast-iron pot or large heavy based frying pan over a high heat. Add the oil, add the beef cheeks and brown them in the pot. Remove the cheeks from the pot and set aside.

To the same pot add the onion, garlic and chilli and cook until the onions are translucent.

Add the tomatoes, red wine, rosemary and thyme and bring to a simmer.

Add the beef cheeks, put the lid on and simmer on the stove for 2-3 hours.

Serve with creamy garlic mashed potatoes and garnish with parsley.

(Click here for a printable version of this recipe)


Tuesday, May 22, 2018

Goulash Tirolese aka Tyrolean Beef Stew

I know a lot of my friends and family think I am made for menu planning.  But although I look nerdy and to some a control freak there are benefits to being organised. A major benefit is that I have meals I want to try and know how long they are going to take to prepare and cook.  This means that I can not only work out which meals are suitable for weeknights and which meals take a little more time.  It also means that from menu planning I create a shopping list and therefore have all the ingredients needed in one shop to pull off a week of cooking.  Totally win win for me... sadly totally outrageous to others.

Needless to say I love finding new recipes to try and share with our friends and family and you, the readers of my blog.

Anyway - I would like to introduce you to Gennaro Contaldo. Gennaro was born in Amalfi, Italy, and came to public attention as the chef who inspired Jamie Oliver when they worked together at Antonio Carluccio’s Neal Street restaurant.  He also co-presents the BBC2 Two Greedy Italians series with Carluccio and has published several cookbooks, including the recently released Slow Cook Italian, from which he shares the following recipe for Goulash Tirolese (Tyrolean beef stew).

“This classic stew from the Trentino-Alto Adige or South Tyrol region of northern Italy is slow cooked with onions, cumin and paprika – its distinct central European flavour is influenced by neighbouring Austria,” he writes in the recipe introduction.

To read this recipe was a pleasure but I must say to cook it and stand in my kitchen just smelling the Goulash (occasionally tasting it because I had too) was an honour.  I am so glad that I tried this recipe.  The flavour matched the aroma that filled the house.  The ease of the recipe was unbelievable especially compared to the flavour.

A very robust goulash style stew with only a few ingredients.  The beef was very tender and the pieces of pancetta that laced the thick sauce were tasty and added a salty yet salty element to the dish.  As we are not a polenta loving household (I am the only one that likes it) we had mashed potatoes to make ensure comfort food status was achieved.


Goulash Tirolese aka Tyrolean Beef Stew
(Recipe sourced from Indaily.com - Slow Cook Italian)

Serves: 4

3 tbsp extra virgin olive oil
2 large onions, sliced
100g pancetta, cubed
About 1 litre (4 cups) hot vegetable stock
1kg stewing beef, cut into chunks
2 garlic cloves, sliced
1 tsp cumin seeds, crushed
1 tsp paprika
2 sprigs thyme
freshly ground black pepper

Heat the olive oil in a large saucepan and sweat the onions on a medium heat for about 5 minutes, stirring all the time to prevent sticking, until softened. Remove and set aside.


Add the pancetta to the pan and cook on a medium heat until coloured but not burnt. Remove from the pan and set aside. 


Return the onions to the pan, add about 3 tablespoons of stock and cook for a minute or so until the liquid has evaporated.


Add the beef, increase the heat and brown the meat all over.


Add 100ml (scant ½ cup) of stock, reduce the heat to low, cover with a lid and cook very gently for 30 minutes, then add another 100ml of stock and continue to cook for 30 minutes.


Stir in the garlic, cumin, paprika, thyme and pancetta.


Add 400 ml of stock, cover with a lid and cook over a low heat for a further 1 hour, gradually adding more stock and stirring from time to time to ensure the meat doesn’t stick.


Remove from the heat and serve with creamy polenta or mashed potato or crunchy bread.


For a slow cooker

Cook the onions, pancetta and beef as above.

Once the beef is browned add 750 ml (3 cups) stock, the garlic, cumin, paprika, thyme and pancetta.
Bring to the boil, stirring, then transfer to a large slow cooker pot, press the meat beneath the liquid, cover and cook on low for 8-9 hours.


(Click here for a printable version of this recipe)