Showing posts with label rice. Show all posts

Monday, May 27, 2019

Korean Beef Bowl

Being a full time working mam I am always on the look out for really quick but flavoursome meals for week nights.  And to be perfectly honest the least pots and pans used the better - I am sure we will all agree on that.

Tonight's recipe is courtesy of a website I came across while menu planning for this week.  The site, Chew Out Loud, is magic.  Amy is very inspirational and like all of us, very busy with life's commitments. Go over and check it out.... you too will be impressed.

Like all Asian dishes the flavours are clean and the ingredients are fresh.  This dish came together in minutes and was bursting with flavour.  A combination of salty, sweet and spicy made boring old beef mince very enjoyable and made me want to eat a lot more than what my stomach could handle.  

A good tip from Amy is to mix the beef into the rice a little so there is no plain rice is sitting by itself at the bottom - wise words.

For such a simple dish this one ticked a lot of boxes - quick, easy and jam packed with flavour.


Korean Beef Bowl
(Recipe adapted from Chew Out Loud)

Serves: 4

1 1/2 cups rice of your choice
1/4 cup Tamari (GF, reduced sodium soy sauce)
2 tablespoons pure honey
1 tablespoon toasted dark Asian sesame oil
1 teaspoon crushed chilli flakes
3 tablespoons olive oil
1 brown onion, chopped
5 cloves garlic, chopped
500 grams extra lean ground beef 
1 cup fresh bean sprouts, to garnish
1/2 bunch coriander, chopped, to garnish
2 spring onions, thinly sliced, to garnish
toasted sesame seeds, to garnish
extra crushed chilli flakes, to garnish

Cook rice as per packet directions, drain and keep warm.

In a bowl, combine tamari, honey, sesame oil and chilli flakes.  Stir to combine well. Set aside.

In a wok or large frying pan, heat olive oil over medium high heat until slightly smoking. 

Add onion and garlic, stirring 2-3 minutes or until aromatic and translucent. 

Add ground beef and stir while breaking the beef up into small bits, about 1-2 minutes or until just browned. 

Add your sauce mixture and stir to combine thoroughly with beef. Continue to cook until beef is  cooked through.

Serve immediately over bowls of warm rice, gently mixing the beef into the rice a bit. Garnish as desired with bean sprouts, coriander, spring onions, sesame seed and crushed chilli flakes.


Tuesday, February 26, 2019

Butter Chicken Rice Pie

Total heaven in a casserole dish this meal was.  I must admit we all love butter chicken in the Murray household so I had a feeling this would definitely be a winner winner chicken dinner!

Now we all know that Indian cooking is all about the spices and the marinating time for many of their meals, butter chicken definitely being one of those dishes.   However this dish was put together in under 30 minutes and in the oven for around the same time.  It definitely could not be any easier to make and the flavours were very authentic.

A rich yet not overly spicy butter chicken, with hints of cinnamon, chilli and garam marsala through the creamy tomato sauce.  In all honestly you would think that it had been marinating for days and slowly cooked.

The rice topping well it made the dish!  The rice laced with Saffron threads and peas provided  a crunchy top yet was still soft underneath drawing up the butter chicken.  It was such a treat instead of having a spoonful on the side.

Needless to say leftovers were quickly packed up in containers and labelled with individual's names for lunches tomorrow.  I'm crossing fingers I get some.


Butter Chicken Rice Pie
(recipe adapted from Taste.com.au)

Serves: 6
SmartPoints per serve: 10

1/2 cup Chobani low fat plain yoghurt
2 tablespoons tomato paste
1/2 teaspoon ground cinnamon
1/2 teaspoon mild chilli powder
1 teaspoon garam masala
1 kilogram chicken breast fillets, cut into 4cm pieces
1 1/2 cups basmati rice
Pinch of saffron threads
3/4 cup frozen peas
20 grams butter
1 brown onion, chopped
1 large red capsicum, chopped
2 garlic cloves, finely chopped
1 cup tomato puree
1 tablespoon brown sugar
1/2 cup thickened light cream
cooking spray
fresh coriander leaves, to serve

Preheat oven to 220 degrees Celsius or 200 degrees Celsius fan-forced.

Combine yoghurt, tomato paste, cinnamon, chilli powder and garam masala in a bowl. Mix well.

Add chicken. Toss to coat well. Set aside.

Place rice and 2 cups water in a large heavy-based saucepan over high heat. Stir with a fork. Sprinkle with saffron. Cover. Bring to the boil. Reduce heat to low. Simmer for 10 minutes or until liquid is just absorbed and rice is almost tender. Remove from heat.

Add peas. Season. Stir with fork. Set aside.

Meanwhile, melt butter in a large, deep frying pan over medium-high heat. Add onion. Cook, stirring, for 3 minutes.

Add capsicum. Cook, stirring, for 5 minutes or until onion has softened.

Add garlic. Cook, stirring, for 1 minute or until fragrant.

Add chicken and marinade to pan. Cook, stirring, for 2 minutes or until chicken just starts to change colour.

Add tomato puree and sugar. Cook, stirring until combined. Bring to a simmer. Reduce heat to low. Simmer for 5 minutes.

Stir in cream. Season with salt and pepper.

Spoon chicken mixture into an 8 cup-capacity roasting pan.

Place rice mixture evenly over the top of the chicken.

Spray rice liberally with cooking spray.

Bake for 25 to 30 minutes or until top is golden and crunchy.

Top with coriander leaves and serve.


Tuesday, January 16, 2018

Echidna Meatballs aka Porcupine Meatballs

Well I definitely surprised myself while menu planning this week!  Not because we planned a full week of super quick and easy meals to get us to Friday as we have a busy week but I was surprised, actually stunned, that I hadn't blogged this gem of a recipe!  And I cannot even begin to think why?

My mam had a variety of homestyle dishes that she cooked as staples when we were growing up as did everyone's mothers.  Ours always had a British twist as although we were living in Australia my parents were born and raised in Wales.  So we had Shepherds Pie, Bangers and Mash with Onion Gray, Lamb Stew, Curry Pie, Toad in the Hole and of course, Eggs Beans and Chips.  These were the meals that were regularly on the table and we all enjoyed them.  I can tell you that there were never any leftovers when these went on our table.  In fact I still get a little excited if I know any of these dishes are what we are having for dinner.

However, my kids, have had to deal with me creating my own list of family favourite dinners.  As easy go to meals especially during the working week items that can be found on the menu planner can include Hamburgers, Taco's, Penne Boscaiola, Devilled Sausages, homemade pizza (your choice of topping), Chicken Parmagiana, Echidna Meatballs and of course, Eggs Beans and Chips.

I understand many of you may have or not had any of the dishes I have just mentioned so just for the record Toad in the Hole does not contain any toads, Porcupine Meatballs do not contain any porcupine meat and Echidna Meatballs definitely do not contain any Echidna meat.  Are we clear?  I am happy now that we have that sorted!

Firstly this recipe is based on Porcupine Meatballs, an American dish that has apparently been a staple for generations.  As we live in Australia I changed the name to Echidna meatballs based on the fact that we don't have Porcupines down under.  The Echidna, or Spiny Anteater, is the equivalent to it's Northern Hemisphere counterpart.

So what is an Echidna meatball?  Basically its a beef meatball with raw white rice added during the mixing stage.  Once the meatballs start cooking the rice starts protruding from the meat.  This resembles a Echidna or a Porcupine.  It's quite a groovy cooking technique and look pretty cool, especially if you are a kid.

Echidna meatballs are a very comforting and easy dish to make. The tender meatballs flavoured with herbs are cooked in a delicious tomato sauce.  There is no need to brown up the meatballs prior as they keep their shape well.  Note there is not a lot of stirring required during cooking so please do not be tempted to continually stir as you will ruin the effectiveness of the rice poking from the meatball.

Like with most hand me down recipes, googles or cookbook searches you will find a multitude of different versions all claiming to the best.  This recipe is nice, tasty and very easy but is it the best?  We think so but I am unsure.  Many use canned tomato soup but we find that using a can of condensed soup seems to make the sauce very sweet.  We prefer to add some diced fresh tomatoes along with canned and passata.  Add some chilli flakes if you wish to spice up the tomato sauce or even some different herbs.  Its a great recipe to experiment with also.

This is a perfect one pot weeknight wonder, even more so for me tonight as the man of the house, Noel, cooked dinner.  It was wonderful to come home from work and smell the deliciousness as I opened the front door.

Serve with mashed potato or plain pasta and I am sure your family will love them.


Echidna Meatballs aka Porcupine Meatballs

Serves: 4
SmartPoints per Serve: 7

500 grams lean beef mince
1/3 cup raw long grain rice
1 teaspoon beef stock powder
salt
ground black pepper
1 egg white 
4 fresh truss tomatoes, diced
350 ml Italian passata
1 x 440g can diced tomatoes
1 onion, finely diced
1 cup water
2 teaspoons chicken stock powder 
2 teaspoon crushed garlic
2 teaspoon dried oregano
1 tablespoon chilli flakes (optional)

In a mixing bowl add mince, rice, stock powder and egg white. Season with salt and pepper.  Using your hand, mix all ingredients together until combined.  Shape into twelve even sized meatballs.

Place the tomatoes, passata, canned tomatoes, onion, water, chicken stock powder, garlic, oregano and chilli, if using, in a flameproof casserole dish or heavy based frying pan (with a lid). Mix well and bring to the boil, reduce heat to low and simmer for 10 minutes.  Season with salt and pepper.

Gently place meatballs in tomato sauce.

Put lid on casserole dish and gently simmer for 1 hour, stirring occassionally, until meatballs are cooked and rice is protruding.

Serve with mashed potatoes or pasta (add SP as required).


Monday, November 9, 2015

Beef Keema with Cumin and Currant Pulao

We had a busy evening tonight we doctor's appointments so I needed something quick and easy to prepare and put on the table. This dish perfectly fits both the "quick" and "easy" requirements and has a magnificent satisfying flavour.

Keema  is a traditional South Asian meat dish and it is main ingredient in mince meat, whether lamb or beef which is cooked with spices, peas and potatoes.  The meat mixture is also used as a filling for samosas or naan bread.  This dry style curry dish compliments the Cumin and Currant Pulau with both dishes flavours complimenting each other.  I love the sweetness of the currants against the spiciness of the beef curry.

This weeknight wonder is something we have cooked before and it was totally devoured.  It's somewhat simple but definitely packed with the perfect combination of spices.  The kids actually get excited when I cook this dish and there is generally nothing left for lunches the next day.


Beef Keema with Cumin and Currant Pulao
(Recipe sourced from Women's Weekly Weeknights Fast and Fabulous Cookbook)

Serves: 4
2 tablespoons peanut oil
1 small brown onion, sliced thinly
1 clove garlic, crushed
1 teaspoon cumin seeds
1 teaspoon caraway seeds
1/4 teaspoon ground turmeric
1 cup basmati rice
2 cups chicken stock
2 tablespoons dried currants
500 grams lean beef mince
2 teaspoons mild or hot curry powder (depending on taste)
1/2 teaspoons ground ginger
2 tablespoons sweet chilli sauce
1/4 cup water
4 green onions, sliced thinly
2/3 cup frozen peas
1/4 cup firmly packed fresh coriander leaves

To make pulao, heat half the oil in large frying pan. Cook brown onion, garlic and spices, stirring, until onion softens. Add rice, cook, stirring, until rice is coated in spice mixture. Stir in stock and bring to a boil. Reduce heat and simmer, covered, 12 minutes. Remove from heat, stir in currants; stand, covered, about 5 minutes or until rice is tender.

Meanwhile, heat remaining oil in large frying pan. Add mince and cook, stirring, until cooked through.
Add curry powder and ginger; stir until fragrant. Add sauce, the water, green onion and peas. Cook, stirring, until peas are tender.

Serve keema on pulao, sprinkled with coriander.


Tuesday, December 2, 2014

Asian Pork Cutlets

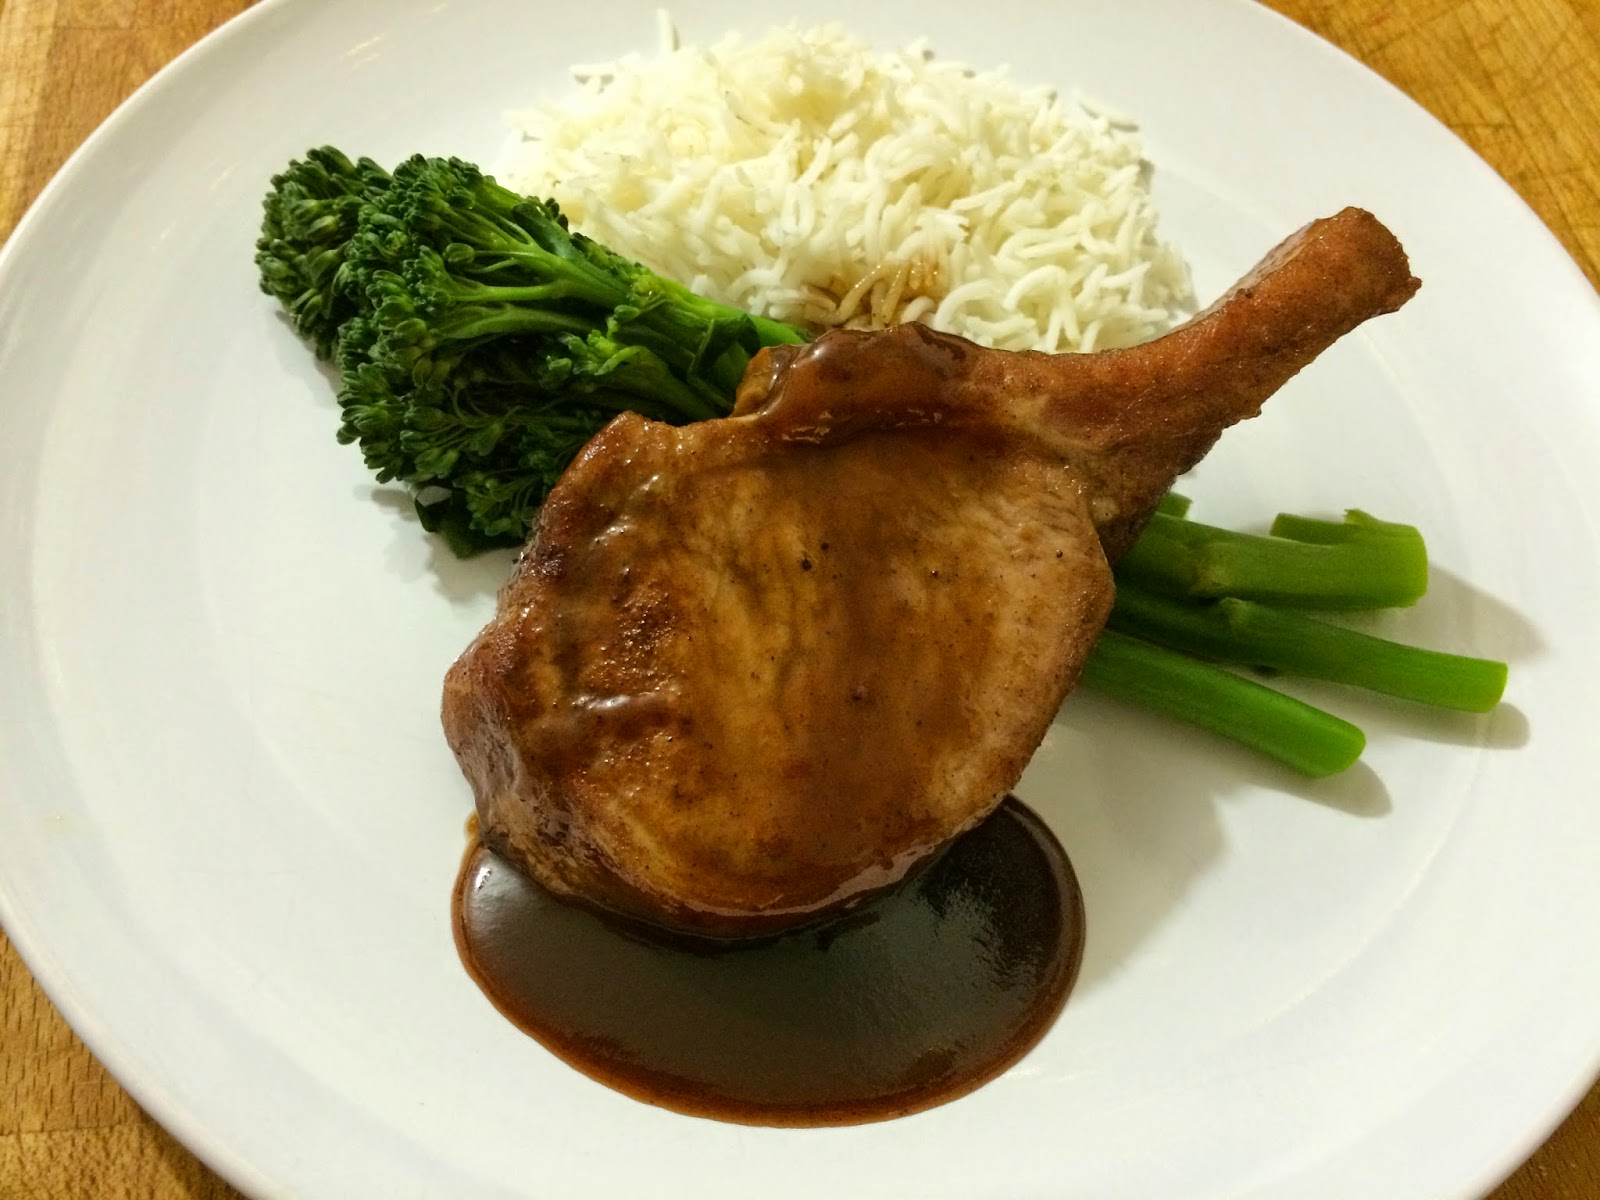
This meal had to be one of the easiest that I have prepared EVER!!  And the outcome was a really tender pork cutlet flavoured with all the spices of the orient.

I have to be perfectly honest that I am not a fan of cooking small pieces of meat in the oven (baking) in fact I don't even cook large peices of meat in the oven as we cook all of our roasts in the Weber.  So this itself was an interesting exercise for me and thankfully with success.

The flavour was full considering the marinating time was very minimal making these Asian Pork Cutlets a perfect midweek wonder.  The kids loved the flavour - somewhat sweet but with the underlying tones of cinnamon, star annise and soy added character to the plum sauce base.

Overall a terrific dish which I am sure will be on the menu again very soon.

 
Asian Pork Cutlets
(Recipe adapted from Weight Watchers 5 Ingredients Cookbook)
 
Serves: 4
ProPoints per serve: 12
 
1/2 cup plum sauce
1/4 cup soy sauce
1 teapsoon chinese five spice powder
4 x 200 gram pork cutlets, fat trimmed
1 bunch broccolini, ends trimmed
1 cup white rice
 
 
Combine the plum sauce, soy sauce and five spice in a shallow glass or ceramic bowl.  Add pork, turning to coat.  Set aside for 30 minutes to marinate.
 
Preheat oven to 180 degrees Celsius.  Line a baking dish with baking paper.  Place cutlets on the baking tray, reserving any marinade.  Bake cutlets for 25 minutes, basting with marinade every 10 minutes.  Cook until pork is cooked through and golden or to your liking.
 
Meanwhile cook rice as per packet instructions. 
 
Place remaining marinade in a small saucepan, bring to the boil and reduce heat, simmering until sauce slightly thickens. 
 
Steam broccolini for 2 minutes or until bright in colour.
 
Place cutlets on serving plates with rice and broccolini.  Drizzle with sauce and serve.


Tuesday, July 2, 2013

Asian Pork Cutlets

A quick and easy mid week dinner was needed as we are so busy at the moment and to top it off it's also school holidays here in Victoria.

I love pork especially when cooked with Asian flavours so this meal was really nice.  The marinade consisted of 3 ingredients so that made for easy preparation but did not lead to any shortcuts in the flavour.  I love Chinese Five Spice by the way..... and the use of Chinese Five Spice did not over power the sweetness of the plum sauce.  To be honest it was the typical asian flavour that we all relate to when we think of an asian meal.

This dish was cooked in the oven, elimating frying or barbecuing.  One baking dish, some steamed rice and some vegetables and voila - done.


Asian Pork Cultlets
(recipe adapted from WW The Extremely Contented Tummy 2007)
 
Serves: 4
ProPoints per serve: 12
 
1/4 cup plum sauce
2 tablespoons soy sauce
1/2 teaspoon Chinese Five spice
4 x 125 gram lean pork cutlets
1 cup white rice
1 bunch baby bok choy, trimmed
3 carrots, peeled and cut into batons

Combine the plum sauce, soy sauce and five spice in a shallow ceramic dish.  Add pork, turning to coat. Set aside for 30 minutes to marinade.

Preheat oven to 180 degrees Celsius.

Line a baking dish with baking paper.  Bake cutlets for 25 minutes, basting with marindae every 10 minutes, until cooked trhough and golden.

Meanwhile, cook rice according to packet directions.

Steam carrots for 5 minutes, add bok choy and steam for a further 2 minutes or until bright green.

Place cutlets on serving plates with rice and bok choy.  Drizzle with sauce and serve.

(click here for a printable version of this recipe)

Wednesday, May 22, 2013

Lamb and Cashew Biryani

I love rice and love Indian flavours as you all know.  Anything spicy always hits the spot with me.

Tonight's dinner was a very easy Lamb and Cashew Biryani - one could not fault the flavour.  My favourite part of this recipe - the recipe calls for Indian curry paste so the Biryani could have been what ever flavour paste you had on hand or fancied.  We used Tikka Masala Paste and while it was mild it was very enjoyable.

Although I did add extra vegetables to bulk it out it was a very and I mean very filling dish.  Topped with some greek yoghurt and fresh coriander this was a yummy mid week dinner.

Don't forget to enter our giveaway.


Lamb and Cashew Biryani
(Recipe adapted from taste.com)
 
Serves: 6
ProPoints per Serve: 9
 
1 tablespoon olive oil
1 medium brown onion, thinly sliced
400g lamb steaks, sliced
1/3 cup Indian mild curry paste
1 cup basmati rice
2 1/2 cups chicken stock
1 cinnamon stick
1/4 cup sultanas
75g baby spinach
300 grams frozen vegetable mix (carrots, brocolli and green beans)
1/2 cup no-fat plain Greek-style yoghurt
1/4 cup cashew nuts, toasted, roughly chopped
2 tablespoons small fresh coriander leaves, roughly chopped
 
Heat oil in a large saucepan over medium heat. Add onion. Cook for 10 minutes or until light golden.
 
Add lamb. Cook, stirring with a wooden spoon to break up mince, for 5 minutes or until browned. Add curry paste. Cook for 1 minute or until fragrant.

Add rice. Stir to coat in curry mixture. Add stock, cinnamon and sultanas. Bring to the boil. Reduce heat to medium-low. Simmer, covered, for 10 minutes or until rice is just tender.
 
Stir in spinach and vegetable mix. Cook for 2 minutes or until vegetables are tender.
 
Serve biryani with yoghurt, nuts and topped with coriander.

 
(click here for a printable version of this recipe)

Monday, May 7, 2012

Hainanese Chicken

After a huge day at work, mentally more than physically, I really wanted to cook something with minimal effort but wanted something with maximum flavours.

This easy version of a Singapore specialty, similar to a soup, was magnificent. Tender poached chicken served with vegetables and rice in a fragrant broth was really what I wanted tonight.


Hainanese Chicken
(recipe sourced from WW Cook It Quick)

Serves: 4
ProPoints per serve: 8

2 cups chicken stock
1 whole star anise
1 cinnamon stick
2 tablespoons soy sauce
1 tablespoon shaoxing wine
1 cup boiling water
600 grams lean chicken breast fillets, fat trimmed
1 tablespoon peanut oil
3 green shallots, thinly sliced
1 cup bean sprouts
2 long fresh red chillies, deseeded, thinly sliced
3 baby bok choy, trimmed and separated
2 cups steamed rice

Combine stock, star anise, cinnamon, soy sauce, wine and 1 cup boiling water in a large saucepan.  Bring to the boil.  Reduce heat to low and simmer for 5 minutes.  Add chicken and simmer for 5 minutes. Remove from heat.  Cover and set aside for 10 minutes.  Remove chicken and thinly slice. Reserve stock.

Meanwhile, heat a wok or large frying pan over high heat.  Add half the oil and heat for 30 seconds.  Add shallots, bean sprouts and chilli.  Stir fry for 1 minute.  Transfer to a bowl.  Reheat wok over high heat.  Add remaining oil and heat for 30 seconds.  Add bok choy and stir fry for 2 minutes or until stems are tender and leaves have just wilted.

Divide rice among serving dishes.  Top with bok choy, chicken and bean sprout mixture.  Ladle over some stock.  Serve.

(Click here for a printable version of this recipe)

Thursday, October 13, 2011

Caribbean Style Pork Cutlets with Rice Salad

OMG the flavour on these pork cutlets was truly amazing - a hit with both adults and kids tonight.

I was a little worried with the use of cinnamon, nutmeg and allspice as these are ingredients I associate with baking but these combined with the garlic and the lime flavours made a rub that absolutley complimented pork. 

The rice salad was light and not as stodgy as some made with a mayonnaise dressing - the fresh pineapple made it very refreshing to eat with the pork cutlets.

I will definitely be doing this marinade again and will try on chicken.


Caribbean Style Pork Cutlets
(recipe sourced from WW Eat and Enjoy Cookbook)

Serves: 4
ProPoints per serve: 8

2 garlic cloves, crushed
2 teaspoon finely grated lime rind
1/4 teaspoon ground cinnamon
1/4 teapsoon ground nutmeg
1/2 teapsoon ground allspice
1 tablespoon olive oil
4 x 180 gram lean port cutlets, fat trimmed
2 cups cooked long-grain rice
1/2 small pineapple, cut into 1cm pieces
1/2 red onion, finely chopped
1 red capsicum, finely chopped
1/4 cup small fresh basil leaves
2 tablespoons lime juice

Combine garlic, rind, cinnamon, nutmeg, allspice and half the oil in a small bowl.  Rub spice mixture over pork.

Heat a barbecue or chargrill over medium-high heat.  Cook pork for 4 minutes each side or until cooked to your liking.  Transfer to a plate. Cover with foil and rest for 5 minutes before serving.

Meanwhile, place rice, pineapple, onion, capsicum and basil in a medium bowl.  Drizzle with juice and remaining oil and toss gently to combine.

Serve pork with rice salad.


Sunday, September 18, 2011

Massaman Beef Curry

When it comes to cuisines I have to say Noel and I enjoy most aspects of Asian inspired cuisine ranking Chinese, Thai and Indian up the top of the list. We both love cooking with all the ingredients associated with those styles of cooking and just the aroma that some dishes give before eating is enough to send our tastebuds into a frenzy.

Massaman Beef Curry does exactly that. It's one of the dishes we always order when at a Thai restaurant even the kids enjoy the mildness of it. I loved the smell of this curry cooking with its pungent flavoursome smell of garlic, lemongrass, ginger and chilli laced with kaffir lime leaves. Not to mention how we devoured it once we sat down to eat. 

This version we used a pre brought jar of massaman curry paste and of course with replacing the thick coconut cream with lighter version it reduced the fat making it fit perfectly within the Weight Watchers ProPoints plan.

Funnily enough this Thai curry originated in India although made from natural Thai herbs and spices so that might explain why Noel and I have a little crush on it.

Massaman Beef Curry
(recipe sourced from WW Magazine September 2011)

Serves: 4
ProPoints per Serves: 11

2 teaspoons peanut oil
600 grams lean beef, cut into 3cm cubes
cooking spray
6 eschallots, thinly sliced
2 tablespoons Massaman Curry Paste
2 kaffir lime leaves, shredded
3 large carrots, thickly sliced
2 cups beef stock
3/4 cup light coconut cream
1 1/2 tablespoons fish sauce
1/4 cup fresh coriander leaves
2 cups steamed jasmine rice
1 lime, cut into wedges, to serve

Heat peanut oil in a large heavy based saucepan over medium-high heat. Cook beef, in batches, for 2 - 3 minutes or until browned, then transfer to a plate and set aside.

Lightly spray same pan with cooking spray. Add eschallots and cook, stirring for 5 minutes or until browned. Add curry paste and lime leaves and cook, stirring, for 1 minute or until fragrant.

Return beef to pan, add carrots and stock and bring to the boil. Reduce heat and simmer, covered, for 1 1/2 hours or until beef is tender.

Add coconut cream and fish sauce and simmer, uncovered, for 30 minutes or until thickened slightly.

Serve Massaman Curry with fresh coriander sprinked on top with a bowl of steamed jasmine rice and lime wedges on the the side.

(Click here for a printable version of this recipe)

Tuesday, November 16, 2010

Panaeng Chicken Curry and our 300th Post!!

Firstly I have to apologize for my obvious slack effort at posting of late... we have been cooking and I have been travelling a lot with work - needless to say the lack of time up my sleeve is being reflected here loud and clear!! This year, with my change of jobs, has seen increased travel and therefore eating at motel restaurants more than ever has had me thinking if I should add reviewing restaurants to this blog? Interesting question - tempting but not sure if I am ready to whip the camera out in a restaurant and photo what I have order just yet!!! Will ponder that thought a little further I think... lol!!!

Secondly the Weight Watchers programme that I follow has just changed to ProPoints. From here on in the recipes will reflect the ProPoints values. Please bear with me while I go back over all the other recipes and revalue the points values to suit the new programme. It will take me a little time - that I am sure of.

Thirdly even though I have managed to spasmodically blog what we have cooked this year I cannot believe that we have reached our 300th post. What started off as my little hobby (which I didn't even tell my hubby about until he asked why I was taking photo's of cooked food for?) has grown so much! I am amazed by how many people come to visit our site, follow us and receive emails of what we cooked... in fact we feel truly privileged that you spend time with us. We love your comments and hope that if you do try any of our recipes that you enjoy them just as we do. Thank you all so very much!!!

So now on to what happened in the kitchen tonight. Thai curries are a huge favourite with us all but I tend to stear clear of them considering coconut milk is so high in fat. I have in fact been fancying a thai curry for some time now especially Panaeng, which has just a beautiful flavour.

This curry was easy to make although a little time consuming getting the ingredients ready as I did decided to add a lot of vegetables to it to bulk it up. Served with steamed rice (which is included in the ProPoints value) it was an excellent meal.

And YES it cured my thai curry craving.... mmmmm!


Panaeng Chicken Curry

Serves: 6
ProPoints per serve: 9

1 cup dry basmatic rice
cooking spray
1 onion, sliced
2 carrots, peeled and sliced on diagonal
200 grams Panaeng Curry Paste (I used Valcom)
500 grams, lean chicken breast, sliced
1 red capsicum, deseeded and large diced
230 gram can bamboo shoots, drained and rinsed
230 gram can sliced water chestnuts, drained and rinsed
440 gram can baby corn spears, drained and rinsed
375ml can Light and Creamy Evaporated Milk Coconut flavoured
4 kaffir lime leaves, thinly sliced
2 tablespoons fish sauce
1 tablespoon white sugar
150 grams snow peas
150 grams bean sprouts

Cook rice according to packet instructions and set aside.

Spray a wok or large frying pan with cooking spray. Over a medium heat cook onions and carrots until tender. Remove to a plate.

To the same wok or frying pan add penaeng curry paste and stirfry for approximately 30 seconds or until fragrant. Increase heat to high. Add chicken and cook for a further 3 - 5 minutes, stirring, until chicken is sealed and coated in curry paste.

Return onions and carrots to the chicken along with the capsicum. Stirfry for a further 2 - 3 minutes.

Add bamboo shoots, water chestnuts and baby corn. Stirfry for a further 2 minutes.

Add evaporated milk, lime leaves, fish sauce, sugar, snow peas and bean sprouts. Continue to cook for a further 2 - 3 minutes but do not boil as the milk with curdle and separate.

Serve immediately with steamed rice.

(click here for a printable version of this recipe)

Thursday, April 1, 2010

Mexican Style Rice

This is a quickie cheats version of a Mexican Rice that we actually had with Chicken Taco Bake and it complimented it nicely.

A dish full of colourful vegetables and spiced by using packet taco seasoning made it not only an easy dish to prepare but had a nice Mexican taste and look to it.


Mexican Style Rice

Serves: 4
Points per serve: 3


1 cup long grain white rice
cooking spray
1 brown onion, diced
1 carrot, peeled and diced
1 red capsicum, diced
1 green capiscum, diced
1/2 cup frozen corn kernals
2 tablespoons packet taco seasoning
2 tablespoons water
fresh coriander to garnish

Cook rice in a large saucepan of water as per packet instructions. Drain and set aside to cool.

Spray a large frying pan over medium heat, coat with cooking spray and cook onions and carrots for 3 - 5 minutes until softened. Add capsicum and corn, cooking for a further 5 minutes. Add 1 1/2 tablespoons of taco seasoning and water mixing through vegetables, cook for 2 minutes. Add rice and stir until mixed completely.

Serve sprinkled with remaining taco seasoning and garnish with coriander.

(click here for a printable version of this recipe)

Wednesday, November 4, 2009

Vegetarian Fried Rice

This is a colourful, yet wonderfully quick and easy side dish to serve and just as nice by itself. It is also a dish that you can bulk up with any vegetables as well as adding cooked meats such as chicken, pork or prawns to make it into a full meal, but that's a recipe for another time.


For a better consistency while stir frying it is good to use rice that has been cooked the day before or is at least ensure rice is cold and has been drained well.


Vegetarian Fried Rice

Serves: 6
Points per serve: 2.5

1 cup basmati or long grain rice
cooking spray
1 teaspoon garlic
2 eggs, lightly beaten
1/4 cup skim milk
salt
white ground pepper
1 carrot, peeled and grated
1/2 red capsicum, finely diced
4 spring onions, sliced
1/2 cup frozen peas
1/2 cup frozen corn kernals
2 tablespoons soy sauce
1 tablespoon kecap manis
100 grams bean sprouts
1/2 cup fresh coriander chopped


Bring a large saucepan of water to boil and add rice. Cook for 10 - 12 minutes or until rice is tender. Drain well and allow to cool completely.


In a small jug combine beaten eggs and milk. Season with salt and pepper. Heat a large frying pan over medium heat, coat with cooking spray and add the eggs to cover pan base. Cook for until bubbles start to appear and flip over. Continue to cook for 2 - 3 minutes. Remove from pan and allow to cool. When cool roll and cut into slices. Set aside.


Coat a wok with cooking spray and heat over high heat. Add garlic, capsicum and spring onions, stir fry for 2 - 3 minutes or until capsicum has softened. Add peas and corn and continue to stir fry for another 4 - 5 minutes. Add rice and stir until fully combined with vegetables. Stir through soy sauce and kecap manis. Add bean sprouts, omellete and corinader, toss until warmed through.


(click here for a printable version of this recipe)

Monday, November 2, 2009

Cheesy Corn, Spinach, Bacon and Mushroom Risotto

Now that I have my children's attention when it comes to Rissotto they haven't stopped requesting it when asked what they would like for dinner. I have to say this recipe is similar to the Bacon and Mushroom Rissotto I cooked not long ago but I thought it would be okay to share it with you all.

I used frozen corn kernals and baby spinach leaves to the original recipe along with extra parmesan cheese, as "cheesy please" was requested by the children. It was quite nice I have to admit ~ mind you Noel still refers to it as gluggy rice pudding! LOL!! I am glad that the kids are starting to enjoy different rice dishes.


Cheesy Corn, Spinach, Bacon and Mushroom Risotto

Serves: 6
Points per serve: 5

1 litre (4 cups) water
1 tablespoon chicken stock powder
1 tablespoon reduced fat spread
1 brown onion, finely chopped
2 rashers middle bacon, rind and visible fat removed
2 garlic cloves, crushed
1 1/2 cups (325 grams) arborio rice
1/2 cup dry white wine, such as chardonnay
1/2 cup corn kernals, frozen
200 grams button mushrooms, finely sliced
200 grams baby spinach leaves
2 teaspoons fresh flat leaf parsley, finely chopped
50 grams (1/2 cup) fresh parmesan, finely grated
freshly ground black pepper

In a small saucepan mix together the water and stock powder. Heat stock and keep simmering over a low heat.

In a large heavy based saucepan heat reduced fat spread over a medium heat. Add onion, bacon and garlic. Cook, stirring, for 5 minutes or until golden

Add the rice into the onion mixture. Cook, stirring, until completely combined. Add the wine and cook, stirring for 3 minutes or until the liquid has reduced by half.

Using a ladle add the stock, one ladle at a time. Stirring continuously after each addition until all the liquid is absorbed, this should take approximately 20 minutes.

Stir in corn kernals and mushrooms. Cook, stirring, for 5 - 10 minutes or until corn is cooked and the mushrooms are tender and liquid absorbed.

Remove from heat and stir in the parsley and parmesan. Season with freshly ground black pepper.

(click here for a printable version of this recipe)

Tuesday, September 29, 2009

Bacon and Mushroom Risotto

Noel worked late again tonight as he is not a lover of risotto I made use of my opportunity and made myself some for dinner. I say myself as the kids both wanted homemade meat pies which was fine and they had but then they too tried my creation.

I wanted to make a creamy style risotto, which are my favourites, but of course without using any cream and at the same time I was trying to keep the points value down. Add more point free vegetables to bulk it up such as baby spinach, zucchini or even asparagus and of course you could omit the bacon.

Although this dish is quite time consuming and demands all your attention, it was well worth it taste wise.


Bacon and Mushroom Risotto
Serves: 4
Points per serve: 6

1 litre (4 cups) water
1 tablespoon chicken stock powder
1 tablespoon reduced fat spread
1 brown onion, finely chopped
2 rashers middle bacon, rind and visible fat removed
2 garlic cloves, crushed
1 1/2 cups (325 grams) arborio rice
1/2 cup dry white wine, such as chardonnay
200 grams button mushrooms, finely sliced
2 teaspoons fresh flat leaf parsley, finely chopped
25 grams (1/2 cup) fresh parmesan, finely grated
freshly ground black pepper

In a small saucepan mix together the water and stock powder. Heat stock and keep simmering over a low heat.

In a large heavy based saucepan heat reduced fat spread over a medium heat. Add onion, bacon and garlic. Cook, stirring, for 5 minutes or until golden

Add the rice into the onion mixture. Cook, stirring, until completely combined. Add the wine and cook, stirring for 3 minutes or until the liquid has reduced by half.

Using a ladle add the stock, one ladle at a time. Stirring continuously after each addition until all the liquid is absorbed, this should take approximately 20 minutes.

Stir in mushrooms. Cook, stirring, for 3 - 4 minutes or until mushrooms are tender and liquid absorbed.

Remove from heat and stir in the parmesan. Season with freshly ground black pepper.

(click here for a printable version of this recipe)

Thursday, September 17, 2009

Curried Sausages

I have to admit I don't cook sausages very often. It is not that we don't like sausages, all of us love them, prehaps a little too much. The reason that they are not regularly on our menu is mainly due to the fact that normal sausages are so high in fat they are pretty much a no-no when it comes to dieting. Well that was until recently!

The Peppercorn Food Company have released a range of gluten free, extra lean sausages and I have to say I really like them. Not only are they very low in saturated fat and get the tick from the National Heart Foundation, but they actually taste good too. They have several different flavours available and although they are a little on the pricey side for sausages - you only get what you pay for right?

Curried sausages have to be a classic home style meal, one that gives comfort no matter when you eat them, either served with mashed potato or steamed rice. It is one of those meals your grandma used to make and are certainly one of those recipes that you expect to have handed down through the generations. I do not have a handme down recipe, infact I cannot recall my grandma cooking them nor my mam. However I saw this in a recent Weight Watchers magazine so I just had to try it.

In the beginning I was kind of concerned with using a combination of curry powder and dijon mustard as the sauce flavouring but it worked well. The apple gave the dish a hint of sweetness but didn't make it overpoweringly sweet and more importantly it got the thumbs up from all of us.


Curried Sausages
(recipe sourced from: WW Magazine June 2009)

Serves: 4
Points per serve: 6.0

500 grams lean sausages
cooking spray
1 medium brown onion, thinly sliced
1 medium green apple, peeled, cored and grated
2 tablespoons plain flour
2 teaspoons mild curry powder
2 teaspoons dijon mustard
2 cups chicken stock
1 medium green capsicum, seeded and thinly sliced
1 medium red capsicum, seeded and thinly sliced
2 cups cooked white rice, to serve

Place sausages in a saucepan and cover with cold water. Bring to the boil, reduce heat to low and simmer for 10 minutes. Drain.

Spray a non stick frying pan and heat over high heat. Add sausages and cook for 3 - 4 minutes or until browned all over. Transfer to a plate and slice in half or quarters diagonally.

Add onion and apple to the pan, cook for 2 minutes or until the onion has softenend. Add flour, curry powder and mustard. Stir to mix. Gradually add stock and bring to the boil. Add sausages and capsicums. Reduce heat to medium low and simmer uncovered for 15 minutes or until sauce thickens. Serve with 1/2 cup rice each.


Stats for Peppercorn Food Company Extra Lean Beef Sausages
500g = 7 sausages (72g per serve), Each serve: Energy: 448kJ Protein 9.6g Fat, total: 5.8g Fat, saturated: 2.2g Carbohydrate: 4.0g Sugars: 0.9g Sodium: 324mg Iron: 1.1mg

Saturday, July 4, 2009

Joamy's Rice Stuff

As I have mentioned previously I participate in a cooking thread on the Weight Watcher Forums where someone will put a recipe up at the beginning of each week for who ever wants to participate to try. The recipe for week two was put up by Joanne and I have been meaning to make it for several weeks now.

"Rice Stuff" as Joanne calls it herself is very similar in style to a Kedgeree, an Indian dish. Joanne offered a few suggestions to jazz up this recipe such as also adding a tablespoon or two of sultanas for a bit of sweetness covering it. "You can have this as is, vegetarian or you can add any cooked meat at the end. I have tried chicken, ham, smoked salmon and cooked mince or you could also pop in some boiled eggs. My family love this, its easy and you can make it as a base and then adapt it for each family member if you have some fussies. I also put in as many veggies as I want, you don't have to stick to the base recipe at all. Peas would be nice in it but it adds points."

We added the sultana's, some peas and also some toasted almond flakes along with a few more spices and it was really yummy. I have to admit it was a nice side dish to have with our Tandoori Lamb Cutlets last night.


"Rice Stuff"
(recipe courtesy of Joanne
)

1 Carrot, diced
1 Onion, diced
1 teaspoon crushed garlic
1 teaspoon crushed ginger
2 teaspoon curry powder
1 teaspoon tumeric
1 teaspoon ground cumin
1 teaspoon ground coriander
600 mls of chicken or veggie stock
200 Grams of basmati rice
1/2 cup frozen peas
freshly ground black pepper
2 tablespoons sultanas
2 tablespoons toasted almond flakes

Dry fry onion, carrot, garlic and ginger for 2 minutes or until slightly tender. Add tumeric, curry powder, cumin, coriander. When its nice and coloured up, add rice, stock and peas. Stir and cover completely. Cook for about 12 mins. At the end you don't want it completely dry, just a little bit moist.

Season with pepper to taste. Stir through sultanas and toasted almonds.

~~~~~~~~~~
Don't forget to enter my giveaway which ends
Monday 6th July, 12pm EST, click here.
~~~~~~~~~

Thursday, June 11, 2009

Fragrant Pork Meatball and Rice One Pot

Not only do I have an obsession with purchasing cookbooks, but I have the same healthy obsession with purchasing cooking magazines. My new all time favourite being "BBC Australian Good Food" which never fails every month to be crammed full of great recipes. Of course July's issue is no different. After reading it several times, cover to cover, I have dog eared the pages containing recipes that I am definitely testing on my family.

The first recipe that caught my attention is this one, Fragrant Pork Meatball and Rice One-Pot. To give you an idea of how good I find this magazine the other recipes on my "to cook list" are Cajun-spiced Chicken with Beans, Glazed Meatloaf, Ross Dobson's Steak and Onion Casserole, Creamy Ham and Mushroom Bake, and Kylie Kwong's Braised Chicken Wings with Tamari, just to name a few.

The concept of this dish and making the meatballs could not be any easier. In fact I was impressed and somewhat surprise as it's a technique that I have never used before. The simple act of taking a sausage and squeezing the insides out to form small meatballs was terrific. This recipe called for pork sausages but I am sure any flavour sausage would work just as well.

Fragrant Pork Meatball and Rice One Pot was quick to prepare, easy to cook and went down a treat. The house was definitely fragrant during the dish being cooked and the taste was smooth yet full of flavour. I did make some minor changes, as usual for me. I didn't have thick pork sausages (4) that the recipe called for so I used thin Italian Style pork sausages and also added some carrot, capsicum and zucchini to the recipe to bulk it up and ensure that we were getting our intake of vegetable also. I don't think these changes or additions made any drastic change in the outcome of the dish. Next time however I will use a low fat style of sausage in an attempt to make this dish more weight loss friendly.

The main thing overall, the kids loved it and once again I can "cook it again"! Even though once again I am showing you a really bad photo of the dish.


Fragrant Pork Meatball and Rice One-Pot
(recipe adapted from BBC Australian Good Food)
Serves: 4

8 thin Italian pork sausages
1 tablespoon olive oil
1 small onion, finely diced
2 garlic cloves, crushed
1 small carrot, finely diced
1/2 red capsicum, finely diced
1 zucchini, grated
2 teaspoons ground cumin
2 teaspoons ground coriander
3/4 cup long grain rice
3 1/2 cups salt reduced vegetable stock
1 x 400g can diced tomatoes
1/2 cup roughly chopped coriander

Cut one end off each sausage. Squeeze sausage meat from skins and roll into small balls.

Heat oil in a large saucepan over high heat. Cook meatballs, turning frequently, for 5 - 6 minutes or until browned and cooked through. Remove from pan.

Reduce heat to low and cook onion, garlic and carrot for 3 minutes or until softened. Add capsicum, zucchini, cumin and coriander, stirring for 1 minute, until fragrant. Stir in rice and cook for a further 1 minute.

Pour in stock and tomatoes. Cover and simmer for 10 minutes or until rice is tender. Return cooked meatballs to the pan and season to taste. Simmer for 2 minutes or until meatballs are heated through.

Ladle into bowls, sprinkle with coriander and serve with crusty bread, if you like.

Thursday, June 4, 2009

Mexican Beef with Rice

Mexican Beef and Rice is a favourite recipe not only as it's a quick and easy dish to make but it is full of flavour considering the lack of complex ingredients.

It has often been a quick fix for Noel and I if we are running late and need a fast meal that is not takeaway. As a family we are not a huge fan of takeaway and yes that includes the kids. Thankfully with our ability the kids will often ask for a dish they know we can whip up quickly like Pasta Carbonara, Chicken and Sweet Corn Soup, Sticky Chicken or even toasted sandwiches. Aren't we lucky having children like that??? LOL - they know McDonald's is either a very special occassion or desperation!!

Anyhow, this was the first time our children have experienced this dish as now that their tastebuds are developing and as they adore tacos' etc., I thought it was time to introduce them to it with that this dish would make it on the "quick list" for them also.

And the kids verdict - they loved it!! Woohoo!! In fact there was the comment of "this is better than taco's!!"

Served with a dollop of light sour cream, grated cheese and chopped corinader leaves it was a flavourful somewhat authentic mexican meal.


Mexican Beef with Rice
(recipe adapted from WW Make It Easy)

Serves: 4
Points per serve: 8

1 kilogram very lean mince beef
2 brown onion, diced
1 medium red capsicum, diced
1 medium green capsicum, diced
1 x 440g can diced tomatoes
1/2 cup water
2 cups frozen corn kernels
1/2 cup tomato paste
1 tablespoon ground cumin
1 tablespoon ground coriander
1 tablespoon sweet paprika
chilli powder to taste
360g long grain rice
1 medium red capsicum, diced, extra
1 medium green capsicum, diced, extra

Heat a non stick frying pan, coat with cooking spray. Add mince, onion and capsicum. Cook until mince is browned. Add tomatoes, water, corn, tomato past, cumin, coriander, paprika and chilli. Mix well to combine and simmer for 10 minutes.

Fill a large saucepan with water and bring to the boil. Add rice and simmer for approximately 5 - 8 minutes or until rice is almost cooked. Add the extra capsicum and simmer for a further 5 minutes or until rice is just tender. Remove from heat and allow to stand for several minutes. Drain rice.

Serve mince over rice.

Thursday, May 28, 2009

Spicy Rice and Bacon Tomatoes

Well this is a creation I thought about and tried last night in order to participate in my first Royal Foodie Joust at the Left Over Queen Forums. If you get a chance, pop over there and have a look - some amazing dishes are always being posted. Some are so good it makes you just want to lick the computer screen for a taste test!! LOL!!

Okay so her I am - a little nervous here as this is my first entry! The reason I am nervous is purely due to what has been entered before mine have been incredible, leaving me thinking that I am definitely not in the same league as some of the participants but hey - you never know unless you try right? So I did!!
Oh and I have to say that I am quite exciting also to be part of the challenge too!

Spicy Rice and Bacon Tomatoes was a dish made using all three ingredients - rice, tomatoes and bacon. We had these as a side dish with t-bone steak last night but I would also be tempted to serve them as an entree.

We liked it - so I hope you do too.


Spicy Rice and Bacon Tomatoes

Serves: 8

8 large tomatoes
1 cup long grain rice
2 rashers bacon
2 spring onions (green onions)
1 tablespoon extra virgin olive oil
1 tablespoon dried oregano
1/2 teaspoon dried chilli flakes (or to taste)
salt
freshly ground black pepper
50g coarsley grated parmesan cheese

Wash tomatoes and dry. Remove stem and cut a large circle around the top of the tomato, remove circle and tomato centre leaving a hollow cavity (be careful not to cut into sides of tomato). Repeat with remaining tomatoes.

Bring a large saucepan of salted water to the boil, add rice. Cook for 8 - 10 minutes or until rice is cooked, drain.

Remove rind and visible fat from bacon and dice. Fry in a large non stick frying pan and cook until a little crispy and brown. Remove to a paper towel covered plate to drain excess fat. To the same pan add the olive oil and the spring onion. Cook for 1 - 2 minutes or until spring onions start to soften. Lower heat and return bacon to the pan. Stir for a further 1 - 2 minutes. Add the rice, oregano and chilli. Mix until well combined. Add salt and pepper to taste. Remove from heat, transfer to a bowl and allow to cool for at least 10 minutes.


Once rice mixture has almost cooled stir through the grated parmesan cheese until well combined.

Using a small spoon, fill the cavity of the tomato pressing down with each addition. Ensure that the cavity is overflowing slighty. Repeat with remaining tomatoes.


Place on a foil lined tray, spray topping with cooking spray. Cook in oven for 15 - 20 minutes or until heated through.

Serve immediately.