Showing posts with label pork. Show all posts

Thursday, May 2, 2019

Sticky Chinese Pork and Vegetables

Fakeaway at it's finest tonight.  Tender pork and crisp vegetables in a sweet yet slightly spicy sauce served on a bed of rice noodles.  Quick, easy and best of all it's nicer on the hip pocket.

The key to making fakeaway Asian meals at home is to ensure that you have all the ingredients ready as once you start cooking the meal comes together very quickly.

No need to marinade the pork fillet as it's a tender meat - also it's one that cooks quickly. So a quick toss in a chinese five spice based sauce while you prep all the other ingredients is all that was needed.  

We used rice noodles as they are gluten free but you can use any noodle you prefer or even rice if desired.  You will need something however to help soak up the delicious sauce.

Not a fan of chilli or love chilli - adjust the quantities to suit yourselves.

A switch I did was use peanuts.  The original recipe called for cashews but I had peanuts - use any nuts you like to be honest.

No doubting that this dish just rose to the top of the pork dish list of favourites.  Even my mother had seconds!  


Sticky Chinese Pork and Vegetables
(Recipe adapted Taste.com.au)

Serves: 4

600 grams pork fillet, thinly sliced
2 tablespoons brown sugar
1 1/2 tablespoons gluten free soy sauce
1/2 teaspoon Chinese five spice
2 teaspoons fish sauce
250 gram packet dried rice stick noodles
1 1/2 tablespoons vegetable oil
1 red onion, halved, cut into thin wedges
1 tablespoon grated ginger
2 teaspoons crushed garlic
1 teaspoon crushed chilli
1 red capsicum, thinly sliced
1 carrot, halved, sliced diagonally
1 teaspoon gluten free chicken stock powder
1/4 cup water
2 teaspoons cornflour
1 bunch baby pak choy, roughly chopped
250 grams snow peas, trimmed
1/4 cup gluten free oyster sauce
1/4 cup dry roasted peanuts
1 long red chilli, sliced diagonally

Combine pork, sugar, soy sauce, five spice and fish sauce in a medium bowl. Toss to coat.

Prepare rice stick noodles, following packet directions until tender. Drain well. Cover to keep warm.

Heat 1 tablespoon of oil in a wok or large frying pan over medium-high heat. Stir-fry pork, in 2 batches, for 1 to 2 minutes or until golden. Transfer to a bowl.

Heat remaining oil in wok over high heat. Stir-fry onion, ginger, garlic, chilli, capsicum and carrot for 5 minutes or until just tender. 

In a small jug mix stock powder, water and cornflour until combined.  

Add pork, pak choy, snow peas, stock mixture and oyster sauce. Stir-fry for 2 to 3 minutes or until pork is cooked through and snow peas are tender. 


Serve with rice noodles and sprinkle with peanuts and sliced chilli.


Saturday, December 1, 2018

Sticky Oven Barbecue Ribs

If you really want to see 2 kilograms of ribs disappear really quickly - I suggest you cook this recipe!

Saturday night feast had us smacking our lips and licking our fingers with this Sticky Oven Barbecue Ribs recipe.  And to say it beats restaurant or takeaway ribs is a total understatement.  Once you cook these I am guessing that you will hesitate to even order ribs at a restaurant or as a takeaway again.

One thing I do love is preparing and cooking easy yet flavoursome food - and to be perfectly honest this recipe was very easy to prepare taking about 15 minutes in total.  Slow cooked, giving me time to do other things, however devoured in minutes!  

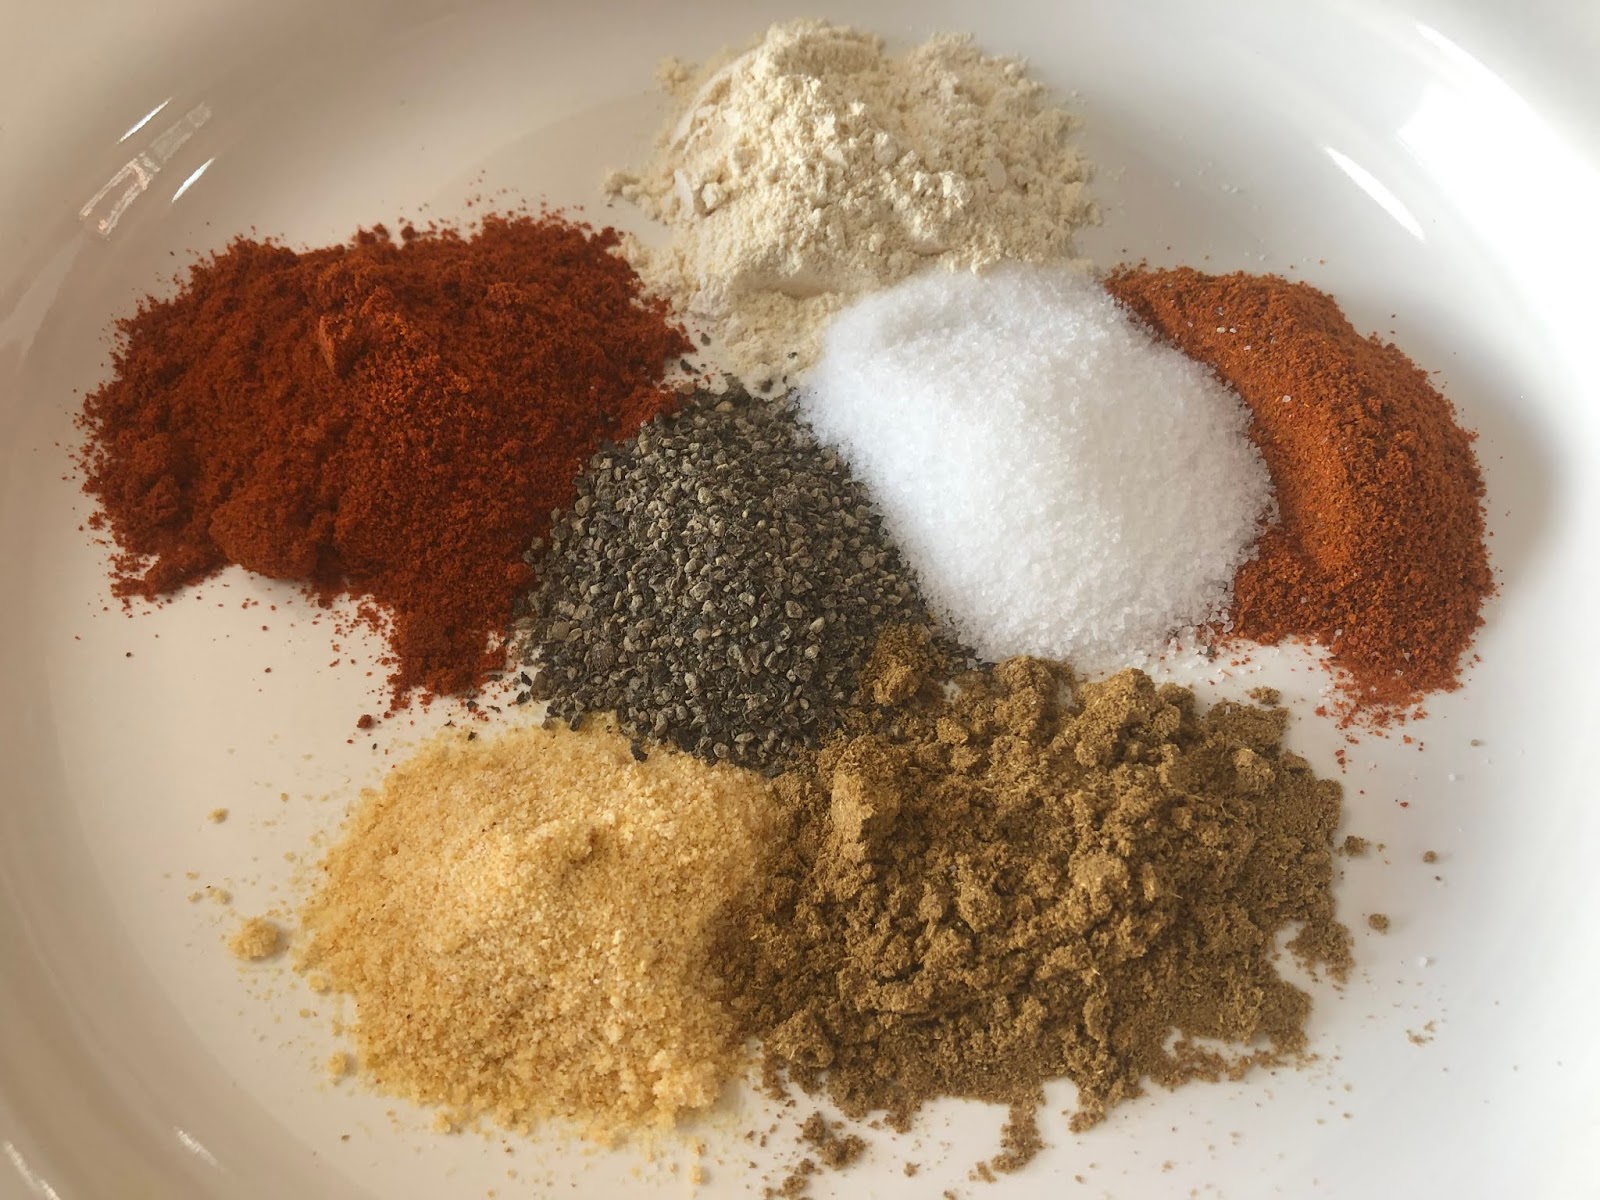
I seasoned the pork ribs with a magic combination of herbs and let them rest in the fridge for around 8 hours (you can just rub the seasoning in and cook straight away).  Smelling these cook low and slow in the oven made coming into the kitchen irresistible as the aroma was very inviting.  Hints of garlic, cumin and chilli filled the air - definitely couldn't wait to eat these.

The sticky barbecue sauce, added to the ribs towards the end of the cooking time, was super easy to prepare also.  Add as little or as much cayenne powder to suit your palette (we added a fair bit but we like spicy) pop them back into the oven for 10 minutes and your fork free dining is ready.  Slice them or serve them as full racks with or without chips, salad!  So many choices.... just have serviettes or napkins on hand.

I am sure that these ribs won't last long - they didn't at ours!  


Sticky Oven Barbecue Ribs
(recipe adapted from Cafe Delites)

Serves: 4 - 6

2 kilograms American Style pork ribs
2 teaspoons garlic powder
1 teaspoon onion powder
2 teaspoons paprika
2 teaspoons salt
1 teaspoon cracked black pepper
1/2 teaspoon cumin
1 teaspoon Cayenne powder or chilli
4 tablespoons olive oil
2 cups (500ml) barbecue sauce
3 tablespoons minced garlic
1 tablespoon Worcestershire sauce
1/2 - 1 tablespoon cayenne pepper (optional for heat)
1 teaspoon salt


Preheat oven to 180 degrees Celsius.


Combine together garlic powder, onion powder, paprika, salt, pepper, cumin and chili or Cayenne. 


Sprinkle seasoning over ribs on both sides.  Place in a glass casserole dish cover with cling film and marinate in fridge for at least 2 hours - longer if time permits.


Place on a baking sheet or tray lined with foil and baking paper.  Drizzle with 2 tablespoons of olive oil.  


Cover tray with foil and bake for 2 hours, turning over once during the cooking time.


Mix together remaining ingredients to make the sauce.

Remove ribs from the oven, remove foil and spread the tops of the ribs with the barbecue sauce mixture.


Increase oven temperature to 240 degrees Celsius.  Return ribs to the oven, uncovered, and bake for a further 10 minutes.


Rest for 10 minutes before slicing or serving.


Enjoy....


(Click here for a printable version of this recipe)

Tuesday, August 28, 2018

French Pork Cutlets with Creamy Herb and Wine Sauce

I don't know about you but I really enjoy experimenting with pork especially what flavours compliment this tender meat.  Needless to say it's not always roasted and served with apple sauce at the House of Murray.

Pork is rarely eaten in our house as a whole family due to the fact that Ms 17 does not like pork unless it's Sweet and Sour Pork and Chinese Roast Pork served in pancakes.  Talk about being fussy and a tad demanding.  Despite her dislike of pork (unless it's on her terms) I decided that it would be on our menu this week as there are 4 others in the house happy to eat it.  Thanks team.

As mentioned I enjoy experimenting with flavours and if you look through our list of pork recipes you will see that so many other recipes have been tried.  Some got the tick of approval others not so.  What is your favourite way of serving up pork?  Or even what's your favourite cut of pork?  I really enjoy cutlets, medallions or fillet.  I find these very tender and easy to cook.

Now did I explain that Ms 17 is fussy right?  To add to her disapproval of pork being on the menu if I even consider making a sauce or marinade that has mustard, lemon, rosemary or occasionally other herbs such as tarragon or thyme it is on for young and old.... needless to say Ms 17 didn't eat dinner tonight.

When all cooked this smelled absolutely delicious.  The combination of the wine and herbs all enveloped into a thick creamy sauce complimented the thyme crusted pork cutlets.  Not to mention it was quick and easy with a total cooking time under 30 minutes.  An absolutely tasty dish that while accompanied by a creamy sauce is still full of flavour without the guilt factor.


French Pork Cutlets with Creamy Herb and Wine Sauce

Serves: 4
SP per Serve: 8

4 pork cutlets, fat trimmed
salt
freshly ground black pepper
2 tablespoons chopped fresh thyme
2 teaspoons vegetable oil
1/2 cup white wine or champagne
1 cup chicken stock
1 tablespoon chopped fresh tarragon
1 tablespoon french mustard
1 cup extra light thickened cream
1 tablespoon cornflour
2 tablespoons water

Preheat oven to 180 degrees Celsius.

Season the pork chops with salt and pepper. Rub both sides of each chop with 1 tablespoon fresh thyme.


Heat the vegetable oil in a skillet over medium-high heat until shimmering. Add the seasoned pork to the pan and cook for 2-3 minutes per side until browned. Remove the pork from the pan and place on a lined oven tray. Place in oven and cook for a further 10 minutes or to your liking.

Pour the wine into the pan and continue to cook for 3 minutes to reduce the liquid. Add the chicken stock, remaining thyme, tarragon, mustard and cream and cook another 3-5 minutes. Stir through combined cornflour and water and continue to stir until sauce has thicken. Remove from heat.

Remove cutlets from the oven and place on a serving tray. Drizzle with sauce if desired or place in a serving jug. Serve with crispy potatoes and steamed vegetables.


(Click here for a printable version of this recipe)

Sunday, April 8, 2018

Tuscan Roast Pork

I mentioned that I received a beautiful cookbook from my gorgeous friend Bernie for my birthday when we cooked Rioja Chicken a little while ago and to be honest the book hasn't made it to the bookshelf yet - in fact it hasn't left the kitchen.  The cookbook is ABC's Delicious - Love To Eat and if you get a chance to get a copy I would encourage you to do so.  It is one of the better cookbooks I have read and used in such a long time.

This is the second time that we have cooked the Tuscan Pork.  The recipe as written has two components - one being the pork and the other being Mustard Fruits.  I am going to confess to having only cooked the pork as I do not believe that any of the family would try let alone enjoy the Mustard Fruits so I haven't even bothered with making them.  If anyone would like the recipe though please contact me and I can email it to you.

The fascinating thing about this recipe which actually goes against everything that I have learnt about cooking pork is that the whole piece of pork belly is marinated including the much treasured skin or the crackle.  Every other recipe will state you must keep the skin dry, do not get the skin wet, pat down with paper towel to ensure it's dry, it won't crisp up if the skin is wet, etc.  Well not this recipe... and it does crisp up producing a fantastic rosemary and fennel infused crackle.

Marinading the pork belly doesn't come any easier than this either.  A combination of fresh rosemary and fennel seeds mixed with olive oil and lemon seasoned with salt - it is simply that easy.  As decadent as this sounds it is one of the easiest marinades but it's by far one of the tastiest.  You can definitely not match the flavour of fresh rosemary or the slight aniseed flavour of the fennel.   Yet together they taste amazing.

We adore the flavours of this pork belly recipe.  Is it our favourite?  Yes definitely.


Tuscan Roast Pork
(Recipe adapted from Delicious - Love To Eat)

Serves: 6 - 8

2 tablespoons finely chopped rosemary
2 tablespoons fennel seeds
finely grated zest of 1 lemon
1 teaspoon sea salt flakes
2 tablespoons olive oil

Ensure pork rind is scored to your liking.

Combine rosemary, fennel, lemon zest, salt and oil in a bowl then rub all over the pork. 


Cover and refrigerate overnight.

Prior to cooking remove pork belly from fridge and sit at room temperature for approx 30 minutes to take the chill of the pork.

Preheat the oven to 220 degrees Celsius.

Place the pork, skin side up, on a roasting rack over a roasting pan.  Fill pan with 2cm water.  Roast pork for 30 minutes.


Reduce heat to 180 degrees Celsius and cook for a further 2 hours, topping up water if necessary.  Remove from the oven and site aside to rest, loosely covered with foil.


Slice pork and serve.

(Click here for a printable version of this recipe)


Thursday, February 1, 2018

Tex-Mex Pork with Charred Corn Salad

I am trying to incorporate more salads into dinner - while we do have salad as a side dish there have only been a handful of times where I have actually served up a main salad for dinner.  I have no explanation really as a really tasty salad is quite satisfying that's for sure.  With this summer already being especially warm it is actually a perfect meal - it's still meat and veg after all.

Tonight I had decided on using pork fillets.  Normally one of the family favourite pork meals is 
Chinese Roast Pork which we normally serve with an Asian style salad and rice paper rolls.  This time I thought I would steer away from the Asian flavours and try the family with Tex Mex.

We all love Mexican food in the Murray house so in all honesty this was a no brainer when it came to the flavours.  Can you actually imagine a world without Mexican food and all the vibrant flavours?  I could not that's for sure and I don't think most of my family or friends couldn't either.  Nachos such as Spicy Chicken Nachos, Quesadilas including one of the kids favourites Chicken and Corn Quesadilas and of course Enchiladas (Chorizo and Smoky Beef Enchiladas, Beef and Capsicum Enchiladas)  to name a few are staple in our house including Homemade Taco Seasoning.  Have a look here for more Mexican dishes we have made.

So now for something completely different, a dry rub marinade for the pork fillets that was full of vibrant flavours such as smoked paprika, cumin, oregano and cayenne pepper - it smelt delicious even while preparing.  For something with a lot of fragrance the preparation was very minimal.

The salad itself was quite basic also.  The corn was chargrilled until just browning.  The charring of the corn gives it such a different flavour and texture.  Corn is naturally sweet and the corn was a little crunchy and soft with that flame grill taste.  The combination of the lime dressing and the salad made my tastebuds dance and this combined with the smoky mexican flavours of the pork was fantastic.


Tex-Mex Pork with Charred Corn Salad
(Recipe adapted from Weight Watchers Australia)

Serves: 4
SmartPoints per serve: 4

3 teaspoons ground cumin
3 teaspoons ground smoked paprika
2 tablespoons dried oregano
1⁄4 teaspoon cayenne pepper
480 grams trimmed pork fillet
3 fresh corn husks removed
1 punnet cherry tomatoes
1⁄3 cup fresh coriander, coarsely chopped
1⁄3 cup fresh basil, torn
1⁄2 small red onion, thinly sliced
2 tablespoons fresh lime juice
1/2 tablespoon olive oil
salt
freshly ground black pepper
2 cups baby spinach leaves
cooking spray

Combine the cumin, paprika, oregano and pepper in a small bowl. Sprinkle pork all over with the spice mixture.

Lightly spray a chargrill or barbecue with oil and heat on medium heat. Cook the pork and corn, turning, for 10 minutes or until cooked through and browned. Cover pork with foil and set aside for 5 minutes to rest. Thickly slice.

Meanwhile, using a sharp knife, remove the kernels from the cobs. Place in a large bowl with the tomato, coriander, basil and onion.  Toss gently to combine.

In a small jug combine the lime juice, oil, salt and pepper.  Stir to mix well.

Serve pork with rocket and corn salad.


(Click here for a printable version of this recipe)

Tuesday, January 2, 2018

Pork and Veal Meatballs on Polenta with Gremolata

One of the ways that I survive is by being organised.  Many of my friends, I believe, think I have a major control issue or am just simply crazy.  Menu planning, shopping lists, list of contents of freezer, family planner, etc., has just become part of our lives as with both hubby and I working full time and the kids with school and sporting activities there was a definite need to be organised not only to be prepared but the maximize the spare time that we did have.  I guess you either love it or hate it (or maybe don't understand it)!  I love it.

So needless to say I have menu planned the first week of the New Year.  As I plan Saturday to Friday it's only a small week especially as we went out for dinner with family last night to the Westernport Hotel in Hastings.  Now I mainly only plan dinners as lunches are normally quite standard weekdays but if I do plan to do a nice lunch on the weekend, for example, this is planned also.  Once the meals are decided I also make note of where the recipe is sourced from so whoever wants to come in and start preparing dinner they know what needs doing.  From the menu plan I get the shopping list and it all flows on from there.

I decided that tonight's dish, Pork and Veal Meatballs on Polenta with Gremolata, an Italian inspired dish would move away from all the foods and flavours of the Festive Season that we have been eating.  While the sauce itself is quite rich, the meatballs were moist and tender with a hint of cheese.  I did actually use pork an beef mince for this recipe as I did not have veal as the original recipe called for.  Both minces were only regular grade not the lean mince as required which would add to the richness and the fat content.  This also made it a tad oilier.  So stick to lean mince for this recipe.

The tomato sauce was very robust and really complemented the whole dish. This combined with the smooth creamy polenta made this meal quite comforting and I can only imagine would make a wonderful meal for a cold winters night.  The kids, not being fans of polenta, had boiled pasta instead.  I think if I had cooked more there would have been seconds taken by everyone that's for sure.


Pork and Veal Meatballs on Polenta with Gremolata
(Recipe adapted from Weight Watchers Australia)

Serves: 4
SmartPoints per serve: 10
SmartPoints per serve (using regular mince): 13

1 tablespoon olive oil
1 medium brown onion, finely choppped
1 celery stick, finely chopped
1 medium carrot, finely chopped
2 cloves fresh garlic, finely chopped
2 tablespoons tomato paste
400 gram canned diced tomatoes
1/2 cup water
250 grams lean pork mince
250 grams mince veal or beef, raw
3/4 cups grated parmesan cheese
salt 
freshly ground black pepper
1/3 cups fresh flat-leaf parsley, finely chopped
125 grams Instant yellow polenta
1 tablespoons fresh lemon rind, finely chopped
1/8 teaspoons garlic powder

Heat oil in a large saucepan over medium heat. Cook onion, celery, carrot and garlic, stirring, for 5 minutes or until softened. Add tomato paste and cook, stirring, for 1 minute. Add tomatoes and water and bring to the boil. Reduce heat and simmer, covered, for 15 minutes.

Meanwhile, combine mince, 2 tablespoons cheese, half the parsley, salt and pepper in a medium bowl. Roll heaped tablespoons of mixture into 12 balls.

Add meatballs to tomato mixture and cook for 15 minutes or until meatballs are cooked through and sauce thickens.

Meanwhile, bring 1 litre of water to the boil over high heat. Add polenta in a steady stream and cook, stirring, for 5 minutes or until soft and creamy. Stir in remaining cheese.

Combine lemon rind, remaining parsley and garlic powder in a bowl. Serve polenta topped with meatballs, sauce and gremolata.


Friday, September 22, 2017

Pork Pad See Ew - หมูทอดดูเอล

Thank God for Friday night Fake-away.... it doesn't get better than this dish nor can it get any easier to create this Thai style noodle dish at home.
 
Firstly let me tell you that this meal is such an easy one to prepare, cook and put on the table in under 30 minutes or so and your family will thank you for an amazing dish that actually took you minimal effort.  In fact I am pretty certain that they will think that you organized Thai Take Away.
 
Pad See Ew is a standard lunch fare among Thais and is very popular dish in Thai restaurants outside of Thailand. The soft, chewy rice noodles pan fried with pork, Chinese broccoli and a soy sauce mix, it is easy to understand why it is a comfort food for many.

The simple ingredients in this dish are readily available combined make for a really light noodle dish that is refreshing but yet very filling.  Using pork mince was quick and easy and actually not as stodgy as larger meat pieces.  The tartness of the fresh lime juice combined with the saltiness of the fish sauce and the sweetness of the kecap manis kept the dish fresh and vibrant.

I really urge you to give your family the opportunity to try this meal - you won't regret it.
 

Pork Pad See Ew - หมูทอดดูเอล
(Recipe adapted from Weight Watchers Weeknight One Pot Cookbook)

Serves: 4
SmartPoints per serve: 11

200 grams dry rice noodles, think
1 tablespoons canola oil
500 grams lean pork mince
2 cloves fresh garlic, crushed
1 teaspoons fresh ginger, finely grated
1 whole fresh red chilli, thinly sliced
2 medium eggs, lightly beaten
1 bunches gai lan (Chinese broccoli), coarsely chopped
2 individual green shallots, thinly sliced
2 tablespoons kecap manis
1 tablespoons fish sauce
1 tablespoons lime juice
2 cup bean sprouts
2 carrots, peeled and coarsely grated
1/4 cup roasted peanuts
1/2 cups fresh coriander
1 medium fresh lime, wedges
chilli flakes, if desired

Prepare noodles following packet instructions or until just tender. Rinse under cold water. Drain.

Heat a wok over high heat. Add oil and heat for 20 seconds. Stir-fry mince, garlic, ginger and chilli, breaking up lumps, for 7–8 minutes or until browned. Transfer to a plate.

Reheat wok over high heat. Stir-fry egg for 1 minute or until just set.
 
Add gai lan and shallots and stir-fry for 1 minute.
 
Add mince mixture, kecap manis, fish sauce, juice, sprouts, carrots and noodles and stir-fry for 2 minutes or until heated through.
 
Sprinkle with peanuts and coriander and serve with lime wedges.  If desired, sprinkle with chilli flakes.


Sunday, April 30, 2017

Spicy Pork Meatballs with Spaghetti

Pasta is one of those dishes that even the fussiest of eaters will enjoy... ultimately pasta is a comfort food for many.  In our house it is definitely held in high regard when you just want to eat something for the soul and to make you feel better about everything.

Today, with having a full day of football ahead, I knew that we need a quick easy dinner that when we got home from football.  Knowing all I had to do was to make the tomato sauce and cooked pasta, this ensured that we had an hearty Sunday night dinner but I wasn't spending all evening in the kitchen.  While I made this recipe today in halves - in total it would take less than 45 minutes to take this dish from kitchen to table so it would be a perfect weeknight wonder also.

I quickly made some yummy bite size meatballs, pork laced with thyme, chilli and as usual, hidden vegetables.  These were baked in the other rather than fried in an effort to reduce the fat content of adding extra oil.    The meatballs themselves, can be cooked at an earlier date, cooled and frozen in preparation for this dish or another.

The tomato sauce, in this instance, was a very easy mix very similar to a Marinara Sauce.  Tomatoes, simmered with onions until thickened laced with a little sweetness to compliment the herbs and spices in the meatballs.

Serve with a pasta of your choice.  In our house it's Meatballs with Spaghetti - just like in that memorable Disney movie Lady and the Tramp.  Whichever pasta you choose I am sure this will become a favourite on your menu.


Spicy Pork Meatballs with Spaghetti

Serves: 8

cooking spray
1 kilogram lean minced pork
2 onions, finely diced
2 carrots, peeled and grated
2 zucchini, grated
2 teaspoons crushed garlic
1 teaspoon crushed chilli or sambal oelek
3 tablespoons tomato paste
1 teaspoon ground white pepper
2 tablespoon dried thyme
1 tablespoon dried parsley
2 teaspoons smoked paprika
1 brown onion, finely diced, additional
2 cans diced tomatoes 
2 cup water
1 tablespoon white sugar
salt 
freshly ground black pepper
spaghetti or pasta of your choice
grated Parmesan Cheese, for serving
dried chilli flakes, optional

Preheat oven to 180 degrees Celsius.  

Line a large baking tray with baking paper.  Spray with cooking spray.

Place pork, onions, carrots, zucchini, garlic, chilli paste, tomato paste, pepper, thyme, parsley and paprika in a very large bowl.  Mix, using your hands, until well combined.  Shape pork mixture into 48 evenly sized meatballs.  

Place meatballs on a baking tray in a single layer.  Bake in oven for 30 or until browned, turning several times during cooking.

Meanwhile spray a large saucepan with cooking spray and heat over low heat. Add onion and cook, stirring, until softened. Add tomatoes, water and sugar. Season with salt black pepper. Bring to the boil, stirring, reduce heat to a simmer.

Remove meatballs from oven and add to the tomato mixture carefully.  Stir gently to mix through and simmer until thickened and liquid has slightly reduced, stirring occasionally.

While sauce is simmering, bring a large saucepan of water to the boil and cook spaghetti or pasta as per the directions on the packet.  Drain.

Serve spaghetti or pasta topped with the meatballs and sprinkle with Parmesan Cheese and additional chilli flakes, if desired.


(Click here for a printable version of this recipe)

Thursday, November 3, 2016

Pork, Artichoke and Spinach Meatloaf

Meatloaf - just an easy dish to prepare and everyone loves it!  But the great thing about meatloaf is that you can honestly use any meat and any flavourings and it is always delicious.
 
Normally when we cook meatloaf we always use beef mince... not sure why?  Just seem to always do.  Well this time was totally different as I had found a recipe for a pork meatloaf that really intrigued me.
 
Pork mixed with spinach, home roasted capsicums, artichoke hearts - what a flavour combination.   The subtle hint of lemon and thyme gave the meatloaf a nice touch but the sticky topping finished the dish off perfectly.
 
As usual we had some beautiful soft bap rolls and accompanied with our favourite Creamy Coleslaw Supreme.
 
Quite simple to make, this dish can be cooked either in the oven or the slow cooker and I am sure your family will enjoy.
 
 
Pork, Artichoke and Spinach Meatloaf
(recipe adapted from Weight Watchers Real Food Slow)
 
Serves: 4
SmartPoints per serve: 8
 
cooking spray
2 red capsicum
500 grams lean pork mince
1 1/2 cups fresh wholegrain breadcrumbs
1 brown onion, finely chopped
300 grams artichoke hearts in brine, drained
100 grams baby spinach, chopped finely
1 teaspoon finely grated lemon rind
1 tablespoon lemon juice
2 tablespoon fresh thyme leaves
salt
freshly ground black pepper
1/4 cup sweet chilli sauce
1 tablespoon tomato sauce
 
Preheat grill.
 
Line a baking tray with foil and spray with cooking spray.
 
Cut capsicum into quarters and deseed.  Place on baking tray skin side up.  Grill until black.  Turn off grill and remove capsicum and place in a plastic bag to sweat.  Allow to cool.  
 
Once cooled remove all the blackened skin from capsicum.  Chopped finely and place in large bowl.
 
Preheat oven to 180 degrees Celsius.
 
Add mince, breadcrumbs, onion, artichoke, spinach, rind, juice, thyme and 2 tablespoons chilli sauce to capsicum.  Season with salt and pepper.  Mix until well combined.
 
Line baking tray with cooking paper.  Shape mixture onto tray into a 20 cm x 10cm loaf shape.
 
 
Bake in oven for 20 minutes.
 
Combine remaining chilli sauce and tomato sauce in a small jug and spoon over top of meatloaf.
 
 
Return meatloaf to oven and cook for 20 - 25 minutes or until cooked through.
 
To cook in slow cooker:
 
Shape mixture into 20 cm x 10 cm loaf shape in a 4.5 litre slow cooker. 
 
Combine remaining chilli sauce and tomato sauce in a small jug and spoon over top of meatloaf.
 
Cook, covered, on low for 6 hours (3 hours on high).
 
Serve with a salad, if desired.


Thursday, October 27, 2016

Creamy Slow Cooked Pulled Pork Enchiladas

There are two dishes I really definitely enjoy experimenting with - the first is lasagne and the second is enchiladas.  The potential for flavours is endless.

Lasagne and enchilada fillings can consist of anything... here are a few of our other creations, just to name a fewm, that have been enjoyed in the past.
This dish was no exception.  The flavours really complimented by a creamy white sauce smothered in cheese.  Yes this will also appear on the comfort food list as it really was so good.

Start by slow cooking the pork in the sauce and once cooled enough, shred and roll in the burrito wraps.  Very simple!  Without including the slow cooking time, this meal will be on the table in under 1 hour.

Strangely enough, there was no taco seasonings were used and you really wouldn't even realise that when you are eating it.  A combination of garlic, chilli and capsicum is the basic flavourings - to be honest it's amazing.


Creamy Slow Cooked Pulled Pork Enchiladas
(Recipe adapted from Weight Watchers Eat Well Diabetes)

Serves: 6

cooking spray
500 grams lean pork neck or shoulder, fat trimmed
1 brown onion, diced
1 green capsicum, chopped
1 garlic clove, crushed
1 small fresh red chilli, thinly sliced
400 gram can diced tomatoes
1 tablespoon apple cider vinegar
salt
freshly ground black pepper
1/2 cup corn kernels
30 grams low fat butter
30 grams plain flour
2 cups skim milk
2 teaspoons dijon mustard
white pepper
6 low fat burrito
100 grams reduced grated fat tasty cheese
1 teaspoon smoked paprika

Lightly spray a frying pan with cooking spray and heat over medium-high heat.  Cook pork, turning, for 5 minutes or until browned all over.  Remove from heat and place pork in slow cooker vessel.

Add onion, capsicum, garlic, chilli, tomatoes and apple cider vinegar.  Season with salt and pepper.
Stir to combine.  

Cook on low for 8 - 10 hours or until pork is tender.  Leave to cool.

Once pork is cool, remove pork from sauce.  Using two forks, coarsely shred he pork apart.  Return pork to the sauce and add corn kernels.  Mix well to combine.

In a heavy based saucepan over medium-heat add butter.  Heat until melted and using a wooden spoon add flour, stirring continuously, until you form a roux.  Remove from heat.  Add milk and using a whisk, stir until roux is dissolved.  

Place saucepan back on stove over heat and bring to the boil, stirring continuously.  Lower heat, add mustard and season with white pepper.  Continue stirring until slightly thickened.  Remove from heat. 

Preheat oven to 180 degrees Celsius.

Spray a large baking dish with cooking spray.

Take one burrito and lay flat on chopping board or bench.  Top with 1/6 of the pulled pork mixure.  Roll up and place in baking dish.  Repeat with remaining burritos.

Smother the buritto rolls with white sauce.

Sprinkle with grated cheese and smoked paprika.

(Yes I doubled the recipe and made 2 - oops)

Place in oven and cook for 30 - 40 minutes until cooked through and cheese is melted and golden.

Enjoy with a leafy salad, if desired.


Monday, July 4, 2016

Cowboy Lasagne

Well howdy partner.....

Who would have thought that a traditional Italian classic could have such an American twist to it?  I know that there are lots and lots of different lasagne recipes out there which have all different takes on the meal that has comfort food written all over it!!!

Once I had read this recipe I knew that the whole family would LOVE it... and they did. 

So what makes this lasagne dish different to every other one?  Well you have to eat it wearing a 10 gallon hat. No only kidding.  Amongst the rich meat sauce is pepperoni - yes that's right pepperoni!!  And oh my God did it taste good....

The pepperoni surprisingly gave the sauce such a nice flavour and was not as overpowering as I thought - adding an element of spices as that found on a pizza. 

Jam packed with vegetables plus the addition of fresh herbs this lasagne was definitely worth trying... give it a go.


Cowboy Lasagne
(Recipe adapted from Trisha's Southern Kitchen)

2 tablespoons olive oil
1 medium onion, finely chopped
2 cloves garlic, crushed
500 grams lean beef mince
500 grams lean pork mince
1/2 cup tomato paste
700 gram jar passata
250 grams sliced pepperoni
800 grams diced tomatoes
2 tablespoons fresh rosemary chopped
2 tablespoons fresh tarragon chopped
2 tablespoons fresh basil chopped
1 tablespoon dried oregano
2 carrots grated
2 zucchini grated
1 red capsicum, diced
1 green capsicum, diced
2 cups water
salt
freshly ground black pepper
3 tablespoons butter
3 tablespoons plain flour
4 cups skim milk
2 teaspoons Dijon mustard
ground white pepper
500 gram packet fresh lasagne sheets
1 cup mozzarella cheese, grated
1 cup grated Parmesan
 
In a large frying pan, over medium heat, add the oil and cook onion and garlic until softened. 
 
Add minced beef and pork, breaking into lumps while cooking. Cook until lightly browned and cooked through. 

Add the tomato paste and cook for a further 5 minutes continuously stirring. 

Add passata, pepperoni, tomatoes, rosemary, tarragon, basil, oregano, carrots, zucchini, capsicums and water. Bring to a simmer and simmer, uncovered, for 30 minutes, stirring occasionally.  Season to taste with salt and pepper.

Meanwhile place a large saucepan over medium heat.  Add butter and heat until fully melted.  Add flour.  Using a wooden spoon, mix until a roux is formed.  Add milk and mustard, stir continuously with a whisk until lump free and starting to thicken.  Season with white pepper.  Remove from heat.

Preheat the oven to 180 degrees Celsius.

In the bottom of a large rectangle casserole dish (approximately 22 x 33 cm) spread a layer of the meat sauce. Top with a layer of the lasagne sheets.  Add another layer of meat sauce and then spread with half of the white sauce. Top with another layer of lasagne sheets.  Add another layer of meat sauce.  Top with a final layer of lasagne sheets.  Spread remaining white sauce on the lasagne sheets and sprinkle with cheeses.

Bake until lightly browned and bubbling, about 40 minutes. Allow the dish to stand for 15 minutes before serving. Cut the lasagne into 12 portions and serve.
 
 
(click here for a printable version of this recipe)

Saturday, October 31, 2015

Asian Sweet and Spicy Pork Belly

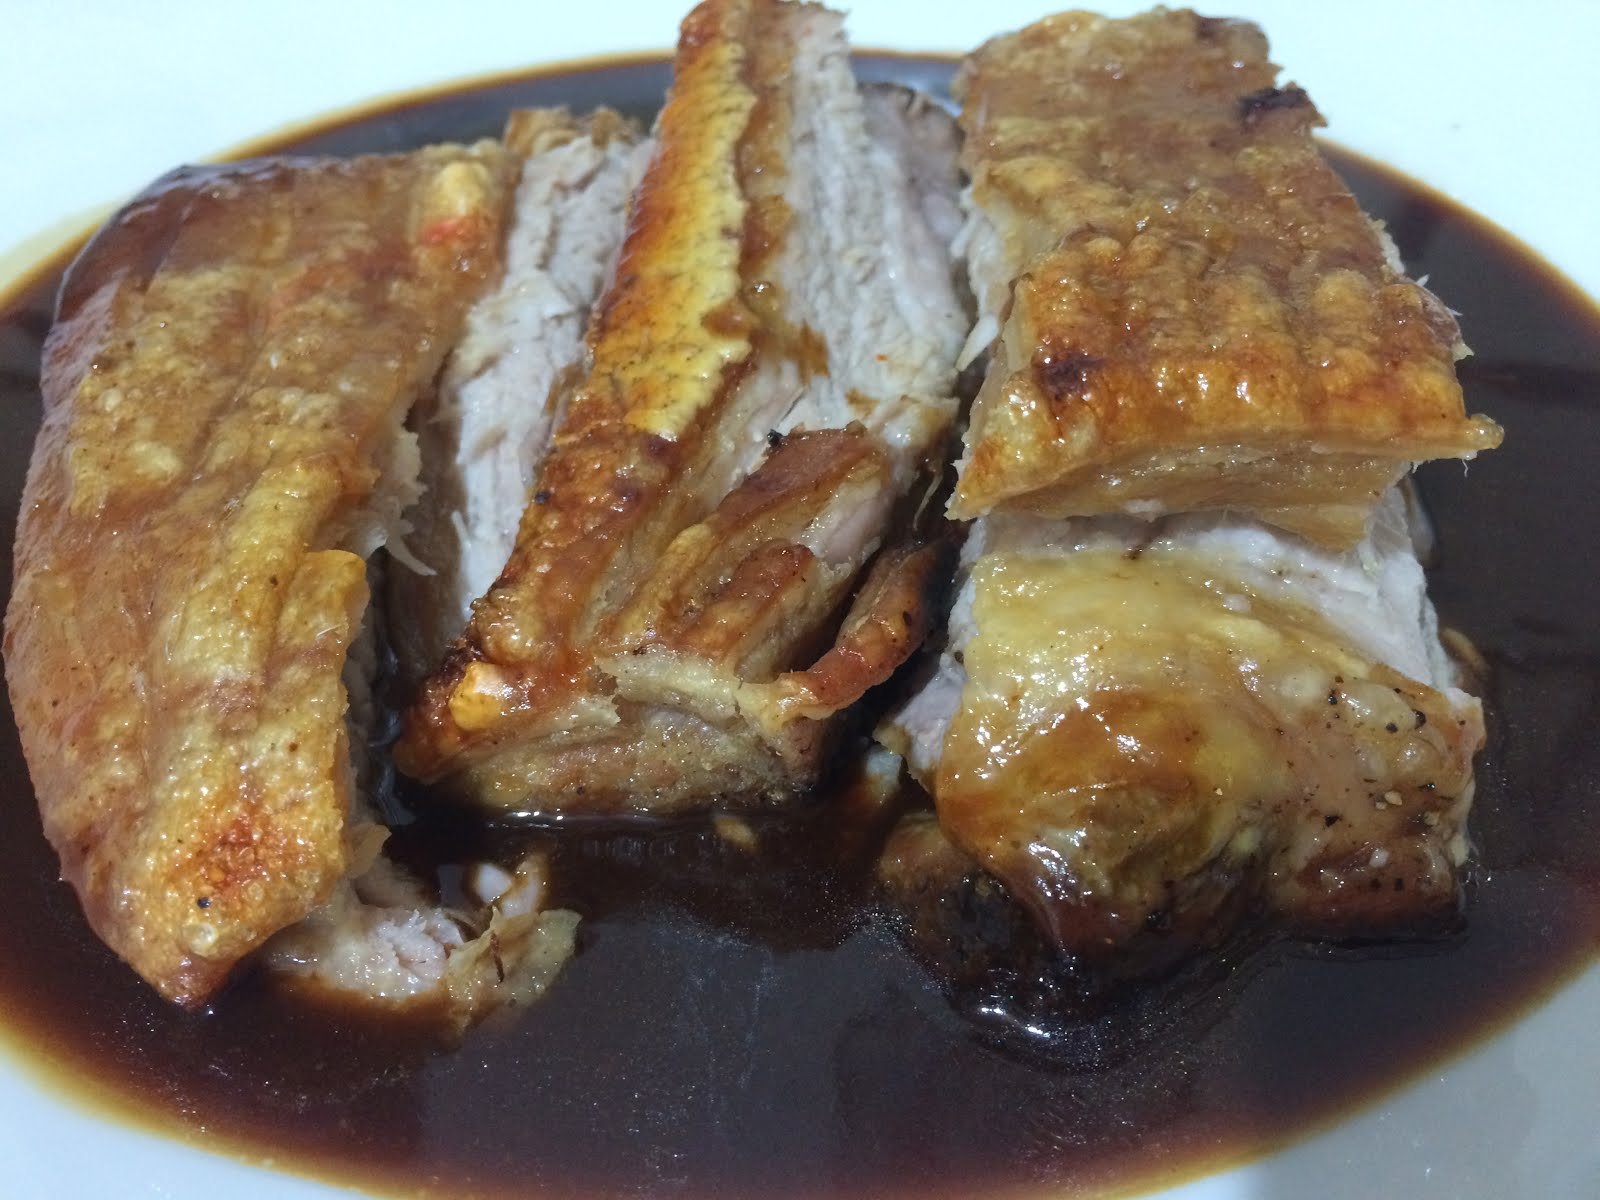
Nothing can be classed as more naughtier than having a huge serve of pork belly for dinner... and I will be totally honest and tell you that we were very naughty as we cooked up a 1.5 kilogram piece of this magnificent meat.

When I say we I mean Noel, Oliver and myself.  Alex who is very fussy with eating pork was staying out for the night so that means the three of us tend to eat food that would not normally get cooked when she is home.

The best pork belly has tender juicy moist meat while being served with crispy crackle.  It must be cooked long and slow then cranked up right at the end to get this correct.

Tonight we had an Asian infused sauce and plain steamed rice with the pork belly and it was perfect.


Asian Pork Belly

Serves: 6

cooking spray
 1 orange, sliced into 6 slices
1 red onion, sliced
6 star anise
1 teaspoon crushed garlic
1 teaspoon crushed ginger
1/2 cup Char Sui Sauce
1/2 cup Spicy Plum Sauce
1 cup chicken stock
1/2 cup dry white wine
2 teaspoons sesame oil
2 tablespoons soy sauce
1.5 kilogram Pork Belly with rind scored
salt
freshly ground black pepper

Preheat oven to 150 degrees Celsius.

Spray a large baking tray or casserole dish with cooking spray.

Layer oranges in a rectangle in the middle of the tray.  Top with onions and star anise.

In a jug add garlic, ginger, Char Sui sauce, Plum Sauce, chicken stock, wine, sesame oil and soy sauce.  Mix well to combine.  Gently pour into the baking tray, do not move the oranges.

Place the pork belly on a chopping board rind side down.  Season generously with salt and pepper. Turn over.  Rub the pork belly rind with paper towel or a clean tea towel ensuring that it is dry all over.  Sprinkle with salt and using your hand rub salt into the scores in the rind.

Place pork on top of the oranges and onions, centering in the baking tray.  Cover with two layers of foil. 

Cook in oven for 2.5 hours.  Remove from oven, remove foil and check level of the sauce.  Add water if it has evaporated too much if necessary.  Check pork to ensure that it is tender and cooked through.

Increase oven to 220 degrees Celsius.  Return pork to the oven and cook for a further 20 - 30 minutes or until crackle is popping and browned.  (You can place under the grill if need be).

Remove from oven, cut into desired pieces and place on a serving tray - keep warm.

Mix together 1 tablespoon of cornflour with 2 tablespoons of water in a small jug.

Drain the juice through a sieve into a small saucepan, disregard solids.  Heat over medium heat until starting to boil. Stir through combined cornflour, continuously stirring, until sauce has thickened.  Remove from heat.

Serve pork belly with the sauce and steamed rice.


Tuesday, October 27, 2015

Glazed Meatloaf

Comfort food doesn't come any better than dishing up slices of meatloaf into a soft white bun with cheese and salad.... and that's what we did tonight.  Everyone here loves quick, fork free dining and this is just perfect.

A glazed meatloaf, somewhat retro is character, is definitely a favourite in our house. Using a combination of beef and pork this meatloaf was moist and as usual I managed to pack it full which was jam packed with vegetables and it was bursting with flavour. I love using fresh herbs as they add so much flavour, dried herbs can be used though and will still give you the flavour.

This meatloaf is perfect hot or cold, served with vegetables or salad and a nice relish or packed up for a picnic..... so versatile but more importantly very yummy!!!


Glazed Meatloaf
(Recipe adapted from A Feast for the Eyes)


Serves: 4
1/2 cup ketchup
1/4 cup light brown sugar
1 1/2 tablespoons cider vinegar
2 large eggs
1/2cup milk
2 teaspoons dijon mustard
1 teaspoon hot sauce or chilli sauce
1 1/2 teaspoons fresh marjoram
1 1/2 teaspoons fresh thyme
salt 
freshly ground pepper
500 grams lean minced beef
500 grams lean minced pork
1 1/2 cups fresh bread crumbs
1/4 cup fresh parsley, minced
1 large onion, chopped
3 garlic cloves, minced
1 zucchini, grated
2 carrots, grated

Preheat oven to 180 degrees Celsius.
 
Stir together ketchup, sugar, and vinegar in a small bowl. Set aside.

In a mixing bowl, whisk the eggs, milk, mustard, and hot sauce together. Add marjoram, thyme, salt, and pepper.

In a large mixing bowl, combine the meats, egg-milk mixture, bread crumbs, parsley, onion, zucchini and carrot.  Mix until well combined (use your hands LOL).

Transfer meat mixture to an oiled loaf pan, place on an oven tray and bake in oven for 15 minutes or until meatloaf feels firm to touch.  Remove from oven.

Line another baking tray with foil and cover with baking paper.  Place this baking tray upside down on top of meatloaf and invert to remove meatloaf from loaf pan.

Brush meat with ketchup glaze. Bake in oven for about 15 minutes, until glaze has set.  Continue to brush meat loaf with remaining glaze every 10 minutes for a further 30 minutes or until meatloaf is cooked through.  Remove from oven and let stand for 5 - 10 minutes prior to slicing.

(Click here for a printable version of this recipe)

Tuesday, September 15, 2015

Spicy Pork, Black Bean, Eggplant and Mushroom Hot Pot

We are sneaking in a few meals this week using different ingredients as our daughter is away on holidays in Japan.  Yes we are cooking with foods she's not a fan off.... LOL!!  Generally I will boast that both my kids have very cultured palates but we are still working on a few ingredients that sometimes don't get to be cooked due to dislikes.  Eggplants and mushrooms are two avoided vegetables with her.  Apparently it's a texture thing.

Needless to say I thought this dish was wonderful.  Full of flavour and easy to make.  I was actually surprised that it was prepared in a flash and cooked in the oven.
I am not a fan of premade black bean sauce so I did use salted black beans (which I purchased at an Asian food store) making the black bean flavour a little more subtle and not as harsh in my opinion. 

Teamed with steamed Choy Sum and plain noodles I nearly thought I was in Asian for a moment.


Spicy Pork, Black Bean, Eggplant and Mushroom Hot Pot
(recipe adapted from WW Program Cookbook 2015)

Serves: 4
ProPoints per serve: 11

1 tablespoon olive oil
1 medium eggplant, cut into 2cm pieces
1 red onion, finely chopped
200 grams button mushrooms, sliced
2 garlic cloves, crushed
2 teaspoons finely grated fresh ginger
1 teaspoon dried chilli flakes
500 grams lean pork mince
4 tablespoons drained salted black beans (or 2 tablespoons black bean garlic sauce)
1 cup water
440 gram packet egg noodles
2 bunches choy sum, chopped

Preheat oven to 180 degrees Celsius or 160 degrees Celsius fan forced.

Heat half the oil in a large flameproof casserole dish over high heat.  Cook eggplant, stirring, in batches, for 2 - 3 minutes or until browned.  Transfer to a plate.

Reduce heat to medium.  Add remaining oil to the dish.  Cook onion and mushroom, stirring for 5 minutes or until softened.  Add garlic, ginger and chilli.  Cook for 30 seconds until fragrant.  Add mince and cook, stirring to break up lumps, for 5 minutes or until browned.

Return eggplant to pan with black beans and water.  Bring back to the boil.  Bake, covered, for 30 minutes or until pork mixture is thick and eggplant is very tender.

Cook noodles as per the packet instructions.  Drain and keep warm.

Meanwhile boil, steam or microwave choy sum until tender.  Drain.

Serve hot pot with choy sum and noodles.