Showing posts with label dessert (cold). Show all posts

Sunday, April 21, 2019

Bakewell Tart

March and April see a string of birthdays in our family.  This year we were bless with our daughter turning 18 and our son turning 21 both in March.  April followed up with our niece's 8th birthday, Dad/Grandad's birthday and of course, hubby turning 50!  No shortage of candles in the House of Murray that's for sure. 

There were several French Vanilla Cheesecakes made along with a couple of Gluten Free Devil's Food Cakes (Chocolate Mud Cakes) but for Dad/Grandad I really wanted to make something that was old school and being that we are all from British background this Bakewell Tart really hit the spot.

A Bakewell tart, as I believe it should be, has a crisp sweet shortcrust pastry base, a layer of thick jam, a generous frangipane filling and flaked almonds.  But honestly, like with everything, everyone has their own versions and there are so many recipes out there to follow.

All I can say is that Dad/Grandad was very happy with his birthday Bakewell Tart (not to mention everyone else in the family).  


Bakewell Tart
(Recipe adapted from Delicious Magazine UK)

Serves: 8 - 10

Pastry
200 grams plain flour, plus extra for dusting
2 tablespoons icing sugar
100 grams unsalted butter, chilled and diced
1 large free-range egg, beaten
1 tablespoon milk

Filling
150 grams  unsalted butter, at room temperature
150 grams caster sugar
3 large free-range eggs, at room temperature, beaten
150 grams ground almonds
grated zest of 1 lemon
6 tablespoons cherry or raspberry jam
2 tablespoons flaked almonds

Sift the flour, icing sugar and a pinch of salt into a large bowl. 

Using your fingertips, rub in the butter until it forms fine crumbs. 

Add the beaten eggs and milk and lightly bring together to form a firm dough, taking care not to handle it any more than necessary. 

Shape into a disc (which will be easier to roll out later), then chill, wrapped in cling film, for 30 minutes.

Preheat the oven to 180 degrees Celsius.   

Roll the pastry out on a lightly floured surface to 4mm thick. 

Lift pastry, trying not to stretch and place over a 23cm fluted, loose-bottomed tart tin or a quiche/flan dish.  Using your fingers gently push the pastry into the tin. Trim the excess and prick all over with a fork. Chill for 30 minutes.


Place the tin onto a baking tray.  Line the pastry case with baking paper and fill with baking beans or rice.

Place tray in oven and bake for 15 minutes, then remove the beans/rice and paper.

Cook for a further 5 minutes until pale golden and dry on top.

Meanwhile beat the remaining butter and sugar together until pale and fluffy. 

Beat in the eggs a little at a time, then fold in the ground almonds and lemon zest.

Spread the jam evenly across the base of the pastry case, then spoon over the sponge mixture, levelling the surface with the back of the spoon. Scatter with almonds. 


Bake for 35-40 minutes until golden, well risen and just set in the centre.


Leave to cool in the tin for 5 minutes, then lift onto a wire rack and leave to cool completely, if desired (we enjoy ours still warm).
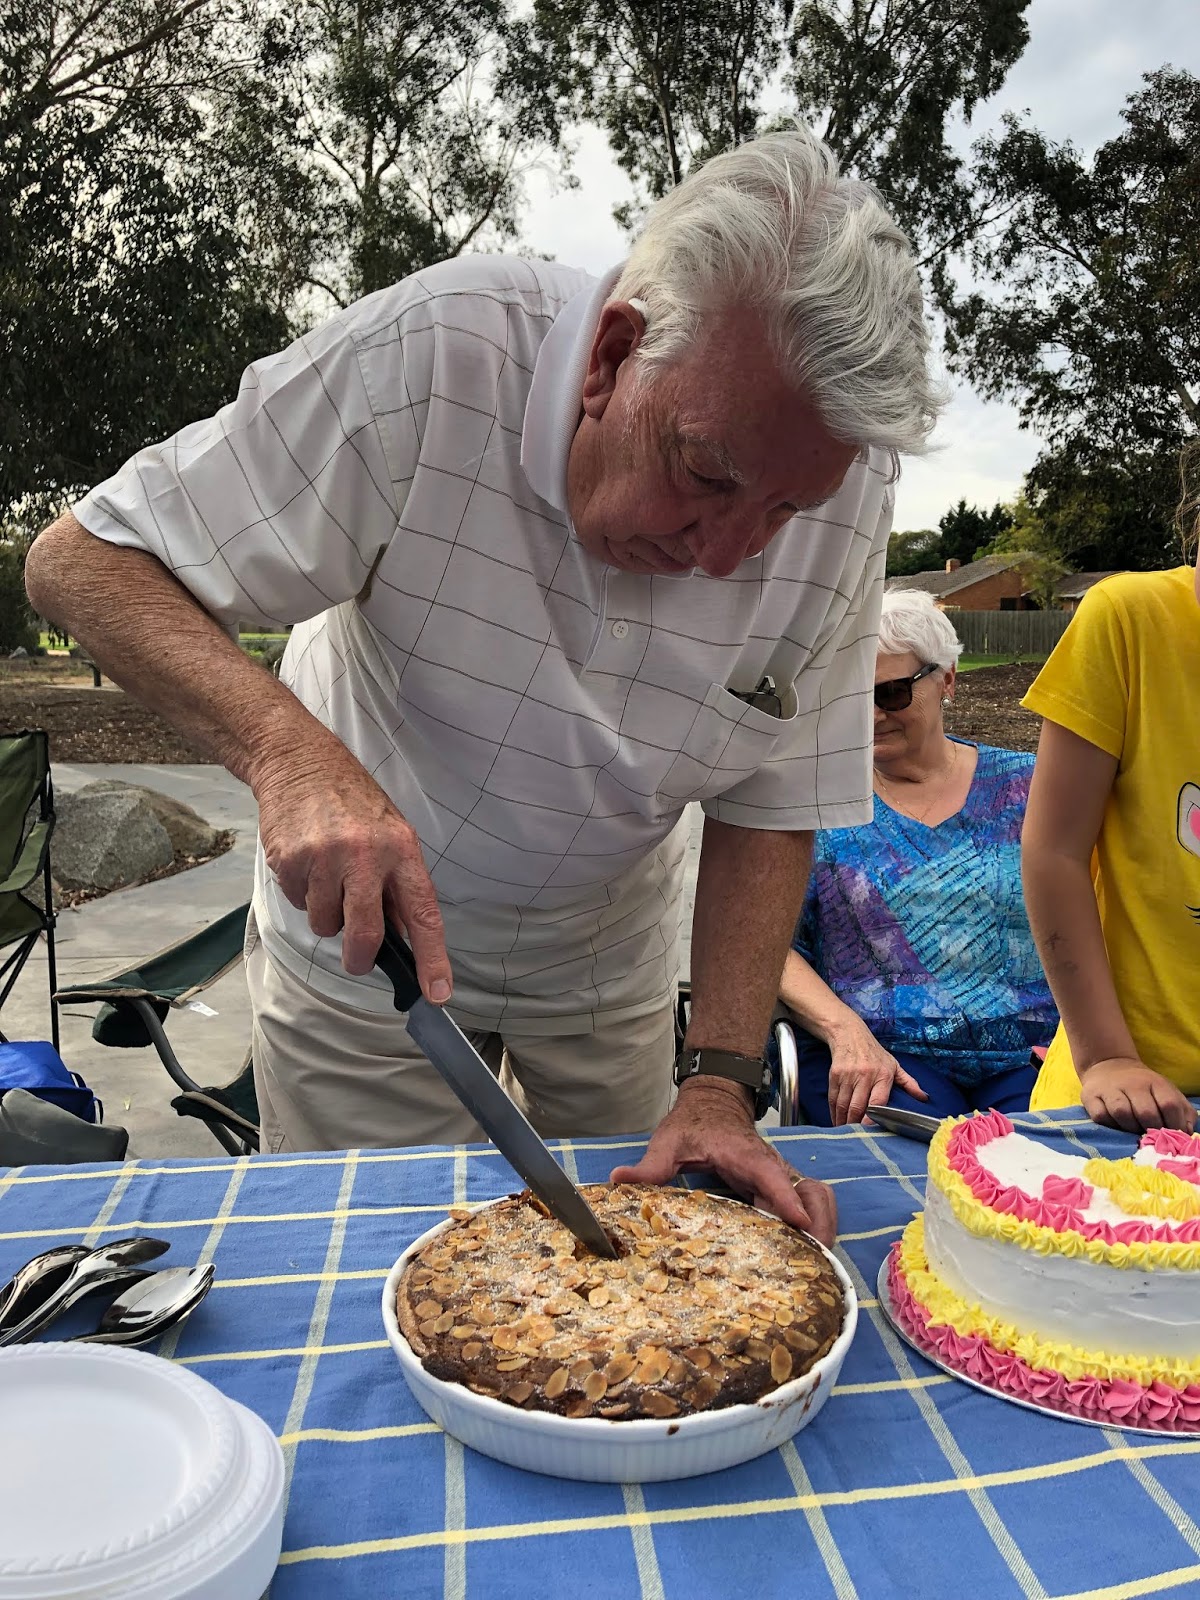

Happy Birthday Dad/Grandad


Sunday, February 26, 2017

French Vanilla Cheesecake with Fresh Berries

I might get this blogging caper happening as a regular happening at some stage in 2017 but I cannot believe that 57 days into the New Year and we still haven't stopped being very busy. Oh well I guess this is just life and how fast it goes by. So much has happened since my last blog (in all honesty without looking I couldn't say when that was). Work has been busy, footy training has started and we have already been on a holiday with the Murray side of the family and a road trip to NSW to visit family and friends in a whirlwind 5 day trip that was a MUST to do. We went to visit my Aunty Maureen and Uncle Dave. In just 10 short weeks we have lost someone very special to me and my family to terminal cancer - Aunty Maureen passed late Thursday evening after such a dignified and amazing journey. Both Mam and I will be attending the service on Friday in Sydney.

I first met my Aunty Maureen, Uncle Dave and my 3 cousins, Steven, Michelle and Alison (the Jones) at the age of 18 months. Strangely the first time I met them was on a Greek Ocean Liner called the Elinis. We were all on our way to start our new lives in Australia - this was in 1973. The Jones were coming from Liverpool. It was then that I also met more family - Lars, Pip, Marica and Annette who were from Finland and Rolf, Anchristin, Ingela and Anna from Sweden. Who would have thought 44 years ago that we would have all still remained so close. Distance may be an issue at times but to me growing up with all of these important people infiltrating my life at some stage, and still today, my life has been truly blessed. While we are not related by blood we are still very much family.

Why am I telling you all of this? Because of my Aunty Maureen. Even while she was sick every time we spoke she told me how she follows our cooking adventures on Facebook all the time and that she was always in awe of our food. She often would encourage me to take up a career in food because she knows that I have the passion for it. It's actually because of her that I am making the effort to post this today.

Today we had close friends Leigh and Lauren over for lunch with their two gorgeous daughters, Harlow and Lenni. Funnily they seem more like family to me than just friends. Knowing that they both love cheesecake, I decided to make my signature French Vanilla Cheesecake with Fresh Berries (to be honest have no idea why I haven't posted about this cheesecake before?) Harlow helped me to decorate the cheesecake just before serving which was a very special moment for me today.

This French Vanilla Cheesecake is so easy to make, is no bake and the vanilla flavour is to die for. It's not an overly sweet cheesecake and I think that the fresh berries are a perfect compliment to the creamy vanilla center. 

For the base today I used Marie Biscuits however you could actually use any biscuit flavour of your choice.  Depending on your pan and the thickness you press the crumb you may have some left over and that is perfectly fine.  Don't make it too thick or it will be hard to cut.  

The recipe calls for it to set overnight but to be perfectly honest 6 hours is long enough.  If you wanted to make a smaller one in a flan tin just half the recipe.

Do yourself a flavour and give it a go.....


French Vanilla Cheesecake with Fresh Berries
(recipe adapted from Taste.com)

Serves: 8

500g packet plain sweet biscuits (such as Marie)
300g butter, melted
600ml thickened cream, whipped
6 teaspoons powdered gelatine
3 tablespoons boiling water
1000g cream cheese, softened
1 1/3 cup caster sugar
300ml thickened cream, extra
1 tablespoon icing sugar
1 tablespoon vanilla bean paste
Fresh berries of your choice, to decorate

Grease a 20 cm round (base) spring-form pan. Using a food processor, process biscuits until fine crumbs. Add butter. Process until combined. Press the biscuit mixture over base and side of prepared pan. Refrigerate for 10 minutes.

In a large bowl, using an electric mixer, beat cream until thickened. Set aside.

Meanwhile, sprinkle gelatine over boiling water in a heatproof jug. Whisk with a fork until gelatine has dissolved. Set aside to cool.

Meanwhile, using an electric mixer, beat cream cheese, sugar and vanilla until light and fluffy.

Gradually beat in gelatine mixture until combined. Fold in whipped cream. Pour mixture into prepared pan, leveling top with a spatula. Cover.

Refrigerate overnight or until set.

When ready to decorate, place cream and icing sugar in a large bowl. Beat with an electric mixer until thickened and forming peaks.

Remove the cheesecake from pan. Decorate top of cheesecake with whipped cream and fresh berries of your choice. Serve.


Monday, June 8, 2015

Low Fat Raspberry Jelly Swirl Cheesecake Slice

Some of you may have noticed a few problems occurring on my blog this last week or so..... I am not 100% sure what happened but I think I have fixed all the problems and at the same time thought I would update the look...... I hope you all like it.
 
Moving on from my IT issues, here in Australia we had a long weekend... so I got to spend some precious time with my family and also in the kitchen.  Lots of things were made, eaten and more importantly enjoyed.  From Roast Beef and Yorkshire Puddings to Homemade Chilli Tomato Ketchup and of course, these little tasty, sweet treats.

Not a heavy cheesecake - in fact very light and fluffy.  The raspberry jelly added a nice texture and was a beautiful replacement to a fruit sauce or a jam.  I am guessing that you could actually use any flavour jelly as long as you think that the flavours would work well with cheesecake.

Very easy to make - practically in the fridge setting in around 40 minutes and to be honest gone in about 5 minutes.


Low Fat Raspberry Jelly Swirl Cheesecake Slice
(Recipe adapted from Taste.com)


Serves: 24
ProPoints per serve: 3


250g packet Marie biscuits
100g reduced-fat spread, melted
9g sachet low-kilojoule raspberry jelly crystals
2/3 cup boiling water
2 teaspoons gelatine powder
500g light cream cheese, softened
1 tablespoon caster sugar
1/2 cup reduced-fat thickened cooking cream
250g reduced-fat vanilla yoghurt

Preheat oven to 170 degrees Celsius.
 

Grease a 3cm-deep, 17cm x 27cm (base) slice pan. Line base and sides with baking paper, allowing a 5cm overhang at long ends.

Process biscuits until mixture resembles fine breadcrumbs. Add spread. Process until just combined. Press mixture evenly over base of prepared pan. Refrigerate for 20 minutes. Bake for 10 minutes. Cool.

Place jelly crystals in a small, heatproof jug. Add 1/2 cup boiling water. Using a fork, whisk until dissolved. Add 1/2 cup cold water. Stir to combine. Pour jelly into a shallow, heatproof dish. Refrigerate for 30 minutes (jelly consistency should be similar to thickened cream).

Place remaining 2 tablespoons boiling water into a small, heatproof jug. Sprinkle over gelatine. Using a fork, whisk until gelatine dissolves. Set aside.

Process cream cheese, sugar, cream and yoghurt until smooth and combined. Fold gelatine into cream cheese mixture.

Pour mixture over base. Using a tablespoon, dollop jelly over mixture. Using a butter knife, swirl together. Cover and refrigerate for 4 hours or overnight.

Cut into 24 slices.


Friday, June 17, 2011

1 Minute Berry Ice Cream

I saw this recipe on Jamie Oliver's 30 Minute Meals and just knew it would go down a treat with the kids!

Frozen berries make it an instant frozen dessert but it can be frozen also to firm it up. The hint of mint from the fresh mint leaves gave it a pleasant aftertaste also.

I loved this recipe as there is no cream - just low fat natural yoghurt complimented with some honey to provide sweetness. A very easy and low ProPoint dessert that anyone can make.

And as Jamie said in the episode I was watching you can literally put anything you want into it - just use a little imagination. Watch out - I will be experimenting with this one.


1 Minute Berry Ice Cream
(recipe sourced from Jamie Oliver 30 Minute Meals)

Serves: 8
ProPoints per serve: 2

500 grams frozen berries
500 grams low fat natural yoghurt
4 tablespoons honey
fresh mint leaves


Place berries, yoghurt, honey and mint leaves. Blend until smooth.

Place in a sealed container and freeze if not using immediately.

(click here for a printable version of this recipe)

Sunday, November 22, 2009

No Bake Chocolate Orange Tarts

I combined a chocolate tart that I found over at Almost Bourdain with some orange and VOILA - a tart that reminded us all of a family favourite, Terry's Chocolate Orange! Warning very very rich but this didn't stop all the family eating them!!!


No Bake Chocolate Orange Tarts
(Recipe adapted from Almost Bourdain)

Makes: 10
Points: WW Danger Beware


400 grams digestive biscuits
200 grams unsalted butter, chopped
2 tablespoons golden syrup
200 grams milk chocolate, chopped
200 grams dark chocolate, chopped, plus extra melted chocolate to drizzle
1 teaspoon orange essence
4 tablespoons pure icing sugar, sifted
400 ml thickened cream, plus extra to serve
1 Terry Chocolate Orange, for decoration

Place the biscuits in a food processor and pulse to form fine crumbs. Place the butter and golden syrup in a saucepan over low heat, stirring until butter melts. then pour into processor and pulse to combine. Press the biscuit mixture into the base and sides of ten 10cm loose-bottomed tart pans. Chill until required.

Melt the milk and dark chocolate together in a heatproof bowl over a saucepan of simmering water (don't let the bowl touch the water). Remove from heat, stir until smooth, then allow to cool for 5 minutes. Stir in the orange essence and fold in the icing sugar.

Whip cream until soft peaks form, then fold into the chocolate mixture. Pour into the tart pans and chill for at least 2 hours until the chocolate filling is set.

Decorate with melted chocolate and wedges of Terry's Chocolate Orange.

(click here for a printable version of this recipe)

Wednesday, July 8, 2009

Carrot, Pineapple and Zucchini Cake

Not only did the ingredients in this cake make me raise my eyebrows but so did the taste!! I love carrot cake but the use of zucchini along with pineapple adds just a new dimension to the taste, texture and moistness to this cake.

Topped with lemon flavoured cream cheese icing it's definitely a cake that wants you to eat seconds.


Carrot, Pineapple and Zucchini Cake
(recipe source: WW Secrets Of Success)


Serves: 16
ProPoints per serve: 4
Points per serve: 2

cooking spray
1/4 cup (50g) reduced fat butter or spread
1/2 cup caster sugar
1 egg, lightly beaten
1 eggwhite
1 x 200g can crushed pineapple in juice
1 medium carrot (120g) peeled and grated
1 medium zucchini (150g) trimmed and grated
1 3/4 cup self raising flour, sifted
1 teaspoon bicarbonate of soda
1 teaspoon groung cinnamon
1/4 teaspoon ground nutmeg
125 grams light cream cheese
1/4 cup icing sugar mixture, sifted
1 teaspoon lemon juice

Preheat oven to 180 deg C.

Spray a 22cm square cake pan with cooking spray. Line base and sides with non-stick baking paper.

Using an electric mixer, beat spread and caster sugar until light and creamy. Gradually add the combined egg and eggwhite, beating until combined. Stir in the pineapple, carrot and zucchini. Stir if the sifted flour, bicarbonate of soda and spices.

Spoon cake mixture into pan, smooth surface. Bake for 35 - 40 minutes or until golden and cooked when tested with a skewer. Cool in pan.

Meanwhile, make cream cheese frosting. Using an electric mixer, beat cream cheese and icing sugar until smooth. Beat in juice.

Remove cooled cake from pan and spread frosting evenly over top of cooled cake.

Tuesday, June 30, 2009

Raspberry Meringue Ice Cream

One thing I really do need to make more of is dessert!!

Honestly we are not really a dessert family only because over the years I haven't made that many desserts and therefore my family do not expect it.

But sometimes when I make a dessert and it's a nice on there is somewhat of a frenzy around the dinner table, you know the type of frenzy seen only when feeding animals that haven't been fed for awhile.

I decided to make or should I say mix up an icecream dessert that I had also seen on the Weight Watchers Forums. Quite easy as it is a recipe that calls for pre-made icecream and shop bought meringues so as far as effort and time, this dessert was perfect.


Raspberry Meringue Ice Cream
(recipe adapted from Newchick)

Serves: 10
Points per serve: 2.5

1 litre tub Light Vanilla Ice Cream
300 grams raspberries, thawed if using frozen
50 grams meringue shell, broken into pieces
fresh berries to serve, optional


Line a 1 1/2 litre loaf tin with baking paper. Leave ice cream out to thaw to room temperature.

When thawed, place ice cream in a bowl and stir lightly with a wooden spoon. Reserve some raspberries to place on the bottom of the loaf tin before stirring the remaining raspberries and meringue pieces into the ice cream liquid.

Place the reserved berrieds on the bottom of the tin. Pour mixture into the tin and place back in the freezer until solid.

When ready to serve, turn onto a platter and decorate with the fresh berries and additional crumbled meringue. Slice and serve.

Monday, February 9, 2009

Raspberry Brownie Slice

Once again Alex wanted to cook something on Sunday and when she wants cook it's generally something sweet. After a short time flicking through some cookbooks she came across this recipe and with having all the ingredients at home it was full steam ahead.
.
.
Raspberry Brownie Slice
Source: WW Easy Entertaining Cookbook
.
Serves: 16
Points per serve: 2.5pts
.
cooking spray
80g reduced fat butter
3/4 cup soft brown sugar
1/3 cup cocoa powder
1/2 cup skim milk
2 eggs, lightly beaten
1 1/4 cups self raising flour
1/2 cup dark choc bits
150g frozen raspberries
icing sugar to serve
.
Preheat oven to 180 deg C. Spray and line a 19cm x 29cm slice pan.
.
Place the butter, sugar, cocoa and milk in a small saucepan. Stir over a low heat stirring until smooth. Transfer to a large bowl and cool for 5 minutes.
.
Stir the eggs, flour, choc bits and raspberries into the cocoa mixture. Spoon the cake mixture into the pan and bake for 45 - 50 minutes or until cooked when tested with a skewer. Stand for 10 minutes before turning out onto a wire racke to cool.
.
Serve cut into squares and dusted with the icing sugar.
.
Note: Store the brownies in an airtight container for up to 3 days.

Wednesday, February 4, 2009

Berry Dream

Alexandria, who will be turning 8 in March, decided it had been a long time since we had dessert. Don't get me wrong Noel and the kids all love desserts, and although I can sometimes be persuaded I am actually not a sweet tooth. Plus there is the fact that I am always trying to lose weight!

Since buying all the Symply To Good To Be True cookbooks (5 in a set) there has been one dessert that Alex has been longing to try, and that is this one - Berry Dream. Needless to say her wish came true so she helped make, decorated, served and also enjoyed eating this.


Berry Dream
Source: Symply To Good To Be True 5
.
Serves: 8
Points per serve: 1pt
.
2 cups frozen mixed berries
3/4 cup chilled evaporated light milk
2 x 200g tubs diet berry yoghurt
1 sachet lite raspberry jelly crystals
1/4 cup boiling water
.
Before starting make sure evaporated mik is chilled.
.
Semi defrost berries.
.
Using an electric beater beat chilled evaporated milk until thick and stiff peaks form. Pour in yoghurt then add berries and beat until well combined.
.
Dissolve jelly crystals with boiling water, pour into bowl beating until all mixture is blended (there should still be small pieces of berries through the mixture).
.
Either leave in bowl or divide into 8 dessert dishes. Refrigerate until set.
.
.
Note: As you can see our desserts were decorated with a swirl of thickened cream and some chocolate shavings... these are additional and not part of the recipe.