Showing posts with label noel. Show all posts

Sunday, November 18, 2018

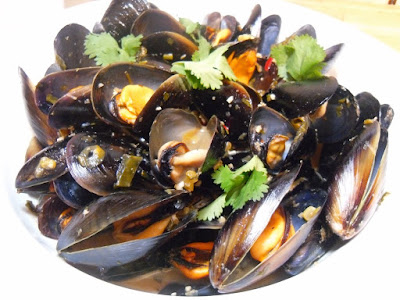
Chilli and Tomato Mussels with Basil

Well we are still busy at the new place - to be honest it looks like an episode of hoarders however with having only been there just over 3 weeks we have made some progress. Rooms are slowly being set up, boxes are getting unpacked one by one or targeted if we desperately need something (that's if we remember which box it's in) and it is starting to feel like home.  However needless to say we are all extremely exhausted and running on empty.and at times enthusiasm.  This year is Christmas at our house and a few important visitors in December so we need to be consistent with our unpacking and organising. 

After another big weekend Sunday's supper needed to be quick and easy.  I knew it would be supper as we had gone out for a Yum Cha lunch at Maxim Saigon, Springvale, with our good friends Kelee and Dave.  While out shopping Saturday morning I noticed mussels in the fish shop and with not having them for such a long time possibly due to seasonal reasons I knew exactly what we were having.  I had all these big plans for them but literally I had hit the wall by the evening.

Thankfully my husband took the reigns and made supper a success. It was a magic dish - mussels with a splash of wine, laced with chilli and tomatoes with flavoursome basil tones.  Noel's creation was on the table within 30 minutes and the majority of the time was spent doing preparation.  If you love mussels you should definitely give this dish a try.


Chilli and Tomato Mussels with Basil
(Recipe courtesy of Noel Murray)

Serves: 4
Smart Points per serve: 5

2 tablespoons extra virgin olive oil
1 brown onion, diced
2 red cayenne chillis, sliced (deseeded if preferred)
2 green cayenne chillis, sliced (deseeded if preferred)
1 tablespoon crushed garlic
6 truss tomatoes, chopped
freshly ground black pepper
1 bunch basil, stalks removed
1 cup hot water
1 teaspoon chicken stock powder
1 cup dry white wine
2 kilograms mussels, cleaned (debearded and rinsed)

Add olive oil to a large pan or wok and heat over medium heat.

Add the onion, chilli, garlic and tomatoes and cook, stirring regularly, for approximately 5 to 10 minutes or until onion has softened. Season with black pepper.

Stir through the basil and cook until starting to wilt and the mix is fragrant.

Mix together the water and chicken stock in a small jug. Add chicken stock and wine to the pan, stir and bring to a simmer.

Increase heat to high and add the mussels. Give it a quick stir and cover with a lid. Cook, shaking the pan occasionally, for 3-4 minutes until all have opened.

Remove from the heat and serve with some nice crusty bread if desired.


(Click here for a printable version of this recipe)

Tuesday, January 16, 2018

Echidna Meatballs aka Porcupine Meatballs

Well I definitely surprised myself while menu planning this week!  Not because we planned a full week of super quick and easy meals to get us to Friday as we have a busy week but I was surprised, actually stunned, that I hadn't blogged this gem of a recipe!  And I cannot even begin to think why?

My mam had a variety of homestyle dishes that she cooked as staples when we were growing up as did everyone's mothers.  Ours always had a British twist as although we were living in Australia my parents were born and raised in Wales.  So we had Shepherds Pie, Bangers and Mash with Onion Gray, Lamb Stew, Curry Pie, Toad in the Hole and of course, Eggs Beans and Chips.  These were the meals that were regularly on the table and we all enjoyed them.  I can tell you that there were never any leftovers when these went on our table.  In fact I still get a little excited if I know any of these dishes are what we are having for dinner.

However, my kids, have had to deal with me creating my own list of family favourite dinners.  As easy go to meals especially during the working week items that can be found on the menu planner can include Hamburgers, Taco's, Penne Boscaiola, Devilled Sausages, homemade pizza (your choice of topping), Chicken Parmagiana, Echidna Meatballs and of course, Eggs Beans and Chips.

I understand many of you may have or not had any of the dishes I have just mentioned so just for the record Toad in the Hole does not contain any toads, Porcupine Meatballs do not contain any porcupine meat and Echidna Meatballs definitely do not contain any Echidna meat.  Are we clear?  I am happy now that we have that sorted!

Firstly this recipe is based on Porcupine Meatballs, an American dish that has apparently been a staple for generations.  As we live in Australia I changed the name to Echidna meatballs based on the fact that we don't have Porcupines down under.  The Echidna, or Spiny Anteater, is the equivalent to it's Northern Hemisphere counterpart.

So what is an Echidna meatball?  Basically its a beef meatball with raw white rice added during the mixing stage.  Once the meatballs start cooking the rice starts protruding from the meat.  This resembles a Echidna or a Porcupine.  It's quite a groovy cooking technique and look pretty cool, especially if you are a kid.

Echidna meatballs are a very comforting and easy dish to make. The tender meatballs flavoured with herbs are cooked in a delicious tomato sauce.  There is no need to brown up the meatballs prior as they keep their shape well.  Note there is not a lot of stirring required during cooking so please do not be tempted to continually stir as you will ruin the effectiveness of the rice poking from the meatball.

Like with most hand me down recipes, googles or cookbook searches you will find a multitude of different versions all claiming to the best.  This recipe is nice, tasty and very easy but is it the best?  We think so but I am unsure.  Many use canned tomato soup but we find that using a can of condensed soup seems to make the sauce very sweet.  We prefer to add some diced fresh tomatoes along with canned and passata.  Add some chilli flakes if you wish to spice up the tomato sauce or even some different herbs.  Its a great recipe to experiment with also.

This is a perfect one pot weeknight wonder, even more so for me tonight as the man of the house, Noel, cooked dinner.  It was wonderful to come home from work and smell the deliciousness as I opened the front door.

Serve with mashed potato or plain pasta and I am sure your family will love them.


Echidna Meatballs aka Porcupine Meatballs

Serves: 4
SmartPoints per Serve: 7

500 grams lean beef mince
1/3 cup raw long grain rice
1 teaspoon beef stock powder
salt
ground black pepper
1 egg white 
4 fresh truss tomatoes, diced
350 ml Italian passata
1 x 440g can diced tomatoes
1 onion, finely diced
1 cup water
2 teaspoons chicken stock powder 
2 teaspoon crushed garlic
2 teaspoon dried oregano
1 tablespoon chilli flakes (optional)

In a mixing bowl add mince, rice, stock powder and egg white. Season with salt and pepper.  Using your hand, mix all ingredients together until combined.  Shape into twelve even sized meatballs.

Place the tomatoes, passata, canned tomatoes, onion, water, chicken stock powder, garlic, oregano and chilli, if using, in a flameproof casserole dish or heavy based frying pan (with a lid). Mix well and bring to the boil, reduce heat to low and simmer for 10 minutes.  Season with salt and pepper.

Gently place meatballs in tomato sauce.

Put lid on casserole dish and gently simmer for 1 hour, stirring occassionally, until meatballs are cooked and rice is protruding.

Serve with mashed potatoes or pasta (add SP as required).


Tuesday, January 31, 2017

Sticky Chilli Barbecue Chicken Cutlets

It feels like a lifetime since we've chatted about our cooking adventures (well it's been many weeks - actually nearly 2 months) and I have missed sharing our experiences on my blog. So here goes my first blog post for 2017. By the way, Happy New Year. I hope that 2017 is kind to you in every way possible.

2016 ended up being the year of unorganised chaos and frantic lifestyle and 2017 has pretty much started off the same way.  But it is what it is and more importantly through all the experiences in the past two months, both good and bad, it has made memories and learnings for all in the House of Murray.  Whilst we have been busy rest assured that we didn't' stop cooking.

So after finally deciding I needed to get my blogging arse back into gear I hope you enjoy this little number we prepared early (well early this evening!)  I say we but in all honesty I made the coleslaw and chopped the potatoes - Noel is responsible for marinating and cooking the chicken.

Sticky Chilli Barbecue Chicken Cutlets, perfect for a mid summers' evening dinner - in fact it tasted that good it would be perfect anytime of the year.  Sticky with a hint of heat and smokiness enveloped the tender juicy chicken - melt in your mouth perfect.

The Chilli component is completely up to your discretion - you can use what ever chilli sauce you like - mild, medium or hot.  Please bear in mind however that using sweet chilli sauce would only add to the sweetness.  We used Maggi Chilli Sauce but you could use Sirracha Sauce, which contains less sugar than most chilli sauces.  Add less sauce for less heat obviously.

Being a "sticky" dish it's quite high in sugars - therefore it's not a meal that should be eaten a lot if you are trying to lose weight but honestly if you want to treat yourself for one meal - this recipe should definitely be on your "to try" list,.  Obviously I will be attempting to modify the recipe to make it more Weight Watcher friendly in the near future.  But in the moment - I really enjoyed dinner tonight.


Sticky Chilli Barbecue Chicken Cutlets
(recipe adapted from Taste.com)

Serves: 4

4 cups water
2 teaspoons salt
1 teaspoon whole black peppercorns
1/2 lemon, rind coarsely chopped, juiced
5 fresh thyme sprigs
1 tablespoon brown sugar
8 (about 1.4kg) chicken thigh cutlets
1 tablespoon extra virgin olive oil

Barbecue sauce
1 1/2 cups tomato sauce
1/3 cup chilli sauce, to taste
1/2 red onion, coarsely chopped
2 large garlic cloves, peeled
1 tablespoon brown sugar
1 tablespoon molasses or honey
1 tablespoon Worcestershire sauce
5 fresh thyme sprigs, leaves picked
2 teaspoons smoked paprika
1 teaspoon dry mustard powder
1 teaspoon ground cumin

Combine water, salt, peppercorns, lemon juice and rind, thyme and sugar in a glass or ceramic bowl. Add chicken and stir to combine. Cover. Place in fridge for at least 30 minutes or up to 3 hours to brine.

For the barbecue sauce, process all the ingredients until smooth. Bring to a simmer in a saucepan over medium-low heat. Reduce heat to low. Simmer, partially covered, stirring occasionally, for 15-20 minutes or until thickened. Season. Reserve one-third of the sauce.

Heat a barbecue grill on medium. Drain chicken from the brine and pat dry with paper towel. Rub with oil, then season. Cook the chicken, turning, for 10 minutes. Baste with marinade and continue cooking, basting generously with marinade and turning every 3 minutes, for 20 minutes or until the chicken is cooked through.

Serve chicken with reserved sauce and sides of your choice.

Saturday, December 3, 2016

Heston’s Barbecue Chicken Wings

Noel was on a mission recently to cook chicken wings.  This fascination started when we went to the Loch Festival with our gorjus friends Kelee and Dave.  We had the most devine Buffalo Chicken Wings there and the men have been talking about them ever since.

I love the fact that Noel loves to cook and he spends hours googling and reading recipes. However saying this he has been know to create his own marinades - successfully I might add. He recently came across this recipe for Heston Blumenthal's Barbecue Chicken Wings and talked about making them for a couple of weeks.  I have to admit they sounded good on paper but they were magnificent in real life.

To quote the great man himself Heston said "Chargrilled chicken wings slathered in a rich, sticky sauce has got to be one of the all-time barbecue classics. This recipe will have those wings flying off the barbecue faster than you can make them. A little lime marinade to season and soften the meat, a coating of sauce made from the gutsy, punchy flavours and a sprinkle of sesame seeds for a toasted note and some crunch – and you’re good to go. Especially with a cooling, easy-to-make blue cheese dip on the side."


Heston’s Barbecue Chicken Wings
(Recipe adapted from Waitrose.com)

Serves: 4 – 6

For the barbecue sauce
2 cups chicken stock
100 grams white caster sugar
100 mls rice wine vinegar
200 mls tomato ketchup
1 tablespoon mushroom oyster sauce
1 tablespoon Worcestershire sauce
1 tablespoon sesame oil
1 tablespoon Tabasco Pepper Sauce, to taste
2 teaspoon Cayenne pepper

For the cheese dip:
300 grams blue cheese
300 ml soured cream

For the chicken wings:
juice of 4 limes
2 teaspoon salt
4 tablespoon oil
1 kilogram chicken wings
50 grams sesame seeds, toasted

To make the barbecue sauce, place the chicken stock in a pan over medium-high heat and reduce until it is approximately 150 ml. Place another pan over medium heat, add the sugar and cook until a medium caramel is formed. Slowly add the rice wine vinegar while whisking until the caramel has dissolved. Add the remaining sauce ingredients and whisk until well combined. Set aside.

To make the blue cheese sauce, removing any rind from the cheese, chop into small pieces and add to a bowl with the soured cream, and use a hand blender to blitz until smooth if desired. Put into a small container and allow to stand in the fridge.

When ready to cook, place the juice, salt and oil in a bowl, add the wings and toss until well coated. Allow to stand in the fridge for 45 minutes. Once the time has elapsed, place the wings on the preheated barbecue and cook for 20 to 25 minutes, turning them every few minutes until cooked through with no pink meat. Once cooked, transfer the wings to the bowl with the barbecue sauce and toss to thickly coat. Remove and transfer the wings to a clean bowl then sprinkle over the toasted sesame seeds.

Serve in a bowl with the cheese sauce, celery and any remaining barbecue sauce on the side.


Thursday, June 9, 2016

Margherita with Onion and Chilli Pizza

While there is only two of us eating pizza tonight we both like to come up with our own creations and always make two pizzas.
 
Noel tends to try and keep his toppings basic but I have to say that they are always full of flavour and super yummy.  Adding onion, chilli and oregano to his Margherita put such a different spin on the good old cheese and tomato pizza that everyone loves.
 
I do have to admit one thing though - my man is getting really good at making pizza bases.


Margherita with Onion and Chilli Pizza

Serves: 4
 
One serve of Noel's Pizza Base or pizza base of your choice
cooking spray
2 tablespoons tomato paste
1 clove garlic, crushed
1/2 brown onion, sliced
1/2 bunch of fresh basil, leaves removed
8 bambino Bocconcini balls
2 teaspoons chilli flakes
1 teaspoon dried oregano

Preheat pizza oven or oven to 220 degrees C.

Spray pizza tray with cooking spray.

Stretch pizza dough on to the pizza tray or place pita bread on the pizza tray.

Mix tomato paste with garlic.  Spread tomato paste all over the base.

Top with  onion and basil leaves. Place Bocconcini evenly over pizza and sprinkle with chilli flakes and oregano.l

Cook in oven for 15 - 20 minutes or until cheese is bubbling and is cooked through.

(Click here for a printable version of this recipe)

Saturday, November 7, 2015

Noel's Pizza Dough

Since Noel received the pizza oven for his birthday in April we have been experimenting with pizza's naturally. It's been fun with trying all different bases from using shop brought to making our own. And while some have been disastrous and messy its been great entertainment to say the least!

A lot of research has gone into our pizza capers - both reading (thank God for Google) and by trial and error.  Definitely the flour has a lot to do with it.  We have purchased some Italian Pizza Flour, which is a high protein flour. According to Lighthouse Baking great dough comes from using a flour with a protein level of 12%. The high gluten level in the flour gives the dough a good elasticity and robustness. Gluten is the key to great pizza dough; it forms strands which bind together like a web during the mixing and kneading process, air bubbles are trapped in this web and expand during cooking allowing the pizza dough to rise. During baking the stretched gluten becomes rigid as the moisture evaporates from the heat of the oven and sets the dough structure. (Not good if you are gluten intolerant - sorry).

However I take my hat off to pizza dough makers - it's not easy that's for sure.  To be honest I think we both started this "dough"quest thinking how hard could it be?  Some flour, some yeast, some water..... well here is the thing... it is HARD!!  

One of my all time favourite pizza bases is at La Camera (I would love to meet the chef there) where their Garlic and Cheese Pizza is to die for.... so soft but not too thick either.  As you can imagine every time we mix a new batch of dough I am thinking about this pizza and praying ours comes out the same... tonight it was very close so we were both really happy.

We are not at the point of spinning the dough to stretch it or throwing it in the air like in the movies but we are getting somewhere with our dough making skills......


Noel's Pizza Dough

Makes: 4 large pizza bases

650 ml lukewarm water
17 grams instant yeast
1 tablespoon caster sugar
900 grams pizza flour
100 grams semolina
1 teaspoon salt
1 tablespoon olive oil

In a medium jug combine water, yeast and sugar.  Mix well and allow to stand until yeast is fully dissolved.

Place flour, semolina and salt into a large bowl and mix to combine.  We used the blender with the flat paddle but wooden spoon will be fine.

On speed number 1, if using blender, add half the water and mix until it starts to form a dough.  Add remaining water and continue to mix until a smooth dough starts to form approximately 5 minutes. Change to the dough hook and continue to mix dough for a further 10 minutes.

If using your hands continue to mix until all flour is combined and a smooth, soft and springy dough is formed.


Place olive oil in a large bowl and swirl it around to ensure that all of the inside of the bowl is greased.

Place dough in the bowl, cover with plastic wrap and place in a warm position.  Allow dough to double in size, approximately 1 1/2 - 2 hours.


Once risen, take out of bowl and divide into 4 balls.  Do not knead.

Spray pizza trays with cooking spray and hand press the dough into shape.

Top with your favourite toppings.


Remaining pizza dough can be wrapped in plastic wrap and frozen.  Defrost at room temperature prior to using.

Monday, October 5, 2015

Char Siu Beef and Vegetable Kebabs


It was definitely BBQ weather tonight so we had our first official House of Murray Summer 2015/2016.

On the menu was Char Siu Beef and Vegetable Kebabs and I decided to team these with a nice healthy serve of Sesame and Soy Stir Fried Vegetable Noodles.

Kebabs can be so much fun. To be honest anything you can eat fork free is fun, right? When I say kebabs can be fun I mean that it just starts as a plain bamboo skewer and you can put anything on it, marinate it, pop them on the BBQ  and voila you have an instant meal on a stick!!

Noel was in charge of the marinating of these bad boy kebabs and they were, as always, delish.  The marinade itself was Asian inspired hence why I felt the need to serve with some noodles.  A Char Siu Sauce base with undertones of garlic, ginger and chilli made the beef and vegetables dance on my tastebuds with every mouthful.


Char Siu Beef and Vegetable Kebabs

Serves: 4

8 bamboo skewers
1/2 cup Char Siu Sauce
1/4 cup dry white wine
1 teaspoon crushed garlic
1 teaspoon grated ginger
1 teaspoon sambal oelek
800 grams beef, cut into 2 cm cubes
1 red capsicum, cut into 2 cm pieces
1 green capsicum, cut into 2 cm pieces
1 onion, cut into 2 cm pieces


Soak bamboo skewers in water for 30 minutes.  Remove skewers from water.

In a medium jug mix together the Char Siu Sauce, wine, garlic, ginger, and sambal oelek.

Starting with a piece of capsicum, thread one piece onto a skewer, then a piece of onion, followed by the beef.  Repeat process 3 times or until skewer is full.  Continue with all 8 skewers.

Place in a shallow baking dish.  Pour over marinade, turning to ensure that the skewers are coated.  Allow to marinade for 2 - 3 hours or overnight if time permits.

Heat a BBQ plate or grill plate and cook skewers, turning occasionally, for 5 - 10 minutes or until beef is cooked to your liking.

Serve.


Wednesday, September 24, 2014

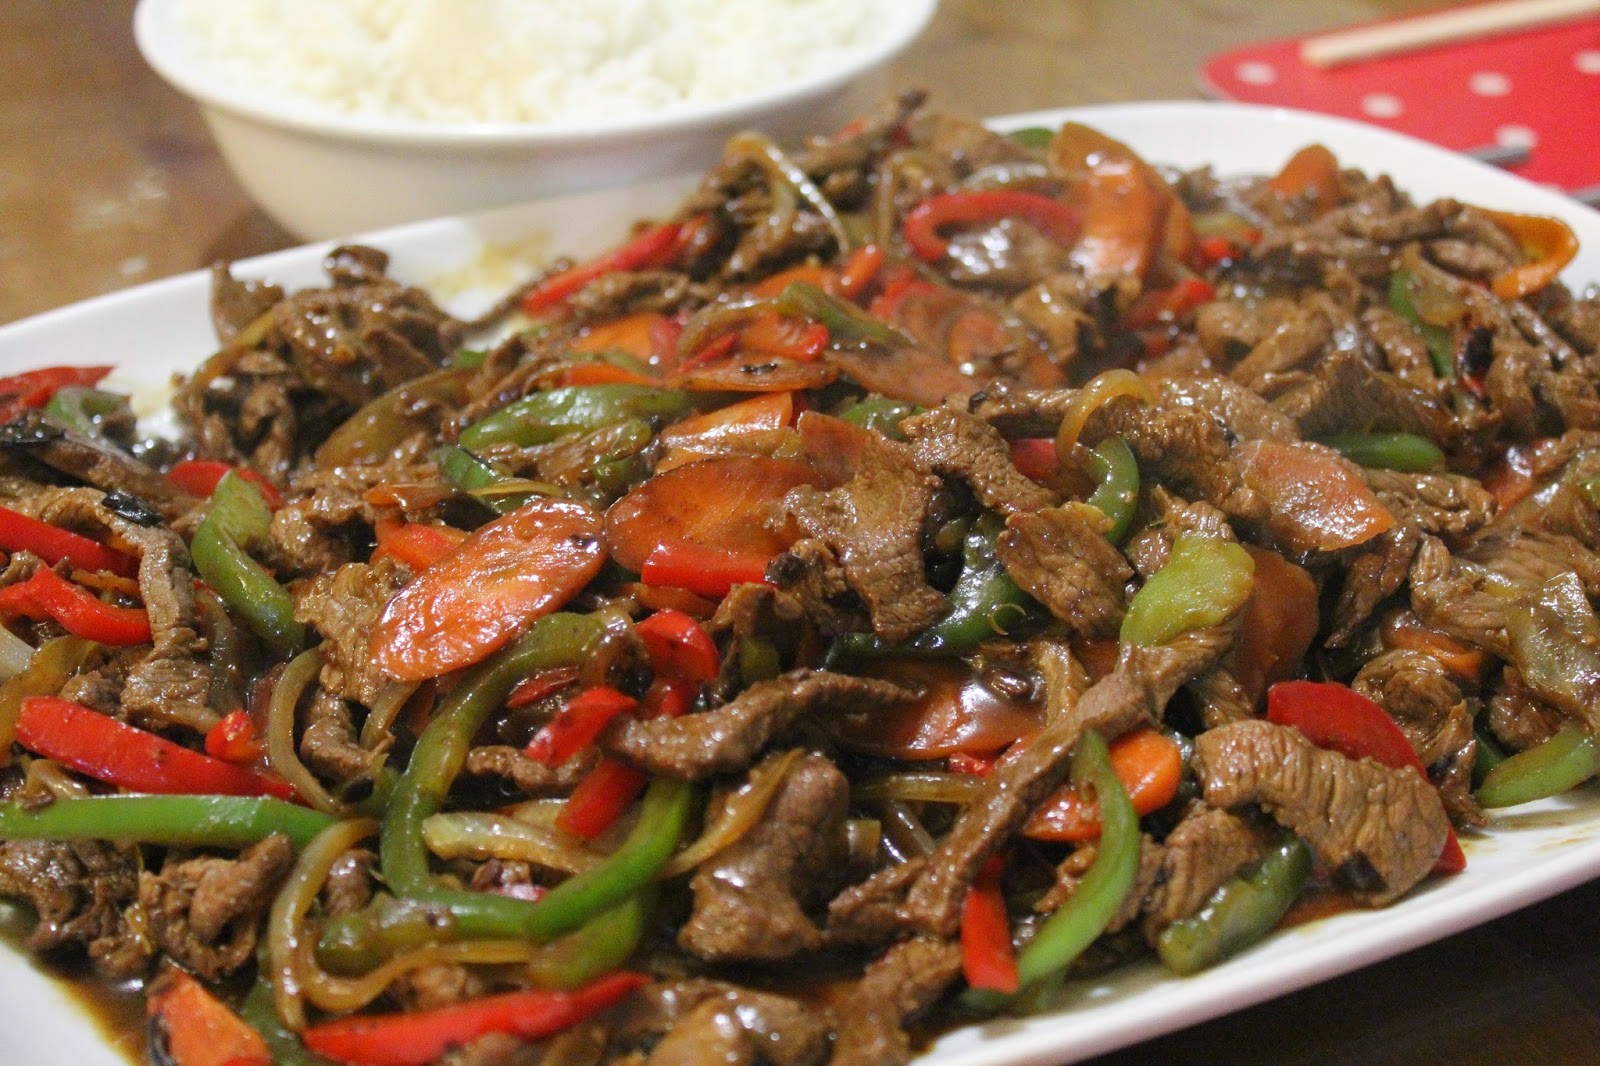
Beef in Black Bean Sauce


Beef in Black Bean Sauce, a classic dish I think that everyone has ordered from a Chinese at some stage in their life.  It has a taste, unique, that you either like or hate.  It's a little sweet, a little salty yet packs a powerful flavour and compliments beef magnificently.   It's a split in our house, the two men love it, the daughter hates it and as for me, I sit on the fence.  If it's too strong I cannot eat it and if there's not enough flavour of the black bean I whinge about that..... gggrrr.  As the daughter being away at her Grandma's for part of the school holidays, I made sure this dish was on our menu planner, as have been a few other meals.
 
Cooking chinese or any Asian dishes can be daunting to many.  Yes many recipes can seem very complex but yet some are very simple.  This one falls into the simple category with no trickly steps at all.   No premade black bean sauce has been used in this recipe.  Instead a trip to the Asian Supermarket saw us armed with a jar of salted black beans and recipe in hand.  I think that was the hardest part of the whole dish.
 
Takeaway in our home, mid week ease and a taste that was exactly how it was meant, slightly sweet and spicy, jam packed with vegetables... who could ask for more?  Bonus points to be awarded as this was prepared and cooked by my husband, Noel.
 
 
Beef in Black Bean Sauce
(recipe adapted from WW Magazine October 2014)
 
Serves: 4
ProPoints Per Serve: 5
 
1/3 cup chicken stock
2 teaspoons cornflour
2 tablespoons kecap manis
1 tablespoon canola oil
600 grams rump steak, fat trimmed, thinly sliced
1 brown onion, sliced
2 carrots, peeled and thinly sliced
1 red capsicum, thinly sliced
1 green capsicum, thinly sliced
2 garlic cloves, thinly sliced
2 tablespoon salted black beans, chopped

Combine stock, cornflour and kecap manis in a small jug or bowl.

Heat a wok over high heat.  Add half the oil and heat for 20 seconds.  Stir-fry half the beef for 2 - 3 minutes of until browned.  Transfer to a plat.  Repeat withthe remaining oil and beef.

Add onion and carrot to the wok and stir-fry  for 2 - 3 minutes or until just softened.  Add capsicum and stir-fry for a further 2 minutes.  Add garlic and black beans, stirring for 30 seconds. 

Return beef to the wok along with the stock mixture.  Stir-fry for 1 - 2 minutes or until sauce has thickened.

Serve with extra steamed 0 ProPoint vegetables and steamed rice.  Add 4 ProPoints per 1/2 cup steamed rice.


Thursday, September 13, 2012

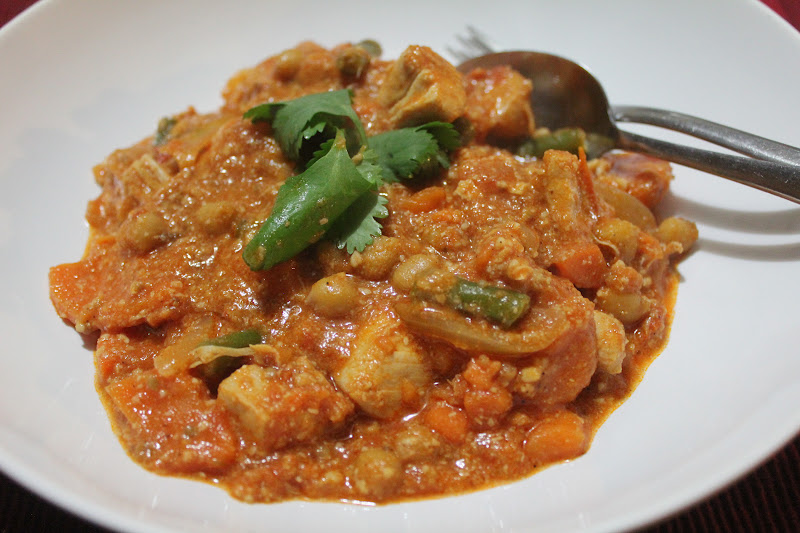
Butter Chicken and Vegetables

Butter chicken is a favourite indian dish - all of us like it.  But it is always so rich and heavy not to mention fattening.  Needless to say I don't cook it that often but am always on the lookout for a healthier version so loved the fact that the new Weight Watchers cookbook, Take Away At Home, had this recipe.

This version was delish - a smooth, creamy and delicately balanced sauce coupled with the sweetness of the sweet potato and the crunch of the green beans.  Having the vegetables made it very filling I didn't even feel the need to have rice with my serve.

A different butter chicken but it was enjoyed and would recommend that you give it a go.


Butter Chicken and Vegetables
(recipe sourced from Weight Watchers Take Away At Home Cookbook)
 
Serves: 4
ProPoints per Serve: 10
 
1/3 cup (50 grams) raw unsalted cashews
2 teaspoons sunflower or canola oil
600 grams lean chicken breast fillets, fat trimmed, cut into 3 cms pieces
1 brown onion, thinly sliced
2 tablespoons tandoori paste
1 tablespoons finely grated fresh ginger
700 grams tomatoes, chopped
1/2 cup chicken stock
400 grams sweet potato (kumara), thinly sliced
400 gram can chickpeas, rinsed, drained
100 grams green beans, cut into 3cm lengths
1/3 cup low fat natural yoghurt

Place cashews in a food processor.  Process until finely ground.

Heat half the oil in a large saucepan over medium-high heat.  Cook chicken, in batches, for 3 - 5 minutes or until browned.  Transfer to a plate.

Heat remaining oil in pan.  Add onion and cook, stirring, for 5 minutes or until softened.  Add tandoori paste and ginger and with tomatoes, stock, sweet potato and ground cashews and bring to the boil.  Reduce heat and simmer, covered, for 20 - 25 minutes or until sweet potato is tender.  Add chickpeas and beans for the last 10 minutes of cooking.

Stir yoghurt into butter chicken.  Serve.

Serve with steamed rice - add 3 propoints value per serve for 1/2 cup steamed rice.


(click here for a printable version of this recipe)

Monday, September 10, 2012

Lamb and Vegetable Hot Pot with Herb Dumplings

Following an enjoyable Roast Lamb dinner on Sunday evening there is always the big question of what to do with the left over lamb.  I am not a lover of having roast two nights in a row.  Call me fussy but it never tastes the same the second night in my opinion.  It normally gets turned into a hearty Lamb Stew but this time I was determined to do something different.

I had been spying this recipe for awhile now but had steered clear as I know Noel is not a lover of dumplings from the last time I cooked them many many years ago - I haven't been game to broach the topic of dumplings again.

I left the recipe on the bench overnight and told the family this was my plan.  They all agreed to give it a go dumplings or no dumplings!

I was running late from work tonight and to my surprise my wonderful husband took the challenge of not only cooking the recipe but adapting it to suit cooked meat instead of the raw meat as called for.

This dish was amazing..... and I must add cooked to perfection.


Lamb and Vegetable Hot Pot with Herb Dumplings
(recipe adapted from Weight Watchers Cook Hearty Cookbook)

Serves: 4
ProPoints per Serve: 13

1 tablespoon olive oil
700 grams lean lamb leg steaks or cooked roast lamb, cut into 3cm pieces
1 brown onion, diced
2 carrots, chopped
200 grams button mushrooms, halved
1 tablesppon finely chopped fresh thyme leaves
1 tablespoon plaing flour
1 tablespoon Worcestershire sauce
2 cups chicken stock
1 cup self raising flour
50 grams Weight Watchers Canola Spread
1 egg, lightly beaten
2 tablespoons chopped fresh flat leaf parsley leaves
1 tablespoons finely chopped fresh rosemary
1/3 cup skim milk

Preheat oven to 180 degrees Celsius.

Heat oil in a 2 litre capacity shallow flameproof casserole dish over high heat.  Cook lamb, in batched, turning, for 2 - 3 minutes or until browned.  If using cooked meat just fry in oil for 1 - 2 minutes.

Add onion, carrot, mushrooms and thyme to dish and cook stirring for 5 - 7 minutes or until vegetables are softened.  Add plain flour and stir to coar.  Combine Worcestershire sauce and stock in a jub.  Gradually add stock mixture to vegetable mixture in dish, stirring until combined.  Cover and bring to the boil.  Transfer dish to oven and bake for 1 hour and 10 minutes.

Meanwhile, place self raising flour and spread in a large bowl.  Using fingertips, rub spread into flour until mixture resembles breadcrumbs.  Stir in egg, parsley, rosemary and enough of the milk to make a soft, sticky dough.  Add a little more milk if needed.

Remove dish from oven.  Increase oven temperature to 220 degrees Celsius.  Drop heaped teaspoons of dough, about 3 cms apart, on top of the hot pot and lightly spray with oil.  Bake, uncovered, for 15 - 20 minutes or until dumplings are lightly browned and cooked through.  Serve.


(click here for a printable version of this recipe)

Wednesday, September 5, 2012

Creamy Chicken Casserole

Dinner tonight - courtesy of my hubby Noel cooking it while I was working late.  The house has a yummy aroma the moment I opened the front door.

This dish was really yummy - a nice thick sauce full of vegetables and tender chicken who could ask for more?  Me - I could have eaten seconds and thirds.

The flavour was impressive - the meatiness of the chicken, the vegetables and the tarragon all in every mouthful brought back memories of food my mother used to cook.... mmmmm!

Served with crunchy bread this was a perfect mid week dinner that was enjoyed by all.


Creamy Chicken Casserole
(recipe sourced from WW Food You'll Love Cookbook)
 
Serves: 4
ProPoints per Serve: 9
 
1 tablespoon olive oil
2 tablespoons plain flour
2 teaspoons mustard powder
500 grams lean chicken thigh fillets, fat trimmed, thickly sliced
1 leek, thinly sliced
125 grams Weight Watchers Bacon, thinly sliced
2 garlic cloves, crushed
3 carrots, thickly sliced
600 grams potatoes, cut into 2 cm pieces
1 tablespoon finely chopped fresh tarragon leaves
3 cups chicken stock
2 tablespoons reduced fat thickened cream
2 cups baby spinach leaves

Heat half the oil in a laege heavy-based saucepan over medium heat.  Combine flour and mustard powder in a small bowl.  Add chicken to the flour mixture and toss to coat, shaking off the ecess.  Cook chicken, in batches, turning, for 5 minutes or until browned.  Transfer to a plate.

Heat remaining oil in the same pan.  Add leek and bacon and cook, stirring, for 5 minutes or until leek has softened.  Add garlic and cook, stirring for 1 minute or until fragrant.

Return chicken to the pan with carrot, potato, tarragon and stock and bring to the boil.  Reduce heat and simmer, uncovered, for 45 - 50 minutes or until vegetables are tender and chicken is cooked through. 

Add cream and spinach and cook, stirring, for 2 minutes or until spinach is just wilted.  Serve.


(Click here for a printable version of this recipe)

Saturday, August 27, 2011

Chengdu Prawns and Scallops

Every now and then we have to put up a spicy dish to please both of our tastebuds and this one was no exception as far as flavour and spice were concerned.

The Sichuan cuisine, also known as Szechuan-style and is one of the most popular regional styles of Chinese cooking. Known for it's spicy and pngent flavours this dish sure kicked a punch. Chengdu is the capital of Sichuan and the inclusion of citrus peel in this dish proves that it comes from this city.

I have to say the thought of using orange rind in a spicy sauce interested me as it is an ingredient that isn't often used.

Noel cooked this dish and I have to say that it was delicious.....


Chengdu Prawns and Scallops (Recipe adapted from Women's Weekly Stir Fry Chop Wok Toss)
Serves: 2
ProPoints per serve: 10

2 tablespoons light soy sauce
2 tablespoons chinese cooking wine
1 teaspoon sesame oil
400 grams prawns, shells removed and deveined
300 grams scallops
2 teaspoon peanut oil
500 grams baby spinach
2 cloves garlic, crushed
2 cms piece fresh ginger, grated
4 spring onions, sliced thinly
1 tablespoon rice vinegar
1 teaspoon white sugar
2 tablespoons finely grated orange rind
2 tablespoons sambal oelek
1 teaspoon sichuan peppercorns, crushed

Combine half the sauce, half the wine and half the sesame oil in a large bowl, add prawns and scallops and mix well. Cover and refrigerate for 20 minutes.

Heat 1 teapsoon peanut oil in wok and stir fry spinach until just wilted. Remove from wok and cover to keep warm.

Heat the remaining peanut oil in wok and stir fry the prawn and scallop mixture in batches until just cooked and remove from pan. To the same pan add the garlic, ginger and onion cooking until the onion just softens.

Return prawn mixture and remaining suacue, wine and sesame oil to the wok along with the vinegar, sugar, rind and sambal. Stir fry for 1 - 2 minutes until prawns are cooked through.

Serve spinach topped with prawns and scallops and sprinkled with the crushed sichuan peppercorns.


(click here for a printable version of this recipe)

Thursday, February 3, 2011

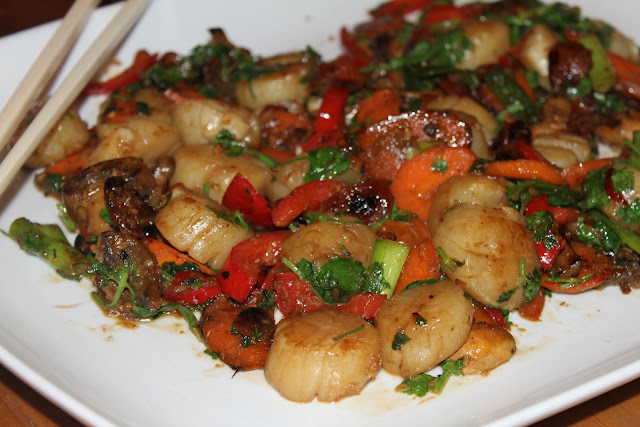
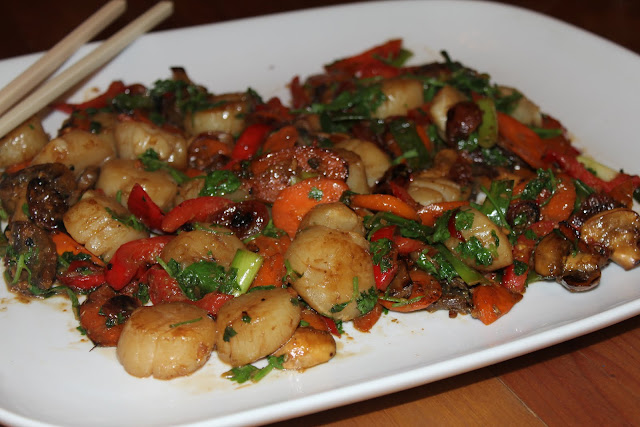
Lemongrass and Chilli Scallops with Lap Cheong

Last night the menu planner said Beef Fajitas with Salsa but what the menu planner didn’t know was that both of our kids would go for sleepovers at their friends’ leaving just Noel and I at home. Knowing that anything Mexican is a favourite of the kids we put the Fajitas on hold until tonight.

Instead, Noel and I decided to have scallops. Not just scallops but a spicy, flavoursome stir fry Noel created packed with vegetables and to add a different twist some Lap Cheong (chinese sausage).

To describe this meal that Noel cooked – DELISH!! It was magnificent and that’s coming from me - not a huge lover of scallops!


Lemongrass and Chilli Scallops with Lap Cheong
Serves: 2
ProPoints per serve: 10

500 grams scallops, roe removed, rinsed
2 teaspoons olive oil
1 Lap Cheong (chinese sausage) 30 grams
1 carrot, thinly sliced
1 teaspoon crushed garlic
1 teaspoon ginger
2 red bullet chillies, sliced
100 grams button mushrooms, sliced
½ red capsicum, thinly sliced
½ green capsicum, thinly sliced
3 spring onions, cut into 2 cm pieces
3 tablespoons lemongrass paste
2 tablespoons water
½ bunch fresh coriander, roughly chopped

Pat scallops dry on paper towel.

Heat 1 teaspoon of oil in a wok or large frying pan. Stir fry scallops until almost cooked, remove to a plate and set aside.

Heat remaining oil in work and Lap Cheong, carrot, garlic and ginger. Stir fry for 1 – 2 minutes. Add chillies and stir fry for a further 1 minute. Add mushrooms, capsicum, spring onions, lemongrass paste and water. Stir fry for 3 – 4 minutes or until vegetables are tender and paste mixed through. Return scallops to the wok and cook for 1 minute to reheat. Remove from heat.

Add coriander and toss to combine. Serve immediately.


(click here for a printable version of this recipe)

Monday, September 13, 2010

Thai Mussels

Firstly I need to apologize for a huge gap in our food blog. I spent the whole of last week in Brisbane on a training session, which was busy and I didn't cook a thing for the whole week. The weekend just gone wasn't any quieter I must say also. We had our football club Annual General Meeting and Presentation. The last week has been a whirlwind of food not to mention alcohol. I have to say that we both fancied something easy and tasty.

Saying this I did have a kilogram of fresh mussels which I brought on a whim on Saturday so we turned our focus on them. Noel and I have only ever cooked mussels once before and then I overdid the chilli so it was decided it was Noel's turn to attempt to create a meal for us and that he did.

Flavoured with lime, chilli, garlic and ginger in a fantastic light sauce these mussels were brilliant and made a great dinner for the two of us. Saying that you could easily serve this to four or 6 as an entree.


Thai Mussels

Serves: 2
Points per serve: 3

1 kilogram fresh mussels in shells
juice of 1 1/2 limes
juice of 1/2 lemon
1 teaspoon fish sauce
1/4 cup dry white wine
1 teaspoon soy sauce
1 tablespoon brown sugar
2 teaspoons crushed garlic
2 teapsoons crushed ginger
pinch of salt
1 tablespoon olive oil
2 spring onions, finely sliced
1/2 bunch fresh coriander, roughly chopped
3 red bullet chillies, deseeded and chopped
coriander leaves for garnish

Clean and scrub mussels, disgarding any broken or open ones that do not close when tapped on the bench.

In a large jug mix together lime juice, lemon juice, fish sauce, white wine, soy sauce, brown sugar, garlic, ginger and salt. Mix well ensuring sugar is dissolved.

Heat oil in a large wok or frying pan that has a lid. Carefully pour in sauce mixture, add spring onions, coriander and chillies. Mix well and bring to a boil.

Add mussels to the wok and toss until coated. Reduce heat to medium, cover with a lid and allow to steam for approximately 5 minutes. Remove from heat and toss through the sauce.

Place in a large serving bowl, garnish with coriander and serve immediately.

Saturday, January 30, 2010

Lobster with Blackbean and Chilli Sauce

The last time we went shopping in Springvale we were lucky enough to get our hands on some frozen raw lobster tails from our favourite Frozen Food shop. They were great value as they were small and 10 tails to the kilogram but unfortunately have been in the freezer ever since.

We decided that tonight would be the night to have them for dinner - maybe a little celebration as today I finished the job I have been doing for the last 8 years and I am moving on within the company as of next week in a new role.

After enjoying the Beef with Blackbean the other week, we knew that the lobster tails would be full of flavour and that their sweetness would compliment the saltiness if cooked in a similar sauce. So the idea of black bean combined with chilli paste was agreed upon as I love chilli and Noel favours the black bean but of course we both agree on the lobster itself!


Lobster with Blackbean and Chilli Sauce

Serves: 4
Points per serve: 5

1 kilogram raw Lobster tails
1 tablespoon olive oil
2 teaspoons crushed garlic
2 teapsoons crushed ginger
1 tablespoon chilli paste, or to taste
1 carrot, peeled and finely sliced
1 head of brocolli, cut into small florets
1/2 red capsicum, diced
2 spring onions, sliced
4 tablespoons black bean sauce
100 grams snow peas, trimmed and sliced
100 grams bean sprouts
fresh coriander leaves, for garnish

Remove shells from lobster tails, rinse well and cut into bite size pieces. Place on paper towel and set aside.

Coat a wok or large frying pan with oil ensuring the surface is covered. Heat over a high heat and add the garlic, ginger, chilli, carrots and broccoli. Stir fry for 2 - 3 minutes or until vegetables start to soften.

Add capsicum, lobster meat and spring onions. Stirfry for a further 2 - 3 minutes or until lobster is startting to turn pink. Mix through the blackbean sauce until all is completely coated with the sauce. Add snow peas and bean sprouts and toss through until warm.

Serve garnished with coriander leaves.


(click here for a printable version of this recipe)

Sunday, November 1, 2009

Roast Pumpkin, Beetroot and Bocconcini Salad with Guinness Dressing

We had been requested to bring a salad as our contribution to Erica's 30th birthday. I knew exactly which salad everyone means when they say "Can you please bring a salad Jo?" Everyone adores the Crunchy Asian Salad that we make.

But I not only fancied something different, I had half a pumpkin that needed using. So roasting that was my first thought but honestly you cannot take a plate of cold roast pumpkin somewhere. Teamed with a tin of baby beetroots, some spinach and creamy bocconcini this amazing salad was created, I have no idea if anyone has done this combination before.

Next I needed a dressing, I made a vinegarette but it was oh so wrong. Noel suggested a few ingredients and voila we had a dressing, which included using Guiness!

Not only did I have a new salad but I had also just created an entry into the Royal Foodie Joust held by Jen at the Left Over Queen!! OMG here I was thinking that I was going to sit another month out!! Thanks Noel ~ MWAH! I love you....


Roast Pumpkin, Beetroot and Bocconcini Salad with Guinness Dressing

Serves: 12
Points per serve: 2.5


1/2 medium jap pumpkin, peeled and cut into 3 cm chunks (approx 800 grams flesh)
cooking spray
1 tablespoon brown sugar
pinch salt
pinch finely ground white pepper
1 teaspoon ground cumin
2 tablespoons honey
1 tablespoon dijon mustard
1/2 cup Guinness
2 tablespoons orange juice
1 tablespoon olive oil
freshly ground black pepper
200 grams baby spinach leaves
1 400 gram tin whole baby beetroots, drained and halved
1 220g packet bocconcini, drained and quartered

Preheat oven to 200 degrees Celcius.

Line a baking tray with baking paper and spray with cooking spray. Place pumpkin on tray in a single layer. In a small bowl combine the brown sugar, salt, pepper and cumin. Sprinkle half over the pumpkin. Cook in oven for 30 minutes. Remove from oven and turn. Sprinkle with remaining sugar mixture and continue to cook for a further 20 - 30 minutes or until pumpkin is tender and sugar caramalised. Remove from oven and allow to cool completely.

In a small jug combine honey, mustard, Guinness and olive oil. Whisk all ingredients together until combined and smooth. Season to taste with black pepper.

In a large flat casserole dish or serving dish place the spinach leaves all over the bottom. Top with roasted pumpkin. Scatter the beetroot and bocconcini over the top.

Just before serving drizzle dressing over the whole salad.


(click here for a printable version of this recipe)

Sunday, September 27, 2009

Oysters with Ginger, Garlic and Chilli

These oysters are one of Noel's flavour bursts and they surely packed a kick! Fresh ginger and garlic are always quite strong which was the intensity that Noel was after coupled with a hint of Kaffir Lime was very unique but it was the after taste of the chilli was the hidden surprise.


Oysters with Ginger, Garlic and Chilli

Serves: 4
Points per serve: 1.5
12 natural oysters, in the half shell
2" piece of ginger, peeled and chopped
4 garlic cloves, peeled and chopped
4 kaffir lime leaves, thinly sliced
1 tablespoon chilli oil
Preheat grill.
Place oysters on an oven proof plate or a patty tin.
Top each oyster with ginger, garlic and lime leaves. Place approx 1/3 teaspoon of chilli oil on each oyster.
Place under the grill and cook for 3 - 5 minutes or until topping is starting to brown.
Serve immediately.


(click here for a printable version of this recipe)

Saturday, August 8, 2009

Roast Beef

I remember as a little girl every Sunday was traditionally "roast dinner" day and without fail I think my Mam cooked a roast every week, not just for my family but for the whole family. At times there could be 18 or more people sat around the table, ranging from aunties and uncles to close family friends.

Now I am grown up and have a family of my own, Sunday's roast dinner is not a 100% regular occurance at our house mainly due to social commitments but it is a tradition that I too want to set up so my children understand family values and have happy memories to look back on.

However, I do have a confession regarding tradition..... we cook most of our meats in the Weber. I cannot remember the last time we cooked a joint of meat in the oven. The Weber gives it such a magnificient flavour.

Anyway (another brag) tonight, Noel spoiled me by cooking a yummy roast beef as I spent all day up at the football club. It was such a nice surprise to come home to and I enjoyed every mouthful.


Roast Beef
(recipe courtesy of Noel)
.
Serves: 12
Points per serve: 3
.
2kg beef silverside
sea salt
freshly ground black pepper
olive oil

Prepare Weber as per directions, ensuring that all heat beads are heated up (no black remaining).

On a tray, drizzle olive oil over the peice of beef, season generously with salt and pepper, rub in to ensure fully covered.

Place on Weber rack, cover and cook for 1 hour or until meat is cooked to your liking. Allow beef to rest before carving.

Alternatively preheat an oven to 180 degree Celcius. Season as above and place on a rack over an oven tray and cook for 1 1/2 hours or until meat is cooked to your liking.

Herb Crusted Rack of Lamb

I have had quite a busy week and Noel decided that he would cook on both Saturday and Sunday this weekend just to give me a break, isn't he sweet? And boy did he step up to the plate.

Noel, like me, enjoys the challenge of trying something new and when he puts his mind its sure to be a winner. What can I say - these were delicious and he can definately cook them for us any time he likes.

The lamb was delicately cooked, still nice and tender and was complimented by the crunchiness of the herbed breadcrumbs. I am positive that this would make an impressive main at your next dinner party.


Herb Crusted Rack of Lamb
(recipe courtesy of Noel)


Serves: 2
Points per serve: 7

200 grams fresh rich white bread
2 tablespoons fresh flat leaf parsley, chopped
1 teaspoon fresh thyme leaves, chopped
1 teaspoon fresh rosemary leaves, chopped
1 large garlic clove, finely chopped
4 tablespoons vegetable oil
100g unsalted butter
sea salt
freshly ground black pepper
2 lamb racks
2 tablespoons dijon mustard
500 ml lamb or beef stock
1 large sprig of rosemary

Preheat oven to 220 degrees C.
Remove all visible fat from lamb racks.

Blend bread until fine, add herbs and garlic and blend for a further 30 seconds.

Heat oil and butter in a large frying pan until foaming. Season the lamb racks with salt and pepper. Add racks to pan, placing meat side down first, cook for 3 - 4 minutes on each side. Remove from pan and rest for 5 minutes.

Brush mustard onto the meat side of the racks ensuring you generously cover. Press herbed breadcrumbs onto the meat side, pressing firmly to form a crust. At this point, you can cover the bones with foil to reduce burning.

Place on a rack on a foiled lined baking tray. Cook for 10 - 15 minutes or until cooked to your liking. Remove foil prior to serving.

While lamb is cooking, place stock and rosemary in a small saucepan and bring to the boil. Reduce heat and simmer until reduced by half. Strain before serving.

(click here for a printable version of this recipe)

Tuesday, July 28, 2009

Noels Homemade Sausage Rolls

Another dish we don't cook a lot of due to the fact that they are very morish, unresistable and overall just too yummy is homemade sausage rolls. Shop bought sausage rolls have nothing on these little gems - especially as Noel did all the hard work not me!!

The best thing about making sausage rolls from scratch is that you get to invent the flavour.... and with any invention the potential is endless.

Perfect for either a party or a snack - they never fail to please.


Noel's Homemade Sausage Rolls


Makes approx 64 rolls
Points per serve - danger beware

500g pork mince
500g sausage mince
1 onion, finely chopped
1 zucchini, grated
1 1/2 cups finely grated parmensan cheese
1 tablespoons minced garlic
2 tablespoons mango chutney
6 tablespoons tomato paste
4 tablespoons barbecue sauce
salt
freshly ground black pepper
1 tablespoon dried sage
1 tablespoon dried thyme
2 tablespoons dried parsley
1 tablespoon dried basil
2 1/2 cups breadcrumbs
2 eggs, beaten
8 sheets premade puff pastry, frozen 24cm x 24cm square


Preheat oven to 180 deg C.

In a large bowl mix all the ingredients besides the egg and pastry, ensuring it is thoroughly mixed together.

Defrost pastry sheets and cut in half.

Roll mince mixture into a sausage formed roll long enough to fit the pastry. Wet hands to stop mince mixture from sticking during this process. Place mince mixture on the pastry, brush with egg and roll to enclose. Cut into 4 pieces (or more if desired). Repeat with remainder of mixture.

Place on a lined oven tray and brush with remainding egg. Cook for 40 - 50 minutes or until cooked through.