Showing posts with label chinese. Show all posts

Thursday, May 2, 2019

Sticky Chinese Pork and Vegetables

Fakeaway at it's finest tonight.  Tender pork and crisp vegetables in a sweet yet slightly spicy sauce served on a bed of rice noodles.  Quick, easy and best of all it's nicer on the hip pocket.

The key to making fakeaway Asian meals at home is to ensure that you have all the ingredients ready as once you start cooking the meal comes together very quickly.

No need to marinade the pork fillet as it's a tender meat - also it's one that cooks quickly. So a quick toss in a chinese five spice based sauce while you prep all the other ingredients is all that was needed.  

We used rice noodles as they are gluten free but you can use any noodle you prefer or even rice if desired.  You will need something however to help soak up the delicious sauce.

Not a fan of chilli or love chilli - adjust the quantities to suit yourselves.

A switch I did was use peanuts.  The original recipe called for cashews but I had peanuts - use any nuts you like to be honest.

No doubting that this dish just rose to the top of the pork dish list of favourites.  Even my mother had seconds!  


Sticky Chinese Pork and Vegetables
(Recipe adapted Taste.com.au)

Serves: 4

600 grams pork fillet, thinly sliced
2 tablespoons brown sugar
1 1/2 tablespoons gluten free soy sauce
1/2 teaspoon Chinese five spice
2 teaspoons fish sauce
250 gram packet dried rice stick noodles
1 1/2 tablespoons vegetable oil
1 red onion, halved, cut into thin wedges
1 tablespoon grated ginger
2 teaspoons crushed garlic
1 teaspoon crushed chilli
1 red capsicum, thinly sliced
1 carrot, halved, sliced diagonally
1 teaspoon gluten free chicken stock powder
1/4 cup water
2 teaspoons cornflour
1 bunch baby pak choy, roughly chopped
250 grams snow peas, trimmed
1/4 cup gluten free oyster sauce
1/4 cup dry roasted peanuts
1 long red chilli, sliced diagonally

Combine pork, sugar, soy sauce, five spice and fish sauce in a medium bowl. Toss to coat.

Prepare rice stick noodles, following packet directions until tender. Drain well. Cover to keep warm.

Heat 1 tablespoon of oil in a wok or large frying pan over medium-high heat. Stir-fry pork, in 2 batches, for 1 to 2 minutes or until golden. Transfer to a bowl.

Heat remaining oil in wok over high heat. Stir-fry onion, ginger, garlic, chilli, capsicum and carrot for 5 minutes or until just tender. 

In a small jug mix stock powder, water and cornflour until combined.  

Add pork, pak choy, snow peas, stock mixture and oyster sauce. Stir-fry for 2 to 3 minutes or until pork is cooked through and snow peas are tender. 


Serve with rice noodles and sprinkle with peanuts and sliced chilli.


Monday, May 7, 2018

Stir Fry Lamb Strips with Carrot, Mushrooms and Broccoli

One thing we don't cook enough with is Lamb.  It's one of those meats here in Australia that you can get a cheap leg or shoulder of lamb but all the other cuts are really expensive. We love lamb, especially a roast, but it's not on the menu very often.  Which is s shame.

I'd recently asked our son what he fancied for dinner and he replied "a lamb stir fry would be really nice Mam - we haven't had one of those for a long time". I thought this was an interesting answer but to be honest it's nothing out of the ordinary for anyone in our family to request something outside the norm.

I came across a new butchers,  Australian Butchers Store, near work (I normally buy all our meat over in Clayton) and I must say I was a little excited about this.   In fact I was pretty impressed with the butchers.  Having only opened recently it was my first chance to go in there and have a look around.  Needless to say the ban on my buying any meat for our freezer went out the window as I came home armed with lots of bargains which included lamb strips.

Using my old friend Google I started looking for a stir fry recipe to cook using the lamb strips.  this was a harder challenge than I thought.  There are actually not that many Asian recipes using lamb.  I finally came across a recipe that sounded really nice.  I hadn't noticed what site it was on but I started reading the recipe and thought to myself this sounds pretty good.  I will cook this and then I read on further only to start laughing at the serving suggestion given.... and couldn't stop laughing. 

Serving Suggestions
Serve with rice or potatoes or fill a pitta bread or tortilla wrap with the stir-fry.

To my surprise the recipe was actually on the Irish Food Board which I guess explains the potatoes??  Please if you are Irish do not take offence to this post - I thought the comment was magic.  I actually cooked this recipes (although I did adapt slightly) but served ours with rice noodles.  It was absolutely delicious and enjoyed by everyone.

The meat and vegetables were tender and laced with the sweetness of the hoisin sauce and traces of the Chinese five spice.  It was a simple dish but bold at the same time.  I would defintely suggest you give this Asian number a go.


Stir Fry Lamb Strips with Carrot, Mushrooms and Broccoli
(Recipe adapted from Bord Bia)

Serves: 6

200 grams dry thick rice noodles
2 cloves garlic, chopped
1 tablespoon finely grated ginger
1/2 teaspoons Five Spice Powder
2 tablespoons soy sauce
1 tablespoon olive oil
2 tablespoons rice wine
freshly ground black pepper to taste
900 grams lean lamb strips
2 tablespoon oil
2 carrots thinly sliced
1 onion, sliced
200 grams button mushrooms, sliced
1 head of broccoli, cut into florets
4 tablespoons hoisin sauce

Cook rice noodles as per packet instructions.  Drain and set aside.

Combine the garlic, ginger, five spice, soy sauce, rice wine and pepper together in a medium bowl.  Add in the lamb strips and mix well to combine.  Allow to stand for at least 30 minutes or longer if time permits.  

Heat half the oil in a wok or frying pan. Then add in the vegetables and cook for 2-3 minutes. Remove from the wok. Stir-fry the lamb in 2 batches.

Return the vegetables to the wok, add back in the cooked lamb and stir in the hoisin sauce. Mix well together.

Place noodles on a a large serving platter and top with lamb stir fry.  Serve immediately.


Thursday, January 18, 2018

Sticky Chinese Chicken Tray Bake

Is it me or are the clocks ticking faster then normal already this year?  At the moment I no sooner get up, go to work, come home, cook dinner then go to bed - whammo another day gone. And I already feeling tired and it's only 18 days into the New Year.  I have so many things I need to get done and want to do around the house, with the family, with my studies but my daily/weekly "To Do List" is starting to become my "Wish To Do List - I actually do not feel I am achieving that much at all.  

Needless to say, I have been looking for quick fix dinners and weeknight wonders to at least ensure that we are all still eating well.  It's so easy to say "let's get takeaway" when in reality by the time our family decide what food we are getting, choose items of the menu, make the phone call something can literally be in a pot cooking!   I am sure you can all agree with this?

What's your favourite weeknight wonder?  We have quite a few that frequent our table for a quite dinner including Chicken Taco Bake (which is stupidly easy), Devilled Sausages, Beef Keema with Cumin and Currant Pulao, and Penne Boscaiola just to name a few.

Obviously I am always on the lookout for new quick and easy dishes that I can add to our collection and I recently came across this one which instantly appealed to my taste buds - sometimes I wish I could smell and lick my computer screen!  Don't you?  How good would that be?

I think it took me 5 minutes tops to marinate the chicken (which I did the night before) , 5 minutes to put it in a casserole dish and place in the oven.  Super easy!  Already a winner in my books. While it baked I prepped a Crunchy Asian Salad and steamed some rice - perfect partners for what was an amazing dish.

Melt in your mouth chicken pieces laced with a perfect balance of hoisin sauce, honey and Chinese five-spice was delicious.  The crunchiness of the cashew nuts complimented the chicken and there was also the right amount of sauce once cooked.  I don't like dry chicken and this wasn't.

This one-pan chicken dish makes a cheap and easy midweek family meal and we will be definitely having it again.


Sticky Chinese Chicken Tray Bake
(Recipe adapted from BBC Goodfood)

Serves: 8
SmartPoints per Serve: 7

8 chicken chops or thighs, skin removed
4 tablespoons hoisin sauce
2 teaspoons sesame oil
2 tablespoons clear honey
11/2 teaspoons Chinese five-spice powder
1 tablespoon grated ginger
2 teaspoons crushed garlic
1 bunch spring onions, cut into 3 cm lenghts
50 grams cashew nuts, toasted

Slash the skin 2-3 times on each thigh and place in a large snap lock bag or casserole dish.

Mix together the hoisin, sesame oil, honey, five-spice, ginger, garlic and some seasoning. Pour over the chicken and toss to coat.  Marinate the chicken for 2 hrs, or overnight if you have time.

Heat oven to 180 degrees Celsius.

Arrange the chicken thighs in a large roasting tin in a single layer.  Cook for 30 - 40 minutes or until chicken is cooked through, basting at least once.

Stir through the cashew nuts and sprinkle the spring onions over the chicken. Return to the oven for 5 minutes.

Serve with steamed rice and Crunchy Asian Salad, if desired.


(Click here for a printable version of this recipe)

Thursday, February 18, 2016

Hunan Beef with Cumin

Well FINALLY!!!

Hooray for me - I have done it.  I've sat down, eaten and enjoyed our dinner and then amazingly found time to share it with you.  Sorry for the long delay but the new job which I started on the 18th of January has had my head in a spin along with all the multitude of things we have been doing recently.  I actually thought I would of had a smooth transition to the new job and I did.  In fact I now have more time due to less work hours but yet I seem to be struggling to cope with finding "ME" time.  

To be totally honest I cannot believe that we are more than half way through February... YIKES!!
 
Anyways I have to say since the beginning of the year our eating has been out of control (definitely no dieting happening in our house) so its been a food fest which, of course, means lots of comfort foods, lots of quick dinners, and the odd takeaway here and there!!  We definitely need to get back on track.
 
Tonight I wanted something full of flavour, easy, quick and of course, healthy.  Well at least healthier than I have been eating.

As well know by everyone, we love cooking Asian style dishes so this one from the Hunan Region excited our tastebuds by just reading about it.  The Hunan Region is located in South Central China, south of the middle course of the Yangtze River, and south of Lake Dongting.
 
Hunan cuisine, known for it's abundant use of chillies, garlic and shallots, is also known as Xiang cuisine. It is one of the Eight Great Traditions of Chinese cuisine and is well known for its hot spicy flavour, fresh aroma and deep colour.  Hunan cuisine is often spicier than most other Chinese dishes because or the pure chili content.  The meals also contain a larger variety of fresh ingredients, and generally tends to be oilier.

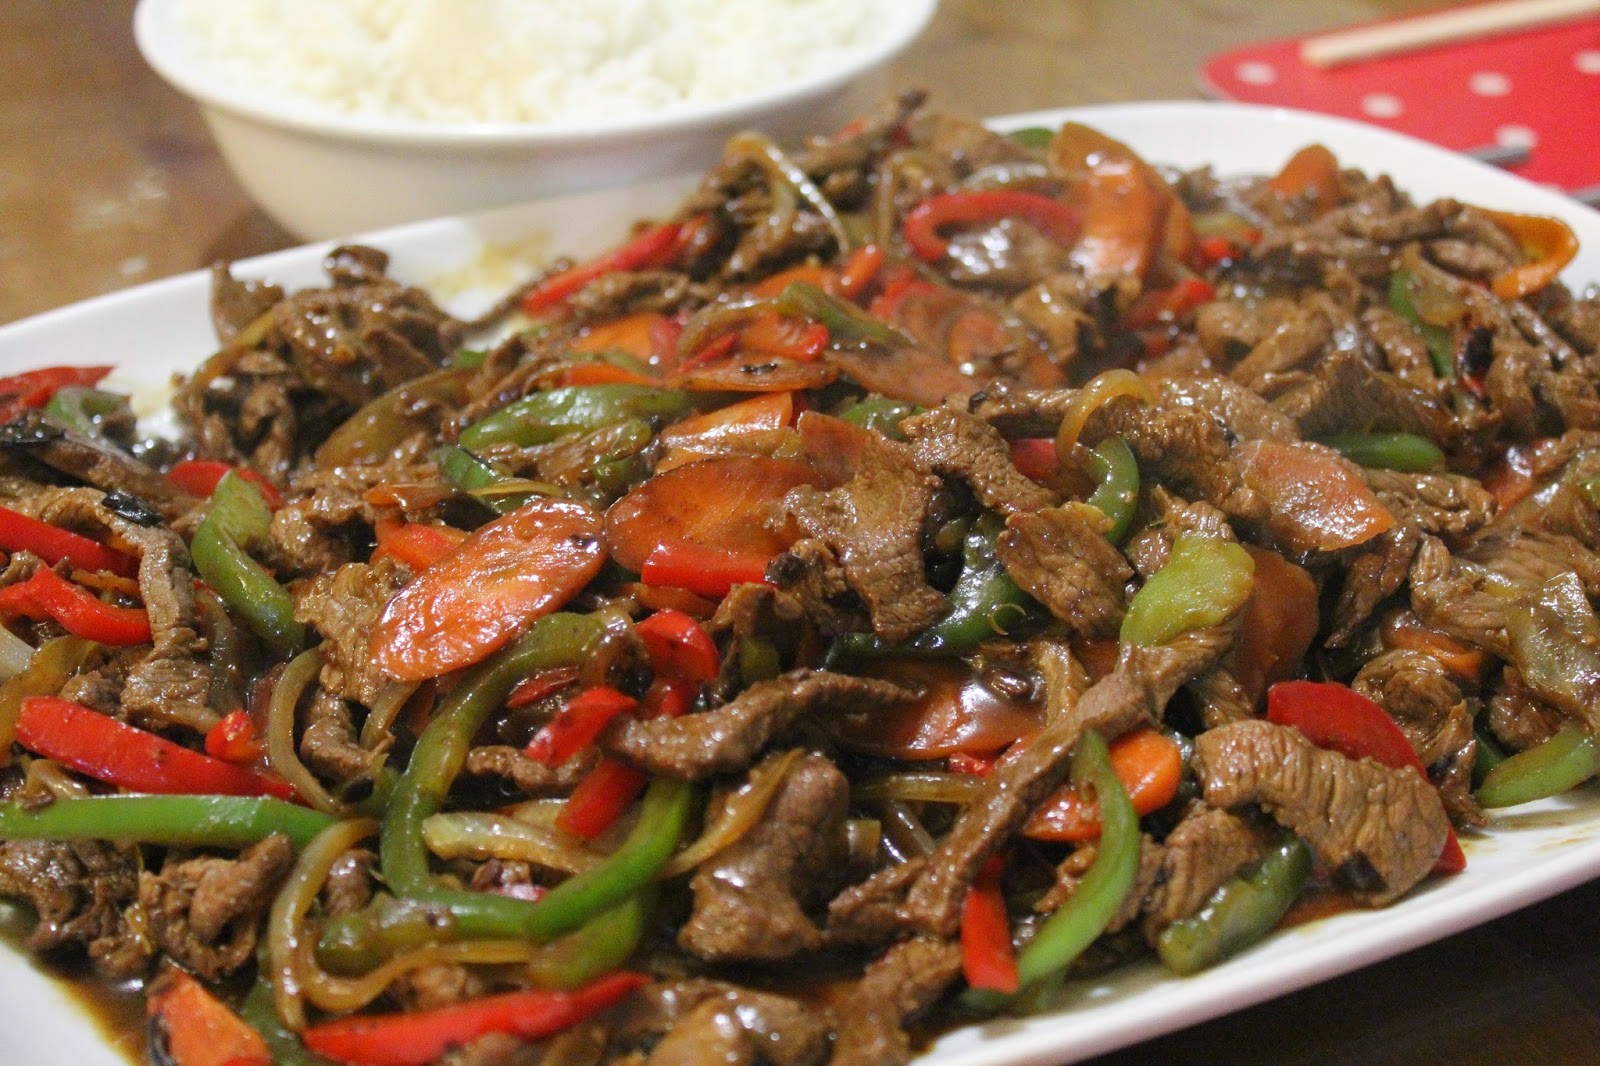
After modifying parts of the recipe to reduce the oil content without compromising on the flavour we were happy with the outcome... tender beef strips, crispy vegetables with a sauce bursting with flavours.  Combinations of chilli, garlic, ginger and cumin!!  Magnificent even if a little on the hot side.... but not to the point of breathing fire!


Hunan Beef with Cumin
(Recipe adapted from Serious Eats)

Serves: 6
SmartPoints per Serve: 9

2 tablespoon Shaoxing wine or medium-dry sherry
1 tablespoon soy sauce
1 tablespoon cornflour
500 grams skirt steak or steak of your choice, cut into thin strips against the grain
1/2 cup canola oil
1 tablespoon fresh ginger, peeled and minced
4 garlic cloves, minced
2 fresh red chilies, stems and seeds discarded, finely chopped
2 teaspoons dried chili flakes
2 teaspoons ground cumin
1 brown onion, sliced
1 red capsicum, thinly sliced
100 grams snow peas
1 bunch coriander, roughly chopped
1 teaspoon sesame oil

Whisk together wine, soy sauce, cornflour, and one tablespoon water in medium-sized bowl. Add beef to marinade, mix with hands, and let sit for at least 15 minutes at room temperature.

Pour oil into large wok. Heat oil in wok over high heat.  Add beef and cook for two minutes, tossing gently. Remove beef with tongs, and drain on paper towel.

Pour out all but three tablespoons of oil.
Turn heat to high again, and once lightly smoking, add ginger, garlic, chilies, chili flakes, and cumin. Stir constantly with wooden spoon for about 15 seconds.

Add onions and capsicum, stir fry for a further 3 minutes, continually tossing.  Once starting to soften return the beef back to wok.  Add snow peas and coriander.  Cook until beef starts to sizzle, about 1 minute. Stir well and transfer beef to a large plate.

Drizzle sesame oil on top. Serve beef with white rice, if desired.


(Click here for a printable version of this recipe)

Friday, June 12, 2015

Beijing Beef

Everyone who knows me will tell you I am definitely addicted to trying new recipes - especially those that are not known down here in Australia.  I have fallen in love with a food web site, Rasa Malaysia, which has given me some inspiration of late to get back into the kitchen and cook new meals, instead of the same good ol' favourites we love.

There are so many taste tantalizing recipes within the site and Bee, the site's author continues to do an amazing job.  We have already sampled a few and one of our new favourites is Sweet and Sour Pork, it was incredible and has been made several times.  This dish, Beijing Beef, was of an equally high standard.

I am not familiar with the origin of this recipe as it's claimed to be a Panda Express Copycat recipe.  Googling I have found that Panda Express is one of America's largest chain of Chinese takeaway stores, starting with their first store in California opening in 1970 they are now branching out to other countries worldwide including the Middle East - not here in Australia yet but I am guessing we'll just give them some time.

We all loved the dish - the flavours were great and the beef was nice and tender. A little spicy and a little sweet the flavour zinged while eating leaving the taste buds craving more and more.  There are a few elements in this dish but to be honest it's well worth the effort.  Like the Sweet and Sour Pork, this dish now gets cooked on a regular basis.


   Beijing Beef
(recipe adapted from Rasa Malaysia)

Serves: 6
ProPoints per Serve: 11

500 grams steak, rump, porterhouse or skirt, cut against the grain into 1/4 inch slices
4 tablespoons oil
4 cloves garlic, minced
1 onions, sliced
1 medium-sized red capsicum, cut into pieces
1 medium-sized red bell pepper, cut into pieces
1/2 cup cornflour, to dust beef for deep-frying
Salt and sugar to taste

Marinade:
2 egg, beaten
1 teaspoon cornflour
1/2 teaspoon ground white pepper
1 teaspoon salt

Beijing Sauce:
8 tablespoons water
4 tablespoons sugar
3 tablespoons ketchup
6 tablespoons Hoisin sauce
1 tablespoon light soy sauce
2 teaspoons oyster sauce
1 tablespoon sweet chili sauce
1-2 teaspoons crushed chili peppers (taste dependent)
2 tablespoons apple cider vinegar

Prepare the Marinade in a bowl and mix well. Marinate the beef for 15 minutes.

In a seperate bowl, mix all the Beijing Sauce ingredients. Set aside.

Place cornflour in a bag/bowl. Toss marinated beef in cornflour, coat well and set aside in the refrigerator.

Heat up enough oil over high heat. Coat beef slices with cornflour again, making sure the beef slices are well coated. Shake off the excess cornflour from beef slices. Prepare to deep-fry beef (in small batches). Drop in the beef slices and deep-fry for 1-2 minutes or until light golden brown. Dish out, drained on paper towel and set aside.

In a wok, heat up the oil over high heat. Stir-fry the onion and bell pepper until fragrant and slightly charred, add in the garlic and continue to stir-fry for 10 seconds. Remove from wok.

Heat up wok over medium-high heat, pour in the Beijing Sauce seasoning. Bring it to a simmer or until it thickens. You may adjust salt, soy sauce, water, etc., to taste.

Toss in the deep-fried beef and stir-fried onion, bell pepper, and garlic. Stir well for 1 minute or until the beef is completely cooked and the sauce is absorbed.

Dish out and serve with hot steamed rice (add an additional 3ppts per 1/2 cup).


(Click here for a printable version of this recipe)

Friday, February 20, 2015

Sweet and Sour Pork

This would have to be my children's "always order" dish at any Chinese restaurant.  They love the crunchy batter on the pork pieces smothered in the famous sweet and sour sauce that everyone is familiar with.

Some Sweet and Sour sauces can be too sweet or too sour which obviously spoils the meal for the consumer but not this one.  This homemade sauce does nothing short of elevate the delicate tender pork to a point where tastebuds explode at the moment of the first mouthful.

Melt in the mouth pork, crunchy vegetables, sweet pineapple enveloped in lip smacking sauce I think I would be allowed to cook this every night if my family had their way.......


Sweet and Sour Pork
(Recipe adapted from RasaMalaysia.com)
 
Serves: 6
ProPoints per Serve: 16

2 teaspoons soy sauce
1 teaspoon rice wine
2 tablespoons cornflour
500 grams pork tenderloin, diced
3 tablespoons tomato ketchup
2 teaspoon plum sauce
1/4 teaspoon Chinese rice vinegar
1 teaspoon Worcestershire Sauce
2 teaspoon oyster sauce
2 teaspoon sugar
4 tablespoons water
3 tablespoons plain flour
1/2 teaspoon baking soda
1 small pinch of salt
1 egg
1 cup water
1 cup canola oil
4 clove garlic, crushed
1 green capsicum, diced
1 red capsicum, diced
4 spring onions, cut into 2cms lengths
425 gram can sliced pineapple, drained and cut into small pieces

In a large bowl combine soy sauce, rice wine and 2 teaspoons of cornflour.  Mix well.  Add pork and marinate for 15-20 minutes.

Meanwhile make the sweet and sour sauce by combining the ketchup, plum sauce, rice vinegar, Worcestershire sauce, oyster sauce, cornflour, sugar and 4 tablespoons water.  Mix well and set aside.

Sift the flour, the remaining cornflour, baking soda and salt in a large bowl.  Then add in the egg, water, and 2 teaspoons of canola oil to form a thick batter.

Transfer the pork pieces into the batter and make sure they are well coated. In a deep skillet, add in the cooking oil enough for deep-frying. Once the oil is hot, deep fry the pork pieces, in batches, until they turn golden brown. Drain on a plate lined with paper towel.

Heat up a wok and add remaining oil. Add in the garlic and stir fry until light brown, then follow by the capsicum and pineapple pieces. Stir fry for 3 - 4 minutes and then add in the sweet and sour sauce. As soon as the sauce thickens, transfer the pork into the wok and stir well with the sauce. Add the spring onions, tossing through well and then place on a serving platter or dish.
 
Serve accompanied with steamed rice, if desired.
 

(Click here for a printable version of this recipe)

Wednesday, September 24, 2014

Beef in Black Bean Sauce


Beef in Black Bean Sauce, a classic dish I think that everyone has ordered from a Chinese at some stage in their life.  It has a taste, unique, that you either like or hate.  It's a little sweet, a little salty yet packs a powerful flavour and compliments beef magnificently.   It's a split in our house, the two men love it, the daughter hates it and as for me, I sit on the fence.  If it's too strong I cannot eat it and if there's not enough flavour of the black bean I whinge about that..... gggrrr.  As the daughter being away at her Grandma's for part of the school holidays, I made sure this dish was on our menu planner, as have been a few other meals.
 
Cooking chinese or any Asian dishes can be daunting to many.  Yes many recipes can seem very complex but yet some are very simple.  This one falls into the simple category with no trickly steps at all.   No premade black bean sauce has been used in this recipe.  Instead a trip to the Asian Supermarket saw us armed with a jar of salted black beans and recipe in hand.  I think that was the hardest part of the whole dish.
 
Takeaway in our home, mid week ease and a taste that was exactly how it was meant, slightly sweet and spicy, jam packed with vegetables... who could ask for more?  Bonus points to be awarded as this was prepared and cooked by my husband, Noel.
 
 
Beef in Black Bean Sauce
(recipe adapted from WW Magazine October 2014)
 
Serves: 4
ProPoints Per Serve: 5
 
1/3 cup chicken stock
2 teaspoons cornflour
2 tablespoons kecap manis
1 tablespoon canola oil
600 grams rump steak, fat trimmed, thinly sliced
1 brown onion, sliced
2 carrots, peeled and thinly sliced
1 red capsicum, thinly sliced
1 green capsicum, thinly sliced
2 garlic cloves, thinly sliced
2 tablespoon salted black beans, chopped

Combine stock, cornflour and kecap manis in a small jug or bowl.

Heat a wok over high heat.  Add half the oil and heat for 20 seconds.  Stir-fry half the beef for 2 - 3 minutes of until browned.  Transfer to a plat.  Repeat withthe remaining oil and beef.

Add onion and carrot to the wok and stir-fry  for 2 - 3 minutes or until just softened.  Add capsicum and stir-fry for a further 2 minutes.  Add garlic and black beans, stirring for 30 seconds. 

Return beef to the wok along with the stock mixture.  Stir-fry for 1 - 2 minutes or until sauce has thickened.

Serve with extra steamed 0 ProPoint vegetables and steamed rice.  Add 4 ProPoints per 1/2 cup steamed rice.


Friday, December 27, 2013

Hoisin and Chilli Chicken Chow Mein

I love Chow Mein and like many reciipes, there are so many different versions. 

I love the Chinese version with noodles.. sometimes soft noodles and other times the crispy noodles take my preference.  There is something wonderful about a dish of noodles accompanied with tender meat and vegetables encased in a thick yet simple sauce.

As the kids were not eating with us tonight I fancied adding some chilli along with the sweet sour taste of hoisin sauce.  Adding two bold flavours to a simple dish could be a little overpowering but it was a risk I was willing to take especially after eating Christmas food for the last few days I was yearning a different flavour - and I had all my money on the fact that this dish may just give me the taste that I wanted.

And boy did it work - it was fantastic.  Both Noel and my Mam were in agreeance that the flavours complimented the chicken, vegetables and noodles. 


Hoisin and Chilli Chicken Chow Mein
 
Serves: 6
ProPoints per Serve: 8
 
200 gram packet Changs Egg Noodles
1 tablespoon peanut oil
600 grams diced chicken
1 teaspoon crushed garlic
1 teaspoon crushed ginger
1 onion, sliced
2 carrots, peeled and sliced
1 bunch broccolini, chopped into 3 cm pieces
200 grams button mushrooms, sliced
1/2 cup hoisin sauce
1/2 cup dry sherry
1 teaspoon crushed chilli
 
 
Boil water in a kettle.  Place noodles in a large bowl and cover with boiling water.  Allow to stand for 5 minutes or until tender (not too soft).  Drain, return to bowl and mix through 1 teaspoon of peanut oil.
 
Heat wok over high heat and add 2 teaspoons peanut oil.  Cook chicken, garlic and ginger, in batches, until browned and just cooked.  Remove from wok.
 
Heat remaining oil in wok.  Cook onion, carrots and broccolini stalks over medium heat for 5 minutes or until softened.   Add mushrooms and cook for a further 3 - 5 minutes.  Add the broccolini heads and return the chicken to the pan. 
 
Mix together the hoisin sauce, sherry and crushed chilli in a small jug.  Add to the chicken and vegetables in the wok.  Toss together for 2 minutes.
 
Add noodles and toss very gently until mixed and noodles heated through. 
 
Serve immediately.


(Click here for a printable version of this recipe)

Friday, December 30, 2011

Xinjiang Lamb with Cumin and Chillies

The ingredients in this dish caught my eye straight away - which only meant one thing!  It had to be cooked.

This cumin spiked dish is inspired by Uygar cuisine in northern China and it sure left an amazing lingering flavour with each mouthful.  The chilli added the heat which complimented the dish nicely.


Xinjiang Lamb with Cumin and Chillies
(recipe adapted from Woolworths Good Taste Magazine January 2012)

Serves: 4
ProPoints per serve: 6

450 grams lean lamb strips
3 garlic cloves, crushed
1 tablespoon cumin seeds
2 teaspoons ground cumin
1 teaspoon dried chilli flakes
2 tablespoons light soy sauce
1 1/2 tablespoons oil
1 brown onion, halved and cut into wedges
1 green capsicum, seeded and coarsely chopped
1 spring onion, finely chopped, to serve
fresh coriander leaves, to serve
dried chilli flakes, extra to serve

Combine the lamb, garlic, cumin seeds, cumin powder, chilli flakes and 1 tablespoon soy sauce in a bowl.

Heat 2 teaspoons of the oil in a wok over high heat until just somoking.  Stir fry the onion and the capsicum for 2 minutes or until lightly charred and tender.  Transfer to a bowl.

Heat 2 teaspoons of the remaining oil in the wok over high heat.  Stir fry half of the lamb mixture for 2 minutes or until browned and just cooked through.  Transfer to a plate.  Repeat with remaining oil and lamb mixture.

Add the lamb mixture, onion mixture and remaining soy sauce to the wok.  Stir fry for 30 seconds or until heated through.

Divide among serving plates.  Sprinkle with spring onion, coriander and extra chilli flakes.

(click here for a printable version of this recipe)

Wednesday, September 21, 2011

Mu Shu Pork

I fell in love with this recipe the minute I turned to the page in the new Weight Watchers Cookbook Eat and Enjoy.  It quickly took it's place on this weeks menu planner and I think we have all been looking forward to trying it.

Fork free dining is always a hit at our house with rice paper rolls, tacos, fajitas etc frequently on the menu - the dinner table is always relaxed and we seem to chat more (I have no idea why) except for tonight - everyone was too busy eating. 

This dish from northern China combines pieces of delicately flavoured pork and the pungent yet sweet flavour of hoisin sauce in everyone's favourite Peking Duck pancakes.  I changed the suggested vegetables as I knew my kids wouldn't eat the choy sum by itself.

All I can say was it was amazing and has already been requested again.

Mu Shu Pork 
(recipe adapted from WW Eat and Enjoy Cookbook)

Serves: 4
ProPoints per serve: 8

1 tablespoon salt reduced soy sauce
1 tablespoon shaoxing wine (Chinese rice wine)
1 teaspoon sesame oil
1 teaspoon caster sugar
1 tablespoon canola or sunflower oil
450 grams lean pork fillet, trimmed, cut into 3 cm pieces
4 green shallots, cut into 2 cm pieces plus extra for garnish
2 teaspoon finely grated fresh ginger
2 garlic cloves, crushed
150 grams fresh shitake mushrooms, thinly sliced
1/2 cup canned sliced bamboo shoots, shopped
1 tablespoon water
12 peking duck pancakes
1/4 cup hoisin sauce
1 bunch choy sum
1 bunch broccolini
2 teaspoons kecap manis

Combine soy sauce, shaoxing wine, sesame oil and sugar in a small bowl and stir until sugar has dissolved.  Set aside until required.

Heat a wok over a high heat heat.  Add half the canola or sunflower oil and heat for 30 seconds.  Stir fry pork, in batches, for 3 - 4 minutes or until lightly browned.  Transfer to a plate.

Reheat wok over high heat.  Add remaining oil and heat for 30 seconds.  Add shallots, ginger and garlic and stir fry for 1 minute.  Add mushrooms and bamboo shoorts and stir fry for 1 minute.  Return pork to wok along with soy mixture and water.  Stir fry for 1 minute or until heated through.

Meanwhile warm pancakes in microwave following packet intstructions.

Steam choy sum and broccolini until just tender.  Place on a plate and drizzle with kecap manis.

To serve spread 1 tablespoon hoisin sauce over each pancake.  Top with pork mixture and roll to enclose filling.  Sprinkle with extra shallots and serve with steamed choy sum.


(click here for a printable version of this recipe)

Saturday, August 27, 2011

Chengdu Prawns and Scallops

Every now and then we have to put up a spicy dish to please both of our tastebuds and this one was no exception as far as flavour and spice were concerned.

The Sichuan cuisine, also known as Szechuan-style and is one of the most popular regional styles of Chinese cooking. Known for it's spicy and pngent flavours this dish sure kicked a punch. Chengdu is the capital of Sichuan and the inclusion of citrus peel in this dish proves that it comes from this city.

I have to say the thought of using orange rind in a spicy sauce interested me as it is an ingredient that isn't often used.

Noel cooked this dish and I have to say that it was delicious.....


Chengdu Prawns and Scallops (Recipe adapted from Women's Weekly Stir Fry Chop Wok Toss)
Serves: 2
ProPoints per serve: 10

2 tablespoons light soy sauce
2 tablespoons chinese cooking wine
1 teaspoon sesame oil
400 grams prawns, shells removed and deveined
300 grams scallops
2 teaspoon peanut oil
500 grams baby spinach
2 cloves garlic, crushed
2 cms piece fresh ginger, grated
4 spring onions, sliced thinly
1 tablespoon rice vinegar
1 teaspoon white sugar
2 tablespoons finely grated orange rind
2 tablespoons sambal oelek
1 teaspoon sichuan peppercorns, crushed

Combine half the sauce, half the wine and half the sesame oil in a large bowl, add prawns and scallops and mix well. Cover and refrigerate for 20 minutes.

Heat 1 teapsoon peanut oil in wok and stir fry spinach until just wilted. Remove from wok and cover to keep warm.

Heat the remaining peanut oil in wok and stir fry the prawn and scallop mixture in batches until just cooked and remove from pan. To the same pan add the garlic, ginger and onion cooking until the onion just softens.

Return prawn mixture and remaining suacue, wine and sesame oil to the wok along with the vinegar, sugar, rind and sambal. Stir fry for 1 - 2 minutes until prawns are cooked through.

Serve spinach topped with prawns and scallops and sprinkled with the crushed sichuan peppercorns.


(click here for a printable version of this recipe)

Sunday, February 14, 2010

Barbecue Prawns

Growing up, and even today, I would have to say that this prawn dish holds so many memories. My mam completed a Chinese Cooking Course when I was 13 or 14 and while she was a great cook to start with the addition of "asian" flavours in our house added excitement to a house full of food lovers.

At around the same time The Australian Women's Weekly produced a cookbook, Chinese Cooking Class Cookbook. I think my mam and dad cooked nearly every recipe from it, delighting us with simple meals for dinner and pulling off the most memorable banquets when needed.

Needless to say Barbecue Prawns was a regular meal as it's quite easy and although called "Barbecue" this does not relate to the way it's cook rather to the flavour of the sauce. It's one of those dishes that everynow and then I fancy and last night was one of those nights.
The original recipe however calls for 1 cup of oil to be used in the cooking process and we all knows what that means - high points. I have removed the oil, replacing it with cooking spray and still got the same result.. which of course made me happy.

Barbecue Prawns
(recipe adapted The Australian Women's Weekly Chinese Cooking Class Cookbook)

Serves: 2
Points per serve: 5.5

500 grams raw king prawns, peeled and deveined
2 teaspoons cornflour
1 teaspoon salt
1 egg white
1 teaspoon curry powder
cooking spray
1 large onion
1/4 teaspoon sugar
2 teaspoons satay sauce
3 tablespoons lite cream
1/2 capsicum, sliced
lettuce leaves
Using a sharp knife make a deep slit along the back of each prawn.
Put cornflour, salt and unbeaten egg white into a bowl, mix well. Add prawns, mix well and allow to stand for 1 hour.
Heat cooking spray in a wok or large frying pan and heat over high heat. Add prawns and fry quickly for 2 minutes or until prawns are just cooked. Remove from pan.
Respray same wok with cooking spray and add onion, saute for 2 minutes. Add curry powder and sugar, stir for 1 minute. Return prawns to the pan and stir for 1 minute. Add satay sauce and cream, bring to the boil, reduce heat and simmer for 1 minute, stirring constantly. Add red capsicum. Remove from heat.
Line serving dish with lettuce leaves, spoon prawns over.

Saturday, January 30, 2010

Lobster with Blackbean and Chilli Sauce

The last time we went shopping in Springvale we were lucky enough to get our hands on some frozen raw lobster tails from our favourite Frozen Food shop. They were great value as they were small and 10 tails to the kilogram but unfortunately have been in the freezer ever since.

We decided that tonight would be the night to have them for dinner - maybe a little celebration as today I finished the job I have been doing for the last 8 years and I am moving on within the company as of next week in a new role.

After enjoying the Beef with Blackbean the other week, we knew that the lobster tails would be full of flavour and that their sweetness would compliment the saltiness if cooked in a similar sauce. So the idea of black bean combined with chilli paste was agreed upon as I love chilli and Noel favours the black bean but of course we both agree on the lobster itself!


Lobster with Blackbean and Chilli Sauce

Serves: 4
Points per serve: 5

1 kilogram raw Lobster tails
1 tablespoon olive oil
2 teaspoons crushed garlic
2 teapsoons crushed ginger
1 tablespoon chilli paste, or to taste
1 carrot, peeled and finely sliced
1 head of brocolli, cut into small florets
1/2 red capsicum, diced
2 spring onions, sliced
4 tablespoons black bean sauce
100 grams snow peas, trimmed and sliced
100 grams bean sprouts
fresh coriander leaves, for garnish

Remove shells from lobster tails, rinse well and cut into bite size pieces. Place on paper towel and set aside.

Coat a wok or large frying pan with oil ensuring the surface is covered. Heat over a high heat and add the garlic, ginger, chilli, carrots and broccoli. Stir fry for 2 - 3 minutes or until vegetables start to soften.

Add capsicum, lobster meat and spring onions. Stirfry for a further 2 - 3 minutes or until lobster is startting to turn pink. Mix through the blackbean sauce until all is completely coated with the sauce. Add snow peas and bean sprouts and toss through until warm.

Serve garnished with coriander leaves.


(click here for a printable version of this recipe)

Thursday, January 14, 2010

Beef in Black Bean Sauce

A favourite Chinese meal of Noel's is Beef in Black Bean Sauce so when I mentioned we had some beef strips that needed using and that we could have Black Bean Sauce his eyes lit up!

To be honest I think you either like Black Bean or you don't. It's a strongish, salty flavouring and not overly sweet. Luckily, even Alexandria our 8 year old loves the flavourings also.

Black Bean, or Douchi as it's known, is made from fermenting and salting soyabeans. This process turns the beans black, soft and mostly dry. We however used a premade version in a jar, called Black Bean Paste (made by Lee Kum Kee) which is just as nice as soaking the beans yourself.


Beef in Black Bean Sauce
Serves; 4
Points per serve: 4
cooking spray
500 grams lean beef strips
1 teaspoon crushed garlic
1 onion, sliced
1 carrot, peeled and thinly sliced
1 head of broccoli, cut into small florets
1/2 red capsicum, sliced
1/2 green capsicum sliced
300 grams button mushrooms, sliced
3 tablespoons black bean paste or sauce
1 teaspoon sugar
1 cup water
2 teaspoons cornflour
300 grams snow peas, trimmed and sliced on diagonal

Spray wok or large frying pan with cooking spray and cook half of the beef until just sealed. Remove to a plate, repeat with remaining beef strips.

Respray wok with cooking spray and add garlic, onion, carrot and broccoli. Stirfry for 3 - 5 minutes or until carrot is tender. Add capsicums and mushrooms. Stirfry for a further 2 - 3 minutes.

Return beef strips to pan along with black bean paste and sugar. Toss through sauce. Add combined cornflour and water, bring to the boil stirring until mixed through and slightly thickened. Add snowpeas and stir through.

Serve immediately.

(click here for a printable version of this recipe)

Tuesday, January 5, 2010

Kung Pao Chicken (Low Fat)

I know this is a repeat post but it is a favourite dish with us, which I must say took me a while to master to an acceptable standard as I have previously mentioned. BUT I have actually revamped my original recipe to become a healthier version so I can still enjoy this while trying to lose weight.

The original or traditional way of cooking this calls for a huge 1 cup of oil to cook with, I have removed this and replace it with cooking spray. To make the sauce a little thicker I also added some hoisin sauce - which is a western addition to this dish that I have read during my research for this dish.

The changes I think made for a nicer dish especially without the layer of oil and knowing that it was healthier for us all!!


Kung Pao Chicken

Serves: 4
Points per serve: 5


500 grams boneless chicken breasts, skin and fat removed
1 tablespoon soy sauce
1 teaspoon Chinese rice wine or dry sherry
2 teaspoons cold water
2 teaspoons cornstarch
2 1/2 tablespoons soy sauce
1 tablespoon black or red rice vinegar, or red wine vinegar
1 tablespoon chicken broth or water
3 teaspoons granulated sugar
1/2 teaspoon salt
1 tablespoon hoi sin sauce
a few drops sesame oil
1 teaspoon cornflour
cooking spray
6 to 8 small dried red chillies, or as desired, seeds removed for less heat
2 garlic cloves, finely sliced
2 spring onions, sliced on diagonal
1/2 cup skinless, unsalted peanuts

Cut the chicken into 1-inch cubes. Mix in the soy sauce, rice wine or sherry, water and cornflour. Marinate the chicken for 30 minutes.

In a small bowl mix together the soy sauce, vinegar, chicken stock, sugar, salt, sesame oil and hoisin sauce, whisking in the cornflour last.

Spray a wok with cooking spray and over a high heat add half of the chicken cooking for about 1 minute, until the cubes separate and turn white. Remove and repeat with remainder of the chicken.

Respray the wok and add the chillies and stir-fry until the skins starts to darken and blister. Add the garlic and spring onion. Stir-fry until aromatic (about 30 seconds). Add the chicken back into the pan and toss until chicken is heated through, then push up to the sides of the wok and add add the sauce in the middle, stirring quickly to thicken. Stir in the peanuts. Stir fry for a further 1 to 2 minutes or until everything is coated and hot.

Serve immediately.

(click here for a printable version of this recipe)

Thursday, June 11, 2009

Braised Chicken with Tamari

You have probably guessed by the multiple posting today that I have been flat out lately and although we have actually eaten dinner each day I haven't been able to blog about it. But as I mentioned just in my last post of Fragrant Pork Meatballs and Rice One-Pot I am in love with this month's edition of BBC Australian Good Food. Here is another recipe that I found in this magazine, and yes I have adapted it to suit us.

I have to be totally honest and say that the picture of her dish caught my eye as soon as I found it. The plating made it look so inviting, as do most asian dishes that have been presented well. Upon reading the recipe, the ingredients also took my fancy as all of our family are quite fond of any Asian style cooking.

This recipe belongs to Kylie Kwong, who I am sure most of you have heard about. She is a regular contributor to this magazine and as soon as I get hold on a new issue I can't wait to see what recipe she has put forward each month. Kylie Kwong is a fourth generation Chinese Australian and a prominent Australian television chef, author, television presenter and restaurateur based in Sydney. To date Kylie has released 5 books, all of which share her love of cooking and explore many different facets of Chinese culture and cuisine.

Braised Chicken Wings with Tamari according to Kylie was a dish her mother used to make once a week when she was growing up. A simple to cook, easy to prepare and delicious family meal made affordable by using chicken wings.

Although eating anything with your fingers is classed as "good" I used skinned drumsticks plus they are not as fiddly to eat as chicken wings plus there is more meat in the offering. They took a little longer to cook than what the chicken wings would have but that is totally understandable.

The sauce was delicate yet complexed. I was worried that using Tamari (somewhat similar to Soy Sauce) in both the marinade and the sauce would have been overpowering but it wasn't. Using fresh ginger and garlic gave it a kick and I don't think you could or should use the pre-crushed jar version of these ingredients in this dish.


Braised Chicken with Tamari
(recipe adapted from BBC Australian Good Food)
Serves: 6

12 chicken drumsticks, skin removed
or 12-16 chicken wings (approx 1.5kgs)
1/4 cup peanut oil
1 large brown onion, sliced
4 spring onions, cut into 10 cm lengths, plus
extra finely sliced to garnish
7cm piece of ginger, peeled and cut into
thin matchsticks
4 garlic cloves, crushed
1/3 cup shaoxing wine (chinese rice wine)
or dry sherry
1/3 cup tamari
1 cup water
finely sliced red chilli, to garnish
sichuan pepper and salt mix, to serve

Tamari marinade:
1/3 cup shaoxing wine (chinese rice wine)
or dry sherry
2 tablespoons brown sugar
2 tablespoons tamari
1 tablespoon cornflour
1 teaspoon sesame oil
1 teaspoon sea salt

Combine marinade ingredients. Add chicken and toss to coat. Cover and chill for 30 minutes.

Heat oil in a wok on high until the surface shimmers slightly. Add brown onion, spring onion, ginger and garlic and stirfry for 1 minute. Cook chicken drumsticks, reserving marinade in batches until browned.

Add shaoxing wine, tamari and reserved marinade. Stir fry for 30 seconds. Return chicken to the wok. Reduce heat to medium and add 1 cup water. Cover and simmer for 10 - 15 minutes, turning once or twice, until just cooked.

Place chicken in a deep platter or bowl. Spoon over remaining sauce and garnish with the chilli and extra spring onion. Serve with sichuan pepper and salt mix and plain steamed rice, if you like.

(Tip) to make sichuan pepper and salt mix, dry roast 1/4 cup sea salt and 1 tablespoon sichuan peppercorns in a pan on medium heat, until peppercorns pop. Cool and grind.

Monday, April 20, 2009

Nice Chicken

Okay so I haven't posted for a little while now and while I don't want you to think that we haven't been eating (mind you that might just do my waistline some good) we haven't been cooking anything special or out of the normal! Noel has actually been on kitchen duty this week (you all know by now that he's cooking is great too) as he has been on holidays with the kids. We have been really busy and so we even had a help yourself night and a UFO night! No we were not sitting on the roof watching for visitors from another planet - UFO meaning Unlabelled Frozen Object. One finds these in the depths of the freezer not amongst the stars!!
3
Another reason for the absence (no, there hasn't been another injury in the house) is that I wasn't a happy camper this last week or so as my camera broke!! I tried using the camera on my Nokia E71 mobile but that wasn't any good either. It was okay but not good enough I thought so off Noel and I went to buy a new camera on Saturday... nothing flash but enough for what I, I mean 'we' require and it's quite good. Its a Samsung ES15, have a look here.
3
Okay so that's the story and now onto last nights dinner.... which Noel did cook (as I spent most of the day up the football club). Geez he's good to me......
3
Okay so I know it's a strange name and not very descriptive except for the fact that it is indeed 'nice' chicken and that's the only name we have known this dish as even when I was a young child and my Mam was cooking it. My Mam is a fantastic cook as was my dad!
3It originated as a pork dish in a chinese cookbook owned by my mam. The original recipe is called Spicy Shredded Pork. She cooked it once with chicken and I don't think the recipe has been the same since. There has of course been a couple of alterations to the original recipe and it was quickly named 'Nice Chicken' by all of our family.
6But this is the way it gets cooked now by Noel and myself. It even gets the tick of approval from Mam so it must be okay. In fact, Mam arrives on Wednesday and when she reads this blog she will be very dissappointed that we cooked before she got here!


33
Nice Chicken
3
Serves: 4
3
2 eggs
60 grams cornflour
500g chicken breast, skin removed and diced
oil for deep frying
250 grams mushrooms, sliced
6 spring onions, sliced
1 x 225 gram can sliced water chestnuts, drained and rinsed
6 tablespoons hoi sin sauce
3 tablespoons soy sauce salt reduced
1 teaspoon cayenne pepper (or to taste)
3
In a bowl mix eggs and cornflour together into a smoot batter. Add chicken to the bowl and mix to combine.
2
Heat oil in a large wok or frying pan. Cook chicken in batches until almost golden but not fully cooked. Drain on a plate lined with paper towel. Allow oil to cool before removing from wok reserving 1 tablespoon.
3
Heat remaining oil in wok or frying pan. Add mushrooms and chicken to the wok and stirfry for 2 minutes. Add water chestnuts and spring onions, stir fry for another 1 - 2 minutes. Combine the hoisin sauce, soy sauce and cayenne pepper. Add combined sauce to wok and toss for another 2 minutes or until chicken is well coated with sauce. Serve immediately.

UPDATE - Picture updated 27/04/2019.

Wednesday, April 1, 2009

Chilli, Ginger and Garlic Scallops (Scallops ala Noel)

Although Noel is definately the master chef of this creation I have the pleasure of being privileged to blog about it!! And yes I feel very special indeed.
.
This dish is intense with flavour but enough to not overpower the delicateness of the scallops. I have been told to also say that it's the use of fresh ginger, garlic and chillies that make the dish and you would not get the same flavour from the jar variety of each ingredient. And as usual with most asian stir fry dishes ensure that you have all of your ingredients prepared so you are ready to "Wok and Roll"!!

.

3
Chilli, Ginger and Garlic Scallops
Recipe Source: Noel
3
Serves: 2
Points per serve: 3
3
500g scallops
1 tablespoon olive oil
2 red birdseye chillies, finely sliced
2 cloves garlic, peeled and thinly sliced
1 thumbsize peice of ginger, peeled and thinly sliced
2 spring onions, sliced
1/2 red capsicum, finely diced
1 small head of broccoli, cut into small florets
2 tablespoons teriyaki sauce
2 teaspoons cornflour
1 tablespoon water
3


Clean and rinse scallops. Individually pat dry scallops on paper towell (especially if using frozen scallops as this helps eliminate any extra water).
3

Add oil to a wok and heat over high heat. Add the chilli, ginger and garlic. Stirfry for 1 minute. Add spring onions, red capsicum and broccoli. Stirfry for 2 - 3 minutes.
3

To the vegetable mixture add scallops and toss over high heat for 2 - 3 minutes or until scallops are turning whiter. Add the teriyaki sauce and combine cornflour and water. Continue to stirfry until sauce thickens. Serve immediately.

Monday, March 16, 2009

Kung Pao Chicken

I have a long history with this dish and mastering it was just something that needed to be done. Not that I have but I think that I am getting pretty damn close.
3
I owe the love of this dish to my father as it was definately one of his favourite meals although I never actually remember him making it. He would buy himself this dish as his treat when we went past the chinese take away in the foodcourt at shopping. And if he didn't go shopping we had to bring it home for him. To not come home with it was somewhat of a sin!
3
Originating in the Sichuan Province of central-western China it has a very unique flavour. According to history the dish is named after Ding Baozhen (1820–1886) who was a Qing Dynasty official. Ding served as head of Shandong province and later as governor of Sichuan province. His title was Gong Bao or palatial guardian and therefore the name "Kung Pao" chicken is derived from this title.
3
3
Kung Pao Chicken
3
Serves: 4
3
500 grams boneless chicken breasts, skin and fat removed
1 tablespoon soy sauce
1 teaspoon Chinese rice wine or dry sherry
2 teaspoons cold water
2 teaspoons cornstarch
2 1/2 tablespoons soy sauce
1 tablespoon black or red rice vinegar, or red wine vinegar
1 tablespoon chicken broth or water
3 teaspoons granulated sugar
1/2 teaspoon salt
a few drops sesame oil
1 teaspoon cornflour
6 to 8 small dried red chillies, or as desired
2 garlic cloves
2 spring onions, sliced on diagonal
1/2 cup skinless, unsalted peanuts
1 cup oil for deep-frying and stir-frying
3
Cut the chicken into 1-inch cubes. Mix in the soy sauce, rice wine or sherry, water and cornflour. Marinate the chicken for 30 minutes.
3
In a small bowl, mix together the sauce ingredients, whisking in the cornflour last.
3
Remove the seeds from the chillies and chop. Peel and finely chop the garlic.
3
Heat the oil in a wok add half of the chicken cooking for about 1 minute, until the cubes separate and turn white. Remove and drain on paper towels. Repeat with remainder of the chicken. Drain nearly all of the oil from wok leaving approximately 1 tablespoon of oil.
3
Add the chillies and stir-fry until the skins starts to darken and blister. Add the garlic and spring onion. Stir-fry until aromatic (about 30 seconds). Add the chicken back into the pan and toss until chicken is heated through, then push up to the sides of the wok and add add the sauce in the middle, stirring quickly to thicken. Stir in the peanuts. Stir fry for a further 1 to 2 minutes or until everything is coated and hot.
3
Serve immediately.

Tuesday, March 10, 2009

Chicken and Sweet Corn Soup

My children devour this soup like it is going out of fashion or as if they hadn't eaten in weeks. However I am not complaining as I am really happy that the love it and are happy to have it whenever I fancy making it. Today was one of those days, and as usual it went down a treat.


3
Chicken and Sweet Corn Soup
3

Serves: 8 as a main
12 as an entree
Points per serve: Main 4.5
Entree 3
3
1 kilogram chicken fillets and/or chicken thigh fillets, skin and fat removed
8 cups water
1 onion diced
1 teaspoon crushed garlic
2 teaspoons crushed ginger
2 tablespoons dry sherry
1 tablespoon dried parsley
salt
freshly ground black pepper
3 x 425 gram cans creamed corn
1/2 teaspoon sesame oil
1/2 teaspoon Chinese five spice
2 slices ham, finely sliced
4 shallots, chopped, reserving 1/2 cup for garnish
4 tablespoons cornflour
4 tablespoons water
3 egg whites, lightly beaten

3
In a large saucepan place chicken, onion, water, ginger, garlic, salt, pepper, parsley and sherry. Bring to the boil, reduce heat and simmer for 20 - 30 minutes or until chicken is cooked, removing any forming scum from time to time.  Remove chicken from pan, reserving all the liquid, and allow the chicken pieces to cool until pieces are manageable. Shred all meat finely.

To the same pan add the shredded chicken, creamed corn, sesame oil and Chinese five spice. Stir until heated through. Add the shallots, reserving 1/2 cup for garnish, along with the ham and stir. Mix the cornflour and water together adding to the saucepan, stirring continually. When soup begins to thicken reduce heat to a simmer.
3
Before serving stir through the egg white by adding to soup in a thin stream while stirring.
3
Serve immediately topped with remaining spring onion as garnish.