Showing posts with label vegetarian. Show all posts

Monday, April 30, 2018

Pomegranate and Spinach Salad

By the end of summer I am personally sick of salad.  Although I try and make salads as interesting as possible.  Some of my favourite salads would have to be Roast Pumpkin, Beetroot and Bocconcini Salad with Guiness Dressing or Roast Pumpkin Salad and of course, the Crunchy Asian Salad.  However, there comes a point where I just cannot eat salad anymore.

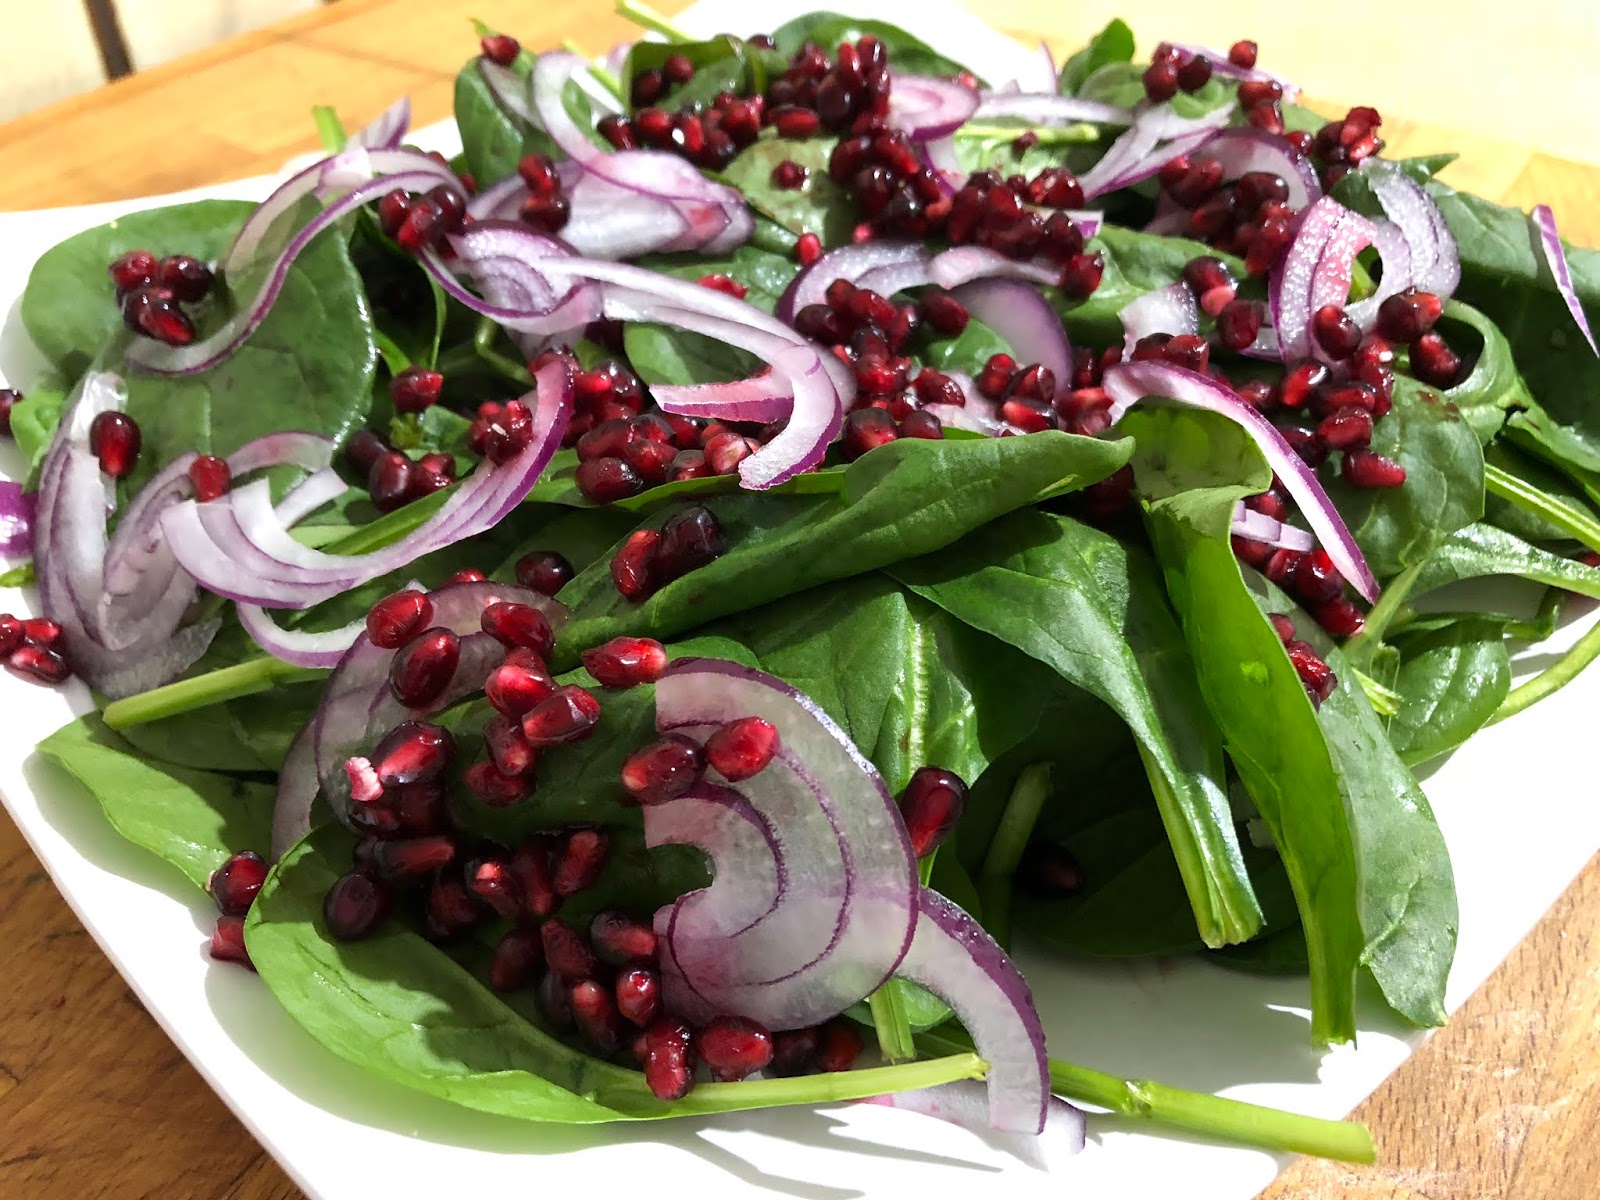
Saying this, you are not going to believe the salad on the plate tonight.  This would have to be the most jam packed flavoursome salad that only has 3 ingredients...... yep go figure.  Bold spinach combined with the sweetness of thinly sliced red onion.  Scattered with fresh pomegranate tendrils.

The hardest thing about making this salad is removing the tendrils from the pomegranate. The easiest way I have found is to cut the top off and make slits down the sides of the pomegranate.  Then open it like a flower, turn upside down and tap with a wooden spoon.  Here is an instructional video.  Once you have done it a few times you will have mastered the art of doing this without too much mess.

It's actually one of our daughter's favourites and takes this for lunch at school quite often.  I like it drizzled with balsamic vinegar to add another element.  In all seriousness you will love this. 


Pomegranate and Spinach Salad

Serves: 4

500 grams baby spinach leaves, rinsed and patted dry
1 small red onion, thinly sliced
tendrils of 1 pomegranate

On a large platter or bowl layer the spinach and red onion.  Toss together if you wish.

Sprinkle with pomegranate tendrils.

Serve immediately.


(Click here for a printable version of this recipe).

Monday, July 24, 2017

Cheesy Potato and Vegetable Medallions

I would have to say that I buy Grönsakskaka from the shop at Ikea every single time that we go there - in fact I get more joy from the grocery shop at the end of the giant furniture store than actually looking at all the furniture. Don't get me wrong the furniture is beautiful and I dream of owning an Ikea house but that little shop at the end is like my reward for going shopping there.
 
For those that have not experienced these Swedish Potato and Vegetable Medallions they are simply a cheesy mashed potato and vegetable ball that are oven cooked.  They are literally the perfect side dish.  Found in the frozen section of the little grocery store at Ikea.
 
So why I am telling you about these tasty treats?  Because I have made a copy cat version using left over vegetables from the night before.  Having left over boiled potatoes and mixed vegetables, which I did not want to waste, I sat down and started thinking about things we could use them for.  Obviously we could have mashed them for a Shepherd's Pie topping or similar but there was way too much for even a quick fry up.  Then, while talking about mashed potatoes, I remembered the Swedish Grönsakskaka.
 
Of course as the vegetables we had were already cooked we could not claim that these were cooked traditionally. However I will be doing that soon - well once we have eaten all the medallions that are in our freezer!
 
 
Cheesy Potato and Vegetable Medallions
 
Serves: 12
 
1 kilogram potatoes, peeled and chopped
1 kilogram frozen mixed Winter Vegetables (or vegetables of your choice)
3 spring onions, chopped
1/2 cup grated tasty cheese
2 eggs
150 ml thickened cream
1 teaspoon garlic powder
1 teaspoon onion powder
2 teaspoons dried thyme leaves
1/2 cup breadcrumbs, if required
salt
ground white pepper
 
Bring a large saucepan of water to the boil and add potatoes. Boil until just cooked through, about 12-15 minutes.  Drain and allow to cool.  When potatoes are cool, mash coarsely (you don't want smooth at this point).

Bring a second saucepan of water to boil and add vegetables.  Boil until cooked through, approximately 5 - 8 minutes or cook as per directions on packet.  Drain and allow to cool.  Mash the vegetables, also coarsely (you want vegetable pieces not puree).
 
Put the potatoes and the vegetables in the same saucepan. 
 
Add spring onions and cheese.

Put the eggs in a medium bowl and lightly whisk them.  Add and garlic powder, onion powder and thyme.  Whisk them together with the eggs.  Season with salt and pepper.
 
Add egg mixture to the potatoes and stir gently until all ingredients are completely mixed through.  If mixture is too moist, add breadcrumbs to assist mixture to firm up.

Preheat the oven to 220 degrees Celsius.
 
Line a baking tray with cooking paper and spray with cooking spray.  Using a round cutter for it's shape and place on tray.  Fill to the top with mixture.  Using the back of a spoon gently push down on mixture while lifting cutter up.  Repeat until all mixture is used.
 
 
Or you can spray a standard muffin pan with cooking spray and put 1/2 of a cup of the mixture into each cup.  Use a spoon to push the mix into the cup so that there are no air pockets.

Spray tops of medallions with cooking spray.

Bake for 20 minutes.  Turn medallions over and bake for a further 10 minutes or until brown and crispy.

Serve warm as a side dish or these are perfect for breakfast also.

This recipe can be doubled or quadrupled as they freeze very well. If you are planning to freeze do so after cooking for 30 minutes.  Remove from oven, allow to cool and then place on an uncovered tray in the freezer. After they have completely frozen place them in a sealed plastic bag or container for storage.  To reheat the frozen medallions defrost completely and cook, as above, for 10 minutes or you can microwave them for one minute and then cook as above.


(Click here for a printable version of this recipe)

Saturday, December 3, 2016

Okonomiyaki お好み焼き - Japanese Vegetarian Pancake

Okonomiyaki (お好み焼き o-konomi-yaki?) is a Japanese savoury pancake containing a variety of ingredients. The name is derived from the word okonomi, meaning "how you like" or "what you like", and yaki meaning "grill".

Okonomiyaki is mainly associated with the Kansai or Hiroshima areas of Japan, but is widely available throughout the country. Toppings and batters tend to vary according to region. Tokyo okonomiyaki is usually smaller than a Hiroshima or Kansai okonomiyaki.

One of Alex's favourite meals is Okonomiyaki. I must admit I love them too.  Either a quick snack or a planned meal they are fantastic. They are jam packed full of goodness and a great way to use up vegetables.

While the traditional Okonomiyaki has cabbage as it's main ingredient and very few others, but you can, in fact, put anything you want into the mix and fry.  Many restaurants offer cooked pork mince, chicken, prawns, bacon, chinese sausage and even noodles - I guess the potential at home is endless.


Okonomiyaki お好み焼き - Japanese Vegetarian Pancake
(Recipe adapted from Okonomiyaki World)

Serves: 2

1 cup plain flour
2/3 cup Water (or Chicken stock)
2 eggs, whisked
Salt
ground white pepper
300 grams green cabbage, cut into strips
1 carrot, peeled and grated
100 grams fresh bean shoots
2 spring onions, thinly sliced diagonally
cooking spray
Kewpie Mayonnaise
Okonomi Sauce or Barbecue Sauce

In a large bowl, whisk together flour and water until smooth. Add in eggs mixing to combine. Season with salt and pepper.

Add cabbage, carrot, bean shoots and ¾ of the onions and mix, but don't over mix.

Spray a non-stick frying pan cooking spray and heat over medium heat. Add half the Okonomiyaki mixture.

Using a spatula flatten and form pancakes until around 1.5cm thick - approximately 30cm across.

After about 3 minutes, flip over pancake and cook for 4 minutes.

Flip pancake again and cook for 3 minutes or until firm and well browned.

Remove to plate and drizzle with Kewpie mayonnaise and Okonomi or Barbecue sauce. Sprinkle with remaining spring onion.

Eat quickly before someone near you takes your portion.

Monday, May 16, 2016

Spicy Vegetarian Pizza

Since we purchased our pizza oven we have had fun experimenting with pizza dough and pizza toppings.  It's always been a laugh and most times, even though we have had some disappointments, we have enjoyed what we have cooked.
 
Tonight I made a vegetarian special which is my go to pizza if I am unsure on what I want (most of the time) but this time I decided to jazz it up with some spiciness of jalapeños.  I adore jalapeños and I am often caught eating them straight from the jar. 
 
These lovely pickled treats along with the fresh tasting vegetables was so comforting..... who needs to order a pizza when you can make fresh goodness like this in your own home?


Spicy Vegetarian Pizza

Serves: 2

cooking spray
1 serve pizza dough or a large pita bread
2 tablespoons tomato paste
100 grams baby spinach leaves
1/2 brown onion, sliced
100 grams button mushrooms, sliced
8 cherry tomatoes, halved
8 - 10 slices of pickled jalapeños
8 baby Bocconcini, stretched

Preheat pizza oven or oven to 220 degrees C.

Spray pizza tray with cooking spray.

Stretch pizza dough on to the pizza tray or place pita bread on the pizza tray.

Spread tomato paste all over the base.

Top with spinach, onions, mushrooms, cherry tomatoes and jalapeños. Stretch Bocconcini and place evenly over pizza.

Cook in oven for 15 - 20 minutes or until cheese is bubbling and vegetables are cooked through.

(Click here for a printable version of this recipe)
Tuesday, October 13, 2015

Crispy Cream-Braised Potatoes and Fennel

This was definitely another experimental recipe not just with cooking with a new ingredient but also experimenting with the tastes of my family... thankfully my family are open to new foods and flavours and are definitely not fussy eaters.

I must say I enjoy fennel - I enjoy the liquorice/aniseed flavour and the way it actually compliments a lot of foods - something I actually didn't think that it would do.  Having two fennel bulbs in the fridge which I had actually brought for another recipe that just didn't happen I needed to find a recipe to use up these interesting shaped vegetables.  I found this recipe on Food 52 a site that I am quite enjoying at the moment.  We had this as a side dish with crumbed pork cutlets.
 
Very similar to a potato bake, I thought it was rather decadent with the fennel wedges and the garnish of herbs, orange zest and cheese.  Something very different but enjoyable.

Crispy Cream-Braised Potatoes and Fennel
(Recipe adapted from Food 52)

Serves: 4

3 potatoes,  peeled and cut into irregular 3 - 4 cm chunks
2 fennel bulbs,  trimmed (with tough or bruised outer layers removed), then cut lengthwise into wedges about 3 - 4cm wide (leaving core intact)
1 cup fat reduced cream
2 to 3 cups of skim milk, or enough to cover the vegetables
1 bay leaf
1/4 teaspoon fennel seed
salt
freshly ground black pepper
3 or 4 large springs of thyme, leaves removed and finely chopped
1 large leafy sprig of rosemary, leaves removed and finely chopped
1/4 cup finely grated pecorino romano (or parmesan reggiano)
zest from 1 small orange, finely grated
olive oil

In a 3 to 4 quart pan, combine potatoes, fennel wedges, bay leaf, and fennel seed. Add enough cream and enough milk to fully cover the potatoes and fennel. Season generously with salt and freshly ground black pepper. Over medium-high heat, bring the milk mixture to a simmer, then lower heat to just maintain the simmer. Cook until the potatoes and fennel are soft and tender, about 20 minutes. Take off the heat. The potatoes and fennel should be fully cooked at this point.

While potatoes and fennel are braising, preheat broiler to medium-high. In a small bowl, combine rosemary, thyme, pecorino, and orange zest.

Remove potatoes and fennel wedges from the half-and-half with a spider or slotted spoon, and transfer them to a gratin or casserole dish. Some of the half-and-half will cling to the vegetables, which is a good thing. Make sure to generously coat the bottom with olive oil to prevent sticking. Taste the potatoes and fennel for seasoning – if you need more salt or pepper, add them now. Toss with olive oil (about 1 tablespoon), then the herb-cheese-orange zest mixture. Arrange the potatoes and fennel wedges in a single layer to promote even browning.

Place the casserole dish under the broiler (about 6 inches away from the source of heat). Broil for about 3 to 5 minutes, or until the potatoes and fennel are caramelized and crispy around the edges. (I typically brown the vegetables more than the ones in the picture above...just leave them under the broiler until they've reached your desired crispness!)


(click here for a printable version of this recipe)

Tuesday, October 6, 2015

Sesame and Soy Stir Fried Vegetable Noodles

Vegetables can be boring let's face it. 

Add noodles - instant change and makes eating lots of vegetables in one sitting easy.  We always have noodles on hand and these shelf life noodles are perfect for a whipping up a quick meal.  Using fresh noodles would be fantastic but not as practical as these pantry dwellers.

These noodles laced with the aromatic sesame oil and soy sauce were perfect accompanying Noel's Char Siu Beef Kebabs.   The kebabs were full of flavours and these simple noodles complimented them perfectly.  All the different vegetables release their own flavours so there was no need to make this dish overpowering by using different sauces etc.


Sesame and Soy Stir Fried Vegetable Noodles

Serves: 4

1 x 220 gram pouch Hokkien Noodles
1 x 220 gram pouch Singapore Noodles
1 tablespoon canola or vegetable oil
1 teaspoon crushed garlic
1 onion, sliced
3 carrots, cut into batons
1 red capsicum, sliced
1 head of broccoli, cut into florets
200 grams button mushrooms, sliced
100 grams snow peas, trimmed and halved diagonally
2 teaspoons sesame oil
1 tablespoon soy sauce

Place noodles in a large bowl and cover with boiling hot water.  Allow to stand for 5 minutes, loosening noodles occasionally.  Drain.

Place oil in a wok or large frying pan and heat over high heat.  Add garlic, onion and carrots and cook, tossing constantly, for 5 minutes or until slightly softened.  Add capsicum, broccoli and mushrooms to the wok.  Continue to cook, still tossing, for another 5 minutes or until broccoli is tender.

Add noodles, snow peas, sesame oil and soy sauce.  Toss until well combined.  Cook until noodles are hot and snow peas are just tender.

Serve.


Sunday, September 27, 2015

Noodle and Vegetable Salad

Noodles are positively delicious - I love them either hot or cold.  

This Noodle and Vegetable Salad is one of my favourites.  I make a huge batch of it and we can take it to work for lunches throughout the week. Best of all this noodle salad is jam packed with vegetables and lots of Asian-fused flavours.  

The vegetables are of the season so you can really use whatever you wish, therefore it can be basic or as interesting as you wish it to be.  

Ultimately a very easy salad (or side dish) to make.  It can be eaten either cold as intended or even warmed through.  I actually like it both ways.  I have also been known to freeze the salad when we have eaten enough and use for quick and tasty lunch boxes.


Noodle and Vegetable Salad
(recipe adapted from WW Everyday Low Point Cooking)

Serves: 4

2 teaspoons sesame oil
1/4 cup sweet chilli sauce
1/4 cup soy sauce
1/4 cup lime juice
1 bunch asparagus, cut into bite size pieces
4 cups cooked egg noodles
4 spring onions, sliced
1 red capsicum, thinly sliced
1 carrot, grated
100 grams snow peas, shredded
1 tablespoon sesame seeds, lightly toasted

In a 2 cup jug mix together the sesame oil, sweet chilli sauce, soy sauce and lime juice until combined.

Lightly steam or microwave the asparagus pieces until tender.  Rinse in cold water until cool.

Place asparagus, noodles, spring onion, capsicum, carrot and snow peas in large bowl.  Drizzle with the sauce.

Toss gently to combine all ingredients.

Place into four takeaway containers (if desired) and sprinkle with sesame seeds.

Monday, September 21, 2015

Ricotta, Mixed Mushroom and Zucchini Lasagne

As Garfield once said "Once again I'm saved by the miracle of... lasagne!"
 
I have to agree... one of my favourite pastas to experiment with is Lasagne sheets.  We have tried making so many different lasagnes and they have all been yum!  To be honest I just think it's all about the layers.  Layers and layers of fillings, sauces, flavours.....
 
This one, a vegetarian delight, is very simple to make.  Not as many ingredients in this one as I have used in others, but I was really happy with the outcome. 

To be honest, being a meat lover, I was a little worried about this dish while I was assembling.  Putting in it in the oven I prayed that all of us would enjoy dinner or it would be frozen meals of our own choice.  Surprisingly... it was nice.  The flavours of the mushrooms and the zucchini noticeable throughout each layer, with the slight hint of chilli and herbs.

Very enjoyable and such a nice change to the normal meaty lasagne.


Ricotta, Mixed Mushroom and Zucchini Lasagne
(recipe adapted from WW Program Cookbook 2015)
 
Serves: 8
ProPoints per serve: 9
 
cooking spray
2 tablespoon olive oil
2 brown onion, finely chopped
2 garlic clove, crushed
400 grams button mushrooms, thinly sliced
400 grams Swiss brown mushrooms, thinly sliced
2 x 400 gram can diced tomatoes
1 - 2 teaspoons crushed chilli flakes
salt
freshly ground black pepper
4 large zucchini, coarsely grated
1 kilogram reduced fat fresh ricotta cheese
2 egg, lightly whisked
1 tablespoon dried oregano
6 lasagne sheets
1 cup grated reduced fat tasty cheese

Preheat oven to 180 degrees Celsius or 160 degrees Celsius fan forced.

Lightly spray a large ovenproof dish with oil.

Heat oil in a large non stick frying pan over medium-high heat. Cook onion and garlic, stirring for 5 minutes or until softened.  Remove half the onion mixture and set aside.  Add combined mushrooms to the pan and cook, stirring, for 5 minutes or untl tender.

Add tomatoes and chilli flakes and bring to the boil.  Cook, stirring, for 5 minutes or until sauce has thickened.  Season with salt and pepper.

Squeeze excess liquid from zucchini.  Combine zucchini, ricotta, reserved onion mixture, eggs and oregano in a medium bowl.  Season with salt and pepper.

Spoon one third of the mushroom mixture over based of prepared dish.  Top with 1 lasagne sheet.  Spread with one third of the ricotta mxture.  Continue layering with remaining mushroom mixture, lasagne sheets and ricotta mixture.

Sprinkle with cheese and bake for 30 minutes or until golden brown and heated through. 


(click here for a printable version of this recipe)

Sunday, September 20, 2015

Ratatouille with Eggs

Eggplant - aubergine - eggplant - aubergine.....
 
What ever you call this sexy purple little number it's definitely a winner.  Eggplant, I have since found out is actually a fruit.  It's a species of nightshade grown specifically for it's edible fruit which is widely used in cooking, most famously as one of the key ingredients in Moussaka and Ratatouille. Eggplant is low in fat, protein, and carbohydrates but sadly it contains relatively low amounts of most important vitamins and minerals.
 
The raw fruit can have a somewhat bitter taste, but becomes tender when cooked and develops a rich, complex flavor. Eggplant, due to its texture and bulk, can be used as a meat substitute suitable for vegan/vegetarian recipes. The fruit flesh is smooth, as in the related tomato (hahaha another fruit) and the skin is edible.  From chutneys, curries, baked dishes or even meat filled eggplants are such a versatile ingredient used in the cuisine of many countries.

But for a vitamin packed brunch (breakfast) we had this veggie and "fruit" medley - definitely the perfect start to Sunday morning.  Eggplant, mushrooms, zucchini, onions and herbs enveloped in tomato sauce served with eggs and turkish bread.... mmmmmmmmm!!!

Minus the eggs (and toast) this Ratatouille is the perfect side dish for barbecue meats etc..... just saying!!


Ratatouille with Eggs
(Recipe adapted from WW Double Up Dinners Cookbook)
 
Serves: 6
ProPoints per serve: 6
 
2 tablespoons olive oil
2 brown onion, finely chopped
2 cloves garlic, crushed
2 fresh or dried bay leaf
6 fresh thyme sprigs, with extra to serve
2 medium eggplant, cut into 3cm cubes
500grams zucchinis, sliced in half lengthways and thickly sliced
2 red capsicums, cut into 3cm cubes
200 grams button mushroom, sliced
2 x 400grams can diced tomatoes
1 tablespoon dried oregano
1 - 2 teaspoons dried chilli flakes
12 eggs

Heat oil in a large saucepan over medium-hight heat.
 
Cook onion, garlie, bay leaves and thyme sprigs, stirring occasionally, for 10 minutes.
 
Add eggplant, zucchini, capsicums, mushrooms, tomatoes, oregano and chilli flakes.  Bring to the boil.  Reduce heat and simmer, covered, for 1 hour or until vegetables are tender and mixture thickens.  Discard bay leaves and thyme stalks.
 
Heat a non stick frying pan over high heat.  Fry eggs to your liking.  Top ratatoille with eggs and extra thyme. 
 
Serve with toasted bread of your choice, if desired.


(Click here for a printable version of this recipe)
 

Wednesday, September 16, 2015

Broccoli, Mushroom and Onion Medley

I love broccoli but not normally as a side dish. Why? I hate the fact it goes cold really quickly (so does cauliflower) on the plate when it's sitting there waiting to be eaten.

We had char-grilled steak for dinner and I wanted to incorporate this stunning vitamin packed vegetable into our meal.. And we did!

I will admit I enlisted the assistance of Google and of course my friends on Facebook and received lots of good suggestions. I especially loved my Uncle Poppy's suggestion of putting it in a plastic bag, microwave it and then eat it from the bag!! I guess it would go cold on the plate then LOL!

I settled on a medley, a quick stir fry, of broccoli, mushrooms and onions! So simple - quick, easy, and super tasty!!

And more importantly - it stayed warm!!!


Broccoli, Mushroom and Onion Medley

Serves: 4

1 tablespoon olive oil
2 garlic cloves, crushed
1 head of broccoli, cut into small florets
200 grams button mushrooms, quartered
1 red onion, sliced

Heat oil in a frying pan over medium heat.

Add garlic, broccoli, mushrooms and onions.

Cook, stirring occasionally, until broccoli is tender.

Serve immediately.


(click here for a printable version of this recipe)

Tuesday, February 3, 2015

Vegetarian Noodles

To my delight the House Of Murray is still a very busy place at the moment and YES there has been lots of food consumed.  Needless to say I have a backlog of recipes to share with you.  So my mission is to of course share these with you as well as the food that we are eating now.

This dish is one of my all time favourites either served by themselves as a sneaky comfort food or served with some barbecued meat or fish.  These noodles however have a flavour that tantalises the taste buds and there is normally none left for leftovers the next day.

A simple meal to prepare and cook but one that everyone enjoys.


Vegetarian Noodles


Serves: 4
ProPoints per serve: 5


440 grams hokkien noodles
1 tablespoon sweet chilli sauce
1 tablespoon kecap manis
2 teaspoons soy sauce
1/4 cup water
2 teaspoons oil
1 garlic clove, crushed
1 cm peice of ginger, grated
1 onion, sliced
1 carrot, julienned
1 red capsicum julienned
200 grams button mushrooms, sliced
2 baby bok choy, roughly chopped
100 grams bean sprouts
1/4 cup fresh coriander, chopped


Fill a large bowl with hot water and soak noodles as per packet directions. Drain and set aside.

In a small jug mix together sweet chilli sauce, kecap manis, soy sauce and water.

Heat oil in a large wok or frying pan over high heat. Add garlic, ginger, onion and carrots tossing until onion starts to soften - add a little water if vegetables start to burn. Add capsicum and mushrooms. Stir fry for 3 - 4 minutes.

Add combined sauce and stir through. Add noodles and bok choy tossing to combine.

Stir through bean sprouts and corinader. Serve immediately.


(click here for a printable version of this recipe)

Monday, November 26, 2012

Baked Vegetable Fettuccine

I have been hankering a vegetarian meal for a while just to take a step back from meat which we seem to have every night of late with the exception of the occasional fish dish.  I remembered a pasta dish I used to cook and new that would be exactly the taste and comfort that I wanted.

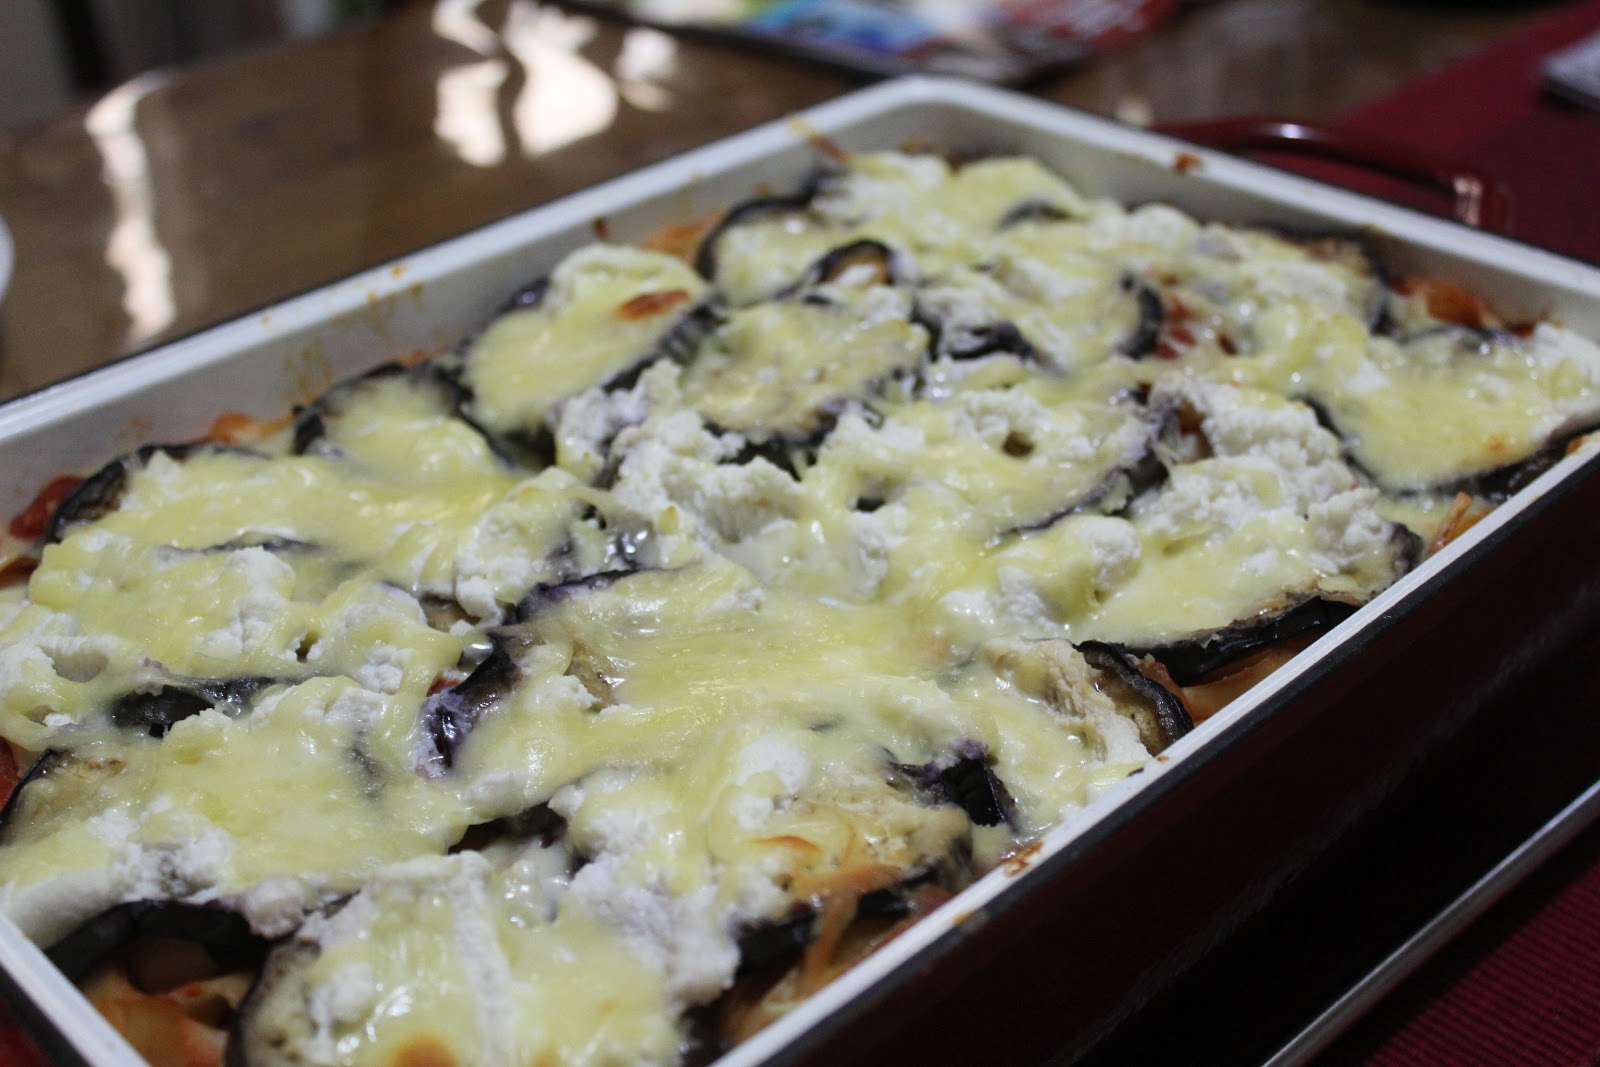
Not too heavy but definitely hearty and very basic to make.  The flavour intensed by the garlic and the nuttiness of the eggplant is complimented with the creamy layers of two cheeses, ricotta and mozerella.

This meal is not only very easy to make but it's very enjoyable and is also great the next day as the flavours do develop even more.


Baked Vegetable Fettuccine
(recipe adapted from WW Pure Points Cookbook)
 
Serves: 8
ProPoints per serve: 10
 
cooking spray
2 medium eggplants, sliced thinly
2 onions, chopped
1 tablespoon minced garlic
3 x 400 grams can diced tomatoes
freshly ground black pepper
500 grams fettuccine
500 grams extra light ricotta cheese
300 grams reduced fat mozzarella cheese, grated

Preheat oven to 220 degrees Celsius.

Coat a frying pan with cooking spray and heat.  Add the eggplant slices in batches and good for 3 - 4 minutes on each side until golden brown.  Set aside.

Respray the same pan with cooking spray, heat and add onion and garlic.  Cook, stirring, until the onion is softened.  Stir in tomatoes and black pepper, reduce heat to a simmer and cook for 20 minutes.

Meanwhile, cook the fettuccine in a pan of boiling water as per packet instruction or until tender.  Drain well.  Stir the tomatoe mixture into the fettuccine.

Spread 1/2 the pasta mixture over the base of the prepared dish. Top with 1/2 the eggplant, 1/2 the ricotta and 1/2 the mozzarella cheese.  Repeat layers finishing with a layer of mozzarella cheese.  Bake for 20 minutes or until the cheese is hot and bubbling.


(click here for a printable version of this recipe)

Saturday, November 3, 2012

Mint and Green Pea Mash

Smooth and creamy mashed potato is a staple side dish in our house as it accompanies anything but having the Quick Sausage Casserole for dinner I decided to take up the suggestion in the cookbook and try a different variation of the trusty mashed potato.

Tasty and colourful this mash sure packed a punch with a creamy minty flavour.  And it was just as easy as normal mash to make.


Mint and Green Pea Mash
(recipe sourced from WW Cook Hearty Cookbook)
 
Serves: 4
ProPoints per serve: 3
 
500 grams desiree potatoes, peeled and chopped
2 cups frozen peas
1/3 cup warm skim milk
1/3 cup shredded fresh mint leaves
salt
freshly ground black pepper
extra mint leaves to garnish
 
 
Boil, steam or microwave potatoes and peas seperately until tender.  Drain.
 
Place together in a large bowl and mash until almost smooth.
 
Add skim milk and shredded mint leaves.  Season with salt and freshly ground black pepper.  Stir to combine.
 
Served topped with extra mint leaves.
 

Wednesday, November 2, 2011

Roasted Pumpkin Chickpea and Rocket Salad

I recently made this lovely salad as we were invited for a BBQ at our dear friends' Tanya and Pete's house for Melbourne Cup Day yesterday.  In true tradition I had to make a "different" salad and I immediately fell in love with the sound of this recipe and the taste also.

Very easy to make just don't dress it too early or it will go soggy.  Be quick as it goes very fast - trust me!!


Roasted Pumpkin Chickpea and Rocket Salad
(recipe adapted from Good Taste March 2009)

Serves: 6
ProPoints per serve: 3

2 large red capsicums, halved, deseeded
cooking spray
750 grams Kent pumpkin, peeled, deseeded, cut into 2cm pieces
1 large red onion, halved, thinly sliced
1 x 400 gram can chickpeas, rinsed, drained
200 grams baby rocket leaves
1/4 cup apple cider vinegar
1/4 cup fresh orange juice
1 tablespoon olive oil
1 teaspoon wholegrain mustard
2 teaspoons caster sugar
salt
freshly ground black pepper

Preheat grill on high. Place the capsicum, skin-side up, on a baking tray. Spray with cooking spray. Cook under grill for 8-10 minutes or until charred and blistered. Transfer to a sealable plastic bag. Set aside for 5 minutes (this helps lift the skin). Peel and discard skin. Cut the flesh into thick strips.

Meanwhile, preheat oven to 190°C. Spray baking tray with cooking spray. Place the pumpkin on the tray. Bake for 20 minutes or until tender. Set aside to cool.

Combine the capsicum, pumpkin, onion, chickpeas and rocket in large bowl.

Combine the vinegar, juice, oil, mustard, salt and pepper in a small jug or jar.  Mix to combine well and sugar is dissolved. Pour over the salad just before serving and toss to combine.

Monday, October 31, 2011

Mustard and Herb Roast Potato Bites

I managed to buy baby (chat) potatoes somehow instead of normal ones so my plans for making wedges to go with our hamburgers went out the window.  Instead I quarter the baby potatoes and make some yummy potato bites.

Very easy, quickly marinade the potatoes and then roast......


Mustard and Herb Roast Potato Bites

Serves: 6
ProPoints per serve: 3

800 grams baby (chat) potatoes
2 teaspoons dijon mustard
1 tablespoon olive oil
juice of 1 medium lemon
1 tablespoon Masterfoods Pizza Topper (mixed herbs)
cooking spray

Preheat oven to 200 degrees Celsius.

Quarter potatoes and place in a large snap lock bag or bowl.

Mix together the mustard, olive oil, lemon juice and herbs.  Pour into bag or bowl and mix well to cover all potatoes.  Allow to stand for 30 minutes.

Cover a baking tray with foil and spray with cooking spray.  Empty potatoes on to the tray spreading to one layer.  Cook in oven for 30 - 40 minutes or until potatoes are crispy on the outside and cooked through.

(click here for a printable version of this recipe)

Saturday, August 27, 2011

Vegetarian Noodles

After a long and unwanted break from sharing out culinary adventures, I want to assure you and myself that I have not forgotten or given up on my beloved blog. A break, which has seen me do very little cooking during this time due to work commitments having me live in a hotel room for 4 out of the 5 weeknights and I must also add this place wasn’t local to my home.

But last weekend we did manage to cook and I have to say that I enjoyed every minute. It is amazing how you miss do something that you find a chore to do day in day out especially when confined to a small hotel room that only has a kettle and a toaster – no real cooking facilities. Even a microwave would be good while I am away.

However hopefully over the next few weeks I will also be able to sneak in a few more cooking experiences here and there and keep A Dash Of Flavour progressing as I still have at least another two weeks away from home.

Enough waffling let's get down to some cooking. I must say noodles are one of my secret favourite dishes, a favourite that I often crave. So it is no surprise that I really enjoyed cooking and eating these especially teamed with Coriander and Lemongrass Fish.


Vegetarian Noodles

Serves: 4
ProPoints per serve: 5

440 grams hokkien noodles
1 tablespoon sweet chilli sauce
1 tablespoon kecap manis
2 teaspoons soy sauce
1/4 cup water
2 teaspoons oil
1 garlic clove, crushed
1 cm piece of ginger, grated
1 onion, sliced
1 carrot, julienned
1 red capsicum julienned
200 grams button mushrooms, sliced
2 baby bok choy, roughly chopped
100 grams bean sprouts
1/4 cup fresh coriander, chopped


Fill a large bowl with hot water and soak noodles as per packet directions. Drain and set aside.

In a small jug mix together sweet chilli sauce, kecap manis, soy sauce and water.

Heat oil in a large wok or frying pan over high heat. Add garlic, ginger, onion and carrots tossing until onion starts to soften - add a little water if vegetables start to burn. Add capsicum and mushrooms. Stir fry for 3 - 4 minutes.

Add combined sauce and stir through. Add noodles and bok choy tossing to combine.
Stir through bean sprouts and corinader. Serve immediately.

(click here for a printable version of this recipe)

Friday, August 13, 2010

Mushy Peas

Ok I am going to introduce you to a family favourite not only in our house but to all off our family - both sides! When I say both sides I mean Noel's side and my side. Both coming from British backgrounds - Noel English and me Welsh we have both grown up eating Mushy Peas.

Unfortunately like most foods everyone cooks recipes differently and that was the case when both families get together. One mother cooks them one way and the other a different way. I have had to come to a happy compromise and it cook them somewhat middle of the road when it comes to both individual cooking styles because as you can imagine they are both right!!

I will say however the Welsh have an ironic name for this staple side dish - "Fluffing Peas". To many they do have an adverse reaction the day after eating but even that doesn't put some of us die hard Mushy Pea lovers from eating them.

Mushy Peas

Serves: 12 as a side dish
Points per serve: 2


500 grams blue peas
2 teaspoons bicarbonate of soda
1 teaspoon salt
1 teapsoon sugar
ground white pepper to taste

Soak peas overnight in a large bowl of cold water and 1 teaspoon bicarbonate of soda.

Drain and rinse thoroughly.

Place peas in a large saucepan with remaining bicarbonate of soda, salt and sugar. Fill saucepan with water enough to cover the peas by approximately 2 cms.


Bring to the boil and then reduce heat to the lowest possible. Allow peas to cook slowly for 1 to 1 1/2 hours, skimming pea skins as they rise to the top.

Once cooked, drain over a large bowl. Once drained, return to saucepan. Add enough juices for the texture of the peas you desire. Season with white pepper to taste.

(click here for a printable version of this recipe)

Thursday, April 1, 2010

Mexican Style Rice

This is a quickie cheats version of a Mexican Rice that we actually had with Chicken Taco Bake and it complimented it nicely.

A dish full of colourful vegetables and spiced by using packet taco seasoning made it not only an easy dish to prepare but had a nice Mexican taste and look to it.


Mexican Style Rice

Serves: 4
Points per serve: 3


1 cup long grain white rice
cooking spray
1 brown onion, diced
1 carrot, peeled and diced
1 red capsicum, diced
1 green capiscum, diced
1/2 cup frozen corn kernals
2 tablespoons packet taco seasoning
2 tablespoons water
fresh coriander to garnish

Cook rice in a large saucepan of water as per packet instructions. Drain and set aside to cool.

Spray a large frying pan over medium heat, coat with cooking spray and cook onions and carrots for 3 - 5 minutes until softened. Add capsicum and corn, cooking for a further 5 minutes. Add 1 1/2 tablespoons of taco seasoning and water mixing through vegetables, cook for 2 minutes. Add rice and stir until mixed completely.

Serve sprinkled with remaining taco seasoning and garnish with coriander.

(click here for a printable version of this recipe)

Tuesday, January 19, 2010

Microwave Mushroom and Onion Omelette

I have been trying to vary my breakfast and lunches so I don't end up with the same day in and day out. It was then that I realised I don't really write about meals other than dinners with the exception of the occassional dish here and there normally when I am entertaining.... so time to start a new leaf with the blog content.

I have to admit that I am neither a cereal or a plain toast lover for breakfast and tend to have the same breakfast most mornings. Either baked beans or spaghetti on toast with the odd toasted sandwich here or there. Thankfully where I work I can cook all my meals should I choose which means that I don't have to eat something very early before I leave the house.

This morning I was fancying something different and remembered how much I liked having an omelette (although I couldn't really remember the last time I had one!). So ensuring I took enough ingredient with me to work I decided I would cook myself an omelette in the microwave for breakfast. Of course, it would be basic and not as fancy as a nice fluffy stove top omelette but I was looking forward to it.

To cook an omelette in the microwave you do require a microwave omelette maker or a large shallow dish, either works well but I just happened to have an omelette maker at work.

I am glad I made the decision to have something different for breakfast as it was brilliant. I enjoyed every mouthful and it was very filling.


Microwave Mushroom and Onion Omelette

Serves: 1
Points per serve: 3.5

cooking spray
4 - 5 button mushrooms, sliced
1 spring onion, sliced
2 eggs
2 tablespoons skim milk
salt
pepper

Spray omelette maker or dish with cooking spray. Add mushrooms and onions. Cook for 2 - 3 minutes in the microwave on high or until mushrooms have softened.

Beat together the eggs and skim milk, season to taste with salt and pepper. Pour egg mixture evenly over the mushrooms (if using an omelette maker split between both sides). Cook on high for 3 - 4 minutes or until egg is set. Allow to stand for 1 minute.

Remove from omelette maker or dish and serve.

Wednesday, January 13, 2010

Triple Cheese and Mushroom Lasagne

I could not believe the flavour of this lasagne and it's meat free... it was delicious!! Not to mention light and healthy something I needed after the Christmas Food Festival that's for sure. I am sure that you all understand what I mean.

The serving sizes looked small but to everyone's surprise it was very filling. An easy lasagne to prepare especially as there was no Bechamel Sauce to make. Full of mushrooms and a nice not overpowering tomato sauce I could eat a lot of this.


Triple Cheese and Mushroom Lasagne
(recipe source: WW Secret of Success Cookbook)

Serves: 6
Points per serve: 6.5

cooking spray
1 onion, finely chopped
2 cloves garlic, crushed
1 finely chopped red capsicum
300 grams button mushrooms, sliced
400 gram can diced tomatoes
140 gram tub tomato paste
1 cup water
1 vegetable stock cube or 1 teaspoon vegetable stock powder
250 grams low fat cream cheese
250 grams low fat cottage cheese
250 grams packet dried instant lasagne sheets
100 grams low fat grated tasty cheese

Preheat oven to 180 degrees Celsius.

Spray a 25 cm x 18 cm (base measurement) baking dish lightly with cooking spray. Spray a large non-stick frying pan with cooking spray and heat over a medium heat. Add onion, garlic and capsicum and cook for 5 minutes or until softened. Stir in mushrooms, tomatoes, tomato paste, water and stock cube. Bring to the boil, reduce heat and simmer for 10 minutes or until thickened slightly.

Beat cream cheese and cottage cheese until well combined. Heat in the microwave for about 30 seconds to make the mixture easier to spread.

Spread 1/3 tomato mixture over the base of the dish. Top with a single layer of lasagne sheets and half the cheese mixture. Add another layer of lasagne sheets, half the remaining sauce mixture, and remaining cheese mixture. Make a final layer of lasagne then the remaining sauce.

Sprinkle with grated cheese and bake for 50 minutes of until pasta is tender and top is golden brown. Cover with foil if top is browning too much.