Showing posts with label weeknight wonder. Show all posts

Tuesday, June 4, 2019

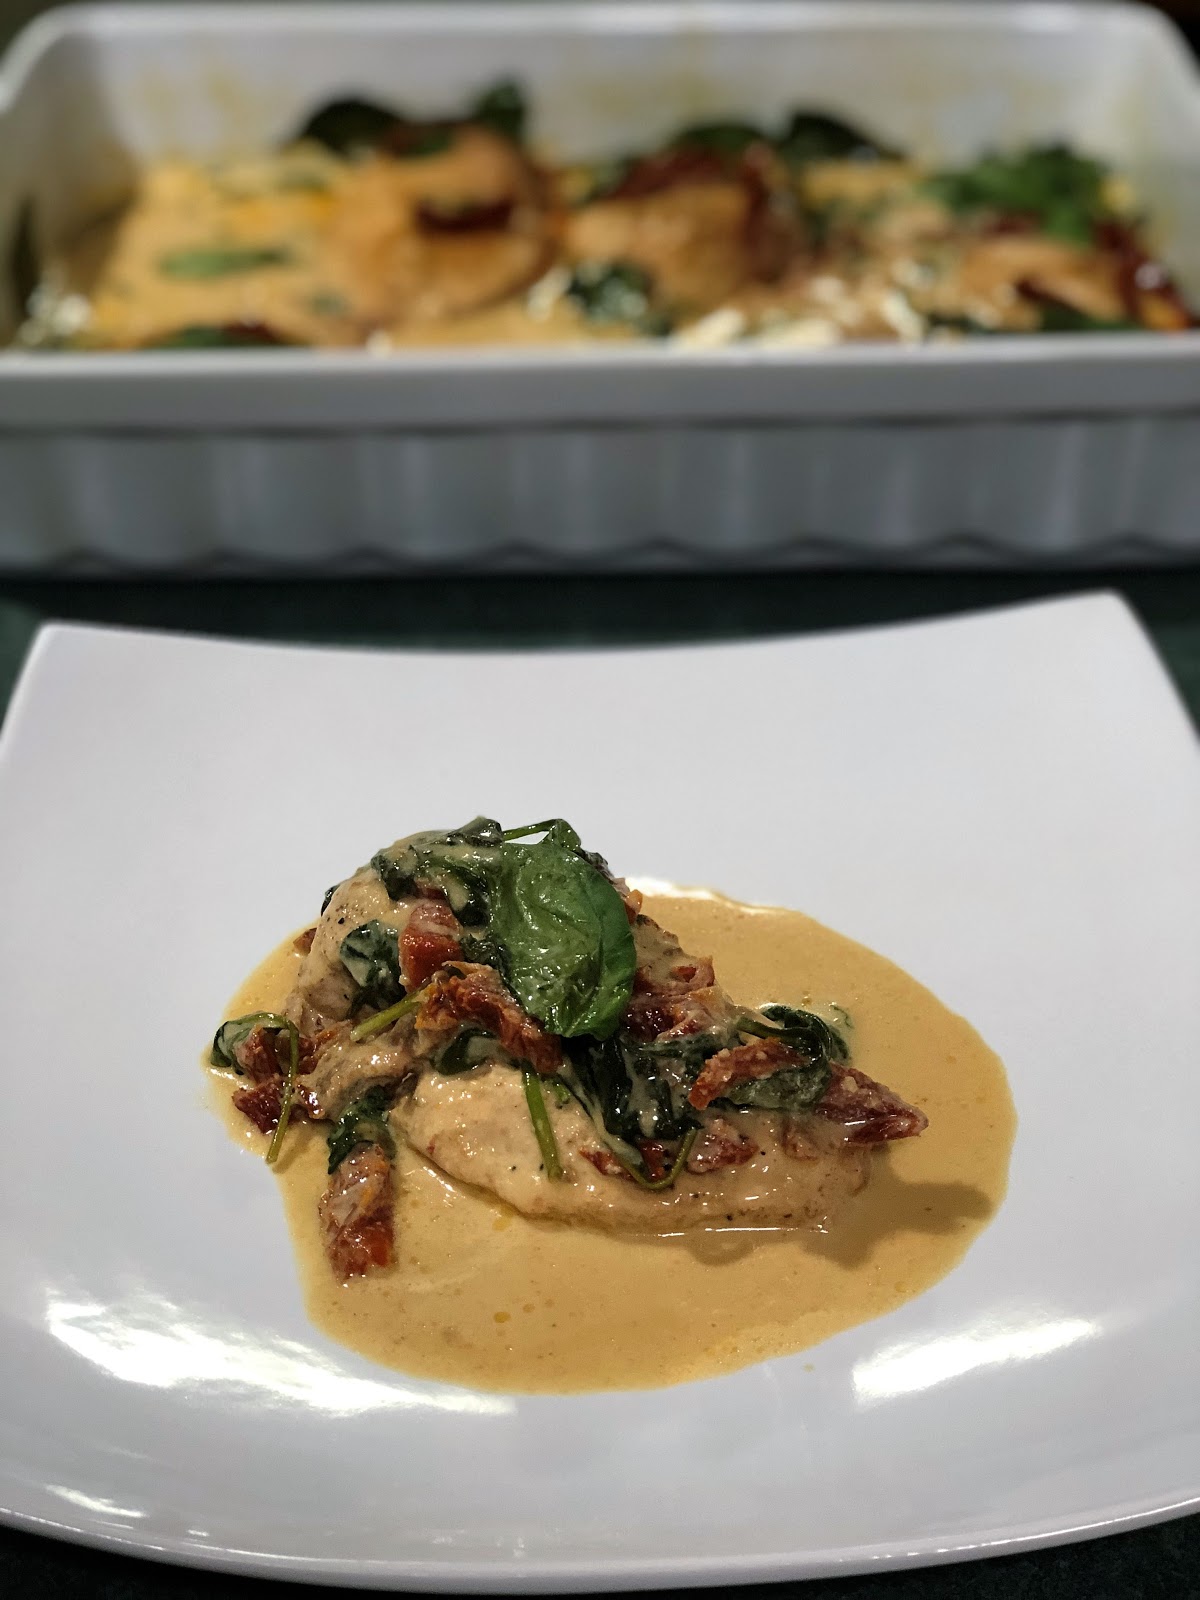
Creamy Italian Chicken


Wanting something different but quick and easy considering winter has officially arrived here in Melbourne (although it's been here for a few weeks now) however I really didn't fancy a heavy dish such as a pasta or a bake but still wanted that comfort food sensation.  This is how everyone feels mid week and during winter right?

I find cooking with chicken breast fillets easy for a mid week meal.  They tend to cook quickly in most applications and unless overcooked are a tender juicy protein for a good dinner.  So armed with a few nicely sized chicken breasts I set upon preparing a comfort food dish and knew it had to be creamy of some sort.  An email had arrived, Taste were promoting 50 One-Pot Winners, so of course I had to stop and have a read... love celebration posts highlighting certain ingredients, seasons, styles of cooking, etc.  I came across One Pot Italian Chicken and was intrigued with the flavours.

Pure Italian flavours of garlic, tomato and basil enveloped in a creamy sauce - aaaaahhhhh my tastebuds were in heaven just reading the recipe let alone cooking it.   It sounded easy.  It sounded delicious. It was now on the menu.

Everything I have just mentioned was true - quick (on the table in less than 30 minutes), easy (simple ingredients and techniques) and flavoursome (who doesn't like Italian?).

No pasta in sight tonight, instead I roasted some chat potatoes, steamed carrots and broccoli.  There was a bread basket of small crusty bread rolls to sop up the creamy sauce - you know that you just have to do that when it comes to a dish with lots of sauce.

Delizioso .... 


Creamy Italian Chicken
(recipe adapted from Taste.com.au)

Serves: 4

4 small chicken breasts fillets, trimmed
salt
freshly ground black pepper
2 teaspoons olive oil
20 grams reduced fat butter
2 garlic cloves, finely chopped
80 grams sun-dried tomatoes, sliced
1/3 cup dry white wine
1 cup reduced fat thickened cream
1/2 cup chicken stock
60 grams baby spinach
1 cup fresh basil leaves, torn

Season chicken with salt and pepper.

Heat the oil and butter in a large non-stick frying pan over high heat until butter is foamy. Add the seasoned chicken  to the pan. Reduce heat to medium-high. Cook the chicken for 5 minutes each side to until just cooked through. Transfer to a plate. Cover with foil to keep warm.

Place the garlic in the pan. Cook, stirring, for 1 minute or until aromatic.

Add the tomatoes and stir to coat.

Add the wine and cook for 1 minute or until reduced.

Add the cream and stock. Return the chicken to the pan and simmer for 5 minutes or until liquid is reduced.

Stir through the spinach until wilted. 

Season to taste and sprinkle with the basil leaves.

Serve with vegetables and crusty bread, if desired.

(Click here for a printable version of this recipe)


Wednesday, May 15, 2019

Baked Spicy Chicken Tacos

I have really been wanting Mexican for some time now but didn't want the usual boring beef tacos that are normally a mid week quick fix for dinner.  Then, as normal, I enlisted the help of my friend Google and came up with some fantastic ideas as always.

After deciding I would try baked tacos - the next decision was all about what filling I wanted.  There are so many different flavour combinations out there.  Something that everyone would eat is always the main criteria so chicken was a must.  And of course, being me, I had to add those vegetables in.  In this version I just used onion, corn, capsicum and black beans - I guess any vegetable would work though depending on your preferences.

This meal was so easy and perfect for a mid week dinner.  To make it even easier you could always used a cooked chicken from the supermarket rather than poaching the chicken yourself.  If you can save time cooking dinner during the week - go for it!

Flavours were magic - fixed my Mexican craving that's for sure.  A little spicy as I used my Homemade Taco Seasoning rather than shop brought.  However the additional cumin and garlic gave the flavours a little more depth and the lime juice added a beautiful zing.

I was pleasantly surprised at the crunchiness of the taco shells as I did expect them to sog a little and set the table with knives and forks at the ready.  No need.  This dinner was definitely finger food worthy and I am pleased to say completely all eaten... with lots of compliments from the family.


Baked Spicy Chicken Tacos

Serves: 6 - 8

4 chicken breast fillets
1 teaspoon salt
1 teaspoon ground black pepper
2 onions, diced
1 cup corn kernels
1 x 400 gram can Black Beans, rinsed and drained
1 red capsicum, finely diced
2 limes, juiced
2 teaspoons taco seasoning (or as desired)
1 teaspoon ground cumin
1/2 teaspoon garlic powder
20 Stand and Stuff (flat bottomed) taco shells
2 cups grated  cheddar cheese
1½ cups shredded iceberg lettuce
2 tomatoes, diced
2 tablespoons chopped coriander
taco sauce or preferred sauce, for garnish

Trim fat off the chicken fillets and cut into 3 pieces.

Bring a medium saucepan of water to boil and add the chicken, salt and pepper.  Stir to ensure that the fillets do not stick together.  

Bring the water to the boil again and reduce heat to medium-low.  Allow chicken to simmer for 20 minutes. After 10 minutes add the onions.  Drain and set aside allowing to the chicken to cool.

In a large bowl mix together the corn, black beans, capsicum, lime juice, taco seasoning, cumin and garlic powder.

When chicken has cooled, shred using 2 forks or your preferred method.

Add chicken and onions to the bowl of vegetables.  Stir to combine well.

Preheat the oven to 200 degrees Celsius. 

Arrange the taco shells inside 2 large baking dishes (not too loosely or they will fall over).

Sprinkle a little cheese into the bottom of each taco shell.

Divide the chicken mixture among the taco shells and top with the remaining cheese.

Bake for 10 - 15 minutes or until tacos are warmed through and cheese is golden and melted.

Serve accompanied with lettuce, tomato and coriander.  Top with taco sauce if desired.


(Click here for a printable version of this recipe)


Sunday, May 6, 2018

Meatball Tomato and Mozzeralla Tray Bake

It's that time of year again - football season and winter.   When meals need to be quick and easy due to weeknight footy training, not to mention Saturday is game day and then there is always our social life to fit in.  

So it officially started this weekend for us.  Two football matches on Saturday (one in Carrum Downs and the other in Hastings).  Needless to say Saturday was busy until around 2pm. Saturday Night we went out for dinner with our beautiful friends, Tanya and Pete, whom we actually met through football.  We were all being "restaurant Guinea Pigs" as I had chosen a restaurant that none of us had been to before.

We had some amazing flavours at the Sun Wah last night - definitely had the taste buds jumping.  Everything on the menu sounded delicious so we all settled for the "Our Chef Degustation Menu".  Eight courses of amazing flavours and the presentation - wow it was magnificent.  This was the second time we had sat down for a Degustation feast - the first time was at Ten Minutes By Tractor.  I have to say we really enjoyed our first experience of a Degustation menu at the beautiful restaurant and winery in Main Ridge so needless to say I was definitely eager to see how the Chinese laid it our.  Our feast at the Sun Wah was as follows:


Amuse Bouche
Duck & Pork Croquette w. black truffle mayo

First Course
Ginger pear scallops, crispy pork belly, golden pearl sago, chilli jam

Second Course
Blue swimmer crab dumpling, Yarra Valley salmon caviar, clear consomme

Third Course
Twice cooked lamb rib, chilli jam, coriander

Fourth Course
Hopkins River grass fed eye fillet, eggplant, snake green beans, snow peas, mushrooms. teriyaki jus
Served with Special Fried Rice

Fifth Course
Roast Peking duck, steamed crepe, pickles, cucumber, hoi sin

Sixth Course
48° poached salmon, black bean, soy dressing with
dry fried spicy green beans

Seventh Course
Stuffed chicken w. minced prawns and mandarin jus

Eighth Course
Indulgence sharing dessert platter

Followed By Coffee and Tea
and Petit Fours 


Tonight's dinner truly had to be worthy of a king to match up with the food we ate last night.  LOL I am only kidding - tonight's dinner needed to be the perfect homemade meal.  A balanced meat and vegetable dish with lots of flavours.  This is a dish I have made a few times and it always goes down a treat.  Not only is it really easy, a fabulous one pot wonder, it is quick and manages to disappear.


Meatball Tomato and Mozzeralla Tray Bake
(Recipe adpated from Weight Watchers Australia)

Serves: 4
Smart Points per serve: 9

500 grams lean beef mince
3 shallots, thinly sliced
2 tablespoons fresh flat-leaf parsley, coarsely chopped
2 teaspoons fresh lemon rind, finely grated
2 teaspoons dried chilli flakes
1/2 cup fresh wholegrain breadcrumbs (approx 2 slices)
1 egg
salt
freshly ground black pepper
1 medium red capsicum, chopped
2 medium zucchini, chopped
cooking spray
400 grams canned cherry tomatoes
1 tablespoon tomato paste
2 cloves garlic, crushed
1 tablespoons baby capers, rinsed, drained
100 grams bocconcini, torn
1/2 bunch fresh basil, leaves

Preheat oven to 200°C or 180°C fan-forced.

Combine mince, shallots, parsley, rind, chilli flakes, breadcrumbs and egg in a large bowl. Season with salt and pepper.  Roll level tablespoons of mixture into 24 meatballs.

Place meatballs, capsicum and zucchini in a large baking dish. Lightly spray with cooking spray and bake for 15 minutes or until meatballs have browned.

Meanwhile, combine tomatoes, paste, garlic and capers in a bowl.

Add tomato mixture to meatballs and stir to combine. Top with bocconcini and bake for 15 minutes or until cheese has melted and meatballs are cooked through.

Serve sprinkled with basil.


(Click here for a printable version of this recipe)

Sunday, April 22, 2018

Creamy Garlic, Chilli and Coriander Prawns

What's that one meal that you always order when you go to a bistro (or the pub as we like to call it here in Australia)?  While many people always swear by good ol' Chicken Parmigiana (well this meal covers most of my family), a burger if they are on the menu or even a nice piece of juicy steak.  For me however it's creamy garlic prawns served with rice and sometimes if I am feeling naughty I also get some chips - I always asked for extra garlic sauce however.

There is something about the way that the bistro's cook garlic prawns - it's totally different than that of the Asian cuisines.  And while the thought of prawns, garlic and rice does sound like something you would get in a Chinese restaurant this style of dish is totally the opposite. The thought of the thick creamy garlic laced sauce, normally laced with chopped parsley, is making my mouth salivate right now.

Creamy garlic has to be one of my favourite sauces to have with prawns or chicken. While it's normally quite bold in flavour it is subtle enough to compliment seafood and poultry.  I do believe given the chance I could just about eat it on anything.

Tonight we jazzed it up a little, maybe incorporating a few more Asian ingredients, but wanted it still to be thick and creamy.  The prawns were marinated in garlic, chilli, spring onion, salt, pepper and a little oil prior to cooking.


Creamy Garlic, Chilli and Coriander Prawns

Serves: 2

500 grams raw king prawns, cleaned and rinsed
2 - 4 cloves garlic, crush, depending on taste
1 tablespoons chilli flakes, more or less depending on taste
1 spring onion, finely chopped
salt
freshly ground black pepper
2 tablespoons olive oil
250 grams light thickened cream
1 tablespoon corn flour
1/2 bunch finely chopped coriander

Pat dry prawns and place in a bowl.  Add garlic, chilli, spring onion, salt and pepper to taste, and olive oil.   Mix well.  Allow to stand for 30 minutes or longer if possible.


Heat a wok or large frying pan over high heat.  Add prawns and stir fry for 1 minutes or until prawns start to turn pink in colour.

In a small jug mix cream and cornflour together.  Add to prawns and cook, stirring continuously, for 2 to 3 minutes or until sauce starts to thicken.  Mix through coriander.


Serve immediately, with steamed rice if desired.


Monday, April 9, 2018

Chicken Lazone

I was looking for another chicken dish - the last new chicken recipe I cooked was definitely going to be a hard act to follow.  After cooking "Marry Me Chicken" and getting the rave reviews and requests for repeat servings from the family I have to say I was a little worried attempting another new chicken recipe.  But OMG!!! Damn Delicious you are so right - I have found another magnificent chicken recipe.  And this meal was devoured also.   Let's face it any dish with a creamy sauce is already on the track of being a winner.

Quite a different way of making this creamy sauced dish I have to admit however it was definitely not hard and was made without limited effort no to mention another quick to prepare meal for a mid week feast.

Instead of putting the herbs in with the cream sauce they are all mixed together with some olive oil to create an intense rub for the chicken.  Combining this is all done in a snap lock bag so there is also not much mess especially on your hands.  Then you simply pan fry the chicken add the cream sauce ingredients pop in the oven while you cook the other vegetables and voila your meal is done and ready for the hungry hoards.

Talk about flavoursome - the mix of smoky paprika, garlic, cayenne pepper, basil and oregano is one of my new favourites especially when smothered in a creamy sauce.  Due to the combination of the herbs the cream sauce had a tingle of smokiness and heat with each mouthful but it definately complimented the spiciness of the chicken breasts.

I really liked this dish - in fact I am finding it hard to make judgement on which is my favourite.  The two dishes Chicken Lazone and Marry Me Chicken are both delicious!  One is spicy and creamy the other is creamy and somewhat a rustic Italian style dish.  What can I say?  I am torn I really am?  I would love to hear what you think?


Chicken Lazone
(Recipe adapted from Damn Delicious)

Serves: 6

4 teaspoons smoked paprika
1 teaspoon garlic powder
1 teaspoon onion powder
1/2 teaspoon cayenne pepper
1 teaspoon dried oregano
1 teaspoon dried basil
salt 
freshly ground black pepper, to taste
6 skinless chicken breasts, approx 150 grams each, fat trimmed
2 tablespoon olive oil
coking spray
4 tablespoons reduced fat butter, divided
2 cloves garlic, minced
2 cups skim milk
2 cups reduced fat thickened cream
2 tablespoons water
1 tablespoon cornflour
2 tablespoons chopped fresh parsley leaves

Preheat oven to 180 degrees Celsius.


Combine paprika, garlic powder, onion powder, cayenne pepper, oregano and basil in a small bowl; season with salt and pepper, to taste.

In a large ziploc bag, add chicken, olive oil and paprika mixture, shaking to coat thoroughly.


Melt 2 tablespoons butter in a large frying pan over medium high heat. Add chicken and cook, flipping once, until cooked through, about 4-5 minutes on each side.


Once cooked remove chicken fillets from the frying pan and place in a large casserole dish in a single layer.  Repeat with remaining chicken fillets.

Melt remaining 2 tablespoons butter in the skillet. Add garlic, and cook, stirring frequently, until fragrant, about 1 minute. Gradually stir through the milk and cream until slightly thickened, about 4-5 minutes and season with salt and pepper, to taste.

In a small bowl or jug mix together the water and cornflour.  Quickly stir into cream mixture.

Pour cream mixture over the chicken fillets and place in oven for 15 - 20 minutes or until chicken is cooked through and the cream mixture is bubbling.

Remove from oven and serve immediately with chicken, garnished parsley, if desired.


Monday, March 19, 2018

Marry Me Chicken aka Sicilian Chicken

So are you as intrigued with the name of this dish as I was?  As soon as I came across a recipe called "Marry Me Chicken" I guessed that it was obviously good and did some more investigation.

Tradition, as it is told, is that there are two dishes that are guaranteed to lead you to the alter!  Far fetched I know but the first dish, "Engagement Chicken", is a roast chicken  and the second is "Marry Me Chicken", which is a creamy casserole.  And before you ask, yes there are so many different recipes for both dishes.  I was reading and reading for a long time before I settled on the recipe I was going to cook.

A quick history lesson regarding the both dishes.  Starting with Engagement Chicken - this was  developed by a fashion editor at Glamour Magazine, following a trip to Italy. Afterwards the recipe was given to co-worker to prepare for her boyfriend and soon afterwards, the couple was engaged. The recipe made the rounds in the office and three other women in the office were offered marriage proposals soon after making the dish for their boyfriends.  The recipe featured in Glamour Magazine later on after it was dubbed "Engagement Chicken". Soon afterwards the magazine began receiving letters from women claiming that their boyfriends proposed shortly after being served the dish. The magazine claims 70 couples have married after the women served their boyfriends the dish.

Now for the story of Marry Me Chicken is not to different. Instead of using a whole chicken this recipe calls for skin on chicken thighs or pieces which are fried until crispy. According to the article I was reading Delish editors started devouring these crispy chicken thighs soaked in a savory sun-dried tomato-thyme cream sauce, people started blurting out "I'd marry you for that chicken" and "OH MY GOD THAT'S MARRIAGE MATERIAL."

So what I can make of my own google investigation?  It is obvious that people have heard of Ina's Engagement Roast Chicken and Marry Me Chicken - I clearly did not have a clue!  Secondly they are both obviously renounced for their flavours and the after effects of serving either dishes to partners according to the romantics among us.

The romantic in me decided to try cooking the Marry Me Chicken even though I did not expect this dish to cause anything incredible to occur (this year hubby and I will celebrate our 25th wedding anniversary).

I didn't have a whole chook nor did I have any skin on chicken thighs so I substituted chicken breast fillets cut into 4 large pieces other than that I followed the recipe.  The smell during the cooking process was magnificent and I have to admit that I was actually looking forward to eating this dish myself.

As mentioned before, these chicken pieces enveloped in a creamy sun dried tomatoes and thyme sauce were magic.  Actually like nothing I have tasted before.  The chicken was tender and juicy.  The sauce thick and creamy.  It was everything in just one dish. 

I wanted to marry myself LOL!!  


Marry Me Chicken or Sicilian Chicken
(Recipe adapted from Delish.com)

Serves: 4

cooking spray
4 chicken breast fillet, quartered
2 cloves garlic, minced
1 tablespoon fresh thyme leaves
1 teaspoons crushed red pepper flakes
3/4 cup chicken stock
1/2 cup light thickened cream
1/2 cup chopped sun-dried tomatoes
1/4 cup grated Parmesan
salt
freshly ground black pepper


Preheat oven to 180 degrees Celsius.

Heat a large frying pan over medium-high heat and spray with cooking spray. Add chicken and season with salt and pepper. Sear until golden, 3 - 5 minutes per side. Transfer chicken to a plate.

To the same frying pan, add garlic, thyme, and crushed red pepper flakes and let cook until fragrant, approximately 1 minute. Add chicken stock, cream, sun-dried tomatoes, and Parmesan and season with salt and pepper. 

Bring to a simmer, then return chicken to skillet and bake for 15 minutes, until chicken is fully cooked through.


Tuesday, February 6, 2018

Broccoli and Bacon Carbonara

Everyone has that one go to dish, right?  You know that one dish that just comes together, is easy and plates up perfectly and more importantly everyone enjoys.  Hubby's dish that always works is Nice Chicken, my mam's is always Shepherd's Pie and mine is Maple Mustard Chicken however the kids will say that it's Pasta Carbonara and the only reason I say this is because everytime I ask them what they would like for dinner I get the same answer - Pasta Carbonara!

I have to be truthful - it's not my most favourite pasta dish.. I prefer tomato based sauces laced with chilli and bolder flavours to be perfectly truthful however when it comes to risottos - the creamier the better.  But that's another story....

Tonight I decided to try a recipe that both hubby and I thought would not only be different but full of nice flavours.  It's a total spin on Pasta Carbonara with a creamy broccoli and cheese sauce instead the normal Carbonara sauce (which is basically eggs, cheese and cream).  Crispy bacon batons and broccoli florets made for a visually pleasing dish also.

An easy dish to make and was on the table in just under 45 minutes I thought this would of been a hit.  Both hubby and I thought it was nice although we both added crushed chilli flakes to ours, one child thought it was "ok" but main Carbonara lover said it was horrible!  I'm actually thinking if I didn't call it Broccoli and Bacon Carbonara and just named it Broccoli and Bacon Pasta would there have been a different mind set??


Broccoli and Bacon Carbonara
(Recipe adapted from Taste.com.au)

Serves: 6
SmartPoints per serve: 15

500 grams gluten free pasta or pasta of your choice
2 large head broccoli, cut into florets
1 small garlic clove, chopped
70 grams Parmesan, finely grated
1 tablespoons extra virgin olive oil
300 mls light thickened cream
4 eggs
cooking spray
300 grams short cut bacon, cut into batons
additional Parmesan to serve

Cook pasta in a saucepan of boiling water following packet directions until tender. Drain, reserving 2 tablespoons liquid. Return pasta and reserved liquid to pan.

Meanwhile bring a large saucepan of boiling salted water to the boil over high heat. Add broccoli. Simmer for 4 minutes or until tender crisp. Remove with a slotted spoon. Refresh under cold running water. Pat dry.

Process half of the broccoli, garlic, half the cheese and oil in a food processor until smooth. Season. 

Whisk cream, eggs and remaining cheese in a bowl.  Season with salt and pepper.

Meanwhile, spray a frying pan with cooking spray and heat over medium heat. Cook bacon, stirring, for 6 minutes or until golden. Drain on paper towel.

Stir broccoli mixture, extra broccoli florets and 3/4 of the bacon into pasta. Add cream mixture. Toss until well combined. 

Sprinkle with remaining bacon and extra cheese.


(Click here for a printable version of this recipe)

Lemongrass and Chilli Larb with Mint Salad

Alex and I are currently researching our family tree.  It's been and still is a very interesting activity not only for me but for Alex also.  We are trying to do both sides of her heritage so she has something to pass on when she is older to the future generations.  I had already started my family - the Davies' and the Lewis' - which has taken me back many generations.  

My blood line is definitely British - a combination of Welsh and English with no real surprises except the odd skeleton or ten in the closest.  However my children believe that I must have a hint of Asian, Mexican or Indian somewhere in history due to the food that I always cook.  Apparently "always" cook which was said in an interesting tone LOL!  To be totally honest, if I traced back and found another nationality I would be truly impressed.

When pregnant on both children I didn't really have any weird and wonderful cravings unlike many ladies - however I did eat Beef Vindaloo Curry (and mind you the hotter the better) like it was going out of fashion.  Every week hubby came home armed with a takeaway from our favourite Indian even detouring on his way home if he wasn't in that area.  Strangely my mother also ate lots of curry when she was pregnant on both my sister and I?  Obviously it runs in the family although I don't think my sister did this.  What cravings did you or your partner have?

Anyhow it's no secret that I really enjoy flavoursome foods and cooking with fresh produce, herbs and spices is my passion.  If I can make it rather than using prepacked packet or jar ingredients I am actually in my element.  Plus it's rewarding making things and experiencing all the flavours coming together.  So many countries have cuisines that truly make your taste buds tingle and your tummy just wanting more.  Thai food has that effect on me - I love the zesty sweetness, saltiness and hotness that comes with combining all the ingredients.  It's all wonderfully balanced and gives you so many flavour experiences in one mouthful.

This Lemongrass and Chilli Larb did exactly that.  Jam packed with lemongrass, garlic, chilli, fish sauce, lime and sugar each mouthful was a flavour explosion.  Served with a crunchy mint salad I was definitely reminded of my time spent in Singapore and of course, of when we go to dine in our favourite restaurant in Springvale and Clayton.  The freshness of the salad complimented the flavours of the Larb.  It's no wonder the Asian cuisines incorporate fresh herbs and salads into most of their meals - it's something that I really enjoy and indulge in quite often.

Once again another simple weeknight wonder that will get your family thinking you have been to a cooking school or that you should be on My Kitchen Rules.  Give it a go and let me know what you and your family think.... 


Lemongrass and Chilli Larb with Mint Salad
(Recipe adapted from Taste.com)

Serves: 6
SmartPoints per Serve: 10 

1/2 cup white rice
cooking spray
1 fresh mint leaves
1 red onion, cut into thin wedges
250 grams bean sprouts, trimmed
1 kilogram lean beef mince
2 teaspoons oil 
1 1/2 lemongrass stalk (white part only), finely chopped
1 tablespoon crushed garlic
4 tablespoons fish sauce
4 tablespoons lime juice
2 tablespoons brown sugar
1/2 cup fresh coriander leaves, roughly chopped

Bring a large saucepan of water to the boil and cook rice as per packet instructions.  Drain and set aside.

Meanwhile, combine mint, onion and bean sprouts in a bowl.   Put in refrigerator until required.

Heat a wok over high heat. Spray with cooking spray.  Add 1/2 the mince. Stir-fry for 5 minutes or until browned. Transfer to a bowl, draining excess fat. Repeat with remaining mince.

Add oil to wok. Stir-fry chilli, lemongrass and garlic for 30 seconds. Return mince to wok with fish sauce, lime juice and sugar. Stir-fry for 3 minutes. Add coriander. Cook for 1 minute. Remove from heat.

Serve mince with rice and mint salad.


Thursday, February 1, 2018

Tex-Mex Pork with Charred Corn Salad

I am trying to incorporate more salads into dinner - while we do have salad as a side dish there have only been a handful of times where I have actually served up a main salad for dinner.  I have no explanation really as a really tasty salad is quite satisfying that's for sure.  With this summer already being especially warm it is actually a perfect meal - it's still meat and veg after all.

Tonight I had decided on using pork fillets.  Normally one of the family favourite pork meals is 
Chinese Roast Pork which we normally serve with an Asian style salad and rice paper rolls.  This time I thought I would steer away from the Asian flavours and try the family with Tex Mex.

We all love Mexican food in the Murray house so in all honesty this was a no brainer when it came to the flavours.  Can you actually imagine a world without Mexican food and all the vibrant flavours?  I could not that's for sure and I don't think most of my family or friends couldn't either.  Nachos such as Spicy Chicken Nachos, Quesadilas including one of the kids favourites Chicken and Corn Quesadilas and of course Enchiladas (Chorizo and Smoky Beef Enchiladas, Beef and Capsicum Enchiladas)  to name a few are staple in our house including Homemade Taco Seasoning.  Have a look here for more Mexican dishes we have made.

So now for something completely different, a dry rub marinade for the pork fillets that was full of vibrant flavours such as smoked paprika, cumin, oregano and cayenne pepper - it smelt delicious even while preparing.  For something with a lot of fragrance the preparation was very minimal.

The salad itself was quite basic also.  The corn was chargrilled until just browning.  The charring of the corn gives it such a different flavour and texture.  Corn is naturally sweet and the corn was a little crunchy and soft with that flame grill taste.  The combination of the lime dressing and the salad made my tastebuds dance and this combined with the smoky mexican flavours of the pork was fantastic.


Tex-Mex Pork with Charred Corn Salad
(Recipe adapted from Weight Watchers Australia)

Serves: 4
SmartPoints per serve: 4

3 teaspoons ground cumin
3 teaspoons ground smoked paprika
2 tablespoons dried oregano
1⁄4 teaspoon cayenne pepper
480 grams trimmed pork fillet
3 fresh corn husks removed
1 punnet cherry tomatoes
1⁄3 cup fresh coriander, coarsely chopped
1⁄3 cup fresh basil, torn
1⁄2 small red onion, thinly sliced
2 tablespoons fresh lime juice
1/2 tablespoon olive oil
salt
freshly ground black pepper
2 cups baby spinach leaves
cooking spray

Combine the cumin, paprika, oregano and pepper in a small bowl. Sprinkle pork all over with the spice mixture.

Lightly spray a chargrill or barbecue with oil and heat on medium heat. Cook the pork and corn, turning, for 10 minutes or until cooked through and browned. Cover pork with foil and set aside for 5 minutes to rest. Thickly slice.

Meanwhile, using a sharp knife, remove the kernels from the cobs. Place in a large bowl with the tomato, coriander, basil and onion.  Toss gently to combine.

In a small jug combine the lime juice, oil, salt and pepper.  Stir to mix well.

Serve pork with rocket and corn salad.


(Click here for a printable version of this recipe)

Wednesday, January 31, 2018

Baked Curried Beef and Rice

Apparently I have been cooking too many curries lately.... this was a sad statement to be told.  Who in there right mind cannot have enough curry?  Further discussion led me to two decisions.  The first being my experimenting with making curry paste from scratch is not satisfying the kids and has possibly made me a little obsessive.  Or two I am not cooking enough Butter Chicken - a curry that they would all happily eat every day!!!  I think it's the later for sure but sadly I do think it's the fist reason.

Looking for a weeknight wonder, I came across this recipe which didn't involve making a curry paste but did however have the curry in the name.  Was I game to serve it up?  Hell yes.

Such an easy dish to make and really took no time at all.  Pop in the oven and voila you have a rice bake that had an Indian style flavour which not surprisingly they all loved. This curry was more a spicy tomato flavour than that of an authentic curry but due to the spices used it was very enjoyable and not that "Plain Jane"  Saying that it was quite mild curry so very kid friendly.  I added some carrots and capiscum to bulk it out and add extra vegetables.

Another perfect weeknight wonder.......


Baked Curried Beef and Rice
(Recipe adapted from Weight Watchers Australia)

Serves: 6
SmartPoints per Serve: 7

cooking spray
2 teaspoons olive oil
1 medium brown onion, finely chopped
500 grams lean beef mince
2 cloves fresh garlic, crushed
1 teaspoon dried saffron
3 teaspoons curry powder, mild
2 teaspoons ground all spice
2 tablespoons tomato paste
1 x 400gram can diced tomatoes
1 1/2 cups beef stock
2 carrots, diced
1 red capsicum, diced
2/3 cup frozen peas, boiled
150 grams Basmati rice
2 medium eggs, lightly beaten
salt
freshly ground black pepper

Preheat oven to 180 degrees Celcius.

Lightly spray a large casserole dish with cooking spray.

Heat oil in a large frying pan over high heat. Cook onion, stirring, for 5 minutes or until softened. 

Add mince and cook, breaking up lumps, for 5-7 minutes or until browned. 

Add garlic, saffron, curry powder and allspice and cook, stirring, for 1 minute or until fragrant. Add tomato paste and cook, stirring, for 1 minute.

Add tomatoes, beef stock, carrots and capsicum and bring to the boil. Reduce heat and simmer, uncovered, for 10 minutes or until sauce thickens slightly. Stir in peas.  Remove from heat.

Meanwhile, place rice in a medium saucepan. Cover well with cold water. Bring to the boil over high heat. Reduce heat and simmer, uncovered for 10 minutes or until rice is almost tender (you still want a little firmness). Drain.

Add rice to beef mixture. Stir to combine. Season with salt and pepper. Stir in egg. 

Transfer mixture to prepared dish. Bake, covered with foil, for 25 minutes. Remove foil and bake for 10-15 minutes or until golden. Stand for 5 minutes before serving.

(Click here for a printable version of this recipe)


Tuesday, January 23, 2018

Asian Beef Salad

The weather has been ridiculous this summer and we are yet to venture into February which is traditionally the hotter of the summer months.  There have already been +40 degree Celsius days which have really knocked most Australian's around not to mention power shortages due to the overloading of the grid.  I have to admit to having our air conditioner on for several days in a row and sometimes I didn't feel I was getting relief at some stages.

Obviously this made cooking in the house a huge non-negotiable topic.  It was cooking outside either on the barbecue (keeping in mind if it is a Total Fire Ban) or in the pizza oven or it was cold foods!  Simple!

I decided that we would have an Asian style Beef Salad - tender warm beef with salad and an Asian infused dressing.  Everyone thought that sounded great and were enthused by the idea.  So I was armed with some nice pieces of rump steak already to make a marinade and then I hit a problem.  What marinade, what dressing, what flavours???  Seriously this just went from super easy to super hard.

Why hard?  Google Beef Salad Recipe and see how many options you get?  I was actually overwhelmed but I knew that I wanted to make it with Asian flavours - chilli, lime, garlic, fish sauce, etc.  So many different versions of recipes depending on the region in the World or cuisine but the more I read the more the same key ingredients kept appearing. Some recipes marinated the meat prior to cooking other's didn't, some did this and some did that!  So after about an hour of googling and two cuppas later I decided that I had read enough recipes and was just going to wing it.  

So here is my version of an Asian Beef Salad - a fusion of Thai, Vietnamese, Malaysian, Oriental, and all the other recipes I read this morning.  Marinated tender rump chargrilled and then sliced served on a bed of mixed salad and herbs.  Of course, then drizzled with a salad dressing made from scratch (also used as the marinade).  It was devoured.......


Asian Beef Salad

Serves: 6
SmartPoints per Serve: 8

1 teaspoon sambal oelek
2 garlic cloves, crushed
2 teaspoons grated ginger
1 tablespoon brown sugar
2 tablespoons light soy sauce
2 tablespoons fish sauce
6 tablespoons fresh lime juice
1 tablespoon sesame oil
salt
freshly ground black pepper
800 grams rump steak
2 cups mixed lettuce leaves
1 punnet cherry tomatoes
1 small red onion, very finely sliced
1 lebanese cucumber , cut horizontally then cut into slices
1/4 cup coriander leaves , roughly chopped
1/4 cup mint leaves , roughly chopped

In a jug mix together the sambal oelek, garlic, ginger, sugar, soy sauce, fish sauce, lime juice and sesame oil. Season to taste with salt (don't use too much) and pepper.  Pour half into a large snap lock bag or casserole dish.  Put remainder into the fridge to use as the dressing.  

Ensure that the rump is trimmed of all fat.  Place whole pieces into the snap lock bag or casserole dish.  Ensure that the rump is coated in the marinade and place in the refrigerator for 2 hours or overnight, if possible.

When ready to cook preheat barbecue grill to high temperature.

Remove rump from marinade and place straight on the grill.  Cook for approximately 2 minutes each side for rare or cook to your liking.  Remove from grill, cover with foil and allow to rest for 5 minutes.

Meanwhile place salad leaves, tomatoes, cucumber, onion, coriander and mint onto a serving platter or dish.

Cut steak thinly across the grain. Place on top of salad leaves.  Drizzle with remaining dressing, if desired, and serve immediately.

Thursday, January 18, 2018

Sticky Chinese Chicken Tray Bake

Is it me or are the clocks ticking faster then normal already this year?  At the moment I no sooner get up, go to work, come home, cook dinner then go to bed - whammo another day gone. And I already feeling tired and it's only 18 days into the New Year.  I have so many things I need to get done and want to do around the house, with the family, with my studies but my daily/weekly "To Do List" is starting to become my "Wish To Do List - I actually do not feel I am achieving that much at all.  

Needless to say, I have been looking for quick fix dinners and weeknight wonders to at least ensure that we are all still eating well.  It's so easy to say "let's get takeaway" when in reality by the time our family decide what food we are getting, choose items of the menu, make the phone call something can literally be in a pot cooking!   I am sure you can all agree with this?

What's your favourite weeknight wonder?  We have quite a few that frequent our table for a quite dinner including Chicken Taco Bake (which is stupidly easy), Devilled Sausages, Beef Keema with Cumin and Currant Pulao, and Penne Boscaiola just to name a few.

Obviously I am always on the lookout for new quick and easy dishes that I can add to our collection and I recently came across this one which instantly appealed to my taste buds - sometimes I wish I could smell and lick my computer screen!  Don't you?  How good would that be?

I think it took me 5 minutes tops to marinate the chicken (which I did the night before) , 5 minutes to put it in a casserole dish and place in the oven.  Super easy!  Already a winner in my books. While it baked I prepped a Crunchy Asian Salad and steamed some rice - perfect partners for what was an amazing dish.

Melt in your mouth chicken pieces laced with a perfect balance of hoisin sauce, honey and Chinese five-spice was delicious.  The crunchiness of the cashew nuts complimented the chicken and there was also the right amount of sauce once cooked.  I don't like dry chicken and this wasn't.

This one-pan chicken dish makes a cheap and easy midweek family meal and we will be definitely having it again.


Sticky Chinese Chicken Tray Bake
(Recipe adapted from BBC Goodfood)

Serves: 8
SmartPoints per Serve: 7

8 chicken chops or thighs, skin removed
4 tablespoons hoisin sauce
2 teaspoons sesame oil
2 tablespoons clear honey
11/2 teaspoons Chinese five-spice powder
1 tablespoon grated ginger
2 teaspoons crushed garlic
1 bunch spring onions, cut into 3 cm lenghts
50 grams cashew nuts, toasted

Slash the skin 2-3 times on each thigh and place in a large snap lock bag or casserole dish.

Mix together the hoisin, sesame oil, honey, five-spice, ginger, garlic and some seasoning. Pour over the chicken and toss to coat.  Marinate the chicken for 2 hrs, or overnight if you have time.

Heat oven to 180 degrees Celsius.

Arrange the chicken thighs in a large roasting tin in a single layer.  Cook for 30 - 40 minutes or until chicken is cooked through, basting at least once.

Stir through the cashew nuts and sprinkle the spring onions over the chicken. Return to the oven for 5 minutes.

Serve with steamed rice and Crunchy Asian Salad, if desired.


(Click here for a printable version of this recipe)

Tuesday, January 16, 2018

Echidna Meatballs aka Porcupine Meatballs

Well I definitely surprised myself while menu planning this week!  Not because we planned a full week of super quick and easy meals to get us to Friday as we have a busy week but I was surprised, actually stunned, that I hadn't blogged this gem of a recipe!  And I cannot even begin to think why?

My mam had a variety of homestyle dishes that she cooked as staples when we were growing up as did everyone's mothers.  Ours always had a British twist as although we were living in Australia my parents were born and raised in Wales.  So we had Shepherds Pie, Bangers and Mash with Onion Gray, Lamb Stew, Curry Pie, Toad in the Hole and of course, Eggs Beans and Chips.  These were the meals that were regularly on the table and we all enjoyed them.  I can tell you that there were never any leftovers when these went on our table.  In fact I still get a little excited if I know any of these dishes are what we are having for dinner.

However, my kids, have had to deal with me creating my own list of family favourite dinners.  As easy go to meals especially during the working week items that can be found on the menu planner can include Hamburgers, Taco's, Penne Boscaiola, Devilled Sausages, homemade pizza (your choice of topping), Chicken Parmagiana, Echidna Meatballs and of course, Eggs Beans and Chips.

I understand many of you may have or not had any of the dishes I have just mentioned so just for the record Toad in the Hole does not contain any toads, Porcupine Meatballs do not contain any porcupine meat and Echidna Meatballs definitely do not contain any Echidna meat.  Are we clear?  I am happy now that we have that sorted!

Firstly this recipe is based on Porcupine Meatballs, an American dish that has apparently been a staple for generations.  As we live in Australia I changed the name to Echidna meatballs based on the fact that we don't have Porcupines down under.  The Echidna, or Spiny Anteater, is the equivalent to it's Northern Hemisphere counterpart.

So what is an Echidna meatball?  Basically its a beef meatball with raw white rice added during the mixing stage.  Once the meatballs start cooking the rice starts protruding from the meat.  This resembles a Echidna or a Porcupine.  It's quite a groovy cooking technique and look pretty cool, especially if you are a kid.

Echidna meatballs are a very comforting and easy dish to make. The tender meatballs flavoured with herbs are cooked in a delicious tomato sauce.  There is no need to brown up the meatballs prior as they keep their shape well.  Note there is not a lot of stirring required during cooking so please do not be tempted to continually stir as you will ruin the effectiveness of the rice poking from the meatball.

Like with most hand me down recipes, googles or cookbook searches you will find a multitude of different versions all claiming to the best.  This recipe is nice, tasty and very easy but is it the best?  We think so but I am unsure.  Many use canned tomato soup but we find that using a can of condensed soup seems to make the sauce very sweet.  We prefer to add some diced fresh tomatoes along with canned and passata.  Add some chilli flakes if you wish to spice up the tomato sauce or even some different herbs.  Its a great recipe to experiment with also.

This is a perfect one pot weeknight wonder, even more so for me tonight as the man of the house, Noel, cooked dinner.  It was wonderful to come home from work and smell the deliciousness as I opened the front door.

Serve with mashed potato or plain pasta and I am sure your family will love them.


Echidna Meatballs aka Porcupine Meatballs

Serves: 4
SmartPoints per Serve: 7

500 grams lean beef mince
1/3 cup raw long grain rice
1 teaspoon beef stock powder
salt
ground black pepper
1 egg white 
4 fresh truss tomatoes, diced
350 ml Italian passata
1 x 440g can diced tomatoes
1 onion, finely diced
1 cup water
2 teaspoons chicken stock powder 
2 teaspoon crushed garlic
2 teaspoon dried oregano
1 tablespoon chilli flakes (optional)

In a mixing bowl add mince, rice, stock powder and egg white. Season with salt and pepper.  Using your hand, mix all ingredients together until combined.  Shape into twelve even sized meatballs.

Place the tomatoes, passata, canned tomatoes, onion, water, chicken stock powder, garlic, oregano and chilli, if using, in a flameproof casserole dish or heavy based frying pan (with a lid). Mix well and bring to the boil, reduce heat to low and simmer for 10 minutes.  Season with salt and pepper.

Gently place meatballs in tomato sauce.

Put lid on casserole dish and gently simmer for 1 hour, stirring occassionally, until meatballs are cooked and rice is protruding.

Serve with mashed potatoes or pasta (add SP as required).


Tuesday, January 2, 2018

Pork and Veal Meatballs on Polenta with Gremolata

One of the ways that I survive is by being organised.  Many of my friends, I believe, think I have a major control issue or am just simply crazy.  Menu planning, shopping lists, list of contents of freezer, family planner, etc., has just become part of our lives as with both hubby and I working full time and the kids with school and sporting activities there was a definite need to be organised not only to be prepared but the maximize the spare time that we did have.  I guess you either love it or hate it (or maybe don't understand it)!  I love it.

So needless to say I have menu planned the first week of the New Year.  As I plan Saturday to Friday it's only a small week especially as we went out for dinner with family last night to the Westernport Hotel in Hastings.  Now I mainly only plan dinners as lunches are normally quite standard weekdays but if I do plan to do a nice lunch on the weekend, for example, this is planned also.  Once the meals are decided I also make note of where the recipe is sourced from so whoever wants to come in and start preparing dinner they know what needs doing.  From the menu plan I get the shopping list and it all flows on from there.

I decided that tonight's dish, Pork and Veal Meatballs on Polenta with Gremolata, an Italian inspired dish would move away from all the foods and flavours of the Festive Season that we have been eating.  While the sauce itself is quite rich, the meatballs were moist and tender with a hint of cheese.  I did actually use pork an beef mince for this recipe as I did not have veal as the original recipe called for.  Both minces were only regular grade not the lean mince as required which would add to the richness and the fat content.  This also made it a tad oilier.  So stick to lean mince for this recipe.

The tomato sauce was very robust and really complemented the whole dish. This combined with the smooth creamy polenta made this meal quite comforting and I can only imagine would make a wonderful meal for a cold winters night.  The kids, not being fans of polenta, had boiled pasta instead.  I think if I had cooked more there would have been seconds taken by everyone that's for sure.


Pork and Veal Meatballs on Polenta with Gremolata
(Recipe adapted from Weight Watchers Australia)

Serves: 4
SmartPoints per serve: 10
SmartPoints per serve (using regular mince): 13

1 tablespoon olive oil
1 medium brown onion, finely choppped
1 celery stick, finely chopped
1 medium carrot, finely chopped
2 cloves fresh garlic, finely chopped
2 tablespoons tomato paste
400 gram canned diced tomatoes
1/2 cup water
250 grams lean pork mince
250 grams mince veal or beef, raw
3/4 cups grated parmesan cheese
salt 
freshly ground black pepper
1/3 cups fresh flat-leaf parsley, finely chopped
125 grams Instant yellow polenta
1 tablespoons fresh lemon rind, finely chopped
1/8 teaspoons garlic powder

Heat oil in a large saucepan over medium heat. Cook onion, celery, carrot and garlic, stirring, for 5 minutes or until softened. Add tomato paste and cook, stirring, for 1 minute. Add tomatoes and water and bring to the boil. Reduce heat and simmer, covered, for 15 minutes.

Meanwhile, combine mince, 2 tablespoons cheese, half the parsley, salt and pepper in a medium bowl. Roll heaped tablespoons of mixture into 12 balls.

Add meatballs to tomato mixture and cook for 15 minutes or until meatballs are cooked through and sauce thickens.

Meanwhile, bring 1 litre of water to the boil over high heat. Add polenta in a steady stream and cook, stirring, for 5 minutes or until soft and creamy. Stir in remaining cheese.

Combine lemon rind, remaining parsley and garlic powder in a bowl. Serve polenta topped with meatballs, sauce and gremolata.