Showing posts with label baking sweet. Show all posts

Sunday, April 21, 2019

Bakewell Tart

March and April see a string of birthdays in our family.  This year we were bless with our daughter turning 18 and our son turning 21 both in March.  April followed up with our niece's 8th birthday, Dad/Grandad's birthday and of course, hubby turning 50!  No shortage of candles in the House of Murray that's for sure. 

There were several French Vanilla Cheesecakes made along with a couple of Gluten Free Devil's Food Cakes (Chocolate Mud Cakes) but for Dad/Grandad I really wanted to make something that was old school and being that we are all from British background this Bakewell Tart really hit the spot.

A Bakewell tart, as I believe it should be, has a crisp sweet shortcrust pastry base, a layer of thick jam, a generous frangipane filling and flaked almonds.  But honestly, like with everything, everyone has their own versions and there are so many recipes out there to follow.

All I can say is that Dad/Grandad was very happy with his birthday Bakewell Tart (not to mention everyone else in the family).  


Bakewell Tart
(Recipe adapted from Delicious Magazine UK)

Serves: 8 - 10

Pastry
200 grams plain flour, plus extra for dusting
2 tablespoons icing sugar
100 grams unsalted butter, chilled and diced
1 large free-range egg, beaten
1 tablespoon milk

Filling
150 grams  unsalted butter, at room temperature
150 grams caster sugar
3 large free-range eggs, at room temperature, beaten
150 grams ground almonds
grated zest of 1 lemon
6 tablespoons cherry or raspberry jam
2 tablespoons flaked almonds

Sift the flour, icing sugar and a pinch of salt into a large bowl. 

Using your fingertips, rub in the butter until it forms fine crumbs. 

Add the beaten eggs and milk and lightly bring together to form a firm dough, taking care not to handle it any more than necessary. 

Shape into a disc (which will be easier to roll out later), then chill, wrapped in cling film, for 30 minutes.

Preheat the oven to 180 degrees Celsius.   

Roll the pastry out on a lightly floured surface to 4mm thick. 

Lift pastry, trying not to stretch and place over a 23cm fluted, loose-bottomed tart tin or a quiche/flan dish.  Using your fingers gently push the pastry into the tin. Trim the excess and prick all over with a fork. Chill for 30 minutes.


Place the tin onto a baking tray.  Line the pastry case with baking paper and fill with baking beans or rice.

Place tray in oven and bake for 15 minutes, then remove the beans/rice and paper.

Cook for a further 5 minutes until pale golden and dry on top.

Meanwhile beat the remaining butter and sugar together until pale and fluffy. 

Beat in the eggs a little at a time, then fold in the ground almonds and lemon zest.

Spread the jam evenly across the base of the pastry case, then spoon over the sponge mixture, levelling the surface with the back of the spoon. Scatter with almonds. 


Bake for 35-40 minutes until golden, well risen and just set in the centre.


Leave to cool in the tin for 5 minutes, then lift onto a wire rack and leave to cool completely, if desired (we enjoy ours still warm).
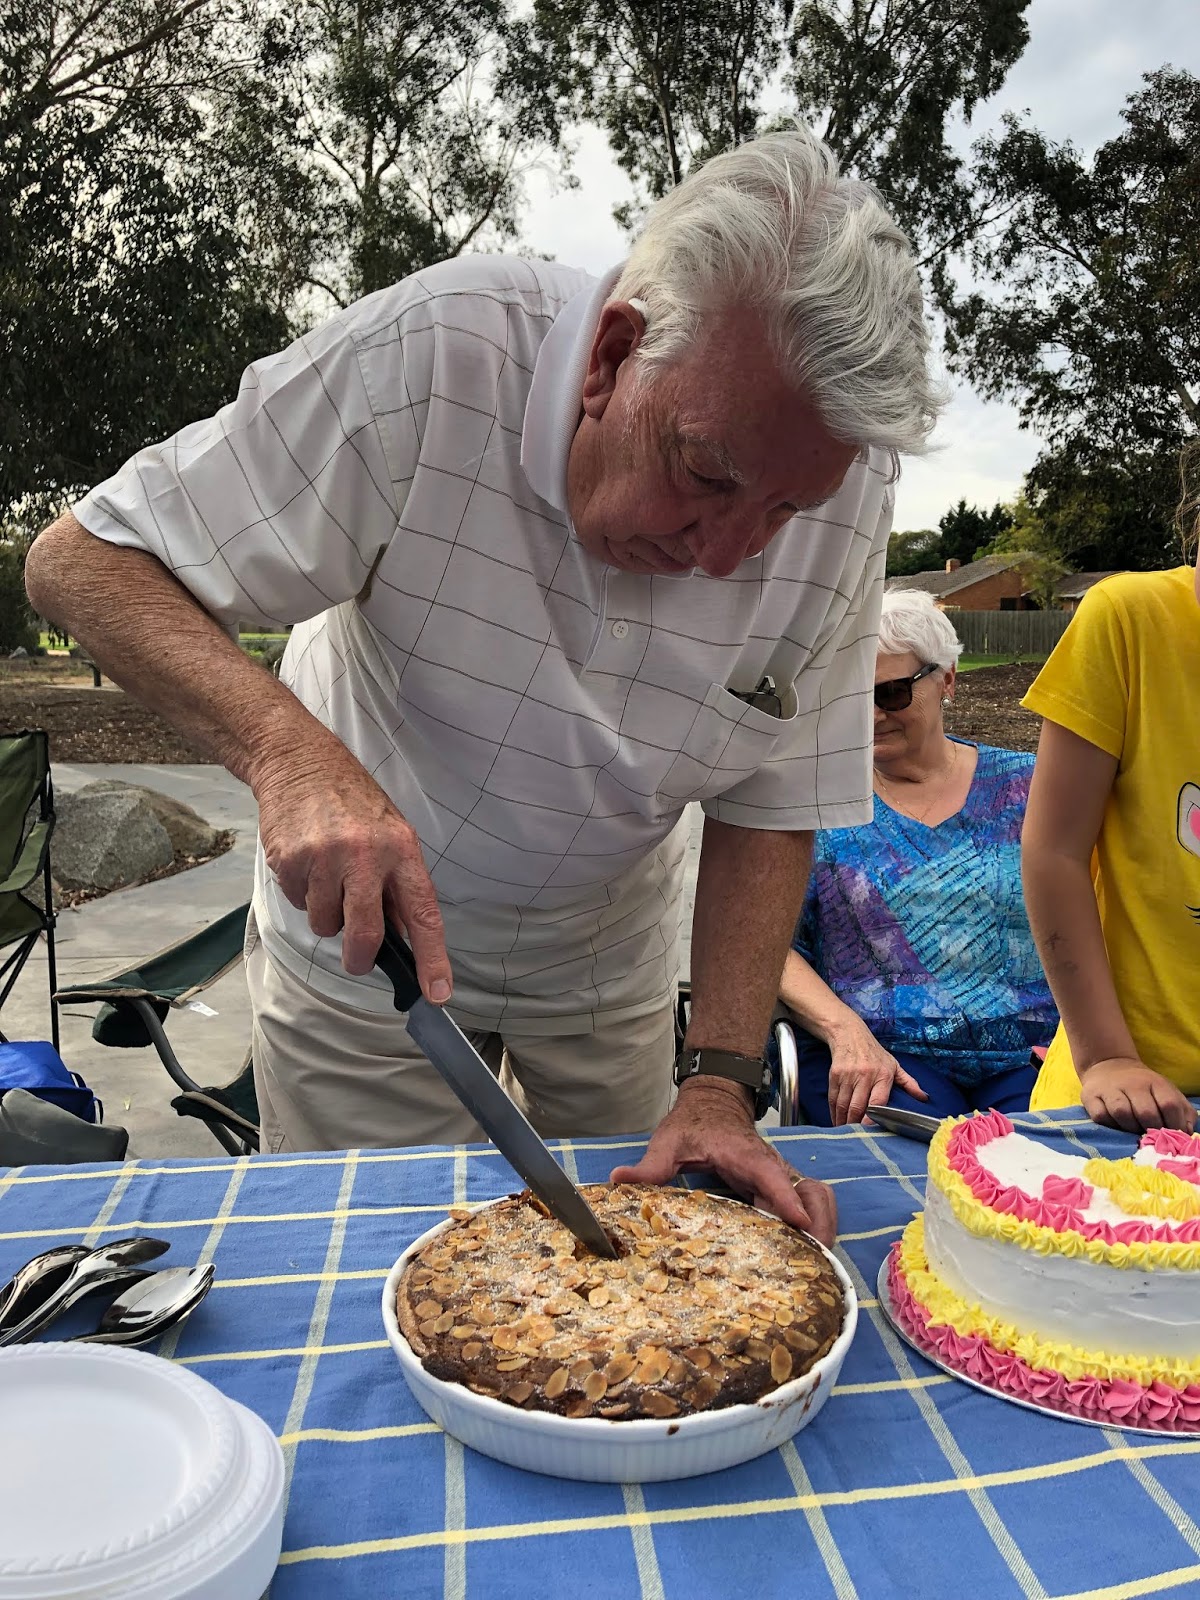

Happy Birthday Dad/Grandad


Wednesday, April 25, 2018

Slightly Chewy Anzac Biscuit

Our daughter asked if I was making Anzac Biscuits again this year.  It always amazes me that something that I may only do or cook once a year is requested with the perfect timing from not only her but from the family.   They know that I have my traditions (as quirky as some of them are) and my beliefs which they let me run with even if it means eating different foods like Faggods and Mushy Peas and Welsh Cakes on St David's Day or only eating seafood on Good Friday and I thank them humbly for letting me do my thing!  Anzac Day is the only day that I bake Anzac Biscuits. 

An Anzac biscuit is a sweet biscuit, popular in Australia and New Zealand, made using rolled oats, flour, sugar, butter, golden syrup, baking soda, boiling water, and (optionally) desiccated coconut. Anzac biscuits have long been associated with the Australian and New Zealand Army Corps (ANZAC) established in World War I. The biscuits were sent by wives and women's groups to soldiers abroad because the ingredients do not spoil easily and the biscuits kept well during naval transportation.

Everyone loves an Anzac biscuit - everyone has a treasured recipe also.  This recipe is very close to the traditional version we all know and love, but with slightly higher amounts of coconut, golden syrup and butter, the end result is more chewy than crumbly.  Personally I prefer a crumbly crisp Anzac Biscuit but these pleased the crew.


Slightly Chewy Anzac Biscuit
(Recipe sourced from Delicious)

Makes: 24

1¼ cups rolled oats
1 ¼ cups desiccated coconut
1 cup plain flour
150 grams unsalted butter
¼ cup golden syrup
1 cup raw sugar
½ teaspoon bicarbonate of soda

Preheat oven to 180 degrees Celsius.

Combine the oats, coconut, flour and a pinch of salt in a bowl. Set aside.

Place the butter, golden syrup and sugar in a saucepan over medium heat, stirring until butter melts. Bring to a simmer and cook for a further 1-2 minutes until sugar dissolves. Remove from heat, cool slightly, then add the bicarb soda and 1 tbs water. Stir to combine, then pour over the oat mixture.

Using a wooden spoon, combine butter and oat mixture.

Using 1 tbs mixture each, roll into 24 equal-sized balls. Divide between two baking paper-lined baking trays, leaving 3cm between each.

Flatten biscuits slightly, then bake for 10-12 minutes until the top tray is slightly golden. Swap trays and cook for a further 6-8 minutes until all biscuits are golden.

Remove from oven and cool completely on a wire rack.


(Click here for a printable version of this recipe)

Tuesday, July 25, 2017

Banana Oatmeal Chocolate Chip Cookies

While I have always and will always maintain that I am not the "housewife" type but since being made redundant I have actually been enjoying my time at home.  It has given me some time to actually relax and I am really feeling better for it.  I have also been able to do some blogging and sharing of recipes with you all which gives me great pleasure.  Not to mention I have had time to catch up on other websites/blogs I follow and also find some new ones to read.
 
Today while looking for inspiration for some old bananas (I hate wasting food) I came across a website that I really like.  Averie Cooks is a vibrant and fresh site full of quick and easy recipes that are uncomplicated and easy to follow.  And that is exactly where I found this recipe for Banana Oatmeal Chocolate Chip Cookies.
 
While I adapted the recipe the results was perfect.  Crispy yet soft cookies with a bold banana flavor married with scrumptious milk chocolate laced with a hint of cinnamon.  The rolled oats complimented the cookies giving them a homemade texture and that old fashioned appeal.  Do not use instant or quick-cook as they will not give the same outcome.
 
Don't overbake even if they don't look cooked.  The cookies firm up as they cool.  These will keep for about 1 week in a sealed container if they last that long! 
 
 
Banana Oatmeal Chocolate Chip Cookies
(Recipe adapted from Averie Cooks)
 
Makes: approx. 20
 
1 large egg
2 small/medium or 1 extra-large ripe bananas
1/2 cup light brown sugar, packed
1/4 cup granulated sugar
60 grams unsalted butter, softened
2 teaspoons vanilla extract
1 1/2 cups rolled oats
1 1/4 cups plain flour
1/2 cinnamon, added to taste
1/2 teaspoon baking soda
1/4 teaspoon salt, or to taste
200 grams milk chocolate chips

In a large mixing bowl (or the bowl of a stand mixer fitted with the paddle attachment or an electric mixer) combine the egg, bananas, sugars, butter, vanilla, and beat on medium-high speed until well combined. 
 
Add the oats, flour, cinnamon, baking soda, salt, and beat on low speed until just combined, about 1 minute.  Add 3/4 of the chocolate chips, and beat on low speed until just combined, about 30 seconds.
 
Line a baking tray with baking paper and spray with cooking spray. 
 
Using a spoon or your hands form equal-sized mounds of dough approximately 1/4 cup in size.  Place on the baking tray spaced apart.  Strategically place a few chocolate chips on top of each cookie.
 
Preheat oven to 180 degrees Celsius.
 
Bake for about 13 minutes (for very soft cookies, longer for more well-done cookies), or until edges have set and tops are just set. Remove from oven and allow cookies to cool on baking sheet.


Sunday, February 26, 2017

French Vanilla Cheesecake with Fresh Berries

I might get this blogging caper happening as a regular happening at some stage in 2017 but I cannot believe that 57 days into the New Year and we still haven't stopped being very busy. Oh well I guess this is just life and how fast it goes by. So much has happened since my last blog (in all honesty without looking I couldn't say when that was). Work has been busy, footy training has started and we have already been on a holiday with the Murray side of the family and a road trip to NSW to visit family and friends in a whirlwind 5 day trip that was a MUST to do. We went to visit my Aunty Maureen and Uncle Dave. In just 10 short weeks we have lost someone very special to me and my family to terminal cancer - Aunty Maureen passed late Thursday evening after such a dignified and amazing journey. Both Mam and I will be attending the service on Friday in Sydney.

I first met my Aunty Maureen, Uncle Dave and my 3 cousins, Steven, Michelle and Alison (the Jones) at the age of 18 months. Strangely the first time I met them was on a Greek Ocean Liner called the Elinis. We were all on our way to start our new lives in Australia - this was in 1973. The Jones were coming from Liverpool. It was then that I also met more family - Lars, Pip, Marica and Annette who were from Finland and Rolf, Anchristin, Ingela and Anna from Sweden. Who would have thought 44 years ago that we would have all still remained so close. Distance may be an issue at times but to me growing up with all of these important people infiltrating my life at some stage, and still today, my life has been truly blessed. While we are not related by blood we are still very much family.

Why am I telling you all of this? Because of my Aunty Maureen. Even while she was sick every time we spoke she told me how she follows our cooking adventures on Facebook all the time and that she was always in awe of our food. She often would encourage me to take up a career in food because she knows that I have the passion for it. It's actually because of her that I am making the effort to post this today.

Today we had close friends Leigh and Lauren over for lunch with their two gorgeous daughters, Harlow and Lenni. Funnily they seem more like family to me than just friends. Knowing that they both love cheesecake, I decided to make my signature French Vanilla Cheesecake with Fresh Berries (to be honest have no idea why I haven't posted about this cheesecake before?) Harlow helped me to decorate the cheesecake just before serving which was a very special moment for me today.

This French Vanilla Cheesecake is so easy to make, is no bake and the vanilla flavour is to die for. It's not an overly sweet cheesecake and I think that the fresh berries are a perfect compliment to the creamy vanilla center. 

For the base today I used Marie Biscuits however you could actually use any biscuit flavour of your choice.  Depending on your pan and the thickness you press the crumb you may have some left over and that is perfectly fine.  Don't make it too thick or it will be hard to cut.  

The recipe calls for it to set overnight but to be perfectly honest 6 hours is long enough.  If you wanted to make a smaller one in a flan tin just half the recipe.

Do yourself a flavour and give it a go.....


French Vanilla Cheesecake with Fresh Berries
(recipe adapted from Taste.com)

Serves: 8

500g packet plain sweet biscuits (such as Marie)
300g butter, melted
600ml thickened cream, whipped
6 teaspoons powdered gelatine
3 tablespoons boiling water
1000g cream cheese, softened
1 1/3 cup caster sugar
300ml thickened cream, extra
1 tablespoon icing sugar
1 tablespoon vanilla bean paste
Fresh berries of your choice, to decorate

Grease a 20 cm round (base) spring-form pan. Using a food processor, process biscuits until fine crumbs. Add butter. Process until combined. Press the biscuit mixture over base and side of prepared pan. Refrigerate for 10 minutes.

In a large bowl, using an electric mixer, beat cream until thickened. Set aside.

Meanwhile, sprinkle gelatine over boiling water in a heatproof jug. Whisk with a fork until gelatine has dissolved. Set aside to cool.

Meanwhile, using an electric mixer, beat cream cheese, sugar and vanilla until light and fluffy.

Gradually beat in gelatine mixture until combined. Fold in whipped cream. Pour mixture into prepared pan, leveling top with a spatula. Cover.

Refrigerate overnight or until set.

When ready to decorate, place cream and icing sugar in a large bowl. Beat with an electric mixer until thickened and forming peaks.

Remove the cheesecake from pan. Decorate top of cheesecake with whipped cream and fresh berries of your choice. Serve.


Tuesday, October 25, 2016

Blueberry Coconut and Banana Muffins

I'm pretty sure that these will be the last of the banana muffins for awhile as I have decided due to the lack of interest in eating them (my kids are on a non fruit vigil at the moment I am certain) I've decided to stop buying them for a while.  However saying this everyone at work has been enjoying my recently baked muffins, although I have been told that the Banana Crumble Muffins are still the favourite.

I really enjoyed this combination  - the juiciness of the blueberries combined with the added sweetness and nuttiness of the coconut added perfectly to the subtle undertones of the banana and cinnamon.  Personally I think this one is a winner!


Blueberry, Coconut and Banana Muffins

Makes 12 muffins
Smart Points Per Serve: SP Warning

1 1/2 cups self raising flour
1 cup white sugar
1 cup shredded coconut
1 teaspoon baking powder
1/2 teaspoon salt
3 medium, ripe bananas
1 egg
1/3 cup canola oil
1/3 cup skim milk
1 teaspoon cinnamon
2 teaspoon vanilla extract
250 grams frozen blueberries

Preheat your oven to 190 degrees Celsius and line a 12-cup muffin tin with paper liners.

In a large bowl, combine dry ingredients.

In another bowl, mash the bananas. Add egg, oil, milk, cinnamon and vanilla and mix well.

Combine the dry and wet ingredients and stir until it just comes together

Fill prepared muffin tins evenly.

Bake muffins for 18 to 22 minutes, or until a toothpick inserted into the center comes out clean.


(Click here for a printable version of this recipe)

Sunday, October 9, 2016

Banana and Double Choc Chip Muffins


When you have over ripe bananas there is no need to bin them... use them!!  In fact the "over riper" they are the better... and looking over at my fruit bowl I could see my bananas had hit that category.  Obviously the only thing to do was to make a batch of muffins...
 
My favourite muffin recipe to date using bananas is Banana Crumble Muffins, which everyone thoroughly enjoyed including work colleagues. This muffin recipe is one of the easiest to follow so I just adapted it to make this latest creation of Banana and Double Choc Chip Muffins.  Why double choc chip?  Because I used a mixture of dark and milk choc chips (actually 2 whole bags of each).
 
As per usual they were moist and light with the added sweetness of the chocolate randomly appearing with every mouthful....


Banana and Double Choc Chip Muffins
 
Makes 12

1 1/2 cups self raising flour
1 cup white sugar
1 teaspoon baking powder
1/2 teaspoon salt
3 medium, ripe bananas
1 egg
1/3 cup canola oil
1 teaspoon vanilla extract
200 grams dark choc chips
200 grams milk choc chips
 
Preheat your oven to 190 degrees Celsius and line a 12-cup muffin tin with paper liners.
 
In a large bowl, combine dry ingredients.
 
In another bowl, mash the bananas. Add egg, oil and vanilla and mix well.
 
Combine the dry and wet ingredients and stir until it just comes together
 
Fill prepared muffin tins evenly.
 
Bake muffins for 18 to 22 minutes, or until a toothpick inserted into the center comes out clean.


(Click here for a printable version of this recipe)

Sunday, October 2, 2016

Carrot Cake with Cream Cheese Icing

I love baking - it's wonderful to be able to get lots of different ingredients and put them in a big bowl, make a batter and cook only to find the outcome to be a moist soft cake that just screams homemade. I can walk passed cakes in shop windows but seldom manage to resist something that has been freshly baked with love and effort.

On a recent trip to Ikea in Springvale Alex was upset that there was no longer any carrot cake in the cafe - it was one of her (and my) favourite treats from the cafe.  We have to stop at the cafe which is half way (it's actually half way in every Ikea store) as it's really hard work shopping at Ikea.  This time she had a princess cake after her meatballs so she was still happy.

I decided, after reading so many versions of carrot cake over the years, that I give it a go and treat Alexandria to her favourite cake of all time.  Unsure on which was the best recipe to use as there are so many different ones out there strangely a recipe popped up in my Facebook news feed and thought this is the one that I am meant to cook.  So thanks to Canadian Living Magazine I present to you Carrot Cake with Cream Cheese Icing.

The cake is so moist - every mouthful was a pleasure to eat.  The combination of carrots, pineapple and walnuts mixed with the cinnamon and the nutmeg was heaven and actually reminded me of days long ago when I was visiting my gorgeous friend Debbie and her family in Mississauga, Canada.  Ahhhh memories......

The velvety cream cheese icing was delicious with a hint of real vanilla.  I don't ever use the imitation vanilla essence. I always use Queen Natural Vanilla Concentrate Extract.  It is a lot stronger and half the quantity is only needed.  It has a nicer and more noticeable natural vanilla taste than the artificial flavour of the essence.  Once you use it in baking you will not use the essence again.

Sprinkled with some more crushed walnuts and you will really enjoy treating yourself to this delicious cake..... 


Carrot Cake with Cream Cheese Icing
(Recipe sourced from Canadian Living Magazine)

Serves: 10 -12

2 cups plain flour
2 teaspoon baking powder
2 teaspoon cinnamon
1 teaspoon baking soda
3/4 teaspoon salt
1/2 teaspoon nutmeg
3/4 cup granulated sugar
3/4 cup packed brown sugar
3 eggs
3/4 cup vegetable oil
1 teaspoon vanilla
2 cups grated carrots
1 cup drained crushed canned pineapple
1/2 cup chopped walnuts (or pecans if preferred)
250 gram package cream cheese, softened
1/4 cup butter, softened
1/2 teaspoon vanilla
1 cup icing sugar
1/4 cup crushed walnuts for decoration (if desired)

Grease and line a 22 cm round cake tin (or 2 smaller ones) set aside.

In large bowl, whisk together flour, baking powder, cinnamon, baking soda, salt and nutmeg. In separate bowl, beat together granulated and brown sugars, eggs, oil and vanilla until smooth; pour over flour mixture and stir just until moistened. Stir in carrots, pineapple and pecans. Spread in prepared pan.

Bake in center of 180°C oven for 40 minutes or until cake tester inserted in center comes out clean. Let cool in pan on rack.

In bowl, beat cream cheese with butter until smooth. Beat in vanilla. Beat in icing sugar, one-third at a time, until smooth. Spread over top of cake.

Sprinkle with crushed walnuts for decoration.

(Click here for a printable version of this recipe)

Monday, May 30, 2016

Blackberry and Apple Muffins

The smell that was filling our house while these were baking was definitely a comforting one... the smell of the sweetness and cinnamon reminded me of my childhood growing up with my Gransha always baking cakes for weddings and birthdays...  I remember the big pots of mixed cake mix sitting on the table in the front room.  He made cakes for all over the Valleys in South Wales and was well known for them.  Before that he was a chef in the British Army.  As a young girl I was guilty of eating the cake mix straight from the bowl before he had baked his cakes causing many of his cakes to be incorrect sizes.  He caught on to me quite quickly and before I knew it there was a lock on the front room door meaning no access unless he was with me.  I do honestly believe I found my love of baking from the times I spent with him.

Honestly our household isn't a cake eating one - lollies and chocolates do disappear quickly however.  I love baking and thankfully the great bunch of people I work with never complain when I turn up with a box of baked treats.  In fact I am often reminded of how slack I am if they are not regularly brought into work!  It makes me laugh especially when I see their faces when I arrive at work and they see that I have been busy the night before.  So far they have enjoyed all flavours that I have brought in which means it's a win-win situation - I get to bake and they get to enjoy homemade treats.
 
I am really enjoying reading recipes over at Sally's Baking Addiction, a magnificent website created by Sally (obviously) who lives in Philadelphia, USA, and does her website full time!!!  Something I could only ever dream about.  There are so many great recipes and stories to read.  Pop over and visit -  your mouth will water.
 
This recipe, which I adapted slightly to match ingredients I had on hand, was one that I have read and re-read.  I knew it would only be a matter of time before they were made.  The combination of blackberries, apple and of course, cinnamon was delicious.  The muffin itself was super moist and laced with maple syrup.  I love cooking with berries and they add a juicy element to the muffin.  Each mouthful was definitely a flavour burst.


Blackberry and Apple Muffins
(recipe adapted from Sally's Baking Addiction)
 
Makes: 12

Muffins
3 cups plain flour
1 tablespoon ground cinnamon
3 1/2 teaspoons baking powder
1/8 teaspoon baking soda
1/2 teaspoon salt
1 very large apple, peeled and diced into small pieces
1/2 cup soft brown sugar
1/2 cup light Greek style yogurt
1/2 cup vegetable oil (or applesauce if preferred)
1/4 cup pure maple syrup
2 large eggs
2 teaspoons vanilla extract
1 cup skim milk
1 cup fresh or frozen blackberries, chopped

Oat Streusel
3 tablespoons soft brown sugar
3 tablespoons old-fashioned rolled oats
1/2 teaspoon ground cinnamon

Preheat oven to 220 degrees Celsius.
 
Line a 12 muffin try with muffin pans. Set aside.

Toss the flour, cinnamon, baking powder, baking soda, salt, and chopped apples together in a large bowl until evenly combined. Set aside.

In a medium bowl, whisk the brown sugar, yogurt, oil, maple syrup, eggs, vanilla, and milk together vigorously until combined and smooth.
 
 Pour the wet ingredients into the dry ingredients and gently stir with a large spoon until combined. Do not over mix the batter.

To make the streusel toss the brown sugar, oats, and cinnamon together in a small bowl. Set aside.
 
Half fill each muffin tin. Top with a couple of blackberries, then layer with more muffin batter and a couple more blackberries until you've filled the muffin cups all the way to the top. Sprinkle each with streusel.

Bake the muffins at 220 degrees Celsius for 5 minutes. 
 
Leave the muffins inside the oven and turn the temperature down to 190 degrees Celsius.  Bake for another 15-16 minutes or until a toothpick inserted into the center of the muffin comes out clean.


Wednesday, May 4, 2016

Raspberry and White Chocolate Muffins

Well I am still on my mission of catching up with blogging... At times I really wish there was 48 hours to every day because I seriously need more than 24. I cannot understand sometimes why I don't get my planned activities done daily but my husband is quick to point out that maybe I am too much of an over achiever and that I try to do to much!! He may actually be on to something... LOL!

Lately I have been baking - I have always enjoyed baking even though I am not a huge fan of sweet foods.  Thankfully I have many people who are happily willing to be taste testers for me.
 
Once again after reading so many different recipes, my recipe is one born from morphing many together.  The outcome was a pleasant surprise - a super easy recipe that was moist, light and full of flavour.  Raspberry and white chocolate are perfect partners in baking but with the added hint of vanilla and lemon these muffins were perfect.
 
They must of been somewhat ok.  Why you ask? 
 
Four dozen were gone by 10am the next morning!!!!!!


Raspberry and White Chocolate Muffins

Serves: 12
SmartPoints per serve: 12

2 cups plain flour
2 teaspoons baking powder
1 cup caster sugar
1 egg
1 cup skim milk
1 teaspoon vanilla essence
50 grams butter, melted
1 tablespoon lemon zest
1 cup frozen raspberries, thawed
200 grams white chocolate buds (roughly chopped if using large buds)

Preheat oven to 190 degrees Celsius.

Place 12 large patty cases into a muffin pan.

In a large bowl sift together the flour, baking powder and sugar.

In a separate bowl, whisk together egg, milk, vanilla and butter.

Add liquid mixture to dry ingredients along with the lemon zest, raspberries and chocolate. Using a large spoon, gently mix until just combined.

Divide the batter between patty cases and bake for 20-25 min, or until a skewer comes out clean and muffins are golden.


(click here for a printable version of this recipe)

Tuesday, April 26, 2016

Banana Crumble Muffins

Noel has annual leave this week and it was so nice to come home to dinner already cooked for us (Noel cooked Shepherds Pie - a family favourite) .... so with nothing else to do I had a "Stepford Wife" moment and decided to do some baking.  I really enjoy baking but find myself so time poor at times that it is impossible to squeeze the extra enjoyable activity in unless I have nothing to do or I get bored.
 
So with the urge to bake then came the huge decision of what to bake??  Looking across to the fruit bowl I spotted a few bananas left from last weeks' shop (so they were nice and ripe).  Banana muffins came to mind but I didn't want to make just the normal banana muffins - you know the boring ones with no character or define flavour.  Searching through recipe books and googling I remember that I had recently come a different recipe on the Rachael Ray website.
 
Ok armed with all the ingredients I went ahead and made Banana Crumble Muffins... Perfect Banana Crumble Muffins.  Oh and WOW they were perfect...
 
Moist on the inside, crunchy crumble topping... so nice especially while still a little warm.  Definitely a flavour explosion in your mouth.  The crumble topping will be used again on other fruit muffins but this recipe is a keeper.


Banana Crumble Muffins
(recipe adapted from Rachael Ray)

Makes 12 muffins
Smart Points Per Serve: SP Warning

Crumble topping
3/4 cup plain flour
1/3 cup packed light-brown sugar
3 tablespoons white sugar
1/4 teaspoon cinnamon
pinch of salt
6 tablespoons cold reduced fat butter (cut into small pieces)

Muffins
1 1/2 cups self raising flour
1 cup white sugar
1 teaspoon baking powder
1/2 teaspoon salt
3 medium, ripe bananas
1 egg
1/3 cup canola oil
1 teaspoon vanilla extract

In a medium bowl, mix the flour, light brown sugar, granulated sugar and salt. Then with your hands, work in the butter until large clumps form. Cover with plastic wrap and chill in the refrigerator until ready to use.

Preheat your oven to 190 degrees Celsius and line a 12-cup muffin tin with paper liners.

In a large bowl, combine dry ingredients.

In another bowl, mash the bananas. Add egg, oil and vanilla and mix well.

Combine the dry and wet ingredients and stir until it just comes together

Fill prepared muffin tins halfway then evenly distribute crumble topping over the muffins.

Bake muffins for 18 to 22 minutes, or until a toothpick inserted into the center comes out clean.


(Click here for a printable version of this recipe)

Tuesday, October 20, 2015

Cafe Style Blueberry Muffins

Café style muffins... who can resist them? It's hard too at the best of times but when they are straight out of the oven sitting on the kitchen bench top it's even harder.

This recipe is super easy and very quick.  You don't even need to use a mixer - a good ol' wooden spoon will be just fine.

Fresh blueberries are obviously the key ingredient in these muffins - frozen can be used.  Buttermilk can be substituted with milk however the buttermilk helps maintain a moister texture.  The wonderful aroma of baking laced with blueberries and cinnamon filled the kitchen not long after they were placed into the oven.

Muffins taste best fresh the same day. Store muffins at room temperature in an airtight container for up to 5 days. Muffins freeze well for up to 3 months.


Cafe Style Blueberry Muffins
(recipe adapted from Sally's Baking Addiction)

Makes: 12

3 cup plain flour (very careful not to overmeasure)
4 teaspoons baking powder
1/2 teaspoon salt
1 teaspoon ground cinnamon
2 eggs, room temperature preferred
1 cup caster sugar
1 cup buttermilk
1/2 cup canola oil (or vegetable or melted coconut oil)
1 teaspoon vanilla extract
1 and 1/2 cups fresh or frozen blueberries
coarse sugar for sprinkling (optional)

Preheat oven to 220 degrees Celsius or 200 degrees Celsius fan forced.

Spray your muffin tin of choice with non-stick spray or line with muffin liners. Set aside.

In a large bowl, gently toss together flour, baking powder, salt, and cinnamon. Mix until all dry ingredients are combined - a 20 second toss to disperse everything together. Set aside.

In a medium bowl, whisk together eggs and sugar until combined. Mix in milk, oil, and vanilla. Mixture will be pale and yellow. Fold wet ingredients into dry ingredients and mix everything together by hand. Avoid over mixing. Gently mix until all the flour is off the bottom of the bowl and no big pockets of flour remain. The batter will be VERY thick and somewhat lumpy. Fold in the blueberries.

Pour batter into prepared muffin tins, filling all the way to the top. Top with a sprinkle course sugar, if preferred.

Bake at 220 degrees Celsius or 200 degrees Celsius fan forced for 5 minutes. Reduce oven temperature to 190 degrees Celsius or 170 degrees Celsius fan forced and continue to bake for 25 minutes until tops are lightly golden and centres appear set. Use a skewer to see if the centres are cooked. Allow to cool for 10 minutes in muffin pan before enjoying.

Sunday, October 4, 2015

Boiled Pineapple Fruit Cake

Not many of you may know this quirky fact about me, in fact there are many things I have not disclosed LOL!!!  This fact however was very pivotal my teenage years.  I grew up living on a golf course... yep a golf course.  My parents were caretakers by night, which meant we lived on the golf course and looked after the property outside of business hours.

The golf course itself was an 18 hole public golf course complete with a historic homestead, our house, a golf shop and a cafe.  My mam worked in the cafe which was perfect as she walked out the back gate and into her workplace.

One of the cakes that was baked at Sandringham Golf Course's cafe was a  Pineapple Boiled Fruit Cake and it was always a star in the cake cabinet. No fancy icing or decorations just fruit cake, moist, sweet and delicious and well enjoyed by many a golfer.

I decided to make recreate this cake... I did actually have the original recipe once but it has been misplaced somewhere in my travels so here is my take on what I can remember.


Boiled Pineapple Fruit Cake

Serves: 12 - 16

150 grams butter, coarsely cubed
1 cup brown sugar
440 grams can crushed pineapple
500 grams mixed dried fruit
100 grams candied cherries, chopped
2 tablespoons brandy
2 large eggs, lightly beaten
1 cup flour
1 cup self-raising flour
1/2 teaspoon baking soda
1 teaspoon mixed spice
1 teaspoon ground cinnamon

Preheat oven to 170 degrees Celsius or 150 degrees Celsius fan forced.

Grease a 20 cm round cake tin and line the base with nonstick baking paper.

Place butter, sugar, pineapple and juice in a saucepan, then stir until butter melts and sugar dissolves. Stir in dried fruit and brandy and simmer gently for 3 minutes. Remove to a bowl to completely cool.

Stir in the eggs.

Then stir in the flours, baking soda and spices, sifted together.

Spoon the mixture into the prepared cake tin and smooth the surface.

Bake for 1½ hours or until a skewer inserted in the centre comes out clean.

Cool cake in the tin before turning out.


(Click here for a printable version of this recipe)

Monday, September 21, 2015

Chocolate Stout Cake with Baileys Irish Cream Cheese Icing

While purchasing Stout for another recipe, my husband was questioned by the Irish salesman if he was planning to drink the stout. 

My husband replied "No we are using it to marinate pork ribs in."

The salesman said "oh the best cake I have ever eaten was a Chocolate Stout Cake".

Of course Noel came home and told me of this conversation and then, needless to say, I was on a baking mission.....  Chocolate Stout Cake!!

As usual Google produced so many different versions of this cake so I ended up combining a few ideas from here and there.....

The result - MAGNIFICENT!!  A little fiddly to make but definitely worth the effort.

Even hubby sent me a Facebook message telling me "this is one of the yummiest cakes I have eaten and is in my top 5 of all time favourites, so moist and a great balance  of chocolate flavour without the sugar overload and icing/frosting marries perfectly with the sponge, would it work with vanilla sponge?  Another reason why I love you so much xxx :)"


Chocolate Stout Cake with Baileys Irish Cream Cheese Icing


Serves: 12
1 cup Stout or Guinness beer
350 grams butter
100 grams cocoa powder
400 grams caster sugar
2/3 cup lite (fat reduced) sour cream
2 eggs
1 tablespoon vanilla extract
2 cups plain flour
2½ teaspoon bicarbonate of soda/baking soda
500­ grams sifted chocolate icing mixture
100 grams sifted icing sugar
250 grams reduced fat cream cheese, at room temperature
1/4 cup Baileys Irish Cream (or to taste)

Preheat oven 180 degrees Celsius.

Spray and line a 23cm (9") spring form pan or cake tin.

Melt 250 grams butter into the Guinness in a saucepan over low heat.  Whisk in the cocoa and sugar and take the saucepan off the heat.

Beat the sour cream with the eggs and vanilla in a separate bowl until combined, than add to the beer mixture.

Whisk in the flour and bicarb until combined.

Pour the cake batter into the tin and bake for an hour. The middle of the cake may still be slightly wet when you take the cake out, but it will firm up as it cools down.  Leave to cool completely in the tin as it is quite a damp cake and could collapse.

To make the icing cream the butter and icing sugar together until well mixed.  Add the cream cheese in cubes slowly until incorporated.

Add in Baileys. Continue mixing for 5 minutes until the icing is light and fluffy.

Spread over top of completely cooled cake.

Monday, June 8, 2015

Low Fat Raspberry Jelly Swirl Cheesecake Slice

Some of you may have noticed a few problems occurring on my blog this last week or so..... I am not 100% sure what happened but I think I have fixed all the problems and at the same time thought I would update the look...... I hope you all like it.
 
Moving on from my IT issues, here in Australia we had a long weekend... so I got to spend some precious time with my family and also in the kitchen.  Lots of things were made, eaten and more importantly enjoyed.  From Roast Beef and Yorkshire Puddings to Homemade Chilli Tomato Ketchup and of course, these little tasty, sweet treats.

Not a heavy cheesecake - in fact very light and fluffy.  The raspberry jelly added a nice texture and was a beautiful replacement to a fruit sauce or a jam.  I am guessing that you could actually use any flavour jelly as long as you think that the flavours would work well with cheesecake.

Very easy to make - practically in the fridge setting in around 40 minutes and to be honest gone in about 5 minutes.


Low Fat Raspberry Jelly Swirl Cheesecake Slice
(Recipe adapted from Taste.com)


Serves: 24
ProPoints per serve: 3


250g packet Marie biscuits
100g reduced-fat spread, melted
9g sachet low-kilojoule raspberry jelly crystals
2/3 cup boiling water
2 teaspoons gelatine powder
500g light cream cheese, softened
1 tablespoon caster sugar
1/2 cup reduced-fat thickened cooking cream
250g reduced-fat vanilla yoghurt

Preheat oven to 170 degrees Celsius.
 

Grease a 3cm-deep, 17cm x 27cm (base) slice pan. Line base and sides with baking paper, allowing a 5cm overhang at long ends.

Process biscuits until mixture resembles fine breadcrumbs. Add spread. Process until just combined. Press mixture evenly over base of prepared pan. Refrigerate for 20 minutes. Bake for 10 minutes. Cool.

Place jelly crystals in a small, heatproof jug. Add 1/2 cup boiling water. Using a fork, whisk until dissolved. Add 1/2 cup cold water. Stir to combine. Pour jelly into a shallow, heatproof dish. Refrigerate for 30 minutes (jelly consistency should be similar to thickened cream).

Place remaining 2 tablespoons boiling water into a small, heatproof jug. Sprinkle over gelatine. Using a fork, whisk until gelatine dissolves. Set aside.

Process cream cheese, sugar, cream and yoghurt until smooth and combined. Fold gelatine into cream cheese mixture.

Pour mixture over base. Using a tablespoon, dollop jelly over mixture. Using a butter knife, swirl together. Cover and refrigerate for 4 hours or overnight.

Cut into 24 slices.


Monday, September 29, 2014

Banana Bread Supreme

Banana bread is a really treat especially as it is often made using lots of butter or oil but this Banana Bread Supreme contains no dairy at all and is not only very easy to makes it's delish. 

Only a handful of ingredients sees this mixed together within minutes.  The riper the bananas the more intense the flavour.... so I tend to let my bananas sit on the bench until the skin is black and the bananas very soft.

Served hot or cold you will be amazed by this Banana Bread.


Banana Bread Supreme
(recipe sourced from Best Recipes)
 
Serves: 12
ProPoints per serve: 2
 
3 ripe medium bananas, mashed
2 tablespoons golden syrup
1/4 cup caster sugar
1 egg
1 cup self-raising flour
1 pinch salt
1 tablespoon cinnamon sugar

Heat oven to 180C and grease and line the base of a loaf tin.

Mash bananas in a medium sized bowl, then add golden syrup.

Add caster sugar and mix well.

Add egg, sifted flour and salt and lightly mix until just combined.

Pour mixture into loaf tin and lightly sprinkle with cinnamon sugar.

Bake for 30 minutes or until a skewer inserted into the middle comes out clean.


Friday, December 27, 2013

Pineapple, Lime and Coconut Cake

Ok so again another apology for the lack of blogging....

I know that I haven't been blogging of late but we have just been seriously "out of control" busy! My work has been complete madness with many nights staying in motels leaving Noel and the kids to look after themselves.

The year is drawing to a close and there is end in sight for the madness.  Needless to say I am going to take a little time today to catch up on some things that I have cooked in the fleeting days of being at home... being a wife to my incredibly supportive husband, Noel, and a mother to my two wonderfully rounded yet quirky at times children, Oliver and Alex - instead of a career lady.

Strange as this sounds, I actually do need to sit, relax and allow the creative side of me roam free.  I adore nothing more than cooking and eating, and then of course there is the blogging side of my life where I enjoy sharing all of our culinary adventures with those that take the time to read our blog.

With that said please enjoy my catch up blogs and with determination I will endeavour to be a little more regular in the future.......

This cake is a perfect recipe to start off with.  A deliciously light sweet treat which I will put my hand up and admit that the flavour combination of the sweet pineapple and tangy lime is incredible. 

Topped with a cream cheese frosting and sprinkled with toasted shredded coconut each slice was like a little piece of paradise.


Pineapple, Lime and Coconut Cake
(recipe sourced from WW Magazine November 2013)
 
Serves: 12
ProPoints per serve: 6
 
cooking spray
100 grams reduced fat margarine
1/2 cup caster sugar
2 teaspoons finely grates lime rind
2 eggs
440 gram can crushed pineapple in natural juice
2 cups self raising flour
200 grams extra light cream cheese
1 tablespoon icing sugar, sifted
1 teaspoon coconut essence
1 tablespoon shredded coconut

Preheat oven to 180 degrees Celsius.

Lightly spray a 20cm round cake tin with cooking spray and line the base with baking paper.

Using electric beaters, beat the margarine, sugar and lemon rind in a bowl until light and fluffy.  Add the eggs, 1 at a time, beating well after each addition.

Drain the pineapple and reserve 1/2 cup of the juice.  Stir the pineapple and reserved pineapple juice into the egg mixture.  Gently fold in the flour.  Spoon into prepared tin. 

Bake for 45 minutes or until a skewer inserted in the centre comes out clean.  Set aside to stand in tin for 5 minutes before turning out onto a wire rack to cool completely.

Combine the cream cheese, icing and coconut essence in a bowl. Spread over the cake and sprinkle with the coconut.


(click here for a printable version of this recipe)