Showing posts with label fakeaway. Show all posts

Friday, May 29, 2020

Penne Boscaiola with Chicken

Fakeaway is always better when cooked at home.... no matter what cuisine. I am sure you will agree?

Tonight's fakeaway is actually an adaptation of a meal, Penne Boscaiola, that is always a hit here at A Dash Of Flavour's home base - to the point the recipe is always doubled so lunches can be taken the next day.

For a very simple pasta dish this packs a punch of flavour with every mouthful. The sauce, creamy yet made from Light and Creamy Evaporated Milk laced with sweet chilli and Parmesan has a wonderful combined flavour that smothers the pasta. Along with the bacon and chicken I love the combination of the mushrooms, capsicum and baby spinach - simple but enough.

I added the chicken tonight just for some extra protein. I am sure this would also work well with tuna or even prawns should you wish to do the same. Just be warned it's very moreish and inviting - very easy to overindulge.


Penne Boscaiola with Chicken
(Recipe adapted from WW Heavenly D’Lites Cookbook)

Serves: 6
💚 sp per serve: 11
💙 sp per serve: 10
💜 sp per serve: 10

375 grams penne pasta or GF penne pasta (or pasta of your choice)
cooking spray
1 brown onion, finely chopped
3 teaspoons crushed garlic
150 grams middle bacon, fat trimmed
1 red capsicum, thinly sliced
150 grams button mushrooms, sliced
375 ml can Carnation Light and Creamy Evaporated Skim Milk
3 tablespoons sweet chilli sauce
150 grams baby spinach leaves
salt
freshly ground black pepper
80 grams finely grated Parmesan cheese

Cook pasta in pan of boiling water following packet instructions until just tender.  Drain.

Coat a large frying pan with cooking spray.  Cook the onions, garlic and bacon until onion is soft.  Add capsicum and mushroom and cook for a further 2 - 3 minutes until capsicum begins to soften.

Add the milk and chilli sauce to the pan.  Season with salt and freshly ground black pepper to taste.  Stir through the pasta, spinach and half the Parmesan cheese until mix through well and spinach just wilted.

Serve with remaining Parmesan cheese.


Thursday, May 2, 2019

Sticky Chinese Pork and Vegetables

Fakeaway at it's finest tonight.  Tender pork and crisp vegetables in a sweet yet slightly spicy sauce served on a bed of rice noodles.  Quick, easy and best of all it's nicer on the hip pocket.

The key to making fakeaway Asian meals at home is to ensure that you have all the ingredients ready as once you start cooking the meal comes together very quickly.

No need to marinade the pork fillet as it's a tender meat - also it's one that cooks quickly. So a quick toss in a chinese five spice based sauce while you prep all the other ingredients is all that was needed.  

We used rice noodles as they are gluten free but you can use any noodle you prefer or even rice if desired.  You will need something however to help soak up the delicious sauce.

Not a fan of chilli or love chilli - adjust the quantities to suit yourselves.

A switch I did was use peanuts.  The original recipe called for cashews but I had peanuts - use any nuts you like to be honest.

No doubting that this dish just rose to the top of the pork dish list of favourites.  Even my mother had seconds!  


Sticky Chinese Pork and Vegetables
(Recipe adapted Taste.com.au)

Serves: 4

600 grams pork fillet, thinly sliced
2 tablespoons brown sugar
1 1/2 tablespoons gluten free soy sauce
1/2 teaspoon Chinese five spice
2 teaspoons fish sauce
250 gram packet dried rice stick noodles
1 1/2 tablespoons vegetable oil
1 red onion, halved, cut into thin wedges
1 tablespoon grated ginger
2 teaspoons crushed garlic
1 teaspoon crushed chilli
1 red capsicum, thinly sliced
1 carrot, halved, sliced diagonally
1 teaspoon gluten free chicken stock powder
1/4 cup water
2 teaspoons cornflour
1 bunch baby pak choy, roughly chopped
250 grams snow peas, trimmed
1/4 cup gluten free oyster sauce
1/4 cup dry roasted peanuts
1 long red chilli, sliced diagonally

Combine pork, sugar, soy sauce, five spice and fish sauce in a medium bowl. Toss to coat.

Prepare rice stick noodles, following packet directions until tender. Drain well. Cover to keep warm.

Heat 1 tablespoon of oil in a wok or large frying pan over medium-high heat. Stir-fry pork, in 2 batches, for 1 to 2 minutes or until golden. Transfer to a bowl.

Heat remaining oil in wok over high heat. Stir-fry onion, ginger, garlic, chilli, capsicum and carrot for 5 minutes or until just tender. 

In a small jug mix stock powder, water and cornflour until combined.  

Add pork, pak choy, snow peas, stock mixture and oyster sauce. Stir-fry for 2 to 3 minutes or until pork is cooked through and snow peas are tender. 


Serve with rice noodles and sprinkle with peanuts and sliced chilli.


Tuesday, March 12, 2019

Asian Peanut Noodles with Chicken

News Flash - I am absolutely in love with Skinnytaste - I won't lie.  It's a web site full of skinny recipes, not to mention skinny tips, that totally makes me drool while I am reading every new recipe that is uploaded.  Gina is amazing.  So if you haven't been to her site, pop on over as I am sure that you will absolutely love it.

This recipe is a Skinnytaste recipe.  One I had actually had my eye on for awhile.  Who am I kidding I want to cook everything from Skinny Taste.

Seriously though what could go wrong to tantalise the taste buds with chicken, noodles and vegetables enveloped in a spicy, crunchy, sweet and salty thick peanut sauce that was absolutely to die for.  Whilst there was a little modification from the recipe trying to make this Gluten Free friendly I don't think I have changed it a great deal.  I did omit one step as I knew my rice noodles wouldn't handle being tossed in the sauce so I just plated them up and layered the rest of the dish on top.  I originally thought I would use Korean Sweet Potato Noodles but I seriously did something wrong with them and they ended up in the bin.  

Overall this dish was enjoyed by all.  Garnished with chopped peanuts and coriander with lime wedges to enable you to add extra flavour it was definitely a winner.


Asian Peanut Chicken with Noodles
(Recipe adapted from Skinny Taste)

Serves: 6
SmartPoints per Serve: 9

For the Peanut Sauce:
1 cup reduced sodium chicken stock
5 tablespoons Mathers peanut butter
1 tablespoon Sriracha chili sauce
2 tablespoons honey
2 tablespoons gluten free soy sauce
1 tablespoon freshly grated ginger
2 cloves garlic, minced

For the chicken:
500 grams chicken breast, cut into thin strips
salt
pepper
1 tablespoon Sriracha chili sauce (more or less to taste)
juice of 1/2 lime
4 cloves garlic, crushed
1 tablespoon fresh ginger, grated
1 tablespoon gluten free soy sauce
1/2 tablespoon sesame oil
200 grams rice noodles
4 spring onions, chopped
1 -1/4 cups shredded carrots
1- 1/4 cups cup shredded broccoli slaw
1 cup bean bean sprouts
2 tablespoons chopped peanuts
1 lime, sliced into wedges
coriander for garnish (if desired)

Combine 1 cup chicken stock, peanut butter, sriracha, honey, 2 tbsp soy sauce, ginger, and 3 cloves crushed garlic in a small saucepan and simmer over medium-low heat stirring occasionally until sauce becomes smooth and well blended, about 5-10 minutes. Set aside.

Boil water for the noodles cook pasta according to package instructions.

Meanwhile season chicken with salt and pepper, sriracha, lime, garlic, ginger and soy sauce.

Heat a large frying pan or wok until hot. Add oil and sauté chicken on high heat until cooked through, about 2-3 minutes; remove from heat and set aside.

Once the noodles are cooked, drain and toss with peanut sauce (add additional chicken stock if needed to loosen the sauce).Add chicken to the noodles and toss to combine.

To the same wok add 2 cloves crushed garlic, spring onions, carrots, broccoli slaw, bean sprouts and salt, sauté until tender crisp, about 1-2 minutes.

Divide noodles and chicken between 6 bowls, top with sauteed vegetables, bean sprouts, chopped peanuts (or you can toss everything together to hide the vegetables so your family members don’t push them aside!) and garnish with coriander, peanuts and lime wedges.

OR (as I did):

Drain noodles and spread over serving platter.

Add cooked chicken to the peanut sauce and toss to combine (add additional chicken stock if needed to loosen the sauce).

To the same wok add 2 cloves crushed garlic, spring onions, carrots, broccoli slaw, bean sprouts and salt, sauté until tender crisp, about 1-2 minutes.

Add chicken mixture to vegetables and stir well to completely combine.

Once warmed through, place chicken mixture on top of noodles.  Garnish with coriander, chopped peanuts and lime wedges.

(Click here for a printable version of this recipe)

Saturday, December 1, 2018

Sticky Oven Barbecue Ribs

If you really want to see 2 kilograms of ribs disappear really quickly - I suggest you cook this recipe!

Saturday night feast had us smacking our lips and licking our fingers with this Sticky Oven Barbecue Ribs recipe.  And to say it beats restaurant or takeaway ribs is a total understatement.  Once you cook these I am guessing that you will hesitate to even order ribs at a restaurant or as a takeaway again.

One thing I do love is preparing and cooking easy yet flavoursome food - and to be perfectly honest this recipe was very easy to prepare taking about 15 minutes in total.  Slow cooked, giving me time to do other things, however devoured in minutes!  

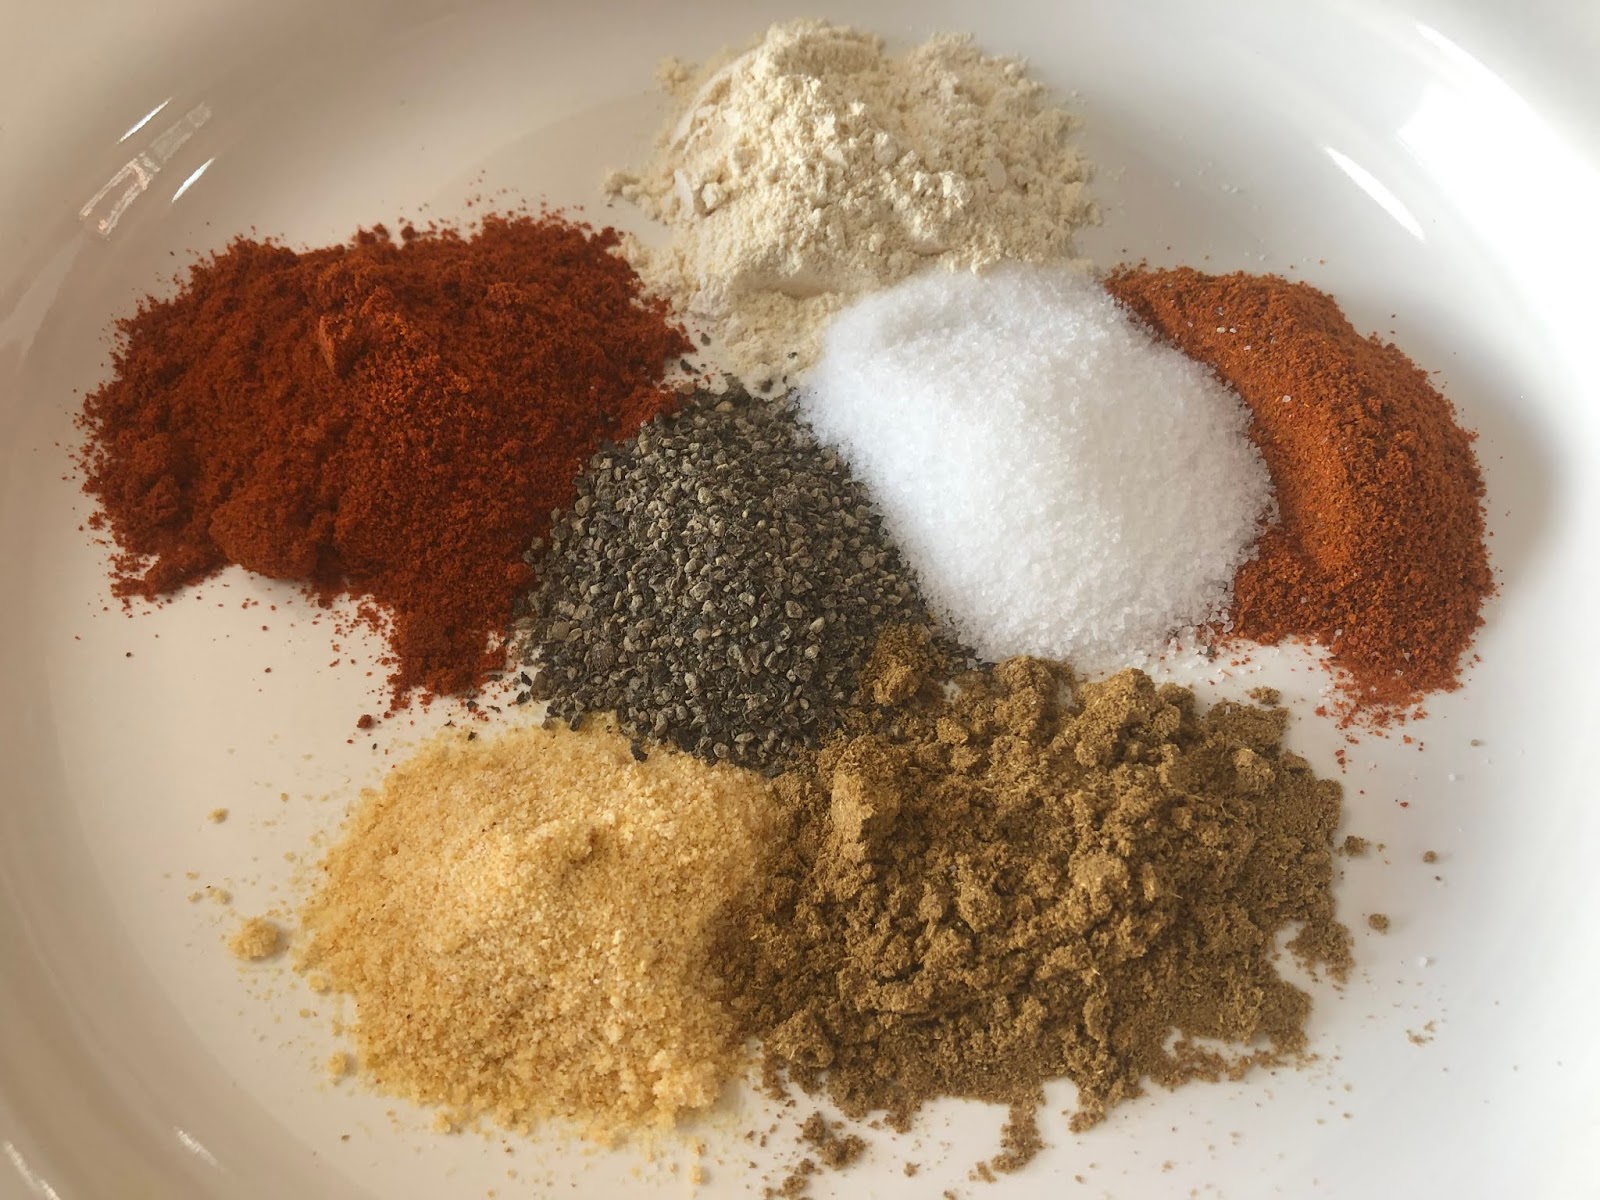
I seasoned the pork ribs with a magic combination of herbs and let them rest in the fridge for around 8 hours (you can just rub the seasoning in and cook straight away).  Smelling these cook low and slow in the oven made coming into the kitchen irresistible as the aroma was very inviting.  Hints of garlic, cumin and chilli filled the air - definitely couldn't wait to eat these.

The sticky barbecue sauce, added to the ribs towards the end of the cooking time, was super easy to prepare also.  Add as little or as much cayenne powder to suit your palette (we added a fair bit but we like spicy) pop them back into the oven for 10 minutes and your fork free dining is ready.  Slice them or serve them as full racks with or without chips, salad!  So many choices.... just have serviettes or napkins on hand.

I am sure that these ribs won't last long - they didn't at ours!  


Sticky Oven Barbecue Ribs
(recipe adapted from Cafe Delites)

Serves: 4 - 6

2 kilograms American Style pork ribs
2 teaspoons garlic powder
1 teaspoon onion powder
2 teaspoons paprika
2 teaspoons salt
1 teaspoon cracked black pepper
1/2 teaspoon cumin
1 teaspoon Cayenne powder or chilli
4 tablespoons olive oil
2 cups (500ml) barbecue sauce
3 tablespoons minced garlic
1 tablespoon Worcestershire sauce
1/2 - 1 tablespoon cayenne pepper (optional for heat)
1 teaspoon salt


Preheat oven to 180 degrees Celsius.


Combine together garlic powder, onion powder, paprika, salt, pepper, cumin and chili or Cayenne. 


Sprinkle seasoning over ribs on both sides.  Place in a glass casserole dish cover with cling film and marinate in fridge for at least 2 hours - longer if time permits.


Place on a baking sheet or tray lined with foil and baking paper.  Drizzle with 2 tablespoons of olive oil.  


Cover tray with foil and bake for 2 hours, turning over once during the cooking time.


Mix together remaining ingredients to make the sauce.

Remove ribs from the oven, remove foil and spread the tops of the ribs with the barbecue sauce mixture.


Increase oven temperature to 240 degrees Celsius.  Return ribs to the oven, uncovered, and bake for a further 10 minutes.


Rest for 10 minutes before slicing or serving.


Enjoy....


(Click here for a printable version of this recipe)

Monday, May 21, 2018

Kashmiri Lamb Korma

It was a miserable day, weather wise, and I had a curry planned on the menu so it was already a win win in my books.

The curry chosen for tonight wasn't a hot and spicy dish but rather a thick creamy mild comforting one.  Korma just means a mild curry. Yet, it is actually a very rich stew in which the meat, chicken or vegetables and nuts are braised in cream, yogurt or coconut milk. 

Kashmir is the northernmost geographical region in Indian. It borders Pakistan, Afganistan and China, the Tibetan region. Kashmir has its own special and traditional foods influenced by the climatic conditions and customs. Rich and redolent with the flavour of the spices used –cinnamon, cardamom, cloves, saffron, etc. Kashmiri food can be the simple meal of a family, or a 36-course wedding banquet called Wazawan. The staple diet of every Kashmiri is rice, the most preferred being the dense, slightly sticky grained Kashmir variety, which is prized in the Valley. Mutton, chicken or fish are of prime importance in Kashmiri meal and everyday cooking often combines vegetable and meat in the same dish.

Once again another curry made from scratch - no jar in sight.  The combination of spices was easy and not over complicated.  Cooked slowly the lamb was beautiful and tender, all most melt in your mouth.  Enveloped with a thick creamy sauce this recipe may not be completely authentic but with lots of spice and herbs, this delicious korma packs a punch of flavour which we all enjoyed.


Kashmiri Lamb Korma
(recipe adapted from Taste.com)

Serves: 4

60 grams ghee or butter
3 brown onions, coarsely chopped
1 teaspoon ground turmeric
4 green cardamom pods, crushed
1 cinnamon stick
8 black peppercorns, crushed
6 whole cloves
1 teaspoon cumin seeds
2 garlic cloves, crushed
1 tablespoon finely grated fresh ginger
2 teaspoons coriander seeds
1 teaspoon chilli powder
1 tablespoon smoked paprika
3 ripe tomatoes, chopped
1 kilogram lamb shoulder, cut into 3cm pieces
2 cups water
1 cup natural yoghurt
salt
freshly ground black pepper
80 grams ground almond meal
additional water if required
toasted flaked almonds, to garnish
chopped coriander, to garnish


Heat the ghee in a large saucepan over medium heat. Add the onion and cook, stirring occasionally, for 5 minutes or until lightly golden.


Add the turmeric, cardamom, cinnamon, peppercorns, cloves, cumin, garlic, ginger, coriander seeds, chilli and paprika and cook, stirring, for 1-2 minutes or until aromatic.


Add the tomatoes and cook, stirring, for 5 minutes or until tomatoes are pulpy.


Add the lamb, stirring until completely covered with the tomato mixture.  Cook for 5 minutes, stirring occasionally.


Add the water and mix well.  Allow mixture to come back to a simmer.


Add the yoghurt and bring to a simmer, ensuring that you mix the yoghurt through completely.  Season with salt and pepper.


Reduce heat to low and cook, covered, stirring occasionally, for 2 hours or until lamb is very tender and sauce thickens slightly.

OR:

Preheat oven to 180 degree Celsius.

Transfer to a large casserole and cook, covered in the oven for 2 hours, stirring occasionally or until lamb is very tender and sauce thickens slightly.


Add almond meal and mix through well.  If too thick add a little water.


Spoon lamb into a serving bowl and sprinkle with flaked almonds.


Serve with steamed rice, if desired, and coriander.

(Click here for a printable version of this recipe).

Thursday, January 11, 2018

Bacon, Sausage, Jalapeno and Sriracha Pizza

Another fakeaway evening!!  Not really the fact of the matter is hubby and I pretty much are cooking for ourselves at the moment so it's our choice and doesn't have to be family friendly as such.  The kids are home, sort of, one is doing evening shifts at the local supermarket and has something quick after work.  The other, is caring for his partner who just had 4 teeth (2 molars and 2 wisdom) removed and cannot eat a great deal at the moment that requires chewing.  My gorgeous boy has gone out in sympathy with her and is eating soup and mashed potatoes (soft foods) with her.

Needless to say our choice tonight was pizza... Noel cooked his usual Margherita, which as usual was yummy and vibrant in flavour. I, of course, had to try something completely different and it was.

Firstly lets start with the dough.  Now over the years, we have experimented with many different pizza dough recipes.  Some good but too technical.  Others complete failures.  A lot of the time we use pita bread as the base as it's quick and easy and actually quite good for you if watching your weight.  But if you want a good pizza shop pizza base you need to make your own dough.  At the moment we are using a recipe we watched Poh make on her show Poh's Kitchen  which was aired on the ABC here in Australia.  It's very easy and tastes great.  That's really all that matters when it comes to the base.  You can try this or use what ever base you like.

Now for the pizza toppings.  As we all know pizza shops are pretty traditional with their menus.  Some have a gourmet range but other than the one or two specials most shops offer the same toppings.  I like to think outside the square and have spent many hours googling and scouring other blogs for different ideas.  I must say that I have read some pretty interesting gourmet ideas and some that just did nothing for my tastebuds!

I had some fresh jalapenos so I wanted to use them so I searched jalapeno pizza and it was incredible - all these new ideas.  But so many different versions on this pizza, Bacon, Sausage, Jalapeno and Sriracha Pizza.  So as always I just went with the idea and made up my own.  

Many of the recipes I read called for salami or summer sausage but I decided to use fresh Italian sausages.  I squeezed them out of the casing and made them into bite size pieces.  These tasty mouthful of fennel, garlic and chilli gave the pizza a really nice element and it was nice to bite into.

Fresh jalapeno has a different taste and texture from the pickled jalapenos you purchase in a jar.  Obviously they are fresh to start with but it's the texture, crunch and the unknown heat with are enjoyable - all without the vinegar taste.

It's no secret that we love to eat spicy food and somehow we seem to bring it into every cuisine where possible.  Sriracha Sauce is always on hand at our place.  It's hot and fantastic.  The combination of the jalapeno and Sriracha Sauce gave this pizza a definite kick - tastebuds tingling with every mouthful.  This along with the smokiness of the bacon, everyone loves bacon, the crisp onions, the cheekiness of the sausage and the gooey cheese made for a fantastic gourmet pizza!

The perfect fakeaway for sure!  We ate off the pizza tray and used napkins - very posh indeed!!


Bacon, Sausage, Jalapeno and Sriracha Pizza

Serves: 4 (2 slices per serve)
SmartPoints per serve: 12

1 serve pizza dough
cooking spray
1/4 cup tomato paste
50 grams  grated light tasty cheese
1 raw Italian sausage
4 slices shortcut bacon, cooked, chopped
1 brown onion, sliced
1 fresh jalapeno, sliced
5 button  mushrooms, sliced
2 bocconcini balls
2 teaspoon sriracha, or more or less depending on taste

Make dough according to the recipe you are following.

Preheat pizza oven to correct heat or a kitchen oven to 220 degrees Celsius.

Spray a pizza tray with cooking spray.  With wet hands stretch the dough over the pizza tray.

Take the end off each sausage to open casing.  Squeeze the filling out and break up into bitesize pieces.

Spread tomato paste evenly over dough.

Top with grated cheese, sausage, pork, bacon, onions, jalapenos and mushrooms.

Individually stretch the bocconcini balls and scatter on top of pizza.

Drizzle with sriracha sauce.

Place pizza in oven and Bake for about 15 to 20 minutes or until golden brown and crispy at the edges, and the cheese is bubbly and brown.

Serve immediately.


(Click here for a printable version of this recipe)

Tuesday, January 9, 2018

Stir Fried Garlic Chilli and Basil Chicken with Rice Noodles

Late in 2017 we, as a family, were faced with a challenge!  Our son's partner was diagnosed with having Coeliac disease therefore meaning we would have to change the way we cook a variety of foods to accommodate this.  It has never been thought of by any of us as a problem or an issue.  As unexciting as having a disease can be we all decided that this would be easy and that with a few changes here and there we can all still enjoy food and cooking without compromising tastes etc.

So just incase you are unawares Coeliac disease is where the immune system reacts abnormally to gluten (a protein found in wheat, rye, barley and oats), causing small bowel damage. People with coeliac disease remain sensitive to gluten throughout their life, so in this sense they are never cured. However, a strict gluten free diet does allow the condition to be managed effectively.  A strict, lifelong gluten free diet is currently the only recognised medical treatment for Coeliac disease. By removing the cause of the disease, a gluten free diet allows the small bowel lining to heal and symptoms to resolve. As long as the gluten free diet is strictly adhered to, problems arising from Coeliac disease should not return. Relapse occurs if gluten is reintroduced into the diet. Coeliac disease affects on average approximately 1 in 70 Australians. However, around 80% of this number remain undiagnosed. This means the vast majority of Australians who have Coeliac disease don’t yet know it.

I remember years ago upon first learning of all these allergies, such as gluten, dairy, fructose, and thinking to myself "oh that poor person - they must miss out on so many things".  The fact of the matter is years ago they did miss out on so many things.  Years ago it was hard to find suitable safe things to eat so they did go without.  Today however the world is far more aware of these allergies and diseases and "special" foods are more readily available.

To be honest I am surprise how easy it is to omit gluten from some meals that we cook - others have been challenging but it's all about learning.  Learning to change, experimenting with other ingredients and ideas whilst trying not to compromise the taste.  I will put my hand up right now though and admit I do not like working with Gluten Free frozen pastry - it sucks big time and my quiche failed completely.  LOL!  I am sure that there will be more interesting adventures with foods....

Anyhow I have to say that a stir fry is always a quick option for dinner especially after a busy working day.  Thankfully rice and rice noodles are Gluten Free along with many other Asian ingredients these days. I substituted the soy sauce in the original recipe for Gluten Free soy sauce but obviously if you are not on a Gluten Free diet you could just normal soy sauce.

When it comes to cooking Asian meals at the House of Murray it's all about finding that flavour - you now the flavours that will be different, tempt the tastebuds from the first mouthful and the dish that you just want to keep eating even though you are full.  Everyone knows this desire.... mmmm.

This recipe does that.  The flavours of the garlic, chilli and fresh basil coupled with the fresh vegetables, tender chicken and the soft rice noodles was magic.  Drizzled with fresh lime juice the taste was so vibrant and the crunchiness of the beanshoots and sesame seeds just made every mouthful enjoyable.  I also did not have Thai basil at the time so substituted this with normal basil and while it wasn't as spicy as the Thai variety it was still very pungent.

Talk about a mouthful of freshness...  I am sure that you will enjoy this as much as we did.


Stir Fried Garlic, Chilli and Basil Chicken with Rice Noodles
(Recipe sourced from Weight Watchers Australia)

Serves: 4
SmartPoints per Serve: 4

500 grams lean chicken breast, fat trimmed, thinly sliced
2 cloves fresh garlic, crushed
1 whole fresh red chilli, finely chopped, plus extra to serve
1/4 cup Gluten Free soy sauce
140 grams dry rice noodles
cooking spray
2 medium red onion, sliced
1 medium Capsicum, red, raw, thinly sliced
300 grams snow peas, halved lengthways
70 grams fresh bean sprouts
1 cup fresh Thai basil or basil plus extra to serve
1 medium fresh lime, cut into cheeks
2 teaspoons sesame seeds

Combine chicken, garlic, chilli and half the soy sauce in a medium bowl. Set aside for 10 minutes to marinate.

Meanwhile, cook noodles in a large saucepan of boiling water for 2-3 minutes or until just tender, drain. Set aside.

Heat a large wok over medium-high heat and lightly spray with oil. Stir-fry onion and capsicum for 2 minutes or until softened and lightly browned. Transfer to a plate.

Reheat wok and stir-fry chicken in 2 batches for 2-3 minutes or until cooked. Return onion, capsicum and chicken to the wok.

Add snow peas, bean sprouts, basil, noodles and remaining soy sauce. Stir-fry for 1-2 minutes or until heated through and cooked.

Serve garnished with extra basil.


(Click here for a printable version of this recipe)

Wednesday, January 3, 2018

Chicken Tikka Masala

Having been accused recently of overdoing it with curry on the menu I have been quite hesitant to cook a curry but it got to a point that I fancied one.  I fancied (and actually have been fancying non Christmas food since Boxing Day! OOPS!!!) something different!  A non Festive comfort food.  Our family comfort food comes in the form of many different foods - could be the flavours, the ingredients, the textures, our moods.  But everyone knows that once you fancy something you just have to have it.

My usual go to curry is either Butter Chicken or Japanese Curry but thought I should cook something new.  Didn't really wan't to get heckled about cooking curry lol!  I was given a Curry cookbook called The Curry Kitchen by my sister, Clare, for my birthday last year. After reading it - it became my favourite cookbook (well for the time being).  I have marked the pages with that many tabs with all the curries that I want to cook and I have tried quite a few - maybe that's where the curry rebellion started.. hhhmmmm?

Anyhow, the kids don't do blow away heat levels with curry.  Their taste buds range from mild to also mild to the occasional medium with one trying a hot dish every now and then.  With this in mind I thought we would have Chicken Tikka Masala served with steamed rice.

For this recipe I substituted the shop brought Tikka Masala Paste for a homemade version of Indian Masala which I made on Monday.  I made it a few days earlier to allow the flavours to develop, which they definitely did.  The paste itself was bordering on a medium heat but once cooked through with the remaining ingredients it mellowed to a very comfortable mild tempered curry.

There was only really one main difference between our version and that of the book (let's put this out there - who's dish actually does end up looking like the picture right?) is that the homemade paste was naturally coloured and not the red as it comes prepared in the shop brought pastes which are full of preservatives, additives and colourings.  However if you are not game or able to make your own paste there is absolutely nothing wrong with using a jar of paste.

The flavours were terrifically balanced - between the Tikka marinated chicken, the tomatoes and the cream.  You could definitely taste the mustard seeds, cumin and coriander on the chicken pieces and in the sauce with the faint trace of cinnamon from using the homemade paste.

This meal was a definite "fakeaway" hit in the Murray household and is also a mid week wonder as besides the marinating of the chicken the whole dish was on the table in under an hour.  Do yourself a favour though - marinate the chicken the day before so the poultry takes on the full flavour of all the Indian spices.


Chicken Tikka Masala
(Recipe adapted from The Curry Kitchen Cookbook)

Serves: 6
SmartPoints per Serve: 8

12 boneless small chicken thighs, cut into chunks
100 grams plain reduced fat yoghurt
8 tablespoons Indian Masala Paste or Tikka Masala Paste
2 tablespoons oil
1 onion
3 garlic cloves, crushed
2 teaspoons finely grated ginger
1/2 teaspoon chilli powder
1 cup chicken stock
400 gram can diced tinned tomatoes
1 tablespoon tomato paste
1/3 cup reduced fat thickened cream
fresh coriander, chopped, to garnish

Combine chicken, yoghurt and half the Masala Paste in a bowl.  Cover and place in the fridge for 3 - 4 hours to marinade or longer if time permits.

Heat half the oil in a saucepan over medium heat.  Add onion, garlic, ginger and chilli powder and stir for 5 minutes or until golden.  Add the remaining curry paste and cook, stirring, for 2 minutes or until aromatic.

Add stock, tomatoes and tomato paste.  Bring to the boil and then reduce heat to low.  Simmer for 15 minutes or until sauce thickens slightly.

Heat remaining oil in a large frying pan over medium heat.  Sear chicken and cook for 5 minutes or until lightly browned.  Add chicken to sauce and simmer for 15 minutes or until cooked through.

Add cream 5 minutes before serving and stir well to combine.  Garnish with coriander and serve with steamed Basmati rice (3sp for 1/2 cup) and small Pappadums (0sp each if cooked in the microwave).

Friday, September 22, 2017

Pork Pad See Ew - หมูทอดดูเอล

Thank God for Friday night Fake-away.... it doesn't get better than this dish nor can it get any easier to create this Thai style noodle dish at home.
 
Firstly let me tell you that this meal is such an easy one to prepare, cook and put on the table in under 30 minutes or so and your family will thank you for an amazing dish that actually took you minimal effort.  In fact I am pretty certain that they will think that you organized Thai Take Away.
 
Pad See Ew is a standard lunch fare among Thais and is very popular dish in Thai restaurants outside of Thailand. The soft, chewy rice noodles pan fried with pork, Chinese broccoli and a soy sauce mix, it is easy to understand why it is a comfort food for many.

The simple ingredients in this dish are readily available combined make for a really light noodle dish that is refreshing but yet very filling.  Using pork mince was quick and easy and actually not as stodgy as larger meat pieces.  The tartness of the fresh lime juice combined with the saltiness of the fish sauce and the sweetness of the kecap manis kept the dish fresh and vibrant.

I really urge you to give your family the opportunity to try this meal - you won't regret it.
 

Pork Pad See Ew - หมูทอดดูเอล
(Recipe adapted from Weight Watchers Weeknight One Pot Cookbook)

Serves: 4
SmartPoints per serve: 11

200 grams dry rice noodles, think
1 tablespoons canola oil
500 grams lean pork mince
2 cloves fresh garlic, crushed
1 teaspoons fresh ginger, finely grated
1 whole fresh red chilli, thinly sliced
2 medium eggs, lightly beaten
1 bunches gai lan (Chinese broccoli), coarsely chopped
2 individual green shallots, thinly sliced
2 tablespoons kecap manis
1 tablespoons fish sauce
1 tablespoons lime juice
2 cup bean sprouts
2 carrots, peeled and coarsely grated
1/4 cup roasted peanuts
1/2 cups fresh coriander
1 medium fresh lime, wedges
chilli flakes, if desired

Prepare noodles following packet instructions or until just tender. Rinse under cold water. Drain.

Heat a wok over high heat. Add oil and heat for 20 seconds. Stir-fry mince, garlic, ginger and chilli, breaking up lumps, for 7–8 minutes or until browned. Transfer to a plate.

Reheat wok over high heat. Stir-fry egg for 1 minute or until just set.
 
Add gai lan and shallots and stir-fry for 1 minute.
 
Add mince mixture, kecap manis, fish sauce, juice, sprouts, carrots and noodles and stir-fry for 2 minutes or until heated through.
 
Sprinkle with peanuts and coriander and serve with lime wedges.  If desired, sprinkle with chilli flakes.


Tuesday, May 2, 2017

Chicken Parmesan Casserole

It's no secret in our circle of family and friends that both my kids (and even my son's girlfriend) are massive fans of Chicken Parmigiana - every time that we go out for dinner to a bistro it's almost instant when I ask have you decided what you want for dinner the instant reply (unless something really catches their eye) is Chicken Parmigiana, Chips and Salad.  

I am going to be totally honest here - I am not a fan of Chicken Parmigiana!  Yep!  I find the deep fried crumbed chicken fillet at times greasy along with the generally rather large amount of melted cheese on top too much for me.. too much grease on some occasions.  Sadly I just don't get the phenomena!! And I sasy phenomena as it seems to be people's most go to dish when they are out for dinner.

So with this in mind, I came across an American recipe for Chicken Parmesan Casserole.  After a little more reading I actually found many different versions of the same casserole (as we do with most American recipes depending on with US State you live in).  Many different versions from whether the tomato sauce is on the top or the bottom, whether you crumb the chicken and fry it beforehand or whether you use croutons in the topping..... so in my quest to please the family I morphed a few recipes together and came up with "my" version (like Jo has never done that before - I can see my family rolling their eyes in the back of their heads LOL).

I have to say that this dish is absolutely amazing.  For a start it was very easy to prepare not to mention cook.  I am not overly fussed with plain tomato passata so I add the element of making a quick tomato sauce to top the chicken fillets with.  If you want to use a jar or two of plain or herbed passata or pasta sauce please go right ahead. That will only make this recipe even easier.

Yes it was cheesy - the gooey mozzeralla layer laced with fresh basil was soft and comforting.  I know the cheese is a major component to the parmigiana.  And for those who do like the crumbs, they are not omitted completely.  Panko breadcrumbs mixed with Parmesan cheese and parsley make a beautiful crunchy topping - completing the dish perfectly.  

Even though I did not serve with the traditional hot chips - I served it with Oregano and Chilli Crispy Potatoes and salad, I do have to say this dish was a hit at the House of Murray and I am sure that it will be when served at yours also.  You may just want to double the recipe - just like I did!


Chicken Parmesan Casserole

Serves 4

cooking spray
1 onion, finely diced
1 bottle tomato passata 660 gram
1 can diced tomatoes 440 gram
freshly ground black pepper
2 tablespoons olive oil
2 teaspoons crushed garlic
1 teaspoon crushed chilli flakes
4 skinless chicken breast fillets, visible fat removed
salt
ground white pepper
1 cup grated mozzarella
20 grams fresh basil leaves, chopped
1 1/2 cups panko breadcrumbs
1 cup grated Parmesan cheeses
1 tablespoon dried parsley flakes

Spray a small saucepan with cooking spray and heat over low heat.  Add onion and cook, stirring, until softened.  Add passata and tomatoes.  Season with black pepper.  Simmer until thickened and liquid has slightly reduced, stirring occasionally.

Preheat oven to 180 degrees Celsius.

Spray a large casserole dish with cooking spray.  Place olive oil, garlic and chilli flakes in casserole dish and stir to combine.  Ensure this is spread around the surface of the dish.  Place chicken breast fillets in a single layer in the dish.  Season with salt and pepper.

Evenly spread the tomato mixture over the chicken fillets.

Top with mozzarella cheese.  Sprinkle basil over mozzarella.

In a bowl combine the panko breadcrumbs, Parmesan cheese and parsley.  Spread evenly over the mozzarella.

Bake in oven for 1 hour or until chicken is cooked through.

Serve immediately.