Our latest feast

Saturday, December 1, 2018

Sticky Oven Barbecue Ribs

If you really want to see 2 kilograms of ribs disappear really quickly - I suggest you cook this recipe!

Saturday night feast had us smacking our lips and licking our fingers with this Sticky Oven Barbecue Ribs recipe.  And to say it beats restaurant or takeaway ribs is a total understatement.  Once you cook these I am guessing that you will hesitate to even order ribs at a restaurant or as a takeaway again.

One thing I do love is preparing and cooking easy yet flavoursome food - and to be perfectly honest this recipe was very easy to prepare taking about 15 minutes in total.  Slow cooked, giving me time to do other things, however devoured in minutes!  

I seasoned the pork ribs with a magic combination of herbs and let them rest in the fridge for around 8 hours (you can just rub the seasoning in and cook straight away).  Smelling these cook low and slow in the oven made coming into the kitchen irresistible as the aroma was very inviting.  Hints of garlic, cumin and chilli filled the air - definitely couldn't wait to eat these.

The sticky barbecue sauce, added to the ribs towards the end of the cooking time, was super easy to prepare also.  Add as little or as much cayenne powder to suit your palette (we added a fair bit but we like spicy) pop them back into the oven for 10 minutes and your fork free dining is ready.  Slice them or serve them as full racks with or without chips, salad!  So many choices.... just have serviettes or napkins on hand.

I am sure that these ribs won't last long - they didn't at ours!  


Sticky Oven Barbecue Ribs
(recipe adapted from Cafe Delites)

Serves: 4 - 6

2 kilograms American Style pork ribs
2 teaspoons garlic powder
1 teaspoon onion powder
2 teaspoons paprika
2 teaspoons salt
1 teaspoon cracked black pepper
1/2 teaspoon cumin
1 teaspoon Cayenne powder or chilli
4 tablespoons olive oil
2 cups (500ml) barbecue sauce
3 tablespoons minced garlic
1 tablespoon Worcestershire sauce
1/2 - 1 tablespoon cayenne pepper (optional for heat)
1 teaspoon salt


Preheat oven to 180 degrees Celsius.


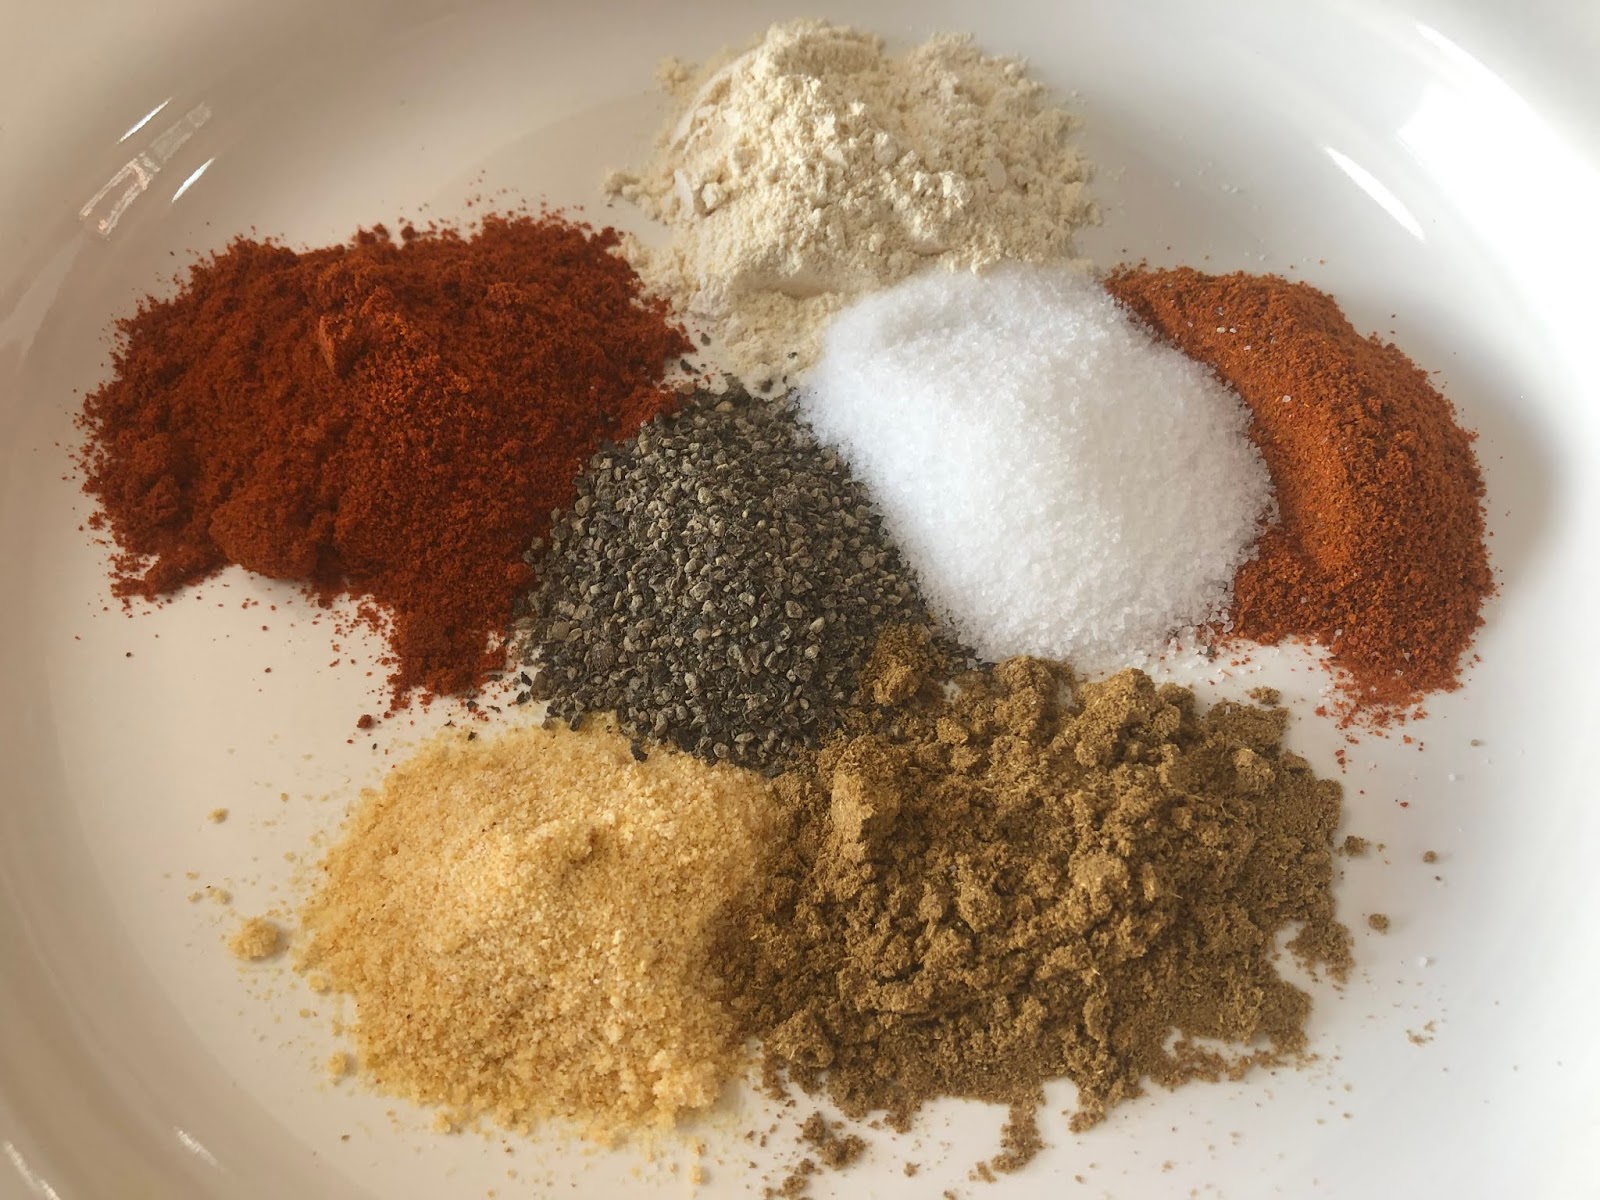
Combine together garlic powder, onion powder, paprika, salt, pepper, cumin and chili or Cayenne. 


Sprinkle seasoning over ribs on both sides.  Place in a glass casserole dish cover with cling film and marinate in fridge for at least 2 hours - longer if time permits.


Place on a baking sheet or tray lined with foil and baking paper.  Drizzle with 2 tablespoons of olive oil.  


Cover tray with foil and bake for 2 hours, turning over once during the cooking time.


Mix together remaining ingredients to make the sauce.

Remove ribs from the oven, remove foil and spread the tops of the ribs with the barbecue sauce mixture.


Increase oven temperature to 240 degrees Celsius.  Return ribs to the oven, uncovered, and bake for a further 10 minutes.


Rest for 10 minutes before slicing or serving.


Enjoy....


(Click here for a printable version of this recipe)

Sunday, November 18, 2018

Chilli and Tomato Mussels with Basil

Well we are still busy at the new place - to be honest it looks like an episode of hoarders however with having only been there just over 3 weeks we have made some progress. Rooms are slowly being set up, boxes are getting unpacked one by one or targeted if we desperately need something (that's if we remember which box it's in) and it is starting to feel like home.  However needless to say we are all extremely exhausted and running on empty.and at times enthusiasm.  This year is Christmas at our house and a few important visitors in December so we need to be consistent with our unpacking and organising. 

After another big weekend Sunday's supper needed to be quick and easy.  I knew it would be supper as we had gone out for a Yum Cha lunch at Maxim Saigon, Springvale, with our good friends Kelee and Dave.  While out shopping Saturday morning I noticed mussels in the fish shop and with not having them for such a long time possibly due to seasonal reasons I knew exactly what we were having.  I had all these big plans for them but literally I had hit the wall by the evening.

Thankfully my husband took the reigns and made supper a success. It was a magic dish - mussels with a splash of wine, laced with chilli and tomatoes with flavoursome basil tones.  Noel's creation was on the table within 30 minutes and the majority of the time was spent doing preparation.  If you love mussels you should definitely give this dish a try.


Chilli and Tomato Mussels with Basil
(Recipe courtesy of Noel Murray)

Serves: 4
Smart Points per serve: 5

2 tablespoons extra virgin olive oil
1 brown onion, diced
2 red cayenne chillis, sliced (deseeded if preferred)
2 green cayenne chillis, sliced (deseeded if preferred)
1 tablespoon crushed garlic
6 truss tomatoes, chopped
freshly ground black pepper
1 bunch basil, stalks removed
1 cup hot water
1 teaspoon chicken stock powder
1 cup dry white wine
2 kilograms mussels, cleaned (debearded and rinsed)

Add olive oil to a large pan or wok and heat over medium heat.

Add the onion, chilli, garlic and tomatoes and cook, stirring regularly, for approximately 5 to 10 minutes or until onion has softened. Season with black pepper.

Stir through the basil and cook until starting to wilt and the mix is fragrant.

Mix together the water and chicken stock in a small jug. Add chicken stock and wine to the pan, stir and bring to a simmer.

Increase heat to high and add the mussels. Give it a quick stir and cover with a lid. Cook, shaking the pan occasionally, for 3-4 minutes until all have opened.

Remove from the heat and serve with some nice crusty bread if desired.


(Click here for a printable version of this recipe)

Sunday, November 4, 2018

Braised Beef Cheeks

We are back.... not that we really went anywhere!  More a case of being uber busy and overwhelmed with life.  Jobs (both hubby and mine) have been very intense of late - mine has been all year.  We have a teenager living out her last year of high school and in the midst of exams as I type and to top it all off we decided to move house.

Moving house has brought it's ups and downs. The ups being a bigger house, including an extra bedroom and a swimming pool, along with a bigger and brighter kitchen.  The downs obviously being packing and moving everything given that we were at the last house for 10 years.

The kitchen is pretty much sorted however the rest of the house looks like an episode of Hoarders.  Needless to say I manage to cook over the weekend which I was determined to do as I am totally over takeaways after the previous weekend.

Armed with my trusty slow cooker (well one of the four that I own) I decided some tender Braised Beef Cheeks and Garlic Mash would fit the bill nicely for an easy dinner.  And I wasn't wrong at all.  The beef cheek melted in your mouth not to mention the herb and chilli infused sauce married with them perfectly.  I left the seeds in the chillis I used as I have not been finding them to have a high heat rating of late but you can deseed them if you wish.  The trick for a richer sauce is to ensure that your brown the meat well.  The darker the tones on the cheeks at this stage, the richer the sauce will be.

Beef cheeks are something that you definitely need to cook low and slow - so obviously the slow cooker is perfect for this.  However the original recipe was cooked on a stove top (both instructions for cooking are below).


Braised Beef Cheeks
(recipe adapted from Good Food)

Serves: 4

salt
freshly ground black pepper
2 tablespoons olive oil
4 large beef cheeks
1 brown onion, diced
2 tablespoons crushed garlic
2 long red chillies, deseeded (if desired) and finely chopped
2 tins diced tomatoes
560 ml bottle red wine
½ bunch rosemary, finely chopped
½ bunch thyme, finely chopped
½ bunch parsley, finely chopped


Season the beef cheeks, both sides, with salt and pepper.

Put a large cast-iron pot or large heavy based frying pan over a high heat. Add the oil, add the beef cheeks and brown them in the pot. Remove the cheeks from the pot and place in slow cooker vessel.


To the same pot add the onion, garlic and chilli and cook until the onions are translucent.


Add the tomatoes, red wine, rosemary and thyme and bring to a simmer.


Add the tomato sauce to the beef cheeks, put the lid on and cook on low for 8 - 9 hours.


Serve with creamy garlic mashed potatoes and garnish with parsley.


Stove top instructions:

Season the beef cheeks, both sides, with salt and pepper.

Put a large cast-iron pot or large heavy based frying pan over a high heat. Add the oil, add the beef cheeks and brown them in the pot. Remove the cheeks from the pot and set aside.

To the same pot add the onion, garlic and chilli and cook until the onions are translucent.

Add the tomatoes, red wine, rosemary and thyme and bring to a simmer.

Add the beef cheeks, put the lid on and simmer on the stove for 2-3 hours.

Serve with creamy garlic mashed potatoes and garnish with parsley.

(Click here for a printable version of this recipe)


Tuesday, August 28, 2018

French Pork Cutlets with Creamy Herb and Wine Sauce

I don't know about you but I really enjoy experimenting with pork especially what flavours compliment this tender meat.  Needless to say it's not always roasted and served with apple sauce at the House of Murray.

Pork is rarely eaten in our house as a whole family due to the fact that Ms 17 does not like pork unless it's Sweet and Sour Pork and Chinese Roast Pork served in pancakes.  Talk about being fussy and a tad demanding.  Despite her dislike of pork (unless it's on her terms) I decided that it would be on our menu this week as there are 4 others in the house happy to eat it.  Thanks team.

As mentioned I enjoy experimenting with flavours and if you look through our list of pork recipes you will see that so many other recipes have been tried.  Some got the tick of approval others not so.  What is your favourite way of serving up pork?  Or even what's your favourite cut of pork?  I really enjoy cutlets, medallions or fillet.  I find these very tender and easy to cook.

Now did I explain that Ms 17 is fussy right?  To add to her disapproval of pork being on the menu if I even consider making a sauce or marinade that has mustard, lemon, rosemary or occasionally other herbs such as tarragon or thyme it is on for young and old.... needless to say Ms 17 didn't eat dinner tonight.

When all cooked this smelled absolutely delicious.  The combination of the wine and herbs all enveloped into a thick creamy sauce complimented the thyme crusted pork cutlets.  Not to mention it was quick and easy with a total cooking time under 30 minutes.  An absolutely tasty dish that while accompanied by a creamy sauce is still full of flavour without the guilt factor.


French Pork Cutlets with Creamy Herb and Wine Sauce

Serves: 4
SP per Serve: 8

4 pork cutlets, fat trimmed
salt
freshly ground black pepper
2 tablespoons chopped fresh thyme
2 teaspoons vegetable oil
1/2 cup white wine or champagne
1 cup chicken stock
1 tablespoon chopped fresh tarragon
1 tablespoon french mustard
1 cup extra light thickened cream
1 tablespoon cornflour
2 tablespoons water

Preheat oven to 180 degrees Celsius.

Season the pork chops with salt and pepper. Rub both sides of each chop with 1 tablespoon fresh thyme.


Heat the vegetable oil in a skillet over medium-high heat until shimmering. Add the seasoned pork to the pan and cook for 2-3 minutes per side until browned. Remove the pork from the pan and place on a lined oven tray. Place in oven and cook for a further 10 minutes or to your liking.

Pour the wine into the pan and continue to cook for 3 minutes to reduce the liquid. Add the chicken stock, remaining thyme, tarragon, mustard and cream and cook another 3-5 minutes. Stir through combined cornflour and water and continue to stir until sauce has thicken. Remove from heat.

Remove cutlets from the oven and place on a serving tray. Drizzle with sauce if desired or place in a serving jug. Serve with crispy potatoes and steamed vegetables.


(Click here for a printable version of this recipe)

Monday, August 20, 2018

Beef and Balsamic Ragu

The world has been throwing everything possible at me as of late and while we have still been cooking up a storm in the kitchen and eating I have had little time to do much else besides work and be a mam.  I cannot believe my last post was 3 months ago... before we all know it the jolly man in the red suit will be coming down our chimneysI  Yikes!!!!

Everyone knows that I love reading cookbooks, cooking magazines or basically anything with a recipe in it or even on it!  Yes I have too many cookbooks, in fact the house is full and I have been banned several times from puchasing anymore!  However there is nothing more enjoyable than the feel of a cookbook, flicking through the pages reading and drooling over the stunning pictures. Not to mention finding a page of a recipe you have cooked before, once or many times, which has been splashed on or scribbled on as you've adapted the recipe.

Coles and Woolworths both produce a wonderful monthly magazine that's actually free and readily available at most service counters or checkouts. While there is quite a lot of product advertising there are always lots of really good recipes inside also.  Why am I promoting these magazines?  Well I can take them home and technically I didn't buy them so that's a win! And secondly because I have actually cooked some wonderful and tasty dinners from each of them.

When I cook Spaghetti Bolognaise it is jam packed full of vegetables much to my kids disgust.  There is always complaints about "why are there so many vegetables?" or "Can't you just make it plain?"  Listening to their pleas of agony I remembered that I had seen a recipe for a Ragu (which is pretty much the same as a Bolognaise) in a recent Woolworths magazine so I decided I would test this recipe out and see if it would appease the natives.

To my surprise it was well recieved, no complaints, no facial expressions as there were no surprise vegetable finds.  This nice, thick tomato based sauce laced with rosemary and a hint of the sweet yet acidic flavour of balsamic made for a very comforting meal.  While one would think that it had been slow cooked for hours to achieve the consistency and develop the flavours it was literally on the table within 40 minutes.


Beef and Balsamic Ragu
(recipe adapted from Woolworths.com.au)

Serves: 4
SmartPoints Per Serve: 14

325 gram pasta of your choice
1 tablespoon olive oil
2 red onions, cut into thin wedges
1 tablespoon finely chopped rosemary, plus extra to garnish
2 garlic cloves, crushed
500 grams lean beef mince
1/3 cup tomato paste
400 gram can crushed tomatoes
1 cup salt-reduced chicken stock
1 tablespoon balsamic vinegar
1/2 cup finely grated parmesan
garlic bread, to serve

Cook pasta in boiling, salted water according to packet instructions. Drain and set to one side.

Heat oil in a large saucepan over medium-high heat. Add onion and cook, stirring occasionally, for 10 minutes or until tender and starting to caramelise.

Add rosemary, garlic and mince. Cook for 5 minutes, stirring to break up any lumps, or until mince is browned. Add tomato paste and cook, stirring, for 2 minutes.

Add tomatoes, stock and vinegar and bring to the boil. Reduce heat to medium and simmer, stirring occasionally, for 15 minutes or until sauce thickens.

Sprinkle with Parmesan and serve with garlic bread (if desired).


(Click here for a printable version of this recipe)

Tuesday, May 22, 2018

Goulash Tirolese aka Tyrolean Beef Stew

I know a lot of my friends and family think I am made for menu planning.  But although I look nerdy and to some a control freak there are benefits to being organised. A major benefit is that I have meals I want to try and know how long they are going to take to prepare and cook.  This means that I can not only work out which meals are suitable for weeknights and which meals take a little more time.  It also means that from menu planning I create a shopping list and therefore have all the ingredients needed in one shop to pull off a week of cooking.  Totally win win for me... sadly totally outrageous to others.

Needless to say I love finding new recipes to try and share with our friends and family and you, the readers of my blog.

Anyway - I would like to introduce you to Gennaro Contaldo. Gennaro was born in Amalfi, Italy, and came to public attention as the chef who inspired Jamie Oliver when they worked together at Antonio Carluccio’s Neal Street restaurant.  He also co-presents the BBC2 Two Greedy Italians series with Carluccio and has published several cookbooks, including the recently released Slow Cook Italian, from which he shares the following recipe for Goulash Tirolese (Tyrolean beef stew).

“This classic stew from the Trentino-Alto Adige or South Tyrol region of northern Italy is slow cooked with onions, cumin and paprika – its distinct central European flavour is influenced by neighbouring Austria,” he writes in the recipe introduction.

To read this recipe was a pleasure but I must say to cook it and stand in my kitchen just smelling the Goulash (occasionally tasting it because I had too) was an honour.  I am so glad that I tried this recipe.  The flavour matched the aroma that filled the house.  The ease of the recipe was unbelievable especially compared to the flavour.

A very robust goulash style stew with only a few ingredients.  The beef was very tender and the pieces of pancetta that laced the thick sauce were tasty and added a salty yet salty element to the dish.  As we are not a polenta loving household (I am the only one that likes it) we had mashed potatoes to make ensure comfort food status was achieved.


Goulash Tirolese aka Tyrolean Beef Stew
(Recipe sourced from Indaily.com - Slow Cook Italian)

Serves: 4

3 tbsp extra virgin olive oil
2 large onions, sliced
100g pancetta, cubed
About 1 litre (4 cups) hot vegetable stock
1kg stewing beef, cut into chunks
2 garlic cloves, sliced
1 tsp cumin seeds, crushed
1 tsp paprika
2 sprigs thyme
freshly ground black pepper

Heat the olive oil in a large saucepan and sweat the onions on a medium heat for about 5 minutes, stirring all the time to prevent sticking, until softened. Remove and set aside.


Add the pancetta to the pan and cook on a medium heat until coloured but not burnt. Remove from the pan and set aside. 


Return the onions to the pan, add about 3 tablespoons of stock and cook for a minute or so until the liquid has evaporated.


Add the beef, increase the heat and brown the meat all over.


Add 100ml (scant ½ cup) of stock, reduce the heat to low, cover with a lid and cook very gently for 30 minutes, then add another 100ml of stock and continue to cook for 30 minutes.


Stir in the garlic, cumin, paprika, thyme and pancetta.


Add 400 ml of stock, cover with a lid and cook over a low heat for a further 1 hour, gradually adding more stock and stirring from time to time to ensure the meat doesn’t stick.


Remove from the heat and serve with creamy polenta or mashed potato or crunchy bread.


For a slow cooker

Cook the onions, pancetta and beef as above.

Once the beef is browned add 750 ml (3 cups) stock, the garlic, cumin, paprika, thyme and pancetta.
Bring to the boil, stirring, then transfer to a large slow cooker pot, press the meat beneath the liquid, cover and cook on low for 8-9 hours.


(Click here for a printable version of this recipe)

Monday, May 21, 2018

Kashmiri Lamb Korma

It was a miserable day, weather wise, and I had a curry planned on the menu so it was already a win win in my books.

The curry chosen for tonight wasn't a hot and spicy dish but rather a thick creamy mild comforting one.  Korma just means a mild curry. Yet, it is actually a very rich stew in which the meat, chicken or vegetables and nuts are braised in cream, yogurt or coconut milk. 

Kashmir is the northernmost geographical region in Indian. It borders Pakistan, Afganistan and China, the Tibetan region. Kashmir has its own special and traditional foods influenced by the climatic conditions and customs. Rich and redolent with the flavour of the spices used –cinnamon, cardamom, cloves, saffron, etc. Kashmiri food can be the simple meal of a family, or a 36-course wedding banquet called Wazawan. The staple diet of every Kashmiri is rice, the most preferred being the dense, slightly sticky grained Kashmir variety, which is prized in the Valley. Mutton, chicken or fish are of prime importance in Kashmiri meal and everyday cooking often combines vegetable and meat in the same dish.

Once again another curry made from scratch - no jar in sight.  The combination of spices was easy and not over complicated.  Cooked slowly the lamb was beautiful and tender, all most melt in your mouth.  Enveloped with a thick creamy sauce this recipe may not be completely authentic but with lots of spice and herbs, this delicious korma packs a punch of flavour which we all enjoyed.


Kashmiri Lamb Korma
(recipe adapted from Taste.com)

Serves: 4

60 grams ghee or butter
3 brown onions, coarsely chopped
1 teaspoon ground turmeric
4 green cardamom pods, crushed
1 cinnamon stick
8 black peppercorns, crushed
6 whole cloves
1 teaspoon cumin seeds
2 garlic cloves, crushed
1 tablespoon finely grated fresh ginger
2 teaspoons coriander seeds
1 teaspoon chilli powder
1 tablespoon smoked paprika
3 ripe tomatoes, chopped
1 kilogram lamb shoulder, cut into 3cm pieces
2 cups water
1 cup natural yoghurt
salt
freshly ground black pepper
80 grams ground almond meal
additional water if required
toasted flaked almonds, to garnish
chopped coriander, to garnish


Heat the ghee in a large saucepan over medium heat. Add the onion and cook, stirring occasionally, for 5 minutes or until lightly golden.


Add the turmeric, cardamom, cinnamon, peppercorns, cloves, cumin, garlic, ginger, coriander seeds, chilli and paprika and cook, stirring, for 1-2 minutes or until aromatic.


Add the tomatoes and cook, stirring, for 5 minutes or until tomatoes are pulpy.


Add the lamb, stirring until completely covered with the tomato mixture.  Cook for 5 minutes, stirring occasionally.


Add the water and mix well.  Allow mixture to come back to a simmer.


Add the yoghurt and bring to a simmer, ensuring that you mix the yoghurt through completely.  Season with salt and pepper.


Reduce heat to low and cook, covered, stirring occasionally, for 2 hours or until lamb is very tender and sauce thickens slightly.

OR:

Preheat oven to 180 degree Celsius.

Transfer to a large casserole and cook, covered in the oven for 2 hours, stirring occasionally or until lamb is very tender and sauce thickens slightly.


Add almond meal and mix through well.  If too thick add a little water.


Spoon lamb into a serving bowl and sprinkle with flaked almonds.


Serve with steamed rice, if desired, and coriander.

(Click here for a printable version of this recipe).

Sunday, May 20, 2018

"Royal Engagement" Roast Chicken aka The Perfect Roast Chicken

Well everyone in the world knows what took place yesterday ... the Royal Wedding!   The wedding of Prince Harry and Meghan Markle was held in St George's Chapel at Windsor Castle in the United Kingdom.  

It was a beautiful event fully televised and I thoroughly enjoyed spending most of my Saturday infront of the tv.  Growing up, like most girls, there is always the dream that I would grow up and meet my Prince Charming, be swept off my feet and live life like a princess! So while I pottered around doing my usual "Princessy" things such as putting the groceries away, cleaning, cooking and menu prepping I watched on in awe (and I guess a little jealousy) an event that will change history.  

Sunday, as most of you know, is family roast dinner day at the House of Murry (now seriously how regal does that sound?) and when possible I ensure that we do sit down for a roast dinner.  Giving the Royal Celebrations this week I thought we would have the "Engagement Chicken" that Meghan Markle cooked for Prince Harry the night that he proposed.  

In an interview from People November 2017 it was revealed that Prince Harry got down on one knee to propose while the couple was at home making roast chicken, the origin of the dish was from famous celebrity chef  and host of the Barefoot Contessa, Ina Garten — and it’s one of Meghan’s go-to recipes.  Ina Garten couldn’t be more pleased that her recipe is now part of the royal couple’s love story.

This recipe has been around for quite sometime despite it's new found fame.  The original recipe which I followed was published on Food Network in 1999 however since gaining celebrity status it has been revamped and can be found here.

The roast chicken itself is quite a plain dish when you read the recipe.  It's quite simple and easy to prepare.  However the decadent flavours from the thyme, lemon and garlic lacing the tender juicy meat which are cooked on a bed of roasted fennel, onions and carrots that are enveloped in the stunning chicken flavours contradict the simplicity of what you read.

Needless to say if it was good enough for Meghan's Prince would be good enough for mine and our loyal subjects?

Yes it was definitely was......


"Royal Engagement" Roast Chicken aka Perfect Roast Chicken
(Recipe sourced Ina Garten: Food Network)

Serves: 6 - 8

2 kilogram roasting chicken
salt
freshly ground black pepper
1/2 large bunch fresh thyme, plus additional 20 sprigs
1 lemon, halved
1 head garlic, cut in half crosswise
2 tablespoons butter, melted
1 large yellow onion, thickly sliced
4 carrots cut into 2-inch chunks
1 bulb of fennel, tops removed, and cut into wedges
Olive oil

Preheat the oven to 220 degrees Celsius.

Remove the chicken giblets. Rinse the chicken inside and out. Remove any excess fat and leftover pin feathers and pat the outside dry. Liberally salt and pepper the inside of the chicken. Stuff the cavity with the bunch of thyme, both halves of lemon, and all the garlic.


Brush the outside of the chicken with the butter and sprinkle again with salt and pepper. Tie the legs together with kitchen string and tuck the wing tips under the body of the chicken.


Place the onions, carrots, and fennel in a roasting pan. Toss with salt, pepper, 20 sprigs of thyme, and olive oil.


Spread around the bottom of the roasting pan and place the chicken on top.


Roast the chicken for 1 1/2 hours, or until the juices run clear when you cut between a leg and thigh. Remove the chicken and vegetables to a platter and cover with aluminum foil for about 20 minutes.


Slice the chicken onto a platter and serve it with the vegetables (or get one of your royal followers to do it for you LOL).  Accompany with other vegetables as desired.