Monday, September 29, 2014

Banana Bread Supreme

Banana bread is a really treat especially as it is often made using lots of butter or oil but this Banana Bread Supreme contains no dairy at all and is not only very easy to makes it's delish. 

Only a handful of ingredients sees this mixed together within minutes.  The riper the bananas the more intense the flavour.... so I tend to let my bananas sit on the bench until the skin is black and the bananas very soft.

Served hot or cold you will be amazed by this Banana Bread.


Banana Bread Supreme
(recipe sourced from Best Recipes)
 
Serves: 12
ProPoints per serve: 2
 
3 ripe medium bananas, mashed
2 tablespoons golden syrup
1/4 cup caster sugar
1 egg
1 cup self-raising flour
1 pinch salt
1 tablespoon cinnamon sugar

Heat oven to 180C and grease and line the base of a loaf tin.

Mash bananas in a medium sized bowl, then add golden syrup.

Add caster sugar and mix well.

Add egg, sifted flour and salt and lightly mix until just combined.

Pour mixture into loaf tin and lightly sprinkle with cinnamon sugar.

Bake for 30 minutes or until a skewer inserted into the middle comes out clean.


Thursday, September 25, 2014

Pepper Crusted Lamb Rack with Cream Cheese Mash

 
Today we celebrated 21 years of wedded bliss.... what more of a gift could I give my husband than a beautiful rack of lamb dinner.... the more part that I gave him was that he cooked most of it!!!!  LOL I have to say it was a joint effort cooking tonight.  Cooking together is something that we have always enjoyed doing which is a bonus.
 
Both of us enjoy lamb especially the fillet, rack or cutlets and even more so a lamb roast.  This lamb rack was cooked to perfection and it wasn't very difficult at all.  A quick pan fry and then finished off in the oven for 15 minutes it was not over cooked - just right.  The crust had a flavour sensation that was not over powered by the pepper it was beautifully balanced with thte rosemary and salt. 
 
The mash - what can I say?  I was mash to die for.  Very rustic with a leek and thyme infusion which did nothing but complimented the lamb rack.
 
It was a toss up as to whether the lamb was better than the mash or that the mash was better than the lamb - that's how nice this dish was.
 
Overall this dinner, which would be a magnificient entertainer's meal, was avvery easy to prepare, cook and serve weeknight wonder. 


Pepper Crusted Lamb Rack with Cream Cheese
(Recipe adapted from WW Dinner With Friends Cookbook)
 
Serves: 4
ProPoints per serve: 12
 
650 grams peeled potatoes, chopped
3 teaspoons cracked black pepper
1 tablespoon finely chopped fresh rosemary
1 teaspoon sea salt
4 x 200 gram (4 cutlets in each) french trimmed lamb racks
1 tablespoon oil
2 small leeks, thinly sliced
2 garlic cloves, crushed
2 teaspoons fresh thyme leaves, plus extra sprigs to garnish
60 grams extra light cream cheese
2 tablespoons milk

Preheat oven to 180 degrees Celsius.
 
Boil, steam or microwave potatoes until tender.  Drain, cover and keep warm.
 
Meanwhile combine pepper, rosemary and salt in a small bowl.  Press pepper mixture over lamb racks.  Heat half the oil in a large non stick frying pan over medium-high heat.  Cook the lamb for 2 minutes each side or until browned.  Transfer to a baking tray.  Bake for 15 - 18 minutes for medium or until cooked to your liking.  Remove from oven, cover with foil and set aside to rest for 5 minutes before serving.
 
Heat remaining oil in the same pan over medium heat.  Add the garlic, leek and thyme leaves, stirring, for 5 - 7 minutes or until leek has softened.   Mash potatoe in a bowl with cream cheese and milk until smooth.  Stir in the leek mixture.  Season with salt and pepper.
 
Serve mash with lamb and 0 ProPoint steamed vegetables.


Wednesday, September 24, 2014

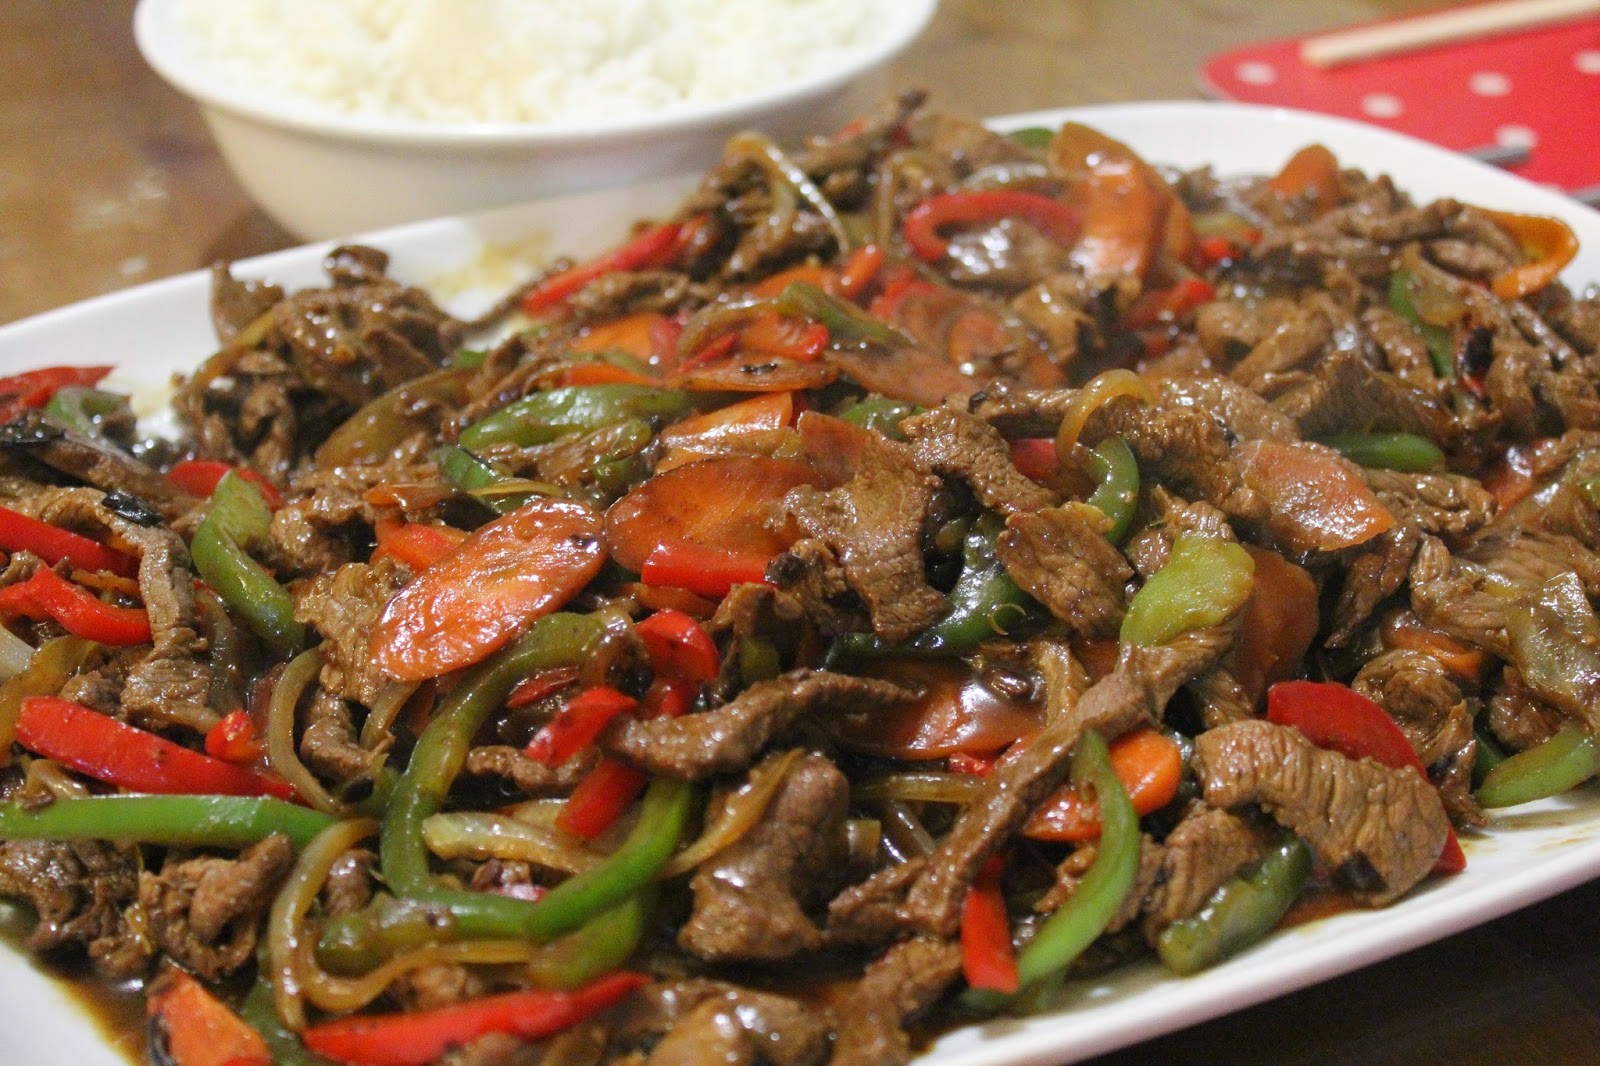
Beef in Black Bean Sauce


Beef in Black Bean Sauce, a classic dish I think that everyone has ordered from a Chinese at some stage in their life.  It has a taste, unique, that you either like or hate.  It's a little sweet, a little salty yet packs a powerful flavour and compliments beef magnificently.   It's a split in our house, the two men love it, the daughter hates it and as for me, I sit on the fence.  If it's too strong I cannot eat it and if there's not enough flavour of the black bean I whinge about that..... gggrrr.  As the daughter being away at her Grandma's for part of the school holidays, I made sure this dish was on our menu planner, as have been a few other meals.
 
Cooking chinese or any Asian dishes can be daunting to many.  Yes many recipes can seem very complex but yet some are very simple.  This one falls into the simple category with no trickly steps at all.   No premade black bean sauce has been used in this recipe.  Instead a trip to the Asian Supermarket saw us armed with a jar of salted black beans and recipe in hand.  I think that was the hardest part of the whole dish.
 
Takeaway in our home, mid week ease and a taste that was exactly how it was meant, slightly sweet and spicy, jam packed with vegetables... who could ask for more?  Bonus points to be awarded as this was prepared and cooked by my husband, Noel.
 
 
Beef in Black Bean Sauce
(recipe adapted from WW Magazine October 2014)
 
Serves: 4
ProPoints Per Serve: 5
 
1/3 cup chicken stock
2 teaspoons cornflour
2 tablespoons kecap manis
1 tablespoon canola oil
600 grams rump steak, fat trimmed, thinly sliced
1 brown onion, sliced
2 carrots, peeled and thinly sliced
1 red capsicum, thinly sliced
1 green capsicum, thinly sliced
2 garlic cloves, thinly sliced
2 tablespoon salted black beans, chopped

Combine stock, cornflour and kecap manis in a small jug or bowl.

Heat a wok over high heat.  Add half the oil and heat for 20 seconds.  Stir-fry half the beef for 2 - 3 minutes of until browned.  Transfer to a plat.  Repeat withthe remaining oil and beef.

Add onion and carrot to the wok and stir-fry  for 2 - 3 minutes or until just softened.  Add capsicum and stir-fry for a further 2 minutes.  Add garlic and black beans, stirring for 30 seconds. 

Return beef to the wok along with the stock mixture.  Stir-fry for 1 - 2 minutes or until sauce has thickened.

Serve with extra steamed 0 ProPoint vegetables and steamed rice.  Add 4 ProPoints per 1/2 cup steamed rice.


Monday, September 22, 2014

Chicken Peanut Curry (Peanut Butter Chicken Curry)

I love the fact that people experiment with ingredients and the possible flavour combinations.  From my own experience I can tell you that some work well and some should never be repeated. 
 
Well, while I am not quite sure where the original recipe came from and who thought that this combination of ingredients would produce what can only be described as a flavour party for the tastebuds.  But I thank them.....  Who would have thought one of the worlds' most favourite sandwich spread, Peanut Butter, yes Peanut Butter, could be such an integral ingredient.
 
The Jalepeno Chilli gave the creamy flavour a nice little kick of chilli which was really only evident in the aftertaste, use more or less of these to suit your chilli threshold.
 
This dish, now known humbly as Peanut Butter Chicken Curry in our house, will be a regular on the menu.  Not only are the flavours magnificient, I don't think I have mentioned that, but it's incrediably easy considering there is no pre-prepared curry paste or packet mix used at all. It's cooked from scratch and can be on the table within the hour.


Chicken Peanut Curry
(recipe adapted from Simply Recipes.com) 
 
Serves: 8
ProPoints per Serve: 9

1.2 kilograms skinless chicken thigh,  cut into 2 cm cubes
1/2 cup flour
4 tablespoons curry powder
2 teaspoons salt
1/2 teaspoon freshly ground peppercorns
1/4 cup cup oil
2 Tbsp fresh ginger, minced
2 Tbsp garlic, minced
4 - 6 fresh Jalepeno chilli, seeded, de-veined, minced
6 - 8 cups chicken stock
2/3 cup light (low fat) peanut butter
1 teaspoon ground coriander
8 spring onions, chopped
1/3 cup finely chopped mint
1/3 cup finely chopped coriander
3 tablespoons lime juice

Rinse chicken and pat dry. In a large bowl or large zip lock bag, combine the flour, curry powder, salt and pepper. Toss the chicken pieces to coat.

Heat oil in a large heavy pot or frying pan on medium high heat. Add chicken pieces in batches, being careful to not crowd the pan. Cook 2-4 minutes per side, or until the coating sets and browns a little. Remove the chicken from the pot as it cooks and set aside in a bowl.

To the same pan add the ginger, garlic, chilli and 1/2 cup of the chicken stock to the saucepan. Cook for a minute or two, scraping the pan with a spatula and stirring to combine everything well. Whisk in the peanut butter, and the remaining chicken stock slowly, stirring continuously to maintain an even texture.

Return the chicken to the pot and simmer for 15-25 minutes. Right before serving, add the ground coriander, spring onions, mint and coriander. Add lime juice to taste.
 
Serve with rice. (Add 3 ProPoints per 1/2 cup of steamed rice.)

(Click here for a printable version of this recipe)

Tuesday, September 9, 2014

Creamy Curried Chicken Pasta

My mam used to make this for me and my sister using a Continental Packet Mix and I inturn used to make it for my children.  It was always such an easy and tasty comfort dish - perfect for a mid week dinner.

Struggling to change meal plans at the last moment with the fact that I gained 2 extra children due to a student free day on Wednesday (not that I mind at all having extra people at anytime) I decided to try and re-create this dish that I always remember getting excited about as a child.

Surprisingly enough - it turned out ok.  Ok enough that the four teenagers were sitting at the table devouring mouthful after mouthful without hesitation.  The combination of the mild curry powder and coconut flavoured evaporated milk with simple vegetables chicken and of course the ultimate comfort ingredient pasta.


Creamy Curried Chicken Pasta
 
Serves: 4
ProPoints Per Serve: 7
 
250 grams pasta
cooking spray
500 grams chicken breast, diced
1 brown onion chopped
2 carrots, diced
1 cup frozen peas
2 teaspoons mild curry powder
2 teaspoons sugar
1 cup Lite and Creamy Coconut Flavoured Evaporated Milk

Cook pasta in a saucepan of boiling water as per packet instructions.  Drain.

Coat a large frying pan with cooking spray and cook chicken, in batches, over medium heat until browned.  Remove and repeat with remaining chicken.

Recoat frying pan and add onion and carrots.  Cook, stirring occasionally, for 5 - 8 minutes or until softened.  Return chicken to the pan.  Add peas and cook for a further 5 minutes. 

Sprinkle mixture with curry powder and sugar, cook stirring until well mixed for 1 - 2 minutes.  Add evaporated milk and mix to combine.  Add pasta to mixture, gently tossing to combine, cook until pasta is heated through.

Serve immediately.

(Click here for a printable version of this recipe)

Friday, September 5, 2014

Coriander Chilli and Cashew Mussels

I cannot actually say this is my dish, proudly the contents of this post are brought to you by my husband, Noel.
 
Mussels are a fairly new ingredient that we use in our kitchen, our tastebuds only developed to liking them over say the last 5 years prior to that touching them was only done by using a long stick LOL.  For me it was the same with oysters.... Oh well they do say flavours develop with age!
 
One of the perfect things about mussels is that they cook in next to no time meaning that any dish can be on the table in literally under 15 minutes depending on how decadent or basic you wish the flavourings to be.
 
We had recently purchased a carton of a favourite dip (I guess you could use any flavour dip of course) and forever looking for new flavours to cook with it was decided that the dip mixed with coconut milk would be an interesting taste on gathering many flavours that we love together.
 
Whilst these were very nice and would definitely be a hit as an entree or casual dinner with friends I still prefer a tomato maybe tomato chilli flavour base for my mussels. 


Coriander Chilli and Cashew Mussels
 
Serves: 4
ProPoints per serve: 7
 
1 tablespoon canola oil
1 brown onion, finely chopped
1/2 cup Coriander Chilli and Cashew Dip
1 fresh red chilli, deseeded and sliced
1 cup lite coconut milk
1 kilogram Blue mussels, bearded and rinsed

Heat oil in a large frying pan or wok until just about smoking.  Reduce heat to medium and add onion cooking for 3 - 4 minutes or soft.

Add coriander dip, stirring, and cook for a further 2 minutes.  Add the chilli and coconut milk stirring for a further 2 minutes or until slightly thickened.

Increase heat to high.  Add mussels and quickly toss to coat.  Cover and steam for 2 - 3 minutes or until the majority of mussels have opened.  Remove lid and toss continuously for a further 2 minutes..

Serve immediately.

(Click here for a printable version of this recipe)

Thursday, September 4, 2014

Massaman Beef Stir Fry

As you can see I am getting back into blogging... it's always something that seems to miss out when I get busy and excess time is just not available.
 
Thai is an amazing cuisine... it produces flavoursome food in matters of minutes using very fresh ingredients and having a wide variety of thai concentrated pastes available to purchase in supermarkets.  While I am not a fan of premade and much prefer to make my own pastes, especially for curries, I will be the first to admit that they make cooking so much easier for someone that has been time poor of late - ME!!
 
Massaman is a milder yet robust curry sauce, one of the thai curries that my kids enjoy as it's not fiery.  Normally as a curry it would have a thicker sauce and be made with beef and potatoes.  But as stir fry it was still full of flavour and of course, a quick dish to prepare.
 
The garnish of toasted coconut added a little extra crunch and enhanced the spice flavours of this delicious sauce. 


Massaman Beef Stir Fry
(recipe adapted from Taste.com.au)
 
Serves: 6
ProPoints per serve: 7
 
1 tablespoon peanut oil
750g beef rump steak, cut into thin strips
1 red capsicum, cut into thin strips
1 large red onion, halved, cut into thick wedges
½ cup Massaman Curry Paste
½ cup water
125ml light coconut milk
60g baby spinach leaves
125 grams bean sprouts
30 grams Shredded coconut, toasted
fresh coriander leaves, to garnish
 
Heat half the oil in a wok over high heat until just smoking. Stir-fry half the beef for 2 minutes or until golden. Transfer to a bowl. Repeat with the remaining beef.

Add remaining oil. Stir-fry capsicum and onion for 3 minutes or until onion softens slightly. Transfer to the bowl.

Stir-fry curry paste for 30 seconds or until aromatic. Add water, Stir in the coconut milk for 2 minutes or until mixture thickens slightly. Stir in the beef mixture, spinach and bean sprouts. Stir-fry for 1 minute or until spinach just wilts.

Transfer to a serving plate and sprinkle with shredded coconut. Serve with steamed rice, adding 4ppts per ½ cup serve.


(Click here for a printable version of this recipe)

Wednesday, September 3, 2014

Asian Pork Chops


I have another secret love and that is asian food with pork as the main meat.  These Asian Pork Chops totally hit that spot as not only were the flavours asian inspired but they were wonderful tender and very easy to prepare, cook and plate.
 
I have a love of sesame and ginger infused soy - it just screams basic Asian cuisine.  Served simply with steamed rice and vegetables this was a perfect mid week wonder.
  
  
Asian Pork Chops
(Recipe adapted from WW Cook The Classics Cookbook)

Serves: 4
ProPoints per serve: 6

1 tablespoons kecap manis
2 tablespoons orange marmalade
1 tablespoon finely grated fresh ginger
1 teaspoon sesame oil
4 x 200 gram lean pork cutlets, fat trimmed
Cooking spray
chopped coriander for garnish

Combine kecap manis, marmalade, ginger and oil in a shallow glass or ceramic dish. Add pork and turn to coat. Cover and place in the fridge for 3 hours.

Spray a large non stick pan with cooking spray and heat over a medium heat.

Remove pork from marinade and reserve. Add pork and cook for 3 – 5 minutes each side or until browned and cooked through (to your liking). Remove from

To the same pan add remaining marinade and cook, stirring, for 1- 2 minutes or until slightly thickened.

Drizzle pork with pan juices, sprinkle with chopped coriander and serve with 0ppt steamed vegetables and rice. Add 4ppts per ½ cup serving of cooked rice.


(Click here for a printable version of this recipe)

Tuesday, September 2, 2014

Sweet and Sour Jalapeno Poppers

I know I have mentioned this before but I, we, both of us LOVE Poppers.

This recipe from Taste of Home not only intrigued me but definitely intrigued my tastebuds from the first mouthful.  Sweetness of the brown sugar, saltiness of the proscuitto and the tingle from the chilli combined make for a delicious mouthful.

The best things about Poppers is that they are not only easy to make, they are quick and perfect for entertaining or even just a quick snack. 


Sweet and Sour Jalapeno Poppers
(Recipe adapted from Taste of Home)

Makes : 16
ProPoints per Popper: 1

8 Jalapeno peppers
125 grams Philadelphia Extra Light Cream Cheese
60 grams grated tasty cheese
1 teaspoon dried thyme
freshly grated black pepper
8 thin slices (100 grams) prosciutto or parma ham, cut in half lengthways
¼ cup firmly packed brown sugar
½ teaspoon chilli powder

Preheat oven to 180 degrees Celsius.

Line a baking tray with baking paper.

Cut jalapenos in half lengthwise and remove seeds, set aside.

In a small bowl beat cheeses, thyme and pepper until well blended. Spoon into pepper halves. Wrap a half strip of prosciutto around each pepper half.

Combine brown sugar and chilli; coat peppers with sugar mixture.

Place on prepared baking tray. Bake for 18-20 minutes, or until cheese is melted and prosciutto crispy.

Serve immediately.


Monday, September 1, 2014

Chicken Parma Meatballs with Pasta

I love it when anyone in my family tag me on food that they have seen posted on Facebook.  I know why they do it as it's like waving a red flag to a bull... it's like "CHALLENGE ACCEPTED".
 
Alex tagged me in a post by 4 Ingredients from one of their non-4 Ingredients books ""4 Play" in the recipe Chicken Parma Meatballs and I am glad she did.  This was such a novel concept - not unlike the meatballs that you get on a Sub at Subway but obviously made with chicken mince.
 
The original recipe is for bite sized balls perfect for entertaining but I wanted to make this into a meal we could have for dinner so what better to go with Parma meatballs than to serve it with pasta.
 
The meatballs were very tender, in fact melt in your mouth tender.  The slight flavour of cheese in each mouthful of meatball was delicate but enticing especially being smothered in a thick tomato sauce and molten cheese.
 
Winner winner chicken dinner I say..............


Chicken Parma Balls
(Recipe adapted from 4 Ingredients - 4 Play Cookbook)
 
Serves: 6
ProPoints per serve: 12

1 kilogram lean chicken mince
4 slices wholegrain bread made into breadcrumbs
1/2 red onion finely chopped
2 tablespoons chopped fresh flat leaf parsley
1 cup grated Parmesan cheese
salt
freshly ground black pepper
700 gram bottle Passata
250 grams spiral pasta or pasta of your choice

Preheat oven to 180°C.

In a large bowl mix the mince, breadcrumbs, onion, parsley and half the cheese. Season with sea salt and cracked pepper. Using your hands shape into 30 balls and place on a lightly greased ceramic baking dish.  Brush each ball with Passata.

Bake in oven uncovered for 10 to 12 minutes.

Meanwhile cook pasta in a large saucepan of boiling water according to packet directions.  Drain and keep warm.

Remove dish from oven and brush meatballs with more sauce and pour remaining Passata around the baking dish.  Scatter with remaining cheese and bake for another 15 minutes or until cheese is melted and golden.

Serve with pasta and 0ppt steamed vegetables.


(Click here for a printable version of this recipe)