Our latest feast

Thursday, December 21, 2017

Christmas Madness and Flavour Generator

Well it's that special time of year again and also that busy busy time of the year! I have to say that I cannot actually remember a year so manic and overwhelming as 2017 has been for me and my family.

Job changes for 3 of us, year 11 for the baby of the family with all the stresses of exams, a new family member living with us - who we all adore (our son's girlfriend) and many special birthday's in the family unit. We have had Grandma's 70th, an uncle's 50th and hosting a special 21st birthday.

During all of this I have found myself so time poor that I haven't even thought about blogging even though we have been cooking and I have been taking photo's just incase I get time to do a quick post. But sadly that hasn't happened!!

Out of the blue I was unexpectedly contacted regarding a new cooking website, Flavour Generator, which I have to say is great. It was perfect timing for me to... feeling down due to not experimenting with cooking as I usually did (yes I have been cooking things I know are quick, easy and at times boring!).

Given the opportunity I tried a Hello Fresh Box for myself. I have to say I am quite a proud menu planner and shopper but have to say I had not even contemplated using such a service of pre-planned and packed meals to save me the time and effort.

The Hello Fresh box arrived and I was so excited. Opening the box was just like it was already Christmas. 5 meals already weighed out, packed together, colour coded with specific recipe cards - it was like it was already Christmas.


HOWEVER!!!!  The best thing of all is this new website Flavour Generator.  Its fantastic.  Firstly you choose what type of food you would like to cook - the choices are Asian, Mediterranean, Mexican, Middle Eastern, Modoz.  Then you choose the flavour from these options Spicy, Sweet, Tangy, Herby and I've never tried.  


Press the Generate My Flavour button and voila - you get recipe options....


It's really exciting to press the Generate My Flavour Button and see what could be what you are cooking for dinner that night...   I absolutely love this new website and I am sure that you will to.  Give it a go!

Now I doubt I will post again this side of Christmas so I will leave you with our favourite Christmas and Festive Season recipes of all time....


From my family to yours
Merry Christmas.

Thank you for all your support
May your New Year be safe
and 
2018 be absolutely delicious

adashofflavour xxxx


Friday, October 27, 2017

Chipotle Mayonnaise

Have you ever been addicted to something?  Well my kids have been addicted to Aioli ever since I can remember - they have it with chips, burgers, chicken, even bacon sandwiches that was until they found Chipotle Mayonnaise.  Now that is the new favourite.
 
As everyone knows we cook with a lot of herbs and spices so this new found love wasn't at all surprising.  What was more surprising when the kids read the weekly menu only to see that Friday night's menu plan was Homemade Hamburgers with Coleslaw and Chipotle Mayonnaise.  It was an awesome reaction and I knew that no shop purchased Chipotle Mayonnaise would cut the mustard, so to speak.
 
I had recently taken a trip to USA Foods, an American Food Store, in Moorabbin and during that visit purchased some Chipotle Chilli Powder along with some dried Chipotle Chillies so I was already in possession of the most important ingredient - now to work the rest of the ingredients out.  Of course my next step was Google and once again an overload of mayonnaise recipes presented themselves.  After reading quite a few, obviously every single one different with a different spin on this humble spicy mayonnaise, I decided to wing it and make up my own. 
 
Now some recipes called for the Adobo Chilli and it's sauce others used chilli and paprika powder.  Having no Adobo Chilli I of course had no other choice than using the powders.  So as you can imagine some recipes had similar ingredients so gathering a list of commonly used ones wasn't too hard and knowing the flavor I was actually trying to achieve made it easier.  I did not make my own mayonnaise but you can do it you wish.
 
Mixing each individual ingredient together I could only think to myself - Jo you cannot fail on this one... there will be a mutiny and it won't end well.  My teenagers have now become my harshest food critics and there is generally no forgiving for offering up something substandard. And I am being serious.
 
So here is my take on Chipotle Mayonnaise - a version that is somewhat smoky and creamy with the right amount of heat and kick to it.  You can taste the traces of lime and garlic making this mayonnaise perfectly balanced.  Best of all the flavours just kept developing while we were waiting for dinner.
 
The outcome..... I passed.  It was smothered all over the hamburgers tonight and I made enough that there is some left for lunch tomorrow.  I am presuming that sealed this will keep in the fridge for at least a week as there is no milk products as ingredients - who knows maybe even longer.  Saying this I know there won't be much left by tomorrow afternoon.
 
 
Chipotle Mayonnaise
 
Makes: approx. 1 cup
SmartPoints per 2 teaspoons: 2 
 
1 cup low fat mayonnaise
1/2 teaspoon Chipotle Chilli powder
1/4 teaspoon smoked paprika
1/2 teaspoon garlic powder
juice of half fresh lime
1/4 teaspoon ground white pepper
1/4 teaspoon salt
 
Combine all ingredients in a bowl and mix thoroughly.
 
Store in refrigerator in a sealed jar.


Thursday, October 26, 2017

Alice Springs Chicken

It's kind of funny when you see something on Facebook and it sits in your head until you do some research on it.  The other day a recipe popped up in one of the many foodie forums I belong to and I thought "WOW that looks different" as I read a recipe for Alice Springs Chicken and then the next thought was "what is the Outback Steakhouse?"

The Outback Steakhouse is an Australian inspired steakhouse restaurant in the States. Many items on the menu are similar to meals found at most bistro or steak restaurants in Australia however the menu items are "Aussie-ied" to reflect meals that we would eat out here in the Aussie Outback.  I guess the Outback Steakhouse is very similar to the Lonestar and Hogsbreath Chains. 
 
On the menu of very interesting dishes is The Bloomin' Onion.  The Bloomin' Onion is a signature Outback item. It is a one-pound onion cut to 'bloom' open, breaded, deep-fried and served with mayonnaise-horseradish sauce.    However I had to try Alice Springs Chicken!  Described as a wood-fire grilled chicken breast topped with sautéed mushrooms, crisp bacon, melted Monterey Jack and Cheddar and honey mustard sauce I knew it would be a winner at our place.
 
The copycat recipe for Alice Springs Chicken I found looked easy enough so it made up my mind to make it even though I have never been to an Outback Steakhouse.  All the ingredients just sounded so delicious together.  In fact the first this I thought was how it was similar to a gourmet chicken parma - just without the breadcrumbs and the tomato sauce and we all know how well a parma goes down in this house.

A juicy chicken fillet, marinated in honey mustard, smothered in mushrooms, bacon and cheese was presented to the family last night and it was really tasty.  A further drizzle of honey mustard mayonnaise added another sweet yet savoury dimension to the chicken temptation. 

This dish was really easy to prepare and cook, even easier to eat and as always, it was a really nice mid week wonder for our ever busy lives. However, I think I need to tweek the recipe a little more as it's quite high in SmartPoints but if you have a day where you can accommodate this dish you will enjoy it.


Alice Springs Chicken
(Recipe adapted from CenterCutCook.com)
 
Serves: 4
SmartPoints per serve: 16

1/2 cup Dijon Mustard
1/2 cup honey
3 tablespoons reduced fat mayonnaise
juice of half a lemon
4 boneless skinless chicken breast halves
salt
freshly ground black pepper
200 grams sliced button mushrooms
cooking spray
200 grams short cut bacon, thickly sliced
100 grams shredded low fat tasty cheese
100 grams shredded low fat mozzarella
 
In a small bowl, combine Dijon mustard, honey, mayonnaise and lemon juice. Pour half the sauce into a small bowl, cover and reserve for later.

Place the chicken in a large zip lock bag. Pour the remaining marinade in the bag and toss the chicken to coat. Chill in the refrigerator for at least two hours, overnight if time permits.

Preheat your oven to 200 degrees Celsius.

Spray a small frying pan with cooking spray and heat over medium heat.  Add the mushrooms and cook for 7-10 minutes, or until the mushrooms are tender and just starting to turn golden brown.  Remove from pan.

Using the same frying pan, add bacon and cook until crispy.  Remove and drain on paper towel.

Heat a large frying pan to medium high heat. Coat with cooking spray.  Remove the chicken from the marinade, discarding marinade. Place the chicken in the pre-heated pan. Cook for about 4 minutes, then when the chicken is golden brown, flip the chicken and cook for an additional 4 minutes.  Transfer the chicken to an oven safe casserole dish.

Top chicken evenly with mushrooms and bacon.

In a small bowl mix the two cheeses together and sprinkle evenly over each piece of chicken.

Place the chicken in the oven and bake for about 10 - 15 minutes or until the chicken is cooked through and the cheese has melted.

Serve chicken drizzled with remaining honey mustard sauce or serve the sauce on the side.

 
(Click here for a printable version of this recipe)

Tuesday, October 24, 2017

Old Fashioned Sausage Casserole

The clock is ticking so fast this year and of course, as always, we are busy with both work and family life.  Seriously another few blinks of our eyes and Christmas will be on our doorsteps.  Yikes - another busy time of year.
 
Sausages are something we always seem to have in the freezer ready for the next barbecue but they are something that we don't normally cook with otherwise.  Do you?  How do you all enjoy sausages?
 
Deciding that we need to eat through our very full freezer I sat down and menu planned our meal out for the next 3 weeks - YES 3 WEEKS!  So I did it - I put sausages on the menu.  Not destined for the barbecue but in a casserole.  My family were very surprised.
 
So armed with low fat beef sausages and a recipe I found online from the Hairy Bikers I prepared a casserole dinner for the family and it was bloody nice.  The Hairy Bikers have been a long time favourite cooking partnership that both my husband and I have always enjoyed watching.  However many of their recipes have been very stodgy and not great for those watching their waistlines.  Their cooking shows however were always entertaining and often did get one drooling to try what they did cook.  This recipe was shown in an episode called "Mums Know Best Recipes", where they cooked family loved and trusted recipes.

This dish has a really nice and thick tomato based sauce infused with smoked paprika, thyme and bay leaves was perfect to cook these sausages in.  I did change the original recipe a little to reduce the calorie count, not that you would really notice and all up the meal was on the table within the hour.
 
I served this Old Fashioned Sausage Casserole with mashed potatoes and a fresh crusty French Breadstick.  It was definitely a hit.  So if you are looking for something quick and easy here you go..... 
 
 
Old Fashioned Sausage Casserole
(Recipe adapted from BBC Food - Recipes)
 
Serves: 6
 
cooking spray
12 reduced fat beef sausages
6 rashers rindless streaky bacon, cut into 2.5cm lengths
2 medium onions, thinly sliced
2 garlic cloves, crushed
1 tsp smoked paprika
1 x 400gram can chopped tomatoes
300ml chicken stock
2 tablespoons tomato paste
1 tablespoon Worcestershire sauce
1 tablespoon dark brown sugar
1 teaspoon dried mixed herbs
2 bay leaves
3–4 sprigs of fresh thyme
100ml red wine
100 ml water
salt
freshly ground black pepper

Preheat oven to 180 degrees Celsius.
 
Spray a large non-stick frying pan with cooking spray and fry the sausages gently for 10 minutes, turning every now and then until nicely browned all over. Transfer to a large flameproof casserole dish and set aside.

Fry the bacon pieces in the frying pan until they begin to brown and crisp then add to the sausages.
 
Place the onions in the frying pan and fry over a medium heat for five minutes until they start to soften, stirring often.
 
Add the garlic and cook for 2–3 minutes more until the onions turn pale golden-brown, stirring frequently.

Sprinkle over the smoked paprika and cook together for a few seconds longer.

Stir in the tomatoes, chicken stock, tomato paste, Worcestershire sauce, brown sugar and herbs.

Pour over the wine and water and bring to a simmer.
 
Tip carefully into the pan with the sausages and bacon.  Season to taste with salt and freshly ground black pepper.  Cover with foil and place in the oven.  Cook covered for 20 minutes.  Remove foil and cook for a further 10 minutes.
 
Serve with mashed potato, steamed rice or slices of rustic bread.
 

Friday, September 22, 2017

Pork Pad See Ew - หมูทอดดูเอล

Thank God for Friday night Fake-away.... it doesn't get better than this dish nor can it get any easier to create this Thai style noodle dish at home.
 
Firstly let me tell you that this meal is such an easy one to prepare, cook and put on the table in under 30 minutes or so and your family will thank you for an amazing dish that actually took you minimal effort.  In fact I am pretty certain that they will think that you organized Thai Take Away.
 
Pad See Ew is a standard lunch fare among Thais and is very popular dish in Thai restaurants outside of Thailand. The soft, chewy rice noodles pan fried with pork, Chinese broccoli and a soy sauce mix, it is easy to understand why it is a comfort food for many.

The simple ingredients in this dish are readily available combined make for a really light noodle dish that is refreshing but yet very filling.  Using pork mince was quick and easy and actually not as stodgy as larger meat pieces.  The tartness of the fresh lime juice combined with the saltiness of the fish sauce and the sweetness of the kecap manis kept the dish fresh and vibrant.

I really urge you to give your family the opportunity to try this meal - you won't regret it.
 

Pork Pad See Ew - หมูทอดดูเอล
(Recipe adapted from Weight Watchers Weeknight One Pot Cookbook)

Serves: 4
SmartPoints per serve: 11

200 grams dry rice noodles, think
1 tablespoons canola oil
500 grams lean pork mince
2 cloves fresh garlic, crushed
1 teaspoons fresh ginger, finely grated
1 whole fresh red chilli, thinly sliced
2 medium eggs, lightly beaten
1 bunches gai lan (Chinese broccoli), coarsely chopped
2 individual green shallots, thinly sliced
2 tablespoons kecap manis
1 tablespoons fish sauce
1 tablespoons lime juice
2 cup bean sprouts
2 carrots, peeled and coarsely grated
1/4 cup roasted peanuts
1/2 cups fresh coriander
1 medium fresh lime, wedges
chilli flakes, if desired

Prepare noodles following packet instructions or until just tender. Rinse under cold water. Drain.

Heat a wok over high heat. Add oil and heat for 20 seconds. Stir-fry mince, garlic, ginger and chilli, breaking up lumps, for 7–8 minutes or until browned. Transfer to a plate.

Reheat wok over high heat. Stir-fry egg for 1 minute or until just set.
 
Add gai lan and shallots and stir-fry for 1 minute.
 
Add mince mixture, kecap manis, fish sauce, juice, sprouts, carrots and noodles and stir-fry for 2 minutes or until heated through.
 
Sprinkle with peanuts and coriander and serve with lime wedges.  If desired, sprinkle with chilli flakes.


Monday, September 18, 2017

Creamy Chicken and Bacon Spaghetti Boscaiola

Pasta I think is one of the Universal words which translates instantly to "comfort food" and never ceases to please anyone in any given mood or frame of mind.  No matter who you are, where you come from and what your nationality I can honestly say that I have never ever met anyone that does not like pasta.
 
In our house, it goes without saying that it is a favourite - whether it's served with a thick meat sauce or a creamier delicate sauce, no matter what shape or size it comes in, if it's layers upon layers, etc.  I could go on but which ever way it's served here its always a hit.  Tonight was no exception. 
 
I have actually been unwell for a wee bit with this dreaded flu that is sweeping Australia.  Many people are in hospital and some have actually lost their lives due to the deadly strain.  Thankfully I was administered some very strong antibiotics, steroids and some liquid codeine as soon as I felt bad however I was bed ridden for nearly four days.  I am still battling a horrid cough, but glad to say I feel there is an end to it coming closer.  While I am still weak and aching I actually returned to work today (thankfully as being bed ridden was doing my head in) and for the first time since last Thursday I cooked dinner.  Anyways enough about me. 
 
Tonight's dinner, Creamy Chicken and Bacon Spaghetti Boscaiola is based on one of our family favourites, Penne Boscaiola.  It is definitely the perfect comfort meal – creamy, jam packed with vegetables, chicken and bacon laced with hint of cheesy sweet chilli…. mmmmm!!  It's not a traditional Italian style pasta using Asian sweet chilli sauce but it works and I would urge you to try it. 

A perfect week night wonder as it’s very easy and quick to prepare and cook not to mention devoured almost instantly.

 
Creamy Chicken and Bacon Spaghetti Boscaiola
(Recipe adapted from WW Heavenly D’Lites Cookbook)

Serves: 6
 
375 grams spaghetti
cooking spray
1 brown onion, finely chopped
3 teaspoons crushed garlic
2 chicken fillets, fat trimmed and thinly sliced
150 grams middle bacon, fat trimmed
1 red capsicum, sliced
150 grams button mushrooms, sliced
375 ml can Carnation Light and Creamy Evaporated Skim Milk
 3 tablespoons sweet chilli sauce
150 grams baby spinach leaves
salt
freshly ground black pepper
80 grams finely grated parmesan cheese

Cook pasta in pan of boiling water following packet instructions until just tender.  Drain.

Coat a large frying pan with cooking spray.  Cook the chicken, stirring, until browned. Remove to a plate lined with absorbent paper.

In the same pan cook the onions, garlic and bacon until onion is soft.  Return chicken to the pan. 

Add capsicum and mushroom and cook for a further 2 - 3 minutes until capsicum begins to soften. 

Add the milk and chilli sauce to the pan.  Season with salt and freshly ground black pepper to taste. 

Stir through the pasta, spinach and half the parmesan cheese until mix through well and spinach just wilted.

Serve with remaining parmesan cheese.


Monday, September 4, 2017

Chicken Jalfrezi

Curry is always a regular on our menu. I think this all stems back to when my mother was pregnant with me, where the regular haunt for dinner with my father was a Chinese Restaurant called Jim Hongs.  My mam's meal of choice was curry throughout her pregnancy and then surprisingly (or not) during both my pregnancies my husband had to stop and pick up a Beef Vindaloo on a weekly basis. It will be very interesting if this somewhat traditional craving gets passed on the my next generation.
 
Both the kids have been raised eating foods full of spices and herbs - more importantly they have eaten foods that have rarely come from packet mixes or premixed jars.  They do not understand the importance of this, hopefully one day they will.
 
As you all may have guessed by now if I can make something from scratch I will definitely give it a go.  Sometimes it doesn't taste the same or even look the same but seriously it's all about the experience and the copious amounts of laughter within the House of Murray when a "failure of sorts" occurs.  Normally it's edible but hey there have also been times that it hasn't been.  Maybe I should do a post on the things that go wrong just so you can all cash in on the enjoyment as well.  That's a thought for another time though.
 
My unemployment period is coming to an end as I have secured a role with another large company that is within the construction industry. Somewhat I am saddened by this but on the other hand I am really looking forward to the new challenge ahead that will come with the new role but it will mean back to cooking quick mid week wonders for week night dinners and sticking to the menu  planner. 
 
For my birthday I was given a book called The Curry Kitchen from my sister in law and to be honest it's a book that I haven't but down yet.  It's got sticky notes all through it for all the different curries I want to try cooking.  The really exciting thing about this cookbook is that the majority of curries actually are made from scratch.
 
Jalfrezi is always on Indian menus and is probably one of the quickest Indian curries to make.  It typically involves frying pieces of unmarinated meat, fish or vegetables in oil and spices to produce a dry, thick sauce.  A traditional Jalfrezi can range in heat from medium to very hot especially for those recipes that use fresh chillies.  This recipe wasn't overly hot in taste as I did tone down the amount of chilli I used.
 
With it's tomato base you could really taste the cumin and coriander which surprisingly is added later in the cooking process.   Along with some butter or ghee if you have it available which gave it a little creaminess.    We served this simple yet super quick curry with plain steamed rice, Mint Raita and freshly cooked poppadum's.

 
 Chicken Jalfrezi
(Recipe adapted from The Curry Kitchen Cookbook)
 
Serves: 6
 
2 tablespoons vegetable oil
1 onion, finely diced
2 cloves garlic, minced
1 kilogram chicken breast fillets, diced
3 teaspoons ground turmeric
1/2 - 1 teaspoons chilli powder (or to taste)
1 teaspoon salt
2 x 400 grams can diced tomatoes
2 tablespoons butter or ghee
3 teaspoons ground cumin
3 teaspoons ground coriander
2 tablespoons ginger, grated
1/2 cup fresh coriander leaves, chopped

Heat the oil in a large frying pan over medium-high heat.  Add the onions and cook for about 2 minutes or until they start to soften, then add the garlic and cook for a further minute.
 
Add the chicken, turmeric, chilli and salt.  Fry gently, turning the chicken often and ensuring that the onion mix does not stick to the pan.
 
Pout in the tomatoes, stir and simmer, covered, over a medium heat for 20 minutes.  Uncover, and simmer for another 10 minutes and let the liquid evaporate to the desired thickness and consistency.
 
Add the butter or ghee, cumin, coriander, ginger and half the coriander leaves.  Simmer for another  5 -  7 minutes.
 
Serve garnished with the remaining coriander leaves.

(Click here for a printable version of this recipe).

Monday, August 21, 2017

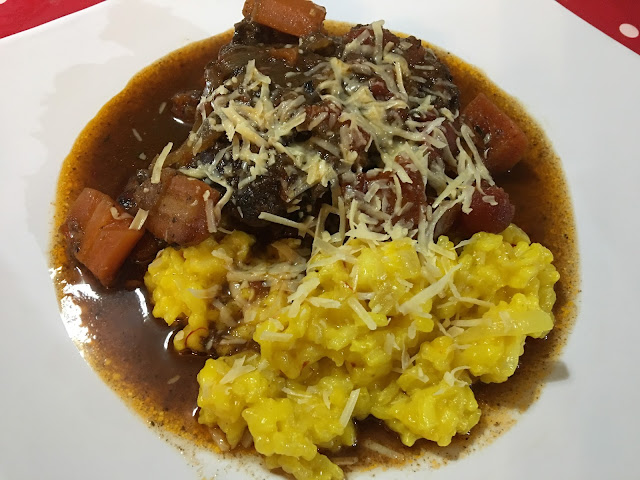
Beef Cheeks with Thyme, Chilli and Ginger Beer with Saffron Risotto

And now for something completely different - LOL!! 
 
As always I am constantly on the hunt for a "different" recipe, dish or really anything to cook.  It's somewhat looked upon as an obsession, an illness perhaps but to be perfectly honest I don't care.  I enjoy what I do, it makes me happy and I take great pride in introducing my family to different foods, flavours, textures experimenting to find their likes and dislikes. 
 
I have mentioned before that this was the way I was raised by my parents - I was taught never to fear food but to taste and decided if I liked it or not.  Nothing was left far from the imagination - we always had food made from little or many ingredients and from many countries or regions.  My parents enjoyed their relationship with food and this was passed on to me - I believe everyone should have a good understanding of foods especially those void of all the added chemicals, additives and preservatives evident in many foods of today's world.
 
My kids have embraced the love of food - although there have been many times over the years that there have been pleas of "can we please have normal food for a change" and many nights where beans, eggs and chips have been served at our table.  However saying this I absolutely adore being at a restaurant and listening to my kids order their meals.  To my delight they often try something other than Parma and Chips.  I remember my daughter as an 8 year old sitting in the local Chinese restaurant boldly asking for Chicken and Sweet Corn Soup followed by Peking Duck.  The waitress was amazed and yelled to the chef telling him of her order.  I still chuckle when I think of that moment.
 
We have a new member in our household, our son's girlfriend.  She has been with us for several months now and I am impressed with her willingness to embrace our lifestyle and our food.  To date she has tried everything put before her and yes there are things that she wasn't a fan of but has had the openness and honestly to speak her thoughts.  I am very proud of her - she definitely belongs in our family.
 
Saying this, beef cheeks were on the menu last night and of course, I would not have done them justice if I had just slow cooked them in red wine.  Research completed and several recipes morphed together plus a few little twists of my own saw this creation - Beef Cheeks with Thyme Chilli and Ginger Beer served with Saffron Risotto.  This recipe is loosely based on a recipe that appeared in the August/September 2008 issue of Gourmet Traveller WINE but as usual I had to change ingredients and put the House Of Murray twist on things.
 
Beef cheeks must be slow cooked - there is no other way to cook them so don't even consider it.  Low and slow either in the oven or a slow cooker.  A quick fry is NOT an option of cooking these meat pieces - they will be tough.

A word of warning also - beef cheeks are a rick meat to start with and most recipes are served with a rich red wine jus or sauce in which they are cooked.    I wanted something different as much as love a good full bodied red wine sauce there was the need to experiment.  So I substituted half the red wine with white wine and also added a bottle of sugar free ginger beer.  The result was fantastic - although still a little rich which I did expect it wasn't as heavy as it would normally be.  Also added the subtly of fresh thyme and a little heat from chilli flakes. 

Overall, a truly hearty dish which served also side a Saffron Risotto was filling and well received at the table.

 
Beef Cheeks with Thyme, Chilli and Ginger Beer
(Recipe adapted from August/September 2008 issue of Gourmet Traveller WINE)
 
Serves: 4 - 6

1 litre beef stock
4 - 6 beef cheeks (approx. 250 grams each), trimmed
salt
freshly ground black pepper
3 large carrot, cut into large chunks
1 onion, diced
3 garlic cloves, roughly chopped
1 bunch fresh thyme
2 cups dry red wine
2 cups dry white wine
750 ml bottle sugar free ginger beer
2 teaspoons dried chilli flakes
2 tablespoons extra-virgin olive oil
600 ml chicken stock
80 ml extra-virgin olive oil
200 grams risotto rice
1 brown onion, finely diced
2 garlic cloves, finely chopped
2 teaspoons saffron threads
150 ml dry white wine
80 grams butter

Place beef stock in a saucepan over medium heat and cook until the liquid reduces by half, or for about 30 minutes.

Season beef cheeks with sea salt and freshly ground black pepper.

In a large jug combine red wine, white wine, ginger beer and chilli.
 
Place beef cheeks in a large bowl and pour over wine mixture. Cover with cling film and marinate in the refrigerator overnight.

Remove from refrigerator and separate beef cheeks and marinade.

Heat olive oil in a large frying pan over medium heat and cook beef cheeks for about 5 minutes or until browned. Transfer to a plate.

Add vegetables to the pan and sauté for 5-7 minutes until softened. Transfer to a bowl.

Place stock and marinating liquid in a saucepan over medium heat, bring to the boil then remove from heat.

Place beef cheeks and vegetables in a roasting dish and cover with stock mixture. Cover tightly with foil and cook in a preheated oven at 150C for 3- 4 hours or until tender.

 
Meanwhile heat the chicken stock in a saucepan over low heat.

Heat oil in a large saucepan over medium heat, add rice and cook, stirring continuously, for 2 minutes. Add shallots, garlic and saffron and cook for another 2 minutes.

Add white wine and shake pot occasionally until wine begins to reduce or for about 3-5 minutes. Add stock a ladle at a time until stock just covers the rice, making sure it continues to just cover the rice. After rice has been cooking for 10 minutes, stir for 2-3 minutes.

Check rice is al dente, remove from heat, stir in butter and season to taste with sea salt and freshly ground black pepper.

 
Serve risotto immediately with beef cheeks, vegetables and sauce.


(Click here for a printable version of this recipe)

Saturday, August 19, 2017

Chicken and Bacon Ranch Casserole

Now once I saw this recipe I knew my kids would love it... of course they would considering it was pasta - cheesy pasta with chicken and bacon.  Little did they know that it would also contain salad dressing, Ranch Dressing, when they were enjoying every mouthful.
 
Yes you read correctly - Ranch Dressing.  One of the most loved salad dressing can actually be used in cooking and it compliments this pasta dish amazingly.  The smooth combination of the garlic, the herbs and the creaminess of the mayonnaise and sour cream added noticeable flavours to the marinated chicken and of course the goodness of bacon. 
 
It was so good the kids pretty much ate the whole casserole dish full in one sitting.


Chicken and Bacon Ranch Casserole
(Adapted from Top Quick Recipes)
 
Serves - 6
 
2 tablespoons olive oil
1/2 tablespoon of chilli sauce of your choice
1 teaspoon pepper
salt to taste
1/2 teaspoon of fresh parsley
500 grams boneless, skinless chicken breasts, diced
500 grams bacon, chopped
1 medium onion, diced
500 grams pasta of your choice
1 cup Homemade Ranch Dressing or store brought Ranch Dressing
1/2 cup light thickened cream
1/2 cup Cheddar cheese, shredded
1 1/2 cups Mozzarella cheese, shredded

Preheat oven to 180 degrees Celsius.

In a large bowl place olive oil, chilli sauce, pepper, salt and parsley.  Mix until well combined.  Add chicken and toss to evenly coat.  Cover and set aside.

In a large frying pan, over medium heat, cook bacon until crisp.  Remove from pan and drain on a paper towel.
 
To the same frying pan add the marinated chicken and diced onion and cook until no longer pink in the center. Set aside.

Bring a large saucepan of water to boil and cook pasta as per the packet directions.  When al dente drain well.
 
Add the chicken, bacon, ranch dressing and cream to the cooked pasta and toss until well coated.

Spray a large casserole dish with cooked spray Add ranch covered pasta to the greased baking dish

Sprinkle both cheeses and bake until cooked through and the cheese is completely melted, about 20 - 25 minutes.


(Click here for a printable version of this recipe)

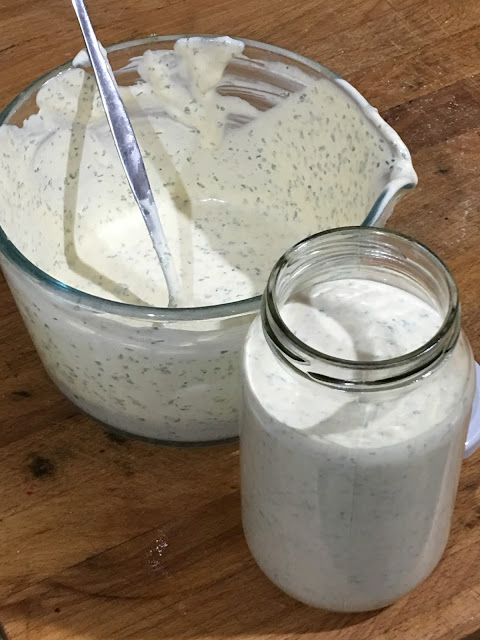
Homemade Ranch Dressing

Another preservative and additive free salad dressing!  I have made this several times for a special occasion but this time I actually made it to put in a pasta dish, Chicken and Bacon Ranch Casserole, that I had decided to make for dinner.  But to be perfectly honest it was a welcomed opportunity to make it again.

One jar, a few measuring spoons and this salad dressing is done.  Simple measure and shake.  Put in the fridge until required.  However it does not last as long as store brought Ranch Dressing so only make it when you need it.

You will be amazed with the taste of this Ranch Dressing - the texture, the fresh herbs and the clean flavours.


Homemade Ranch Dressing
(Recipe Adapted from Foodiecrush)

Makes: 1 cup approximately

6 tablespoons mayonnaise
4 tablespoons milk or buttermilk
4 tablespoons sour cream
2 teaspoon champagne or white wine vinegar
2 clove garlic, pressed or finely minced
2 tablespoon chopped chives
2 tablespoon Italian parsley, minced
2 teaspoon kosher salt
1 teaspoon freshly ground black pepper
1/2 teaspoon onion powder
Pinch of cayenne pepper

Mix all of the ingredients together in a small bowl. Add more milk for desired consistency.

Refrigerate until ready to serve.


(Click here for a printable version of this recipe).

Thursday, August 3, 2017

Homemade Ricotta

Nothing beats being self sufficient and making your own food. It's quite therapeutic if you are into that sort of thing. I love it. To me experimenting with food to make other food is quite like a hobby. One follows a recipe and other times one doesn't. I honestly believe that if you are enjoying yourself and the outcome is good well it's a win-win situation.

Recently Noel and I participated in a cheese and bread making course. It was an all day event hosted by Tamara from Boatshed Cheese down in Dromana, on our beautiful Mornington Peninsula.  Tamara runs a variety of cooking classes which are homely, comfortable and as there are only a small amount of participants per class they are very easy to follow and you have a opportunity to be hands-on during the classes.  If you can get in you should do yourself a favour and book a class.
 
Fresh ricotta is a magnificently easy and quick cheese to make as far as cheeses go - the longest part of the process is actually boiling the milk.  You will require to have a food grade thermometer to ensure temperature accuracy. Once the milk starts to reach heat the temperature moves fast.
 
What ever you do please do not buy fancy vinegar.  This recipe requires good old plain white vinegar so don't go all out there flavoured or imported vinegar. Cheap white vinegar is best because it has a high acidity level.  It's not added for flavor - it's added to simply acidify the milk and will do nothing to the actual taste of your cheese.


Homemade Ricotta

Makes: 1.5 kilograms approx.
 
10 litres cows milk (full cream or low fat) or goats milk
1 - 2 tablespoons salt
200 - 250 millilitres plain white vinegar


Heat the milk to 60 degrees Celsius over high heat, stirring constantly

When milk has reached 60 degrees Celsius add salt and stir well.

Continue stirring while heating until the milk reaches 90 degrees Celsius or 85 degrees Celsius is you are using goat milk.

As the milk edges past 9 degrees Celsius (or 85 degrees Celsius if using goats milk) add the vinegar and stir until flecks begin to appear on the surface.

Remove from the heat and continue stirring for a few seconds until the liquid turns a clear almost greenish tinge and the coagulated curds are clearly visible.

Allow to sit undisturbed for 5 minutes so that curds can rise to the surface.

Using a slotted spoon, scoop curds into ricotta baskets or cheese moulds or even a colander and drain over the sink for 30 minutes then transfer to a bowl or container and refrigerate until ready to use.

Store in an airtight container for up to 7 days in the refrigerator.


(Click here for a printable version of this recipe)

Wednesday, August 2, 2017

Thai Style Chicken Satay Skewers with Peanut Sauce

I have been cooking the same Satay Sauce since I was a kid... it's the same one my mam cooks.  It comes from a old Women's Weekly Cookbook titled Chinese Cooking Class Cookbook.  Many of you would have seen this cookbook whether it was when it was first published, then republished or more likely on the shelf at an Opportunity Shop.  However saying this I thought it was time to try a different Satay Sauce to accompany some chicken skewers. 
 
Have you ever google a recipe and been amazed by how many different results you get?  Makes me wonder how big Google is or then again how big the world really is! I think I could have read about Satay Sauce for days.  Instead of the Chinese style sauce this time I thought I would be adventurous and try a recipe from another style of cooking, Thai.  While both hubby and I enjoy eating Thai foods we rarely cook it at home for a reason I can not produce.  I guess it's a style that we just haven't really experimented with - yet!

The marinade should taste sweet, spicy, and salty. It doesn't have to be the spiciest but the stronger more vibrant flavours should be sweet and salty. If you need to adjust the taste add more sugar or more fish sauce to adjust the taste. However if you would want it to be spicier you also can add more chilli.

Now for the sauce.  No peanut butter in sight as this authentic recipe for Thai peanut sauce is made with real peanuts! This part of the meal was quick and easy to make.  While this sauce is meant to have be smooth, but if you prefer it with a bit of crunch when processing the nuts leave some smaller pieces to the side. Adding more fish sauce (or soy sauce) if not salty enough, or more cayenne if not spicy enough. If too salty, add a squeeze of fresh lime juice. If you'd prefer it sweeter, add a little more sugar.

Overall this wasn't one of the easiest recipes to make but well worth the effort.

 
Thai Style Chicken Satay Skewers with Satay Sauce
(Recipe adapted from The Spruce)
 
Serves: 6
 
1/4 cup minced lemongrass, fresh or frozen
2 shallots
4 cloves garlic
1 to 2 fresh red chillies, sliced
1 thumb-size piece galangal or ginger, thinly sliced
1/2 teaspoon turmeric
2 tablespoons ground coriander
2 teaspoons cumin
3 tablespoons dark soy sauce (available at Asian food stores)
3 tablespoons fish sauce
6 tablespoons brown sugar (you need all of this)
2 tablespoons vegetable oil
18 chicken tenderloins or 1 kilogram chicken breast fillets, sliced thinly
1 cup fresh-tasting dry roasted peanuts, unsalted
1/3 cup water
2 cloves garlic, minced
1/2 teaspoon dark soy sauce
2 teaspoons sesame oil
1 - 2 tablespoons brown sugar, to taste
2 - 2 1/2 tablespoons fish sauce
2 tablespoons lime juice
1/2 teaspoon cayenne pepper
1/3 cup coconut milk
18 wooden skewers

Make the marinade by placing the lemongrass, shallots, garlic, chiles, galangal or ginger, turmeric, coriander, cumin, soy sauce, fish sauce, brown sugar, and oil in a food processor or chopper. Process well.


Place chicken in a bowl and pour the marinade over. Stir well to combine. Cover and allow to marinating for at least 2 hours but overnight if time permits.


Soak skewers in hot water for 30 minutes.

Meanwhile place remaining ingredients in a blender or food processor. Blend or process until sauce is smooth. If you prefer a runnier peanut sauce, add a little more water or coconut milk.  Place in a bowl.
 
 
Thread chicken onto the skewers leaving a quarter of the skewer empty to act as a handle when grilling or frying.

Grill or fry the satay, basting the first time you turn it with a little of the leftover marinade from the bowl. Depending on how thin your meat is, the satay should be done in 10 to 20 minutes.

 
Place satay sauce in the microwave on high for 1 - 2 minutes or until warmed through.

Serve with Thai jasmine rice and Thai peanut sauce for dipping.
 
Note:  This sauce tends to thicken as it sits so just add a little water or coconut milk to thin it out, as needed. Otherwise, it stores well if kept covered in the refrigerator for up to 2 weeks or you can place in the freezer.

Tuesday, August 1, 2017

Tatws A Chig yn y Popty (Meat and Potatoes in the Oven)

Many of you know that I was actually born in Wales many moons ago.  Our journey to Australia was born from a dream my parents had for a better life for them and their family.  And like other family members before us they embarked on the epic long journey across the waters to start a new life long adventure.

While I have grown most of my life in Australia, I am very passionate with my cooking especially when cooking recipes from my heritage and my childhood.  Tatws A Chig yn y Popty, translated to Meat and Potatoes in the oven, is one of my naughty all time favourites. I say naughty as there really isn't a low calorie version of this recipe and nor should there be as it would really take away the tradition from this dish.

Unlike most roast meat dishes there is not a gravy as such to accompany this meal - more like a rich broth that has envelope all the flavours into a juice that tantalizes the mouth and comforts the belly.  As this roast is cooked low and slow the meat is very tender and practically falls away from the bone.  Traditionally this dish uses lamb shoulder or the lamb flaps (ribs) but I guess it would be just as nice with any cut of meat.

With the vegetables placed under the meat while cooking they too take on the flavour of the meat juices and are a combination of tender and crispy depending on their placement within the roasting dish.


Tatws A Chig yn y Popty (Meat and Potatoes in the Oven)

Serves: 6 - 8
 
2kg shoulder lamb
1/4 cup oil
salt
freshly ground black pepper
2 cups water
1 kilogram potatoes, peeled and halved
1 kilogram carrots, peeled and cut in to large chunks
brown onions, peeled and quartered
 

Preheat oven to 150 degrees Celsius.

Season lamb with oil, salt and freshly ground black pepper ensuring that the lamb is completely covered. 

Place the lamb in a roasting tin and add the water.

Cover with foil and roast for 1 hour.

Remove from oven and place the meat on a plate. Add the potatoes, carrots and onions to the baking dish, mixing to ensure all are covered with remaining juices.  Place the lamb on top of vegetables, cover with foil and cook for a further 1½ - 2 hours, or until meat is tender.

Remove foil and cook for a further 30 minutes at 200 degress Celsius to crisp up the lamb and the top of the vegetables.

Serve the lamb sliced, with the potatoes, carrots and onions accompanied with steamed vegetables and crusty bread to mop up the juices.

(Click here for a printable version of this recipe)


Tuesday, July 25, 2017

Zucchini and Bacon Muffins

Well I baked something sweet this morning and thought I may as well keep it going while the oven was on and flour was all throughout the kitchen... so I thought I would bake something savoury.  I had some zucchini that needed using so that was going to be the star ingredient.

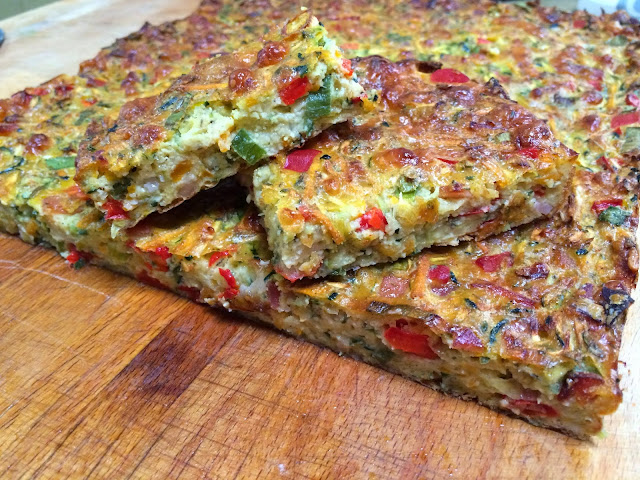
I often make a Zucchini, Bacon and Thyme Slice but this time I thought I would make muffins, just for something different, with the idea that the family may just eat them for breakfast or take them to work or school for lunch.

Jam packed with the goodness of vegetables, lots of zucchini, carrots and onions, along with cheese and a delicate hint of sweet chilli sauce along with everyone's favourite bacon I cannot believe how light these muffins are. Not to mention an easy muffin to make.

Sitting here, watching these fluffy light yet flavoursome muffins cool I am actually not quite sure if there will be any left for tomorrow??  Maybe I had better get dinner cooked....


Zucchini and Bacon Muffins
(Recipe adapted from Best Recipes)
 
Makes: 12

1 tablespoon low-fat butter
1 onion diced
4 short-cut bacon rashers
2 carrot medium grated
1 zucchini large grated
3 large egg
1/4 cup light thickened cream
1/3 cup parmesan cheese grated
2/3 cup tasty cheese grated
1 tablespoon sweet chilli sauce
2/3 cup self-raising flour sifted
salt
ground white pepper 

Melt butter and cook onion and bacon until soft. Add zucchini and carrot and cook until soft. Allow to cool.

In a separate bowl, beat eggs. Mix in cream, both cheeses, sweet chilli sauce and salt and pepper.

Add cooled bacon and vegetable mixture and stir.

Add sifted flour and stir.

Preheat oven to 180 degrees Celsius.

Pour into a greased muffin pan and bake for 25 minutes until brown and cooked through.


(Click here for a printable version of this recipe).