Sunday, October 9, 2016

Spice Roasted Pumpkin and Ricotta Brushetta

OMG I don't think I have ever mentioned on here that my favourite place to go to enjoy fresh farm produce and wine is Green Olive at Red Hill, right here on the Mornington Peninsula.  Noel and I actually attended a sausage making class there and enjoyed ourselves so much that we often go there just to enjoy their tapas style menu and sit, relaxing, enjoying the views which look over the winery,  the paddocks normally full with sheep grazing and the dam with the ducks waddling about.  (I have added some of our recent photos after the recipe.)

Why is this bruschetta so enjoyable?  To be honest I would never have strayed away from the traditional bruschetta made with tomatoes, red onion and feta until we went to Green Olive.  Roasted Pumpkin with cumin until tender, slightly mashed and served on crusty bread with ricotta.  It makes your taste buds dance - trust me!

Now the chefs at Green Olive actually serve this magnificent treat with Salsa Verde but we did not have this one hand (or the ingredients) so I improvised and drizzled balsamic glaze over the toppings.  It was still very nice (however if you live near the Mornington Peninsula do yourself a flavour and visit Green Olive).
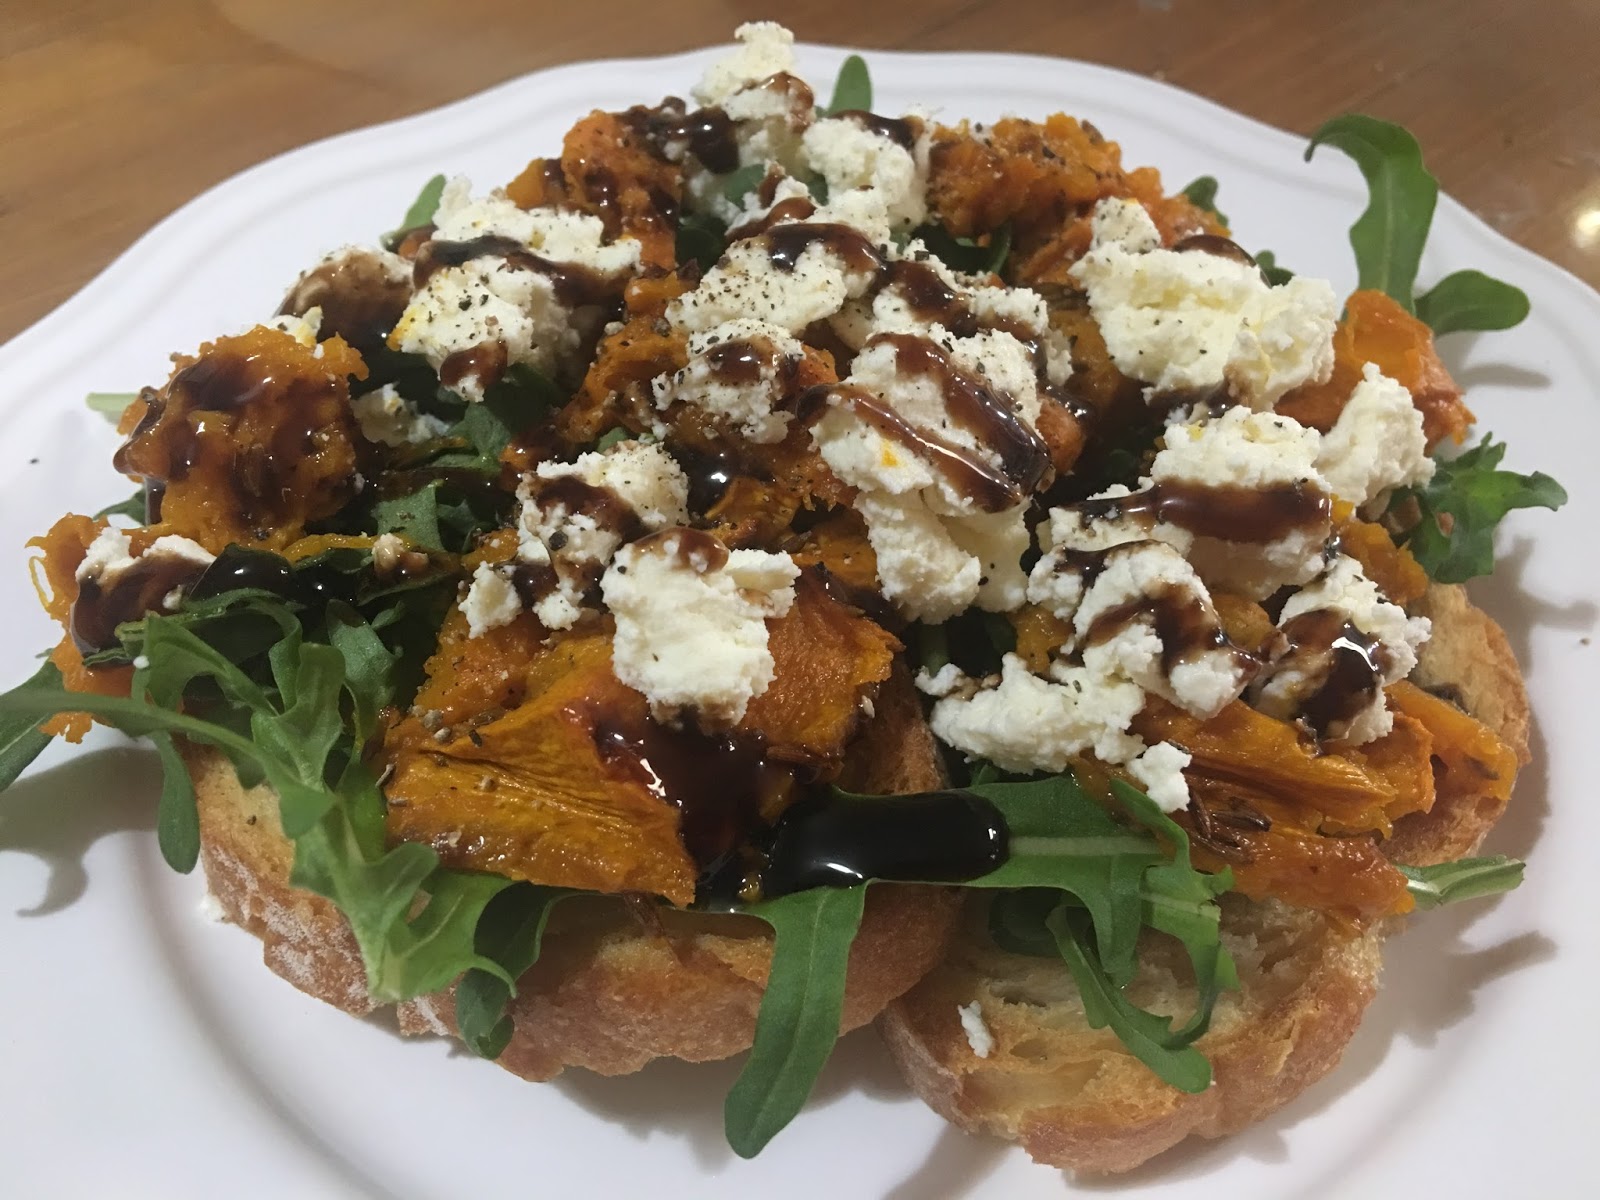

Spice Roasted Pumpkin and Ricotta Brushetta
(recipe adapted from Green Olive)

Serves: 4

250 grams Jap pumpkin, peeled and diced large
cooking spray
2 tablespoons cumin seeds
8 slices crusty bread
olive oil
100 grams rocket leaves
100 grams fresh low fat ricotta
balsamic glaze, to drizzle

Preheat oven to 189 degrees Celsius.

Line a baking sheet with baking paper and spray with cooking spray.  Place pumpkin on baking tray in a single layer. Sprinkle with cumin seeds.  Spray pumpkin with a light layer of cooking spray.  Cook, turning once, for 20 - 25 minutes or until tender.  Remove from oven and allow to cool.

Meanwhile, preheat grill.  Brush with olive oil and place under the grill until lightly toasted.  Turn over and repeat with other side of bread.  Remove from grill.

Mash pumpkin lightly, retaining some shape and texture.

Place bread slices on serving plate or individual plates.

Place the rocket leaves on the bread slices.

Top evenly with pumpkin. 

Sprinkle ricotta randomly over the pumpkin.

Drizzle balsamic glaze over the bruschetta.

Serve immediately.

(Click here for a printable version of this recipe)


Saturday, October 8, 2016

Macaroni and Cheese with Bacon

Our princess Alexandria will eat pasta every day if we let her.  She enjoys pasta more than anything in the world.  As a special treat I thought I would cook one of her all time favourites - Mac and Cheese.  Of course, there had to be a twist.  I added bacon and onion to the mix to make it a one pot dish for her dinner.

This has to be one of the easiest pasta dishes to make - it's creamy and gooey texture screams comfort food with every mouthful.  The soft pasta is so tender it almost melts in your mouth and being enveloped with the cheesy sauce is just a perfect partnership but made more so tempting with bacon pieces scattered through the mix.  OMG - normally more than one serve is eaten.  Trust me you will be going back for more than seconds.....

Please note that you want to make more than the recipe - just simply double it.  Please resist adding more pasta and cheese!  Please resist the urge to add more pasta to stretch the recipe. You need a lot of sauce with that pasta.  As this is baked after both the pasta and sauce is cooked the pasta will continue to soak up the liquid while baking.  If you want a cheesier Mac and Cheese sprinkle more in between layers of pasta and on top - do not add extra cheese to the sauce as it will change the consistency in a bad way.


Macaroni and Cheese with Bacon
(Recipe adapted from Kitchen Treaty)

Serves: 6 - 8

250 grams macaroni or pasta elbows (or pasta of your choice)
cooking spray
1 brown onion, finely diced
150 grams bacon, diced (or more if desired)
3 tablespoons butter
1/4 cup all-purpose flour
1/2 teaspoon salt
1 dijon mustard
1/4 teaspoon black pepper
1/8 teaspoon smoked paprika plus more for sprinkling on top
2 1/2 cups skim milk
3 cups grated medium cheddar cheese

Boil the pasta until al dente, according to package directions. Drain and rinse with cool water to stop the cooking, and return to the pan you boiled it in. Set aside.

Spray a frying pan with cooking spray.  Heat over medium high heat.  Add onion and bacon.  Cook, stirring, for 5 - 8 minutes or until onion has softened and bacon starting to crisp.  Remove from heat and drain on paper towel.  Once cooled add to the pasta.

Preheat the oven to 180 degrees Celsius.

To a medium saucepan over medium heat, add the butter. When the butter has melted, add the flour, salt, mustard, pepper, and 1/8 teaspoon smoked paprika. With a wooden spoon or whisk, stir constantly for three minutes.

Add the milk in a thin stream, stirring constantly with a whisk. Continue to stir constantly until the sauce thickens, about 10-12 minutes.

Remove from heat and add 2 cups of the cheese, stirring until melted. Pour the cheese sauce over the pasta and toss gently until all of the pasta is coated.

Add half the pasta to a large casserole dish (I used a 20cm x 30cm baking dish). Sprinkle on half the cheese. Add the rest of the pasta. Sprinkle on the rest of the cheese, then dust lightly with the smoked paprika.

Bake for about 25-30 minutes, until the mac and cheese starts getting a slightly dry and a tiny bit brown on top.

Serve or eat straight from the casserole dish LOL.


(Click here for a printable version of this recipe)

Tuesday, October 4, 2016

Chilli Con Carne Tortilla Stack

Mexican is always one of my go to comfort foods but then again so is Chinese, British - oh who am I kidding most food is my comfort food!!  What can I say as you have probably gathered I love food, not just eating but cooking whether its following a recipe and making it up as I go along.
 
With that being said let me start this again...
 
Mexican is one of my go to foods when I want to cook something so full of flavour and something that is generally quick and easy.  This Chilli Con Carne Tortilla Stack is a recipe that covers both taste and fits perfectly into a midweek wonder.
 
Layers of the soft flour tortillas and a slightly spicy sauce filled with meat, vegetables and kidney beans make for a different dish rather than taco's or burritos.   I use our Homemade Taco Seasoning, which is hotter than the packet mix, which needs to be half the packet amount.  You can however, use more and enjoy a spicier version.
 
This simple yet flavoursome meal will definitely please and will have your family asking you for more.... mine enjoy it that much that I actually make two every time.


Chilli Con Carne Tortilla Bake

Serves: 4

1 tablespoon olive oil
1 onion, finely chopped
2 cloves garlic, crushed
500 grams extra lean beef mince
15 grams homemade taco seasoning or 30 grma packet taco mix
2 x 410 gram can diced tomatoes
420 gram can red kidney beans, drained
1 cup water
1 green capsicum, diced
1 red capsicum, diced
½ cup frozen corn kernels
Salt
Freshly ground black pepper
Cooking spray
8 extra light flour tortillas/burritos
200 gram jar mild taco sauce or salsa
1 cup grated reduced fat tasty cheese

Preheat oven to 200 degrees Celsius.

Heat oil in a non-stick frying pan over medium heat. Add onion and garlic. Cook, stirring occasionally, until soft.

Add mince and taco seasoning. Cook, stirring, for 5 minutes, or until browned.

Add tomatoes, beans, water, capsicum and corn. Cook, stirring occasionally, for 15 to 20 minutes, or until capsicums are soft. Season to taste with salt and pepper.

Line a 22cm deep spring form pan with baking paper and spray with cooking spray. Place one tortilla at the base of the spring form pan. Place two ladleful's of the beef mixture in pan. Top with another tortilla. Continue until the top layer is the last tortilla.

Top stack with taco sauce or salsa and sprinkle with cheese.

Cook in oven for 20 minutes or until heated through and cheese is melted and golden. Cool in pan for 10 minutes. Place on serving dish and remove spring form pan sides.

Serve with mixed salad leaves, sour cream and extra salsa if desired.


(Click here to get a printable copy of this recipe)

Sunday, October 2, 2016

Carrot Cake with Cream Cheese Icing

I love baking - it's wonderful to be able to get lots of different ingredients and put them in a big bowl, make a batter and cook only to find the outcome to be a moist soft cake that just screams homemade. I can walk passed cakes in shop windows but seldom manage to resist something that has been freshly baked with love and effort.

On a recent trip to Ikea in Springvale Alex was upset that there was no longer any carrot cake in the cafe - it was one of her (and my) favourite treats from the cafe.  We have to stop at the cafe which is half way (it's actually half way in every Ikea store) as it's really hard work shopping at Ikea.  This time she had a princess cake after her meatballs so she was still happy.

I decided, after reading so many versions of carrot cake over the years, that I give it a go and treat Alexandria to her favourite cake of all time.  Unsure on which was the best recipe to use as there are so many different ones out there strangely a recipe popped up in my Facebook news feed and thought this is the one that I am meant to cook.  So thanks to Canadian Living Magazine I present to you Carrot Cake with Cream Cheese Icing.

The cake is so moist - every mouthful was a pleasure to eat.  The combination of carrots, pineapple and walnuts mixed with the cinnamon and the nutmeg was heaven and actually reminded me of days long ago when I was visiting my gorgeous friend Debbie and her family in Mississauga, Canada.  Ahhhh memories......

The velvety cream cheese icing was delicious with a hint of real vanilla.  I don't ever use the imitation vanilla essence. I always use Queen Natural Vanilla Concentrate Extract.  It is a lot stronger and half the quantity is only needed.  It has a nicer and more noticeable natural vanilla taste than the artificial flavour of the essence.  Once you use it in baking you will not use the essence again.

Sprinkled with some more crushed walnuts and you will really enjoy treating yourself to this delicious cake..... 


Carrot Cake with Cream Cheese Icing
(Recipe sourced from Canadian Living Magazine)

Serves: 10 -12

2 cups plain flour
2 teaspoon baking powder
2 teaspoon cinnamon
1 teaspoon baking soda
3/4 teaspoon salt
1/2 teaspoon nutmeg
3/4 cup granulated sugar
3/4 cup packed brown sugar
3 eggs
3/4 cup vegetable oil
1 teaspoon vanilla
2 cups grated carrots
1 cup drained crushed canned pineapple
1/2 cup chopped walnuts (or pecans if preferred)
250 gram package cream cheese, softened
1/4 cup butter, softened
1/2 teaspoon vanilla
1 cup icing sugar
1/4 cup crushed walnuts for decoration (if desired)

Grease and line a 22 cm round cake tin (or 2 smaller ones) set aside.

In large bowl, whisk together flour, baking powder, cinnamon, baking soda, salt and nutmeg. In separate bowl, beat together granulated and brown sugars, eggs, oil and vanilla until smooth; pour over flour mixture and stir just until moistened. Stir in carrots, pineapple and pecans. Spread in prepared pan.

Bake in center of 180°C oven for 40 minutes or until cake tester inserted in center comes out clean. Let cool in pan on rack.

In bowl, beat cream cheese with butter until smooth. Beat in vanilla. Beat in icing sugar, one-third at a time, until smooth. Spread over top of cake.

Sprinkle with crushed walnuts for decoration.

(Click here for a printable version of this recipe)

Saturday, October 1, 2016

Oven Baked BBQ Beef Ribs

To say that we really enjoy pork ribs is an understatement - this house goes mad for them.  However there is also a sneaky admiration for thick cut beef ribs (or short ribs as they can be known by). There is nothing more enjoyable than slow cooked beef ribs that are tender and melt in your mouth.  Now normally I would marinade them in an Asian influenced style sauce and slow cook for 8 hours in my trusty slow cooker but this time I decided to try an American BBQ based recipe and I am so glad that we did.

Half way through making the dry rub, when I realized that I didn't have any Cajun Seasoning and had to make my own (lol a recipe within a recipe), I knew just from the combination of the herbs and spices that these beef ribs were going to have so much flavour not to mention a little kick of heat with having both chilli and cajun seasoning in the mix.  I marinade these overnight to allow the flavours to develop.

Slow cooked in the oven on a very low temperature for 4 hours ensured that these nice plump beef ribs were tender and fell off the bone.  The addition of the BBQ sauce in the last step not only added the sweetness but also the stickiness that gave you a reason to lick your fingers to ensure you savour every mouthful.

It was the AFL Grand Final today and these ribs would be our dinner after watching the match. Not really an traditional Aussie meal (we ate party pies during the game) but OMG I enjoyed these ribs, and so did the others, and will definitely be cooking them again.     


Oven Baked BBQ Beef Ribs
(Recipe adapted from Diva's Can Cook)

Serves: 8

2 kilograms meaty beef ribs
 2 - 3 tablespoons Liquid smoke (optional)
2-4 tablespoons olive oil
2 tablespoon garlic powder
2 tablespoon onion powder
2 tablespoon cajun seasoning
4 tablespoon brown sugar, packed
1 teaspoon chili powder
2 teaspoon salt
2 teaspoon paprika
4 teaspoons oregano
 4 tablespoons of your favorite BBQ Sauce

Rinse ribs and dry with paper towels
.
Douse dry ribs with liquid smoke if using.

Lightly coat ribs in olive oil.

Mix together seasoning and sprinkle generously over ribs, front and back.


Massage the spices into the ribs, adding more olive oil to help distribute the spices well if needed.


Place the ribs in a large ziplock bag or covered bowl and marinate in the fridge for 1-2 hours or overnight.

Preheat the oven to 120 degrees Celsius.

Place the ribs on a foil lined baking tray in a single layer.

Add another piece of foil on top to create a pouch for the ribs to cook in. Be sure to seal the edges of the foil so that it's tight and steam won't seep out.

Bake on the middle rack of 3½ -4 hours. Check on it after the 3½ hour mark.


When the ribs are done to your liking, drain off the excess fat.

Brush the ribs with desired amount of BBQ sauce.

Grill until the sauce is sticky.


Serve with oven baked potato wedges and coleslaw.

(Click here for a printable version of this recipe)

Friday, September 30, 2016

Homemade Cajun Seasoning

Oh my time flies when you are having fun or if you are just out right busy!!

Apologies for my absence - life has just been one massive juggle for the last few months. One thing after another and I found myself saying many times "I'm too old for all this shit" but we all pulled through it together as a family.  Sanity wise I am ok (well at least I think I am), a little exhausted but needing to control the stress better and also actually let myself relax every now and then.  

As you can only imagine I have so many recipes banked up to share with you so hopefully you will enjoy what you see while I am not only catching up but creating new meals doing what I like best - enjoying myself in the kitchen.

While I was preparing BBQ Beef Ribs for dinner and gathering all the ingredients for the dry rub I was missing Cajun Seasoning.  Rather than get in the car and drive to the shops just for 2 tablespoons of mixed herbs and spices I decided to make my own.  I already make my own Homemade Taco Seasoning and that is damn good, even if I say so myself.

It is not a hard process at all - simply measure and mix!  Thankfully I had all the ingredients to make the recipe to use in the original recipe I had planned to make.  LOL what a laugh this process has been - I hope these BBQ Beef Ribs are bloody good!  Will let you know tomorrow as they are marinating overnight.


Homemade Cajun Seasoning
(recipe sourced from Allrecipes.com)

Makes 1/4 cup

2 teaspoons salt
2 teaspoons garlic powder
2 1/2 teaspoons paprika
1 teaspoon ground black pepper
1 teaspoon onion powder
1 teaspoon cayenne pepper
1 1/4 teaspoons dried oregano
1 1/4 teaspoons dried thyme
1/2 teaspoon red pepper flakes (optional)

Stir together salt, garlic powder, paprika, black pepper, onion powder, cayenne pepper, oregano, thyme, and red pepper flakes until evenly blended.


Store in an airtight container.

(click here for a printable version of this recipe)

Tuesday, July 12, 2016

Persian Slow Cooked Lamb with Pomegranate Glaze

A Sunday night tradition for as long as I can remember is a roast dinner.  Even when I was a little girl, Sunday dinner meant Roast Meat and Potatoes, lots of vegetables and a nice thick gravy (often mopped up with a piece of bread if I was ever in a naughty mood - so nearly every time we had roast LOL)!  Growing up my parents loved to be surrounded by our families - something I also treasure dearly.  I remember the table always being full and lots of chatter and laughter - everyone enjoying themselves and the food......
 
Now, in my forties, I still look forward to a Sunday roast.  Although during footy season it's a lot harder to organise it with our commitments with the kid's footy.  Mainly due to the time constraints and also the Junior club (where our daughter plays) hold presentations/dinner every Sunday night.
 
I was really wanting a roast dinner…. I wanted a roast dinner badly as it had been so long. So totally out of character for me I cooked a roast on a Tuesday night… yep midweek! Sadly, it was due to darling daughter being sick but it gave me the opportunity. Not only was I going to seize that opportunity but I was going to be adventurous about it.
 
I found a recipe in a new Weight Watchers Cook Book which got my attention – it was cooked in a slow cooker, had pomegranate as one of the ingredients and had a totally different twist to any roast lamb I have ever cooked. I have only ever cooked on roast in a slow cooker and it was a leg of lamb and I did not enjoy it. Only to find out that I should have browned it first and done this and done that. I was very disappointed.
 
When I mention cooking a Roast to my family – they automatically think of the traditional roast we grew up loving. I told them how I was going to serve them up lamb tonight I received some interesting looks…. Needless to say I was very determined cooking this dinner – although I cheated!! Well not really cheated but I cooked it in the oven slowly (as the recipe does say) instead of using the slow cooker. Note to self – stop being a chicken and try roasting in the slow cooker again!!
 
Anyhow, what can I say the flavours on this dish were magnificent. Persian, I am guessing, is very similar to that of Moroccan and all the other middle Eastern cuisines. I have never cooked a Persian meal before. The use of all the spices made the lamb bursting with a tantalising flavour followed by a taste of sweetness from the pomegranate juice. I also loved the garnish of sweet and sour fresh pomegranate arils, nuttiness of the almonds and the salty feta cheese. Served with couscous and vegetables this actually was a wonderful and easy roast to cook and even more so as it’s achievable to do so midweek.


Persian Slow Cooked Lamb with Pomegranate Glaze
(Recipe sourced from Weight Watchers Real Food Slow Cookbook)
 
Serves: 8
SmartPoints per serve: 8

3 brown onions, cut into wedges
4 garlic cloves, chopped
400 gram can crushed tomatoes
½ cup chicken stock
½ cup pomegranate juice
2 orange rind strips
4 fresh or dried bay leaves
½ teaspoon ground cinnamon
2 teaspoons ground cumin
2 teaspoons ground coriander
2 teaspoons dried oregano
2 kilograms lean leg lamb, fat trimmed
2 teaspoons honey
¼ cup coarsely chopped fresh flat leaf parsley
2 tablespoons fresh pomegranate arils (seeds)
50 grams reduced fat feta cheese
1 tablespoon toasted almonds

Place onion, garlic, tomatoes, stock, juice, rind and bay leaves in a 4.5 litre (18 cup) slow cooker. Combine cinnamon, cumin, coriander and oregano in a small bowl. Rub lamb with spice mixture. Place lamb in slow cooker.

Cook, covered, on low for 7 hours (or high for 3 ½ hours).

Transfer lamb to a plate and cover to keep warm. Skim excess fat from cooking juices and discard bay leaves. Transfer juices to a saucepan and bring to the boil. Boil uncovered for 10 – 12 minutes or until sauce has thickened.

Stir honey into sauce and spoon over lamb. Sprinkle with parsley, pomegranate arils, feta and almonds to serve.

Serve with 0sp mixed salad leaves or steamed vegetables. You could serve with couscous allowing 3 points per ½ cup.

To cook in the oven:

Preheat oven to 160 degrees Celsius or 140 degrees Celsius fan forced and bake lamb mixture in a covered baking dish for 2 ½ hours. Uncover and bake for 30 minutes or until very tender.


(Click here for a printable version of this recipe)

Monday, July 4, 2016

Cowboy Lasagne

Well howdy partner.....

Who would have thought that a traditional Italian classic could have such an American twist to it?  I know that there are lots and lots of different lasagne recipes out there which have all different takes on the meal that has comfort food written all over it!!!

Once I had read this recipe I knew that the whole family would LOVE it... and they did. 

So what makes this lasagne dish different to every other one?  Well you have to eat it wearing a 10 gallon hat. No only kidding.  Amongst the rich meat sauce is pepperoni - yes that's right pepperoni!!  And oh my God did it taste good....

The pepperoni surprisingly gave the sauce such a nice flavour and was not as overpowering as I thought - adding an element of spices as that found on a pizza. 

Jam packed with vegetables plus the addition of fresh herbs this lasagne was definitely worth trying... give it a go.


Cowboy Lasagne
(Recipe adapted from Trisha's Southern Kitchen)

2 tablespoons olive oil
1 medium onion, finely chopped
2 cloves garlic, crushed
500 grams lean beef mince
500 grams lean pork mince
1/2 cup tomato paste
700 gram jar passata
250 grams sliced pepperoni
800 grams diced tomatoes
2 tablespoons fresh rosemary chopped
2 tablespoons fresh tarragon chopped
2 tablespoons fresh basil chopped
1 tablespoon dried oregano
2 carrots grated
2 zucchini grated
1 red capsicum, diced
1 green capsicum, diced
2 cups water
salt
freshly ground black pepper
3 tablespoons butter
3 tablespoons plain flour
4 cups skim milk
2 teaspoons Dijon mustard
ground white pepper
500 gram packet fresh lasagne sheets
1 cup mozzarella cheese, grated
1 cup grated Parmesan
 
In a large frying pan, over medium heat, add the oil and cook onion and garlic until softened. 
 
Add minced beef and pork, breaking into lumps while cooking. Cook until lightly browned and cooked through. 

Add the tomato paste and cook for a further 5 minutes continuously stirring. 

Add passata, pepperoni, tomatoes, rosemary, tarragon, basil, oregano, carrots, zucchini, capsicums and water. Bring to a simmer and simmer, uncovered, for 30 minutes, stirring occasionally.  Season to taste with salt and pepper.

Meanwhile place a large saucepan over medium heat.  Add butter and heat until fully melted.  Add flour.  Using a wooden spoon, mix until a roux is formed.  Add milk and mustard, stir continuously with a whisk until lump free and starting to thicken.  Season with white pepper.  Remove from heat.

Preheat the oven to 180 degrees Celsius.

In the bottom of a large rectangle casserole dish (approximately 22 x 33 cm) spread a layer of the meat sauce. Top with a layer of the lasagne sheets.  Add another layer of meat sauce and then spread with half of the white sauce. Top with another layer of lasagne sheets.  Add another layer of meat sauce.  Top with a final layer of lasagne sheets.  Spread remaining white sauce on the lasagne sheets and sprinkle with cheeses.

Bake until lightly browned and bubbling, about 40 minutes. Allow the dish to stand for 15 minutes before serving. Cut the lasagne into 12 portions and serve.
 
 
(click here for a printable version of this recipe)

Tuesday, June 28, 2016

Indonesian Satay Chicken Curry

Well there is no secret that curry is somewhat a staple in the Murray household so when I came across this recipe I had to put it on the menu this week.
 
One of the highlights of this recipe is that you actually make the base paste yourself rather than using a shop brought jar one.  There is something so much nicer make it from scratch rather than using the premix with all the preservatives and at times, lots of hidden sugar and salt. However, saying this, if you prefer you could use purchased rending curry paste instead of making your own. 
 
This curry had plenty of flavour and I loved the combination of the spices, the fresh coriander and the lime juice.  It made my taste buds dance.
 
While it was enjoyed next time I make this dish, which I presume will be soon, I will definitely make some changes,  I would use chicken thigh fillets instead and reduce the amount of stock as I found it had too much liquid and wasn't a thick curry.  I think a lot of water came from the pumpkin.
 
 
Indonesian Satay Chicken Curry
(recipe adapted from Weight Watchers Everyday Wholefood)
 
Serves: 4
SmartPoints per serve: 4
 
2 teaspoons olive oil
500 grams lean chicken breast fillets, fat trimmed cut into 3 cm pieces
1/3 cup Indonesian Satay Curry paste (refer recipe below)
2/3 cup chicken stock
1/3 cup light coconut milk
400 grams pumpkin, cut into 2cm pieces
1 tablespoon lime juice
2 teaspoon wheat-free tamari (Japanese Soy Sauce) or soy sauce
150 grams snow peas
3/4 cup fresh coriander leaves
lime wedges
 
Heat oil in a large wok or saucepan over medium-high heat.  Cook chicken, stirring for 5 minutes or until browned.  Transfer to a plate.
 
Cook curry paste, stirring, for 1 minute or until fragrant.  Add stock, coconut milk, pumpkin, lime juice and tamari.  Reduce heat and simmer, covered, for 5 minutes. 
 
Add chicken and simmer, covered for 10 minutes or until chicken is cooked through.  Add peas and simmer, uncovered until vegetables are tender.  Stir in coriander and serve with lime wedges.
 
If desired serve with rice adding 4 SmartPoints for 1/2 cup.
 
 
 Indonesian Satay Curry Paste
(recipe sourced from Weight Watchers Everyday Wholefood)
 
Makes: 3/4 cup
Smart Points per tablespoon: 0
 
2 teaspoons ground coriander
1 teaspoon ground turmeric
1/2 teaspoon ground cinnamon
8 fresh curry leaves
1/2 red onion
1 lemongrass stalk, coarsely chopped
3 garlic cloves, chopped
3 cm piece fresh ginger, coarsely chopped
1 tablespoon lime juice
2 teaspoons sambal oelek
1 tablespoon natural peanut butter
2 tablespoons water
 
Heat a small non-stick frying pan over medium heat.  Cook coriander, turmeric, cinnamon and curry leaves, stirring, for 1 minute, or until fragrant.
 
Process spice mixture in a small food processor or blender with onion, lemongrass, garlic, ginger, lime juice, sambal oelek, peanut butter and water until smooth and combined.
 
Store curry paste in an airtight container in the fridge for up to 1 week or in the freezer for up to 2 months.  It is great for chicken, fish and vegetable curries.
 
 If using premade Rendang paste the smartpoints value per serve of the curry would be 5.

(Click here for a printable version of this recipe)

Monday, June 20, 2016

Oven Baked Leek and Prosciutto Risotto with Gummy Shark

I have had it in my head for the last few weeks that I wanted to make a risotto.  Sadly, as Masterchef Australia has labelled risotto the "death" dish of their competition, I have to say every past attempt that this has been my "death" dish also.  Death obviously not from dying but from failing to create the dish as intended.  Determined as usual I decided to give an oven baked version of risotto a try in hope to put all my epic failed attempts of cooking one of our favourite dishes behind me.
 
There is nothing better than a plate/bowl full of creamy soft rice that is full of flavour especially when it's home cooked.  Risotto, originating in Italy, can be served as an entrée, main or even a dessert and while there are an abundance of traditional recipes its a dish that can be made using what ever ingredients you have available.

As I planned to serve this risotto with some thick gummy shark fillets I wanted I knew that I wanted something that was bold enough to compliment the fish but not overpower it's flavour.  A balanced combination of leek and prosciutto with a hint of tarragon and some sweetness from the corn kernels made this risotto a perfect partner for the tender gummy shark which was laced with a hint of smokiness.

I challenge anyone who is, like me, haunted by past failed attempts to give this oven baked method a try - you won't be disappointed.


Oven Baked Leek and Prosciutto Risotto with Gummy Shark
(Recipe adapted from Weight Watchers Food You'll Love)
 
Serves: 6
 
2 teaspoons olive oil
1 leek, finely sliced
80 grams prosciutto, fat trimmed, thinly sliced
2 garlic cloves, crushed
1 tablespoons chopped fresh tarragon leaves
250 grams Arborio rice
150 grams cherry tomatoes, halved
150 grams corn kernels
4 cups chicken stock
1/2 teaspoon ground white pepper
6 x 200 gram pieces gummy shark or fish of your choice
2 teaspoons smoked paprika
cooking spray
4 tablespoons reduced fata thickened cream

Preheat oven to 180 degrees Celsius or 160 degrees Celsius fan forced.

Heat oil in a large flameproof casserole dish over medium heat.  Add leek and prosciutto and cook, stirring, for 5 minutes or until prosciutto is crisp and leek has softened.  Add garlic and tarragon and cook, stirring, for 30 seconds.  Add rice, tomatoes and corn and stir to combine.

Add stock and bring to the boil, stirring occasionally.  Cover and bake in the oven for 25-30 minutes or until rice is just tender.

Meanwhile sprinkle fish with paprika.  Lightly spray a large non stick frying pan with oil and heat over medium high heat.  Cook fish for 4-5 minutes each side or until just cooked through.

Remove risotto from oven and stir in the cream.  Serve fish with risotto.


Saturday, June 11, 2016

Italian Sausage and Cheese Jalapeno Poppers

There is nothing quite like a quick late night snack.... we had been busy all week and when it was finally the weekend - and being Saturday night I thought I would treat us with one of our favourite treats... JALAPENO POPPERS!!!
 
Jalapeno Poppers have become a regular feature in our house.  Both hubby and I love jalapenos and experimenting with different fillings.  There are so many different varieties of these unbelievable tasty morsels - just Google you will be surprised.  I loved the idea of putting sausage and cheese together to give these some meatiness but not take away from the jalapeno itself.
 
These tasty yet sometimes hot nibbles are just what the doctor ordered.  Tonight we tried filling them with Italian Sausage and creamy cheese.  Very simple ingredients but an abundance of flavour.  The Italian Sausage filled with fennel, garlic and chilli made it easy as I didn't have to add anything else to the mix except for the cream cheese and some grated parmesan.
 
Trust me these did not last long... didn't even make it to a fancy platter!! OOPS!!


Italian Sausage and Cheese Jalapeno Poppers
(Recipe adapted from A Taste of Home)

Makes: 40
 
500 grams Italian sausages
cooking spray
250 grams cream cheese, softened
1/2 cup shredded Parmesan cheese
20 large jalapeno peppers, halved lengthwise and seeded

Preheat oven to 220 degrees Celsius.

Heat a frying pan over medium heat and spray with cooking spray. Cook the sausage until no longer pink; drain.

In a small bowl, combine the cream cheese and Parmesan cheese; fold in sausage.

Line two large baking trays with baking paper. 

Spoon about 1 tablespoonful into each jalapeno half.  Place on baking tray in a single layer.

Bake, uncovered, 15-20 minutes or until filling is lightly browned and bubbly.

(Click here for a printable version of this recipe)

Thursday, June 9, 2016

Prosciutto, Thyme and Brie Pizza

As you all know having fun in the kitchen is one of my greatest pleasures in life.... so it's only natural I love coming up with different pizza toppings when we decide to have homemade pizza for dinner.  Sadly my husband has to deal with my indecision every single time. 
 
He is bombarded with "Do you think these flavours will taste good? What about putting these two items together?" along with "I just don't know what I want this time?"... he gets so frustrated with me.  The last time it was decided to have pizza he sent me a text early in the morning telling me to start thinking what topping I wanted on my pizza!!!

Tonight I decided to try some very basic ingredients but ones that were bold on flavours.  Prosciutto and Brie both salty on their own but the smoky pork complimented the creaminess of the cheese.  Of course the thyme just laced it perfectly and with the addition of a few vegetables made this one of my favourite pizzas......
 

Prosciutto, Thyme and Brie Pizza

Serves: 4
 
One serve of Noel's Pizza Base or pizza base of your choice
cooking spray
2 tablespoons tomato paste
1 large tomato, sliced
1/2 brown onion, sliced
100 grams button mushrooms, sliced
50 grams thinly sliced prosciutto, torn into smaller pieces
100 grams brie, sliced
3 - 4 springs of fresh thyme, leaves removed
50 grams of fresh rocket leaves

Preheat pizza oven or oven to 220 degrees C.

Spray pizza tray with cooking spray.

Stretch pizza dough on to the pizza tray or place pita bread on the pizza tray.

Spread tomato paste all over the base.

Top with tomato, onion, mushrooms and prosciutto. Place brie evenly over pizza and sprinkle with thyme leaves.

Cook in oven for 15 - 20 minutes or until cheese is bubbling and vegetables are cooked through.

Serve topped with fresh rocket.

(Click here for a printable version of this recipe)


Margherita with Onion and Chilli Pizza

While there is only two of us eating pizza tonight we both like to come up with our own creations and always make two pizzas.
 
Noel tends to try and keep his toppings basic but I have to say that they are always full of flavour and super yummy.  Adding onion, chilli and oregano to his Margherita put such a different spin on the good old cheese and tomato pizza that everyone loves.
 
I do have to admit one thing though - my man is getting really good at making pizza bases.


Margherita with Onion and Chilli Pizza

Serves: 4
 
One serve of Noel's Pizza Base or pizza base of your choice
cooking spray
2 tablespoons tomato paste
1 clove garlic, crushed
1/2 brown onion, sliced
1/2 bunch of fresh basil, leaves removed
8 bambino Bocconcini balls
2 teaspoons chilli flakes
1 teaspoon dried oregano

Preheat pizza oven or oven to 220 degrees C.

Spray pizza tray with cooking spray.

Stretch pizza dough on to the pizza tray or place pita bread on the pizza tray.

Mix tomato paste with garlic.  Spread tomato paste all over the base.

Top with  onion and basil leaves. Place Bocconcini evenly over pizza and sprinkle with chilli flakes and oregano.l

Cook in oven for 15 - 20 minutes or until cheese is bubbling and is cooked through.

(Click here for a printable version of this recipe)

Wednesday, June 8, 2016

Sticky Asian Beef Ribs

Slow cooking means a lot of different things to different people.  I guess their biggest bragging right is that this way of cooking provides busy people with easy meals to feed their family.  Sometimes you just throw anything and everything in to the vessel and pray that it tastes nice when you get home from work.  Other times the recipe is made with precision following a recipe. 
 
This was definitely the later - following a recipe and it's techniques.  Not the easiest of slow cooker dishes, considering it takes several days but well worth the effort.  It pays off and you will not be disappointed.
 
When it comes to cooking with meat I know that slow cooking will produce meat that is generally melt in your mouth or fall apart on the fork.  These Sticky Beef Ribs were exactly that.  Just lifting off the bone and considering the size of the ribs (the thickness of the meat) every mouthful was so tender and mouth watering,
 
Flavour wise - Asian infused with elements of sweet, salty and chilli... OMG!!!  I could have eaten plate after plate.


Sticky Asian Beef Ribs

(Recipe adapted from Not Quite Nigella)
 
Serves: 6 - 8

2 kilos beef short ribs
1 1/2 cups soy sauce
2 cups brown sugar, divided into two
1 inch piece of ginger, peeled and thinly sliced
3 star anise
2 large red chilli, sliced
2 cups water
1 tablespoon rice wine vinegar
1/2 cup freshly chopped coriander leaves
2 large red chilli, extra, sliced
1/2 cup chopped raw peanuts

Mix the soy sauce, 1 cup of the brown sugar, 1 teaspoon of salt, garlic, ginger, star anise and chilli in a bowl and then marinate the beef ribs in the marinade for 1 hour. Drain the ribs, reserving the marinade for cooking.

Put the ribs straight into the slow cooker vessel. Mix the marinade with the 2 cups of water and add to the ribs. Cook on low setting for 8 hours.

Once cooked allow the slow cooker vessel to cool. Place in fridge overnight.  The next day, skim the fat off the top and reheat and serve with rice if you don't want to make the glaze.

If you are making the glaze, take 500ml of the liquid to make the glaze and place in a saucepan and heat with the extra cup of brown sugar and rice wine vinegar-taste and add salt if needed. Reduce down to a syrupy glaze. Heat the ribs in about 1 cup of the liquid and then brush with the glaze.
 
Serve garnished with sliced chilli, coriander and chopped peanuts. 

If desired also serve with steamed rice.

 
Visit Not Quite Nigella for different slow cooking options.


Tuesday, May 31, 2016

Vietnamese Caramel Chicken ( A Dash of Flavour's 600th recipe)

After the last year or so battling work loads, busy lives and being time poor I cannot believe that I have reached my 600th post.  Finally!!!  At times I have thought to myself I would have to stop blogging - the fear of not keeping up and not being able to regularly post worried me.  It's my nerdy hobby that I kept hidden even from my family but it's something that I find really enjoyable and in all honestly would love to spend more time focusing on it.  Thanks to everyone that still pops in to visit A Dash Of Flavour and a huge thank you to those that try recipes and leave me a comment.  I really appreciate every moment of support and your kind words.

So may I proudly present to you the 600th A Dash of Flavour recipe.....

There is nothing I enjoy more than experimenting with Asian cooking - except for eating it of course.  Actually who am I kidding?  I love experimenting with all foods!!

I think that the whole Asian cuisine is so diverse as it covers many countries, districts, cultures and even religions.  I believe that Caramel Chicken is of Vietnamese origin. It's actually a dish that none of us have ever eaten before - saying this we were all intrigued and excited about trying something this different.  I say this different and when it comes to dinners we often worry that some recipes will be sickly sweet.  We all adore Sweet and Sour Pork but only occasionally, all of us tend to order savoury style dishes in any cuisine.

This is a dish that covers many flavour angles - sweet (but not too sweet), sour, salty, mildly spicy and has the element of sticky!  Not to mention it is one of the easiest Asian dishes I have prepared in a long time.  My tip to ensure that Asian cooking is quick and easy is to ensure that everything is measured out before hand and that all the meat/vegetables are chopped ready to go.  As this wasn't a recipe that had millions of ingredients the preparation time was minimal also.

Served with steamed rice this basic dish was amazing - flavours totally out of this world.  Yes I have been told that I can cook this again.


Vietnamese Caramel Chicken
 
Serves: 6
 
1 tablespoon vegetable oil
1 kilogram chicken thigh fillets, trimmed and halved
2 red onions, sliced
2 teaspoons grated fresh ginger
3 cloves garlic, crushed
1 long red chilli, finely chopped (deseed to reduce heat if desired)
1/4 cup soy sauce
1/3 cup brown sugar, firmly packed
1 tablespoon fish sauce
1 tablespoon lime juice
fresh coriander leaves
2 tablespoons chopped roasted unsalted peanuts
1 long red chilli, sliced

Heat oil in a large wok over a medium to high heat.  Add chicken and cook in two batches.  Cook for about 2 minutes on each side or until golden brown.  Transfer to a bowl.  Reduce heat to medium.
 
Add onions to the same wok.  Stir fry for 2 -3 minutes or until starting to soften. 

Then add ginger, garlic and chilli.  Stir fry for 2 minutes or until fragrant.
 
Return chicken and juices to the wok along with the soy sauce.  Reduce heat to low.  Cover and simmer, for about 10 minutes, or until chicken is cooked through.
 
Increase heat to high.  Add sugar and stir fry for about  4 to 5 minutes, or until caramelised.  Stir in the fish sauce and lime juice.  Remove from heat. 
 
Served garnished with coriander leaves, chopped peanuts and sliced chilli, if desired. 


Monday, May 30, 2016

Blackberry and Apple Muffins

The smell that was filling our house while these were baking was definitely a comforting one... the smell of the sweetness and cinnamon reminded me of my childhood growing up with my Gransha always baking cakes for weddings and birthdays...  I remember the big pots of mixed cake mix sitting on the table in the front room.  He made cakes for all over the Valleys in South Wales and was well known for them.  Before that he was a chef in the British Army.  As a young girl I was guilty of eating the cake mix straight from the bowl before he had baked his cakes causing many of his cakes to be incorrect sizes.  He caught on to me quite quickly and before I knew it there was a lock on the front room door meaning no access unless he was with me.  I do honestly believe I found my love of baking from the times I spent with him.

Honestly our household isn't a cake eating one - lollies and chocolates do disappear quickly however.  I love baking and thankfully the great bunch of people I work with never complain when I turn up with a box of baked treats.  In fact I am often reminded of how slack I am if they are not regularly brought into work!  It makes me laugh especially when I see their faces when I arrive at work and they see that I have been busy the night before.  So far they have enjoyed all flavours that I have brought in which means it's a win-win situation - I get to bake and they get to enjoy homemade treats.
 
I am really enjoying reading recipes over at Sally's Baking Addiction, a magnificent website created by Sally (obviously) who lives in Philadelphia, USA, and does her website full time!!!  Something I could only ever dream about.  There are so many great recipes and stories to read.  Pop over and visit -  your mouth will water.
 
This recipe, which I adapted slightly to match ingredients I had on hand, was one that I have read and re-read.  I knew it would only be a matter of time before they were made.  The combination of blackberries, apple and of course, cinnamon was delicious.  The muffin itself was super moist and laced with maple syrup.  I love cooking with berries and they add a juicy element to the muffin.  Each mouthful was definitely a flavour burst.


Blackberry and Apple Muffins
(recipe adapted from Sally's Baking Addiction)
 
Makes: 12

Muffins
3 cups plain flour
1 tablespoon ground cinnamon
3 1/2 teaspoons baking powder
1/8 teaspoon baking soda
1/2 teaspoon salt
1 very large apple, peeled and diced into small pieces
1/2 cup soft brown sugar
1/2 cup light Greek style yogurt
1/2 cup vegetable oil (or applesauce if preferred)
1/4 cup pure maple syrup
2 large eggs
2 teaspoons vanilla extract
1 cup skim milk
1 cup fresh or frozen blackberries, chopped

Oat Streusel
3 tablespoons soft brown sugar
3 tablespoons old-fashioned rolled oats
1/2 teaspoon ground cinnamon

Preheat oven to 220 degrees Celsius.
 
Line a 12 muffin try with muffin pans. Set aside.

Toss the flour, cinnamon, baking powder, baking soda, salt, and chopped apples together in a large bowl until evenly combined. Set aside.

In a medium bowl, whisk the brown sugar, yogurt, oil, maple syrup, eggs, vanilla, and milk together vigorously until combined and smooth.
 
 Pour the wet ingredients into the dry ingredients and gently stir with a large spoon until combined. Do not over mix the batter.

To make the streusel toss the brown sugar, oats, and cinnamon together in a small bowl. Set aside.
 
Half fill each muffin tin. Top with a couple of blackberries, then layer with more muffin batter and a couple more blackberries until you've filled the muffin cups all the way to the top. Sprinkle each with streusel.

Bake the muffins at 220 degrees Celsius for 5 minutes. 
 
Leave the muffins inside the oven and turn the temperature down to 190 degrees Celsius.  Bake for another 15-16 minutes or until a toothpick inserted into the center of the muffin comes out clean.


Conchiglioni with Italian Sausage


One of the best things about pasta is that it's so versatile and there are many different types to choose from.  However the ultimate bonus about pasta is that it is nearly everyone's go-to comfort food.
 
There is always an air of excitement when the family know pasta is on the menu - pasta is always normally easy to prepare and easy to eat. 
 
This recipe was one of the easiest but flavour packing sauces I have made. In fact I cannot believe the pasta took nearly as long to boil as it did to make the sauce.  Minimal ingredients were used which is also a bonus.  If you do not have the Conchiglioni (large pasta shells) and pasta will be perfectly fine for this recipe.
 
The flavours of fennel, chilli, garlic and parsley were perfect with the pork mince - literally this was the insides of store-brought Italian sausages... yep you read right - store-brought sausages.  Some tinned tomatoes, cream and seasoning and voila - dinner is served!!
 
You must give this recipe a go.....


Conchiglioni with Italian Sausage
(Recipe adapted from Australian Women's Weekly)

Serves: 6
SmartPoints per serve: 14

1 kilogram Italian-style sausages
1 tablespoon extra virgin olive oil
4 cloves garlic, chopped finely
3 x 400g cans crushed tomatoes
2 tablespoons cream
2 cups loosely packed basil leaves
500g conchiglioni (large shell pasta, see Cook's Note)
1⁄3 cup finely grated parmesan cheese

Make a slit along the length of the sausages and remove sausage meat, discard skins.

Heat a large frying pan over high heat, coarsely crumble sausage meat into the pan and cook, stirring, until browned. Remove meat with a slotted spoon and drain on absorbent paper. Discard fat.

Heat oil in the same pan over low-medium heat, add garlic. Cook, stirring, for about 5 minutes, until fragrant but not coloured. Increase heat, add tomatoes and sausage meat; simmer, uncovered, for 10 minutes or until sauce is thick. Season well with salt and freshly ground black pepper. Stir in cream and half the basil.

Meanwhile, cook pasta in plenty of rapidly boiling, well-salted water until al dente; drain, reserving 1/2 cup of the cooking water. Add pasta to sauce mixture, stir to combine. Remove from heat, stir through parmesan. If mixture feels dry, add some of the pasta cooking water. Serve sprinkled with remaining basil leaves.