Tuesday, April 9, 2013

Veal Schnitzel with Spicy Pizzaiola Sauce

This dish was filled with an amazing flavour not to mention texture.  The veal is coated in crunchy Panko breadcrumbs served on top of a bed of fresh basil infused tomato pasta. 
 
A slight hint of the chilli was noticable but not overpowering in the pasta sauce which made a perfect bed for the yummy veal schnitzel.
 
Panko breadcrumbs are Japanese breadcrumbs and are available from Asian grocery stores or the Asian section in most supermarkets.


Veal Schnitzel with Spicy Pizzaiola Sauce
(recipe sourced from Weight Watchers Magazine May 2013)
 
Serves: 4
ProPoints per Serve: 11
 
400 gram can diced tomatoes
3 garlic cloves, crushed
1/2 teaspoon dried oregano
1/2 teaspoon dried chilli flakes
salt
freshly ground black pepper
250 grams fettucine or pasta of your choice
4 veal schnitzels, fat trimmed
1 egg white
2 teaspoons water
2/3 cup (50 gram) dried panko breadcrumbs
1 tablespoon olive oil
100 grams baby spinach
1/4 cup coarsely chopped fresh basil leaves
fresh basil leaves, to serve

Blend the tomato until smooth.
 
Lightly spray a small saucepan with oil and heat over medium heat.  Cook the garlic, stirring, for 30 seconds or until fragrant.  Add the tomator, oregano and chilli.  Season with salt and freshly ground black pepper.  Bring to the boil.  Reduce heat and simmer, covered, for 10 minutes.
 
Meanwhile, cook the pasta in a large saucepan of boiling salted water following packet directions or until al dente.  Drain.
 
Meanwhile, season the veal with salt and freshly ground black pepper.  Whisk the egg white and water in a shallow bowl.  Dip the veal in the egg white mixture then dip into the breadcrumbs to coat.
 
Heat the oil in a large non stick frying pan over high heat.  Cook the veal for 1 minute on each side or until gold and cooked through.
 
Stir the pasta, spinach and chopped basil through the sauce to coat well.  Divide the pasta among serving dishes and top with the schnitzel. 
 
Sprinkle with basil leaves to serve.

(Click here for a printable version of this recipe)

Saturday, April 6, 2013

Spicy Green Curry and Coriander Prawns

I found a new cookbook, Weight Watchers Five Ingredient 15 Minute Recipes, in the well stocked Clayton Newsagency.  This newsagency import magazines and cookbooks from all over.  This is an US publication so I was a little overjoyed to purchase it and discover some great recipes.

Green Curry (kaeng khiao wan) is a Thai Curry.  The green color comes from fresh green chillies. The "sweet" in the Thai name (wan means "sweet") refers to the particular color green itself and not to the taste of the curry.  Green curries tend to be as hot as red curries or hotter.  And I love them - infact I love most Thai dishes.

WOW and did this dish excite the tastebuds!! Simple ingredients but so full of flavour not to mention very easy to cook.  And yes I had a craving for prawns this week......


Spicy Green Curry and Coriander Prawns
(recipe adapted from WW Five Ingredient 15 Minute Recipes)
 
Serves: 4
ProPoints per Serve: 9
 
cooking spray
700 grams peeled and deveined raw prawns
1 cup light coconut milk
2 tablespoons sugar
2 tablespoons fresh lime juice
1 tablespoon green curry paste
1 teaspoon cornflour
1/4 teaspoon salt
1/3 cup chopped fresh coriander leaves
2 cups steamed white rice
lime wedges to serve

Heat a wok or large non stick frying pan over medium to high heat.  Coat wok with cooking spray.  Add prawns and cook for 3 minutes stirring occassionally.

While prawns are cooking, combine milk, sugar, lime juice, curry paste and salt, stirring with a whisk until smooth.  Add to the pan along with the coriander, bring to the bil.  Reduce heat and simmer for 5 minutes or until slightly thickened.

Serve with 1/2 cup steamed white rice and lime wedges.

(Click here for a printable version of this recipe)

Thursday, April 4, 2013

Choo Chee Prawns


This would have to be one favourite prawn dishes of all time.  We have been cooking this dish for years now and it never fails to amaze with flavour.  This version is a low fat take on the traditional Thai Dish but I don't beleive it is any less as flavoursome than the original.

The amazing spicy yet somewhat creamy sauce is created using few ingredients and it's cooked in no time at all. 

I love the final addition of flavours from the fresh curry leaves, the basil and the coriander. It is delish.


Choo Chee Prawns
(recipe adapted from Taste.com)

Serves: 4
ProPoints per serve: 8

2 teaspoons peanut oil
1 brown onion, finely chopped
3 garlic cloves, finely chopped
1 fresh red chilli, finely chopped
1kg medium green prawns, peeled
2 tablespoons sambal oelek
1 x 400ml can lite coconut milk
2 teaspoons soy sauce
2 teaspoons fish sauce
2 teaspoons oyster sauce
2 teaspoons cornflour
1 tablespoon water
12 fresh curry leaves
1 bunch fresh Thai basil, leaves picked
1 bunch fresh coriander, sprigs picked

Heat oil in a wok or large deep frying pan over medium-high heat. Stir-fry onion, garlic, chilli, prawns and sambal oelek for 2-3 minutes or until prawns change colour.

Add the coconut milk, soy sauce, fish sauce and oyster sauce. Bring to the boil. Reduce heat to medium and simmer for 1 minute.  Stir in combined cornflour and water.

Stir in the curry leaves, basil and coriander.

Serve with steamed rice if desired, allow an additional 4 ProPoints per 1/2 cup.

(Click here for a printable version of this recipe)

Tuesday, March 12, 2013

Sweet Chilli Chicken and Cashew Stir Fry

Noodles are always a big hit at our house especially when enveloped with a nice sauce and plenty of meat and vegetables.  They are also a great way to get the kids to eat their vegetables.

The sweet chilli flavour isn't over powering in this dish it is detectable as is the lime.  The cashews added an extra crunch and as always this dish was enjoyed by all.

Another quick mid week dinner that will tempt everyone's tastebuds....


Sweet Chilli Chicken and Cashew Stir Fry
(Recipe adapted from WW Family Favourites 2013 Cookbook)
 
Serves: 6
ProPoints per Serve: 9
 
500 grams lean chicken breast fillets, fat trimmed and thinly sliced
1/2 cup sweet chilli sauce
3 garlic cloves crushed
2 tablespoons lime juice
440 gram Wokka Thin Egg Noodles
1 tablespoon canola oil
4 green shallots, thinly sliced
1 red capsicum, sliced
200 green beans, diagonally sliced
175 gram broccolini, cut into 5cm lengths
2 tablespoons water
1/2 cup chopped fresh coriander leaves
1/2 cup unsalted roasted cashew nuts, chopped

Place chicken and combined sweet chilli sauce, garlic and lime juice in a glass or ceramic dish.  Toss to coat and allow to stand for 30 minutes.

Prepare noodles in a large bowl of hot water as per packet instructions. Drain and set aside.

Drain chicken reserving marinade.

Heat a wok over high heat.  Add half the oil and heat for 30 seconds.  Stir fry chicken mixture, in batches, for 1-2 minutes or until browned.  Transfer to a plate.  Wipe wok clean with paper towel.

Reheat wok over medium-high heat.  Add remaining oil and heat for 30 seconds. Add shallots, capsicum, beans, broccolini and water.  Stir fry for 2-3 minutes or until vegetables are tender.

Return chicken mixture to the wokong with reserved marinade and noodles.  Stir fry for 2 minutes or until heated through.

Serve sprinkled with coriander and cashews.


(Click here for a printable version of this recipe)

Monday, March 11, 2013

Easy Mango Chilli Prawn Salad

Relaxing on Labour Day, a public holiday here in Melbourne I decided to make a quick and easy lunch for Noel and myself - a prawn salad with a Mango Chilli Dressing.  Took no time at all really and made a nice change to the boring but healthy salads we had been eating.
 
The dressing of course, was store brought and not homemade but it is quite a flavoursome and diet friendly one produced by Coles.  Simply Less Mango Chilli Dressing is one of the new flavours in dressing that Coles have recently released.

 
Easy Mango Chilli Prawn Salad
 
Serves: 2
ProPoints per serve: 4
 
16 cooked king prawns, peeled
2 cups of mixed salad leaves
1/2 red capsicum, thinly sliced
1 lebanese cucumber, finely diced
1/2 red onion, finely sliced
1/2 bunch fresh coriander leaves
4 tablespoons Coles Simply Less Mango Chilli Dressing

Rinse prawns and pat dry with paper towel.
 
Divide the salad leaves amongst two serving plates or bowls.
 
Top with capsicum, cucumber and red onion.  Add prawns to each dish.  Sprinkle with the coriander leaves.

Drizzle 2 tablespoons of dressing over each salad and serve.
 

Wednesday, March 6, 2013

Chicken and Mushroom Baked Crepes

Tonight's dinner surprised me on two levels - firstly I didn't think my kids would eat savoury crepes and secondly I didn't think my husband would appreciate "pancakes" for dinner!  I was wrong on both counts and stand corrected.

In fact tonight is the first time ever I have cooked savoury crepes and the first time I have ever served pancakes as a main course.  This recipe was very tasty. 
 
The soft crepe enveloping the creamy chicken and mushroom filling was absolutely delightful and delicate.  Although the filling ingredients sound "plain" as such in fact the delicate thick creamy sauce was perfect - you could taste every element right down to the pinch of nutmeg. 

Needless to say nothing left......


Chicken and Mushrooms Baked Crepes
(Recipe sourced from WW Cook Hearty Cookbook)

Serves: 4
ProPoints per Serve: 12

cooking spray
1/2 brown onion, finely chopped
400 grams lean chicken breast fillet, fat trimmed, cut into 1 cm pieces
400 grams button mushrooms, sliced
2 tablespoons water
salt
freshly ground black pepper
2 tablespoons Weight Watchers Canola Spread
2 tablespoons plain flour
1/2 cup skim milk
1/2 cup chicken stock
pinch ground nutmeg
2 tablespoons fresh flat leaf parsley, chopped
8 French-style frozen crepes, just thawed
1/3 cup finely grated parmesan cheese
2 tablespoons finely chopped fresh chives

Preheat oven to 200 degrees Celsius or 180 degrees Celsius fan-forced.  Spray a 28cm x 20cm x 3cm ovenproof dish with cooking spray.
 
Lightly spray a large non-stick frying pan with cooking spray and heat over medium-high heat.  Add onion and cook, stirring, for 5 minutes or until softened.  Add chicken and cook, stirring, for 5 minutes or until browned.  Add mushrooms and 2 tablespoons water and cook, stirring, for 2 minutes or until mushrooms have softened.
 
Heat spread in a saucepan over medium heat.  Add flour and cook, stirring, for 1 minute. Combine milk, stock and nutmeg in a jug.  Gradually add milk mixture to the folour mixture and stir until  smooth.  Bring to the boil.  Reduce heat to low and simmer, uncovered, for 2 - 3 minutes or until sauce has thickened.  Stir in chicken mixture and parsley.
 
Reserve 1/2 cup of the chicken mixture.  Lay crepes on a flat work surface.  Divide remaining chicken mixture among crepes and spread evenly along 1 edge.  Roll crepes to enclose filling and place, seam side down, in prepared dish.  Spoon reserved filling along centre of crepes.  Sprinkle with parmesan cheese and bake for 10 minutes or until cheese is melted.
 
Served sprinkled with chives. 
 

Tuesday, March 5, 2013

Ham, Zucchini and Caramelised Onion Lasagne

As intriguing as this dish sounds was exactly how it tasted.  My tastebuds were intrigued with every mouthful and every mouthful was enjoyed. I have tried so many lasagne recipes but this one really surprised me. For a different lasagne you should really give this a go.

The flavours were amazing yet so different.  The sweetness of the carmalised onion complemented the chargrilled zucchini perfectly. In fact I would have never thought of this flavour combination. 

There is no thick Bechamel Sauce with this dish either but to be honest it doesn't need it.  It has a fresh flavour and is nice and light for either lunch or dinner.


Ham, Zucchini and Caramelised Onion Lasagne
(Recipe adapted from WW 1 Recipe 3 Ways Cookbook)
 
Serves: 8
ProPoints per serve: 8
 
cooking spray
1 tablespoon olive oil
6 brown onions, thinly slice
1 tablespoon brown sugar
1 tablespoon balsamic vinegar
1 kilogram small zucchini, thinly sliced lengthways
2 2/3 cups (660ml) tomato pasta sauce
2 tablespoons dried oregano
6 x 47 gram fresh lasange sheets
300 grams shaved ham, fat trimmed and chopped
1 1/2 cups Bega So Extra Light grated Tasty Cheese
4 tablespoons finely grated parmesan cheese

Preheat oven to 200 degrees Celsius or 180 degrees Celsius fan-forced.  Lightly spray a large lasagne or baking dish with cooking spray.

Heat oil in a large non-stick frying pan over medium heat.  Add onion and cook, stirring occasionally, for 15 minutes or until golden.  Add sugar and vinegar and cook, stirring, for 3 - 4 minutes or until sugar has dissolved and onions have caramelised.  Transfer to a bowl.  Cool.

Meanwhile, preheat a chargrill or barbecue over high heat.  Lightly spray zucchini with cooking spray.  Cook zucchini in batches for 1 minute each side or until charred and tender.  Transfer to a plate.

Spread 2/3 cup pasta sauce over base of prepared dish.  Top with 1 layer (2 sheets) of lasagne, cutting sheets to fit. Top with half the zucchini, caramelised onion and ham.  Top with 2/3 cup pasta sauce.  Sprinkle over 1 tablespoon of oregano.  Top with another layer of lasagne sheets.  Repeat layer of zucchini, onion, ham, pasta sauce and oregano.  Finsh layering with the remaining sheets and sauce.  Sprinkle with combined cheeses.

Bake for 30 - 35 minutes or until pasta is tender and top is golden. 

Serve with a ProPoint free salad.


(Click here for a printable version of this recipe)

Beef and Bacon Casserole with Cheese Dumplings

The one great thing about comfort food is that there is no season when you must eat it... comfort food is definitely a year round happening.  This dish is certainly in the comfort food category.

Beef and Bacon Casserole, a  thick tomato gravy laced with tender beef chunks, bacon pieces and vegetables is nice by itself but topped with a couple of fluffy cheese dumplings it was perfect.  The hint of thyme perfectly complimented the mix.

Best of all this recipe was easy to prepare which made it easy to fit into the mid week rush especially as I cheated by putting the casserole in the slow cooker (although the recipe cooks in the oven) and was ready not long after getting home from football training with only the dumplings to prepare.


Beef and Bacon Casserole with Cheese Dumplings
(Recipe sourced from WW Food You'll Love Cookbook)
Serves: 4
ProPoints per serve: 11
cooking spray
125 grams Weight Watchers Bacon, chopped
1 brown onion, finely chopped
2 garlic cloves, crushed
600 grams lean blade steak, fat trimmed cut into 3cm pieces
2 tablespoons plain flour
1/3 cup dry red wine
1 1/2 cups beef stock
400 gram can diced tomatoes
2 carrots, chopped
1 celery stick, chopped
1 tablespoon fresh thyme leaves
200 grams button mushrooms, halved
salt
freshly ground black pepper
1 cup self raising flour
1 tablespoon Weight Watchers Canola Spread
1/4 cup finely grated Parmesan cheese
1/3 cup reduced fat milk

Preheat oven to 160 degrees Celsius or 140 degrees Celsius fan forced. 

Lightly spray a large 1.5 litre (6 cup) flameproof casserole dish with cooking spray and heat over medium-high heat.  Add bacon and onion and cook, stirring, for 5 minutes or until onion has softened.  Add garlic and cook for 1 minute.  Transfer to a bowl.

Lightly spray the same dish with cooking spray and heat over high heat.  Cook beef, in batches, turning, for 5 minutes or until browned.  Return beef and bacon mixture to the pan.  Add plain flour and cook, stirring, for 1 minute.  Gradually stir in the wine and bring to the boil.  Add stock, tomatoes, carrot, celery and thyme. Cover and bring to the boil.  Transfer dish to oven and bake for 1 hour.  Add mushrooms and bake for 30 minutes.  Season with salt and freshly ground black pepper.

Meanwhile, place self raising flour and spread in a large bowl.  Using fingertips, rub spread into flour until mixture resembles breadcrumbs.  Stir in Parmesan.  Make a well in centre of flour mixture and stir in enough milk to create a soft, sticky dough.

Remove dish from oven.  Increase oven to 200 degrees Celsius or 180 degrees Celsius fan forced.  Using floured hands, roll dough into 8 dumplings about the size of a walnut. Arrange dumplings, about 3 cm apart, on top of beef mixture and lightly spray with oil.  Bake, uncovered, for 15 minutes or until dumplings are lightly browned and cooked through.


Note:  I mentioned that I cooked the casserole component in the slow cooker (I love my slow cooker).  Cooked on low for 8 hours after the second step.  Transfer to an oven proof dish when ready to cook dumplings in the oven.

(click here for a printable version of this recipe)

Monday, March 4, 2013

Gnocchi Bolognaise

Bolognaise has to be one of the most versatile sauces not to mention a comfort food.  This version is quite a basic recipe but there was no shortage on taste.  In fact the flavour was very surprising.

Packets of ready made potato gnocchi are available in the chiller section of most supermarkets so that takes the time and effort out of making homemade gnocchi making this dish brilliant for a mid week dinner.


Gnocchi Bolognaise
(Recipe sourced from WW Take Away At Home Cookbook)
 
Serves: 4
ProPoints per serve: 11
 
1 tablespoon olive oil
1 celery stick, finely chopped
1 carrot, finely chopped
1 brown onion, finely chopped
2 garlic cloves, crushed
250 grams lean beef mince
250 grams lean pork mince
3 vine-ripened tomatoes, chopped
500 gram jar tomato and basil pasta sauce
1/4 cup fresh basil leaves, plus extra to garnish
salt
freshly ground black pepper
700 grams 98% fat-free fresh potato gnocchi
2 tablespoons finely grated parmesan cheese

Heat oil in a large saucepan over high heat.  Add celery onion and garlic and cook, stirring, for 5 minutes or until softened.  Add mince and cook, breaking up any lumps, for 10 minutes or until browned.

Add tomatoes and pasta sauce and bring to the boil.  Reduce heat and simmer, uncovered for 15 minutes or until sauce thickens.  Stir in the basil.  Add a little water if the sauce seems too thick.

Meanwhile cook gnocchi in a large saucepan of boiling salted water, following packet directions or until just tender.  Drain.  Stir gnocchi through sauce. 

Serve sprinkled with parmesan and extra basil.


(click here for a printable version of this recipe)

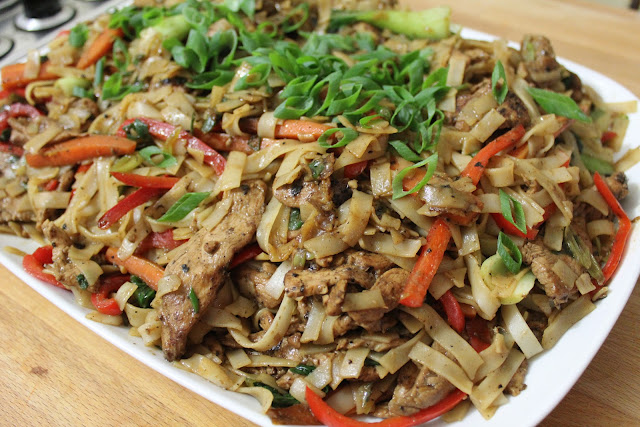
Five Spice Chicken with Noodles

Chinese Five Spice is definitely an interesting flavouring used often in Asian recipes.  Some people like it others don't.  Thankfully we do and all really enjoyed this easy noodle dish for dinner.

The chicken is marinated for several hours which allows the flavours to develop.  With this taken care of early it's only a matter of preparing the vegetables, noodles and actually cooking the dish.

The flavour itself was somewhat sweet and salty combined with the underlying incredible flavour that Chinese Five Spice provides. Chinese Five Spice powder is a ground spice blend of cinnamn, star anise, cloves, fennel seeds and pepper.  Needless to say it definitely tantalised the tastebuds while eating this noodle dish.


Five Spice Chicken with Noodles
(Recipe Sourced from WW The Complete Kitchen Cookbook)
 
Serves: 4
ProPoints per serve: 10
 
2 tablespoons kecap manis (sweet soy sauce)
2 tablespoons soy sauce
2 teaspoons cornflour
1 teaspoon Chinese Five Spice powder
1 teaspoon finely grated fresh ginger
1 garlic clove, cruushed
600 grams lean chicken breast fillets, fat trimmed, thinly sliced
200 grams rice stick noodles
1 tablespoon canola oil
1 carrot, cut into matchsticks
1 red capsicum, thinly sliced
2 green shallots, thinly sliced
1 bunch baby bok choy, cut into 5cm lengths

Combine kecap manis, soy sauce, cornflour, five spice, ginger and garlic in a large glass or ceramic bowl.  Add chicken and turn to coat.  Cover and refrigerate for 3 hours.

Prepare noodles following packet instructions or until just tender.  Drain.  Using scissors, cut noodles into 5cm lengths.

Drain chicken, reserving marinade.  Heat a wok over high heat.  Add half the oil and heat for 5 seconds.  Stir fry chicken, in batches, for 5 minutes or until browned.  Transfer to a bowl.  Reheat wok over high heat.  Add remaining oil and heat for 5 seconds.  Stir fry carrot and capsicum for 2 minutes or until just softened.  Add 3/4 shallots and bok choy and stir fry for 3 - 4 minutes or until vegetables are tender.

Return chicken to wok with noodles and reserved marinade.  Stir fry until heated through.

Serve sprinkled with remaining shallots as garnish.


(click here for a printable version of this recipe)

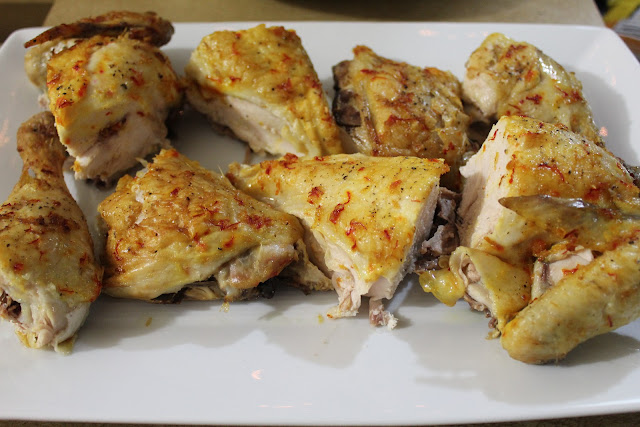
Lemon and Saffron Chicken

I don't cook Roast Chicken very often.  Why?  I really don't know.  I guess using the same stuffing and roasting is just boring.  Plus I have always associated Roast Chicken as being a "fatty" roast.  But when I saw this recipe I knew that we had to put in on the menu for dinner.  The kids thoroughly enjoyed it and to be honest they are still talking about it. 
 
A very easy roast chicken to prepare and cook.  The flavours were noticable but not overpowering and it was easy on the eye also.  The sauce, unlike a normal thick fatty gravy was zesty and complemented the chicken perfectly.
 
A little high ProPoint wise but served with steamed ProPoint free vegetables it was definitely a perfect Sunday roast.
 

Lemon and Saffron Chicken
(recipe adapted from WW 1 Recipe 3 Ways Cookbook)
 
Serves: 4
ProPoints per Serve: 13
 
cooking spray
1.4kg whole chicken
1/4 teaspoon saffron threads
2 teaspooons finely grated lemon rind
1 teaspoon sea salt flakes
2 teaspoons olive oil
freshly ground black pepper
500 grams chat (baby) potatoes
4 carrots, peeled and sliced
1/2 cup frozen peas 
1/2 cup frozen corn kernels
1 cup verjuice
3 teaspoons cornflour

Preaheat oven to 180 degrees Celsius or 160 degrees Celsius fan forced.

Lightly spray a large flameproof baking dish with cooking spray. 

Using kitchen scissors, cut along each side of the chicken's backbone.  Remove and discard backbone.  Place chicken, breast-side up, in prepared dish.  Using the heel of your hand, press firmly on breastbone to flatten chicken.  Trim and discard excess fat around neck and legs.

Combine saffron, rind, sea alt and oil in a small bowl.  Set aside for 5 minutes.  Rub saffron mixture all over chicken.  Season with freshly ground black pepper.  Bake for 1 hour 10 minutes or until skin is crisp and chicken is cooked through.  (The chicken is ooked if juices run clear when thigh is pierced with a skewer.) Transfer to a plate.  Cover chicken with foil and set aside to rest for 10 minutes before cutting into portions.

Meanwhile, boil, steam or microwave potatoes until tender.  Cook carrots and peas seperately, drain.

Whisk 1/4 cup verjuice and cornflour in a jug.  Drain and discard fat from baking dish.  Place dish over medium heat and add cornflour mixture and remaining verjuce.  Cook stirring for 2 - 3 minutes or until sauce has thickened.

Serve chicken with sauce and vegetables.


(click here for a printable version of this recipe)


Balsamic and Garlic Lamb Cutlets

I am definitely playing catch up once again with blogging.  Please forgive me for my lack of recipe sharing it saddens me but aat this point in time it has been totally unavoidable with our life just being so full on and I have to say I do not have much idle time anymore.  Many of you know that my work load has increased, I have been travelling with work, we had a well earned family camping trip and are planning one for the Easter break not to mention school (Miss 11 started high school this year) and football season is starting up again with training currently 3 nights per week.

BUT..... Life is so busy but not busy enough to not cook good food!!
I do hope you enjoy what we have been cooking.....

Lamb cutlets are always devoured at the House of Murray - to be honest they are inhaled by everyone rather than chewed delicately but at least they are always enjoyed.

We always tend to marinate our lamb cutlets as its a meat that is complimented by many flavours.  Tonight we tried something new by using balsamic vinegar where we usually would use red wine as a marinade base. I have to say I have used balsamic vinegar before in one of my favourite meals, Chicken with Balsamic Glaze and a few steak recipes so tonight was a new experience.

A very nice experience I have to admit.  The combination of the balsamic vinegar, fresh garlic and oregano made a delicate yet noticeable in taste.

Please note:  I actually doubled the recipe as we had visitors for dinner.


Balsamic and Garlic Lamb Cutlets
(recipe adapted from WW 1 Recipe 3 Ways Cookbook)

Serves: 4
ProPoints per Serve: 8

2 tablespoons balsamic vinegar
2 garlic cloves, crushed
1 tablespoon dried oregano
1 tablespoon olive oil
salt
freshly ground black pepper
8 x 50 gram French lamb cutlets, fat trimmed
cooking spray
500 grams chat (baby) potatoes, halved
200 grams baby spinach leaves
2 truss tomatoes, chopped
1 small red onion, finely sliced
1 tablespoon white wine vinegar

Combine vinegar, garlic, oregano and half the oil in a large glass or ceramic bowl.   Add lamb and turn to coat.  Cover and refrigerate for 3 hours.
Preheat oven to 200 degrees Celsius.
Place potatoes on a prepared cooking tray.  Spray with cooking spray.  Cook in oven for 40 - 45 minutes or until crisp and golden.
Preheat a chargrill or barbecue over medium high heat.  Lightly spray both sides of lamb with oil.  Cook for 3 - 4 minutes each side or until cooked to your liking.
Meanwhile place spinach leaves on a plate, top with tomatoes and scatter over onion.  Whisk white wine vinegar and reamining oil in a small jub.  Drizzle over salad.  Serve lamb with potatoes and salad.


(click here for a printable version of this recipe)

Sunday, February 17, 2013

Smokey Barbecue Chicken Pizza

Another business trip, this time to Tasmania, has seen me not cooking but eating out of hotel rooms or restaurants.  Although it sounds pleasant I can assure you that it is not with the exception of the few dinners I get to out with special friends, catching up on happenings and having many laughs.

Upon my return, as I always do, I want to cook.  Needless to say this trip was no different.  A huge shop to fill the fridge full of fresh fruit and vegetables and other delights which lead to having home made pizzas... full of toppings that we all individually chose.

I normally have a tomato base on my pizza so thought I would try a barbecue base this time for a change.  I have to say I actually surprised myself with the outcome of the taste in each mouthful.


Smokey Barbecue Chicken Pizza

Serves: 2
ProPoints per serve: 11

cooking spray
1 x 200 gram chicken breast fillet, all visible fat removed
1/4 cup smokey barbecue sauce (I used HP Hot and Spicy Sauce)
1 garlic clove, crushed
1 x 100 gram pita bread
100 grams reduced fat grated mozerella
1 small brown onion, halved, thinly sliced
1 small red capsicum, thinly sliced
1 small green capsicum, thinly sliced

Preheat oven to 220°C/200°C fan-forced. Lightly grease 2 large pizza trays.

Spray a non stick frying pan with cooking spray. Slice chicken fillet in half lengthways and cook in pan over medium heat until cooked through, turning once. Remove from pan and allow to cool. Dice.

Combine sauce and garlic in a bowl. Place pizza base on prepared tray.

Spread the base with the sauce mixture. Sprinkle each with 50 grams of cheese. Top with onion, chicken and capsicum. Top with remaining cheese.

Bake for 18 to 20 minutes or until bases are crisp and cheese has melted. Serve.


(click here for a printable version of this recipe)

Wednesday, January 30, 2013

Chorizo and Cherry Tomato Pasta

Another absence this time due to family holidays.  Some fun times at home just relaxing along with a 5 day camping trip to Sheep Yard Flats nestled in the Howqua Hills Historical Area has made for an enjoyable January indeed. 

We are actually really enjoying pasta at the moment especially creating my own sauces.  Tonight a different flavour was required to excite the taste buds and they were definitely pleased with this dish.  I also love Chorizo (Spanish Sausage).  It is a spicy and somewhat smoky flavoured sausage. Chorizo is normally sold as a fresh sausage and therefore needs to be cooked before eating.  

This dish was filling and very tasty.  I minimized the overkill of a thick tomato pasta sauce by using cherry tomatoes which added a wonderful and visible texture to the meal.  Both hubby and I enjoyed the combination of the smoky sausage and the sweet tomato flavours which was definitely complimented by the fresh basil.  This wasn't a meaty dish as with normal pasta sauces but the bit size Chorizo pieces did not disappoint.


Chorizo and Cherry Tomato Pasta

Serves: 6
ProPoints per serve: 10

250 grams pasta of your choice
cooking spray
250 grams Chorizo sausage, sliced 5mm thick
1 brown onion, thinly sliced
2 garlic cloves, crushed
1/4 cup tomato paste
1/2 cup dry white wine
410 gram tinned diced tomatoes
250 grams cherry tomatoes
salt
freshly ground black pepper
1/4 cup fresh basil, finely shredded plus addition leaves to garnish

Cook pasta in a large pot of salted boiling water as per packet directions.  Drain.

Spray a large frying pan with cooking spray and heat over medium heat.  Cook Chorizo for 3 - 5 minutes or until slightly crispy.  Remove from pan onto a plate and set aside.

In the same pan add onion and garlic.  Cook for 3 - 5 minutes or until onion has softened.  Add tomato paste and white wine.  Cook stirring for a further 2 minutes and all is combined with no lumps of tomato paste.  Add cherry tomatoes and diced tomatoes.  Season with salt and freshly ground black pepper to taste.  Reduce to low heat and simmer for 15 minutes.

Return Chorizo to the frying pan and add the pasta and shredded basil leaves.  Stir to combine and cook for 5 minutes or until heated through and pasta coated with the sauce.

Serve garnished with additional basil leaves and Parmesan cheese (add an extra 2 ProPoints per 20g of cheese).


(click here for a printable version of this recipe)

Thursday, January 10, 2013

Barbecued Lamb and Vegetables

We are still cooking on the barbecue - probably will until the novelty wears off again this summer.  To be honest we don't use it enough or should I say we don't use it too it's full potential.  Really, a girl can only have so many sausages on the barbie!! If we continuously cook the same thing that's when I start thinking to myself that I am sooooo over barbecues!!

So with all that said, the challenge then is to keep barbecuing exciting and this recipe is a perfect example of not only an easy dish but a very flavoursome meal.  Right from the preparation stage and the aromas of the garlic and rosemary I knew we would all enjoy.


Barbecued Lamb and Vegetables
(recipe adapted from Weight Watchers Cook Easy Cookbook)

Serves: 4
ProPoints per Serve: 9

4 cloves fresh garlic, crushed
2 tablespoon fresh rosemary, plus extra sprigs to garnish
salt
freshly ground black pepper
2 tablespoons olive oil
500 gram trimmed lamb fillet or backstrap
2 carrots halved lengthways, cut into 3 cm pieces
2 medium zucchini, thickly sliced
1 small red onion, cut into thin wedges
1 medium red capsicum, cut into 3cm pieces
cooking spray

Combine garlic, chopped rosemary and oil in a small bowl. Place half of the rosemary mixture in a shallow dish. Add lamb and turn to coat.

Steam, boil or microwave carrots until just tender.  Drain and allow to cool slightly.

Combine carrot, zucchini, onion, capsicum and eggplant in a large bowl. Add remaining rosemary mixture and toss to coat.

Heat an oil-sprayed chargrill or barbecue over medium-high heat. Chargrill lamb for 3–4 minutes each side or until cooked to your liking. Transfer to a plate. Cover to keep warm. Rest lamb for 10 minutes before slicing thickly.

Meanwhile, chargrill vegetables, turning occasionally, for 8–10 minutes or until golden and tender. Transfer to a large serving bowl. Add sliced lamb and rosemary sprigs and toss to combine. Serve.


Monday, January 7, 2013

Creamy Chicken, Bacon and Vegetable Pasta

Comfort food is needed at times and pasta is one of the ultimate in my book that is especially when it is accompanied with a nice creamy sauce.


I have never used cherry tomatoes in a creamy sauce before and will do again as they were a wonderful addition not to mention added character to the sauce.


This dish was delish, easy and very filling! The combination of chicken and bacon is always perfect combined with vegetables and fresh herbs enveloped in a delicate creamy sauce made for a not only fragrant but flavoursome dish.


Creamy Chicken, Bacon and Vegetable Pasta

Serves: 4
ProPoints per serve: 14

250 grams dried spaghetti pasta
cooking spray
500 gram chicken breast fillets (see note)
200 grams Weight Watchers or Reduced Fat Bacon
1 large brown onion, finely chopped
2 garlic cloves, thinly sliced
150 grams mushrooms, sliced
1 red capsicum, diced
250 grams cherry tomatoes
375ml can Carnation Light & Creamy Evaporated Milk
2 teaspoons arrowroot or cornflour
2 teaspoons fresh thyme leaves
2 tablespoons chopped fresh chives
200 grams baby spinach
50 grams finely grated Parmesan cheese

Cook spaghetti in a large saucepan of boiling water, following packet directions, until tender. Drain. Return to pan. Cover to keep warm.

Meanwhile, heat half the oil in a large frying pan over medium-high heat. Cook chicken for 5 to 7 minutes each side or until browned and cooked through. Transfer to a board. Thinly slice. Cover to keep warm.

Heat remaining oil in pan over medium heat. Add onion and garlic. Cook, stirring, for 3 minutes or until onion has softened. Add mushrooms and capsicum and cook for a further 5 minutes or until softened. Add tomatoes. Cook for 2 minutes or until tomatoes have just softened. 

Combine evaporated milk with arrowroot or cornflour.  Add evaporated milk, thyme and chives. Season with pepper. Bring to the boil. Remove from heat. Add chicken, spinach and milk mixture to pasta. Toss to combine and served topped with Parmesan.


Sunday, January 6, 2013

Beef Tomato and Zucchini Kebabs with Chutney

Another night of balmy weather called for more barbecuing.... tonight with what my children have always fondly called "Meat on Sticks".

These marinated Beef, Tomato and Zucchini Kebabs were a breeze to prepare, cook and devour complimented with a sweet, slightly spicy chutney that screamed homemade... jar chutney is so boring.  The pungent spices used in the marinade surprisingly matched each other creating a really enjoyable flavour on the tender beef.

Served with Smashed Potatoes and a green salad - I would definitely recommend these at your next barbecue.....


Beef, Tomato and Zucchini Kebabs with Chutney
(recipe sourced from WW 1 Recipe 3 Ways Cookbook)

Serves: 4
ProPoints per serve: 7

1 teaspoon ground cumin
1 teaspoon smoked paprika
1 teaspoon fennel seeds
1 teaspoon dried oregano
1 garlic clove, crushed
3 teaspoons olive oil
600 grams lean beef rump, fat trimmed and cut into 3cm pieces
500 grams baby chat potatoes
cooking spray
1 red onion, finely chopped
1 teaspoon brown sugar
2 teaspoons red wine vinegar
1 small fresh birdseye chilli, deseeded if desired, finely chopped
400 gram can cherry tomatoes
2 small zucchini thickly sliced
8 cherry tomatoes

Place cumin, paprika, fennel, oregano, garlic and half the oil in a large glass or ceramic dish.  Add beef and turn to coat.  Cover and refrigerate for 3 hours.

Preheat the oven to 220 degrees Celsius or 200 degrees Celsius fan forced.  Lightly spray a baking tray with oil.  Boil, steam or microwave potatoes until tender.  Drain and allow to cool for 5 minutes.  Using a potato masher gently press potatoes until lightly crushed.  Lightly spray with oil and bake for 20 minutes or until golden.

Meanwhile, heat remaining oil in a small suacepan over medium heat.  Add onion and cook, stirring, for 5 minutes or until softened.  Add sugar, vinegar and chilli and cook, stirring, for 1 minute.  Add canned tomatoes and bring to the boil.  reduce heat and simmer, uncovered, for 10 minutes or until chutney is thick.

Thread beef, zucchini and fresh cherry tomatoes onto 8 wooden skewers (see note).  Preheat a chargrill or barbecue over medium high heat.  Lightly spray skewers with oil and cook, turning occasionally, for 3 - 4 minutes each side or until cooked to your liking.

Serve skewers with crushed potatoes and tomato chutney.

Note: Soak skewers in cold water for 10 minutes to stop them burning during cooking.

(Click here for a printable version of this recipe)


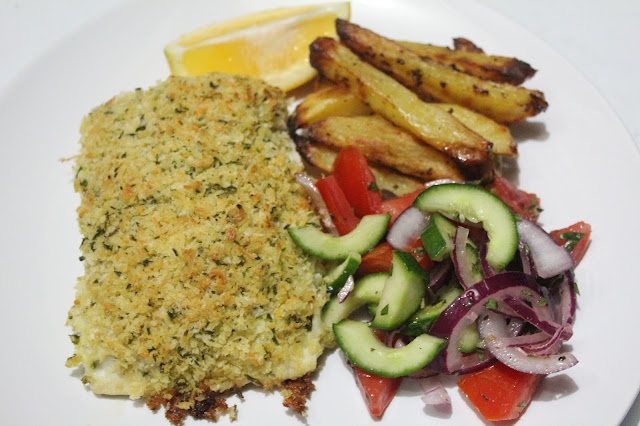
Crunchy Parmesan and Chive Baked Fish Fillets

Happy New Year to you all I hope that you have an enjoyable and safe one.  Best wishes to you and your families for 2013.
I don't make New Years' Resolution but one thing I have promised myself is that I cook more new recipes and definitely blog more! LOL it's like there is a void in me when I leave it too long in between posts especially when the subject is food.  I actually get excited when I sit down to post as I know that I am not only sharing a meal with you all but that you actually get pleasure out of reading all about it... I guess that's why we are called "Foodies", right?
So here goes my first A Dash Of Flavour blog post for 2013...
With the weather being seriously hot here in Melbourne these last few days cooking up feasts in the kitchen has be not really an option and I am sure that many barbecues around the State have been working in overdrive... ours has!  From the simple sausage in bread to tonight's feast I am surprised we haven't ran out of cooking gas yet.

This Crunchy Parmesan and Chive Baked Fish Fillets was very easy to prepare not to mention quite quick to cook.  Although the recipe cooks it in the oven we had no problems cooking in on the bbq with the hood closed.  The topping was crunchy and had a definite cheesy onion flavour from the seasoning.  The fillets we used were quite thick so once cooked they were tender and juicy while still remaining intact and holding the shape.

A definite winner for kids young and old......


Crunchy Parmesan and Chive Baked Fish Fillets
(recipe adapted from WW 1 Recipe 3 Ways Cookbook)
Serves: 4
ProPoints per serve: 9
4 x 200 gram firm white fish fillets 
3/4 cup (45 grams) Panko breadcrumbs
2 tablespoons finely grated Parmesan cheese
2 tablespoons finely chopped fresh chives
1 tablespoon Weight Watchers Canola Spread, melted
salt
freshly ground black pepper
2 Lebanese cucumbers, deseeded and finely sliced
3 Roma tomatoes, deseeded, coarsely chopped
1 red onion, thinly sliced
1/3 cup pitted kalamata olives
2 tablespoons lemon juice
1 tablespoon olive oil
1 garlic clove, crushed
2 teaspoons finely chopped fresh oregano leaves
1 tablespoon water
lemon wedges to serve

Preheat oven to 200 degrees Celsius or 180 degrees Celsius fan forced.  Line a baking tray with baking paper and place fish on prepared tray.  

Combine breadcrumbs, Parmesan, chives and spread in a medium bowl.  Season with salt and freshly ground black pepper.  Press breadcrumb mixture onto fish.  Lightly spray with cooking spray.  Bake for 12 - 15 minutes or until fish is cooked through and topping is golden and crisp.

Meanwhile combine cucumber, tomatoes, onion and olives in a large bowl.  Toss gently to combine.  Whisk juice, oil, garlic, oregano and water in a small bowl or jug.  Add dressing to salad and toss gently to combine. 

Serve fish with salad and lemon wedges.


Thursday, December 20, 2012

Christmas Favourites and A WINNER!!

Busy busy with preparations for Christmas which is being held at our house this year. 

Some baking that will take place over the next couple of days will include:


Gingerbread House


Mince Pies

And to announce our winner of the OrgoPot - we have selected K8 for not only a wonderful sounding dish but for including the recipe which just made my husbands mouth water.

Congratulations K8!!


Wednesday, December 12, 2012

Pulled Pork and Bean Burritos & an ORGOPOT giveaway

Another spell between posts but I am still busy as a bee, my work changed dramatically the other week with a department reshuffle - not the best outcome but something I have to deal with!!

Despite the sweltering heat of Melbourne today I needed to post tonight.  So with having decided that I must blog and with it being such a warm day I knew dinner would need to be easy and flavoursome.  Mexican on a warm day was my first thought strangely.  Easy to cook easy to eat was my theory behind the choice!! 

These Pulled Pork and Bean Burritos by all means fit the bill... the pork was slow cooked in an Orgopot for a few hours on a low heat so there was no over the stove top sweats with the preparation.  Shredded and mixed with kidney beans and the sauce it was cooked in gave the meat texture and also a nice delicate yet a little spicy flavour.  A quick colourful salad all combined in a tortilla wrap ensured this was the perfect meal.


Pulled Pork and Bean Burritos
(recipe sourced from WW Takeaway At Home Cookbook)
Serves: 4
ProPoints per Serve: 12
1 tablespoon olive oil
400 gram peice of lean pork neck (scotch fillet) fat trimmed
1 brown onion, chopped
2 cloves garlic, crushed
1 teaspoon ground cumin
1/2 teaspoon ground chilli
2 tablespoons tomato paste
3/4 cup chicken stock
400 gram can kidney beans, rinsed and drained
2 cups (150 grams) finely shredded red cabbage
1 carrot, cut into matchsticks
1 red capsicum, thinly sliced
100 grams snow pea sprouts
1 tablespoon lime juice
8 x 20cm flour tortillas

Preheat oven to 160 degress Celsius or 140 degrees Celsius fan forced.

Heat half the oil in a medium stove/oven proof pan over high heat.  Cook pork, turning for 5 minutes or until browned. Set aside.

Heat remaining oil in the same pan over medium heat.  Add onion and cook, stirring, for 5 minutes or until softened.  Add garlic, cumin and chilli and cook, stirring, for 30 seconds or until fragrant.  Stir in tomato paste and stock.

Place pork on top of onion mixture.  Cover with foil and bake for 2 hours or until very tender.  Uncover and cool slightly.  Using 2 forks, shred pork.  Add beans and stir to combine.

Combine cabbage, carrot, capsicum, sprouts and juice in a medium bowl.

Heat tortillas following packed instructions.

Divide pork mixture among tortillas.  Top with cabbage salad and roll to enclose filling.  Serve.


(click here for a printable version of this recipe)

Tonight's post also brings a special giveaway. 

I recently brought two Orgopots for my own use through a work colleague's recommendation who had purchased one herself.  Bottom line all I can say is that they are wonderful to use.  Both for use on the stove top and in the oven these pots make cooking a dream and I have also noticed that due to the pan surface I have actually reduced the use of oil while cooking.  The pots are lightweight, dishwasher safe, metal utensial safe and very easy to clean.  Measuring 28cm in diameter, 9.5 cm deep and hold 4.5 litres.  A glass lid also allows you to see what you are cooking at a glance.


Now for the giveaway - I have one of these Orgopots (valued at $69 each) to giveaway.  To be in with a chance of winning please tell me what is your family favourite "one pot wonder" recipe that you love to cook.  Leave a comment on this post - if I like the sound of your dish I may even cheekily request the recipe.  Should you leave an anonymous comment please ensure you leave your name and email address on the comment or email me me confirmation of your comment including contact details to houseofmurray@optusnet.com.au so I can contact you.

To ensure that the winner will recieve this brilliant prize in time for Christmas (I must say what a wonderful Christmas present) the competition will close Sunday 16th December 8pm EST and unfortunately for my overseas friends this competion is only available to Australian residents.

However should you wish to own your own Orgopot it's easy to purchase one. You can own one for $69 each plus delivery of $9.95. Total being: $78.95.
You can order your Orgopot by clicking here.  I have been told by the supplier, Orgolife, that if you order before Christmas you will not be charge Postage and Handling - so you will save $9.95!!

Here is a video of OrgoPot in action, the Youtube link is: http://youtu.be/xltzljs1Ix4.

Good luck to all that enter and I will be contacting one of you Sunday night via email.